Bleeding ABS brakes is essential for safe vehicle operation. After replacing the brake fluid, remove any remaining air from the system. The procedure for bleeding brakes with ABS confuses many drivers, since the process differs from that on cars where this system is not provided.
Have you ever needed the help of a car lawyer?
Not really
It is no more difficult to bleed a brake system with ABS than a conventional one. The main difference lies in the accumulator and valves, from which it is not so easy to remove air. However, if you have certain knowledge and skills, it is quite possible to bleed ABS brakes yourself, without the help of specialists from a service station.
Bleeding the brake system without ABS
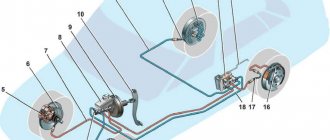
Pumping scheme:
1. Brake cylinder or caliper of the rear right wheel.
2. Brake cylinder or caliper of the rear left wheel.
3. Front right wheel caliper.
4. Front left wheel caliper.
Attention! On cars with distribution of braking forces along the axes (in common parlance “sorcerer”), while pumping the rear brakes, it is necessary to move the sorcerer lever (piston) to simulate a full load of the car. This will ensure maximum brake line flow and make bleeding the brakes easier.
Sequencing:
1. Remove the cap from the wheel brake cylinder ventilation outlet valve, clean the valve and install a clean transparent hose. Insert the other end of the hose into a container half filled with brake fluid.
2. Ask your assistant to press the brake pedal until pressure is built up in the system. A sign will be increasing resistance to the brake pedal.
3. To create pressure, you must fully press and hold the brake pedal.
4. Loosen the air release valve half a turn. Liquid will flow into the container. The other end of the hose must be immersed in liquid.
5. After a noticeable drop in system pressure, tighten the vent valve.
6. Repeat the bleeding operation with the brake pedal depressed.
7. Repeat pumping again until there are no air bubbles in the liquid in the hose.
8. Remove the hose from the outlet valve and replace the protective cap.
9. Repeat the same steps for the brake cylinders of the remaining wheels.
How to bleed the brakes on a VAZ 2170-VAZ 2172?
Note! The brakes need to be pumped strictly according to the contours, for example, if you need to bleed the front right wheel from air (For example, on this wheel the brake hose broke and air got into the brake system through this place), then the rear left one will also have to and you should absolutely not neglect this, but In front-wheel drive cars, in general, the contours go diagonally, but on classics the contours are located across, this is very bad, if a hose breaks on one of the brake circuits, then we can assume that either both front wheels will not brake, or both rear wheels, in a front-wheel drive car , if, again, one of the circuits becomes airy, then one of the front wheels and one of the rear wheels will still work and during emergency braking the car will not go into any intersection or into a ditch, but on the classics this moment was not really thought out!
1. It is best to bleed the system with an assistant, we will not tell you how to do this in this article, but we will only tell you about some nuances, and you can read about how to bleed the brake system in the article: “Replacing brake fluid in a car,” everything is done absolutely identically, but only when replacing, you need to wait until the new, clean fluid flows, and when pumping, you need to watch for air bubbles, if they disappear, then this indicates that the brake system of this wheel has been pumped, after which to the other you will need to go and follow the contours, it is strictly forbidden to jump from one contour, abruptly to another, that is, for example, you have pumped the front right, you cannot go to the front left, but you will need to pump the rear left (diagonal circuit), if the second contour is the brake system was not affected, and you don’t even have to get into it, because there’s no point if it’s not depressurized.
2. The next piece of advice, do not under any circumstances pour used fluid into the brake reservoir again, otherwise you will pump forever, since air gets into the drained fluid and the brake system will be constantly aired, in addition, it is not allowed to fill in fluid that was stored in open container (You need to buy a liquid that is stored in a closed container and this is mandatory), in principle, that’s all, pumping the system is very easy, so we won’t write much about it (And it’s not necessary, everything we wanted before you carry, we have already expressed in this article on bleeding the brake system on the Lada Priora) and it’s better to do everything with an assistant, without him it is much harder to pump the brakes and not convenient (But although you can make a special unit thanks to which you can pump the brake system alone, more details you will learn about it in the video below and don’t look at the fact that the video shows a classic, on a front-wheel drive you can do this too, you’ll just need to find a suitable cap for the expansion tank, that’s all essentially)
Additional video: On most cars, bleeding the brakes is carried out identically, using the Gazelle car as an example, see how to bleed the brakes on a car.
We bleed the hydraulic drive of the brake system after its repair, which resulted in a violation of the tightness of the system and if air is suspected of getting into the system
In the latter case, you must first determine and eliminate the cause of air getting into the hydraulic drive and only then begin pumping it.
The presence of air in the hydraulic drive of the brake system is determined by the behavior of the brake pedal: it becomes soft (you can’t feel the stop at the end of the pedal stroke) and drops below its normal position.
To complete the work you will need an assistant, as well as:
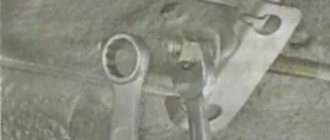
— a special wrench for the bleeder fitting or an 8 mm socket wrench;
- a transparent vinyl tube of suitable diameter;
— container for draining brake fluid;
— new brake fluid recommended by the manufacturer.
— inspection ditch or overpass (preferably).
We prepare the car for work.
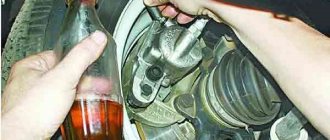
Disconnect the wiring harness connector from the brake fluid level sensor connector and remove the reservoir cap
To prevent air from entering the hydraulic drive of the brake system, when bleeding the drive, make sure that the brake fluid level in the reservoir does not fall below the MIN mark.
If the rear axle of the car is suspended (the car is on a lift or placed on stands), the pressure regulator will block the path of brake fluid to the rear wheel cylinders
Therefore, to bleed the rear wheel cylinders, it is necessary to open the regulator valve.
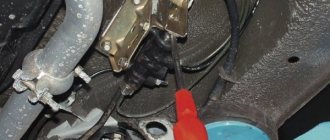
To open the pressure regulator valve, insert the blade of a slotted screwdriver between the lever and the plate, recessing the regulator rod.
Clean the air release valve on the brake mechanism from dirt and dust.
Check the level and, if necessary, add brake fluid to the reservoir to about.
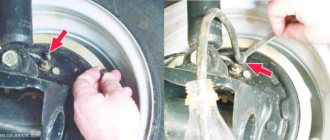
Remove the protective cap from the air release valve.
Place the rubber hose over the valve head and immerse the end of the hose in a clean, clear container partially filled with brake fluid.
The assistant must sharply press the brake pedal 4–5 times (with an interval of 1–2 s between presses).
After the last swing you need to keep the pedal pressed.
Unscrew the air release valve 1/2 - 3/4 turn.
Air bubbles will be visible in the liquid flowing from the hose.
When the fluid stops flowing from the hose, close the release valve completely, after which the assistant should release the brake pedal.
Repeat steps 5–6 until bubbles stop appearing in the escaping liquid.
When pumping, monitor the brake fluid level and, if necessary, add it to the reservoir, not allowing the level to drop below about
Remove the hose, wipe the valve fitting dry and put the cap on it.
Bleed the brakes of the remaining wheels if necessary.
If there is no air in the system, the brake pedal should be “hard”, i.e. when pressing, go no more than half the distance to the floor.
Bleeding the brake system with ABS
In vehicles equipped with ABS, the process is slightly different. If the fluid level in the reservoir drops too much during bleeding, air may enter the brake system, which will then end up in the pump. In this case, you will not be able to continue pumping the system and will have to contact service.
Front wheels:
1. Turn off the ignition and apply the brake approximately 20 times to release the ABS control pressure.
2. Fill the brake system reservoir to the very brim.
3. Place a transparent hose onto the right front wheel bleeder valve. Place the other end of the hose into a container of brake fluid.
4. Have an assistant press the brake pedal until pressure appears in the system. Then, while holding the brake pedal depressed, unscrew the valve. When the pedal resistance stops, close the valve.
5. Repeat this procedure several times until the liquid in the hose is free of bubbles.
6. Close the valve and fill the reservoir with brake fluid.
7. Pump the second “wheel” in exactly the same way.
Rear wheels:
1. Turn off the ignition and apply the brake approximately 20 times to release the ABS control pressure.
2. Press and release the brake pedal.
3. Turn on the ignition, put on the hose and open the air bleed valve of the right brake cylinder. Close the valve as soon as there are no more air bubbles in the hose.
Attention! The ABS pump should not run for more than two minutes, otherwise it will overheat. Thus, after every two minutes it is necessary to take a ten-minute break to cool the pump.
4. Turn off the ignition and prepare the left wheel brake valve.
5. Bleed the second “wheel” in exactly the same way.
6. Turn on the ignition and wait until the ABS pump turns off on its own.
7. Add fluid to the brake reservoir to the Maximum.
All vehicles of the VAZ family use a hydraulically driven braking system. This means that the force that the driver makes when pressing the brake pedal is transmitted to the brake mechanisms installed on the car's wheel hubs using fluid. But in order for the impact to have sufficient force, an amplifier is included in the design.
Practical tips and nuances when bleeding brakes
Even if you follow all the points of the detailed instructions, you cannot be completely sure of the correctness of your actions and a reliable result. Experienced motorists know that the secrets of any independent manipulations in the car lie in the details.
While working with each wheel, it is worth tilting the car slightly in the appropriate direction. In this case, the air inside the system will rise up and flow faster to the threaded valve. Additionally, the process is activated by a slight vibration if you tap on the caliper.
In addition to the main method, you can bleed the brakes by gravity. It is necessary to unscrew the valves and add the necessary brake fluid to the supply tank in time. The procedure is quite lengthy and is only available to experienced car enthusiasts. Moreover, it is not suitable for vehicles equipped with return pressure control valves.
Bleeding the brakes, relying solely on your own experience, is fraught with breakdowns in the brake system. Incorrect actions can lead to large accumulations of air in the lines. Before you start working, you should familiarize yourself with the experiences of other people or watch training videos on the Internet:
Each vehicle system deserves special attention. Not only the proper operation of the vehicle, but also the safety of people depends on the correct operation of the internal mechanisms. Timely pumping of the brakes will ensure high-quality operation of the car in emergency situations.
AFTER BLEEDING YOURSELF, BEFORE YOU MOVE AWAY AFTER BLEEDING THE BRAKES, PRESS THE BRAKE PEDAL SEVERAL TIMES!
We remind you that the braking system of a car is the most important element of safety on the road, in order to be completely confident in the brakes of your car, it is better to entrust bleeding of the brakes to a certified car service!
Have you ever needed the help of a car lawyer?
It is no more difficult to bleed a brake system with ABS than a conventional one. The main difference lies in the accumulator and valves, from which it is not so easy to remove air. However, if you have certain knowledge and skills, it is quite possible to bleed ABS brakes yourself, without the help of specialists from a service station.
A little theory
To transmit force, one of the properties of the fluid is used - its incompressibility. That is, when a force is created on a liquid, its volume does not change, and it acts as a transmitter.
A hydraulic brake drive is more practical than a mechanical or pneumatic one, but it has one drawback - if air gets into the fluid, the transmission of force will be significantly reduced. This is because air, like any gas, is compressible. As a result, the presence of air leads to a change in the volume of the liquid when creating force (due to gas compression). Because of this, the force is no longer transmitted to the actuators, since it is absorbed by the volume change.
It turns out that effective operation of the brakes on a VAZ occurs only until air enters the drive system. And this can happen for several reasons.
Alternative Brake Fluid Change Method: Our Pump-and-Hold Answer
Who hasn’t heard shouts of “download and hold” somewhere in garages, and even at mediocre services? Surely the men are pumping the brakes. Replacing brake fluid is a well-known procedure. Have you ever wondered how they fill the system with it at car manufacturing plants? Let's try to apply the factory operation in civilian conditions.
Industrial approach
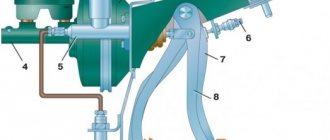
At the factory, the entire brake system is completely empty, but its design is such that the fluid reservoir is located on the main brake cylinder in the engine compartment, at the very top. A little lower is usually the ABS unit (who has it), and then the brake pipes go to the front and rear wheels. There, in wheel brake mechanisms, cylinders of different designs can be used. But one feature unites all of them: a bleeder fitting is always located at the very top of the cylinder. It is also sometimes called an air release valve.
At the factory, a special fitting is put on the neck of the reservoir, through which brake fluid fills the system under pressure. The worker below opens the bleeder fittings on the wheel cylinders one by one. Air is first forced out of them, and then brake fluid flows. All. The fitting can be screwed on. By repeating this operation with all the wheels of the car, we obtain a fully charged and functional braking system. All that remains is to disconnect the filling nipple from the neck of the tank installed on the master brake cylinder and tighten the tank cap.
The question arises, can an ordinary car owner use the same method? If you have repaired the brake system and replaced hydraulic components, or are bleeding the system because you suspect there is air in it, I usually recommend doing a classic “pump and hold” bleed. More intensive passage of liquid in the tubes and cavities of the cylinders is guaranteed to displace air bubbles.
Don't try this at home?
What if, in accordance with the maintenance regulations for our car, we decided to simply replace the fluid? For some every two years, for others every three. And this is where the method of flushing the system with new brake fluid comes to our aid. We take advantage of the fact that the fluid reservoir is located high, and the fluid simply drains down to the working cylinders under the influence of gravity. The main advantage of the proposed method is that it does not require an assistant.
Brake fluid should be purchased with a reserve (at least 1 liter). It is interesting, by the way, that almost all passenger cars, regardless of their size, increased cross-country ability, the presence of ABS systems and other differences, have a brake system capacity of about half a liter. Please note that the replacement occurs by stirring, so you need to pour a slightly larger amount of liquid through the system. Stock up on 1 liter of brake fluid from any manufacturer (they are all compatible). DOT-4 is the most common brake fluid used in the vast majority of cars. It has to be replaced due to its high hygroscopicity - the ability to absorb moisture from the air and, as a result, lose its performance characteristics.
So, replacing the brake fluid yourself will require placing the car on an inspection ditch or overpass and providing free passage between the place from where you can refill the brake fluid reservoir in the engine compartment and the brake cylinders of all four wheels.
We work in stages
Use a rubber bulb or syringe to pump out the brake fluid from the reservoir. Add new fluid to the top edge. To speed up the process (to release fluid from all cylinders at once), it is advisable to select four pieces of tubes that fit tightly onto the bleeder fittings of all cylinders. We lower the free ends of the tubes into small transparent bottles.
When is it necessary to bleed the brakes?
The first of these is that the drive pipelines are exposed to negative environmental influences. The rear brake pipelines on VAZs are made of soft metals (copper, brass) and they pass under the bottom of the car. Oxidation processes and possible shock loads during operation can cause cracks or breakdowns in the pipeline. The drive of the front mechanisms is composite, one part of the pipeline is metal, and the second is rubber. Over time, the rubber “ages” and cracks appear on it.
The second reason why there may be air in the system is scheduled maintenance of the brake system. The fluid used in the drive has its own resource, so it must be replaced periodically. It is during the replacement process that air gets inside the system. It can also appear in the system after repair of mechanisms, for example, during the replacement of pads. Therefore, it is imperative to bleed the brakes after replacing the pads.
But on VAZ cars it is possible to remove air bubbles by pumping - a process in which air is expelled from the liquid. For this purpose, special fittings are provided for the design of the brake mechanisms.
It is not difficult to identify that the system requires bleeding - the failure of the pedal, the ease of pressing it and a decrease in the effectiveness of the brakes, up to their complete absence, indicate that the system is airy.
But before you start pumping, you should carefully inspect all pipelines and components of the system for leaks, as well as the amount of liquid in the tank. If traces of leakage are detected, the malfunction should be eliminated by repair using repair kits (main and working brake cylinders), replacing the damaged section of the system (pipelines), and after replacement, carry out bleeding. If air has entered the system due to a lack of fluid, it must first be replenished to the level.
Adjusting the handbrake of Lada Priora with your own hands
We turn the adjusting nut clockwise, thereby tightening the handbrake cables. The full stroke of the handbrake lever should be from 2 to 4 teeth (clicks). When the handbrake is adjusted correctly, with the handbrake lever lowered, the wheels should rotate freely. After adjustment, use the locknut to fix the adjusting nut.
This completes the replacement of the rear pads on the Priora and the adjustment of the handbrake. If you have any questions, ask them in the comments.
Tools
But it is important to know how to properly bleed the brakes on VAZs of different models and what is required for this. The operation itself is not complicated, so you can do it yourself. But it’s better to do this with an assistant - it will be both faster and easier.
Not many tools are required:
- Key for 8 (10);
- Silicone transparent tube according to the diameter of the fitting;
- Capacity;
- Brake fluid;
As for the wrench, you should use the cap type. There are also special keys on the market for unscrewing fittings, clamping. The fact is that the fittings often stick to the thread and are very difficult to unscrew. Using a regular open-end tool, you can easily “lick” the edges and then it will be completely impossible to unscrew the fitting.
The essence of pumping work is almost the same for all cars - VAZ-2101, VAZ-21099, and VAZ-2121 Niva. But the sequence of operations is affected only by the design features of the models.
How to properly bleed the brakes
First of all, look in the car manual to see in what sequence the pumping is carried out. If no recommendations are given, then the procedure is carried out in the form of English Z.
What you will need
You should invite an assistant who will press the brake pedal on command.
A rubber hose, a set of spanners, brake fluid and a container for draining it are also prepared.
Carrying out work on rear mechanisms on VAZ classic models
First, let's look at how to properly bleed the brakes on a Classic. To perform the operation correctly, it is necessary to take into account that on the VAZ-2106 or any other model, the brakes are dual-circuit. That is, the entire system is divided into two independent parts. This was done so that if one of the circuits depressurizes, the second remains operational and the car can stop. But it is important to understand that the separation into circuits occurs on the master cylinder, and if air enters the system due to lack of fluid, it will be in both components.
For all classic models, including the VAZ-2107 brakes, the circuits separate the front and rear wheel drives. This must be taken into account when it is necessary to bleed the brakes of a 2101 or another model.
By the way, if only one circuit is aired, then it is not necessary to bleed the second one, although it would not be superfluous to treat all mechanisms, both front and rear.
So, everything is prepared, and you can get started.
The sequence of actions is as follows:
- It is better to drive the car into a pit to make it easier to get to the fittings. At the same time, he is immobilized using a handbrake or wheel chocks;
- Remove the cap from the brake fluid reservoir, check the level, and if necessary, bring it to the maximum level;
- First, we bleed the rear brakes of the VAZ, since the entire operation is done from the brake mechanism, which is as far as possible from the master cylinder, that is, from the right rear wheel;
- We put the assistant in the driver's seat. We climb under the car ourselves, put the key on the fitting, and then put the prepared tube on it, the second end of which should be lowered into a container with a small amount of liquid poured into it. It is advisable to immediately tear the fitting out of place and immediately screw it back, even before pumping. This is done so that there is no hitch in the process due to a non-unscrewing fitting;
- We ask the assistant to press the brake pedal 5-6 times. At the same time, with each press the failure will be less and less - the drive is pumped with liquid, while air moves to the mechanisms. After downloading the system, the assistant should hold down the pedal - press and hold it;
- Unscrew the fitting half a turn, working fluid will begin to flow out of it. If a transparent tube is used, air bubbles will be clearly visible in it, and the pedal being held will begin to move down until it hits the floor. In this position, the assistant must hold it, at this time the fitting must be screwed back;
- This sequence of actions should be carried out for one mechanism 4-5 times to completely remove air;
- On the “classic”, the left rear wheel is pumped next (since they are combined into one circuit). But before that, you need to check the level of the tank and bring it to the maximum level. The sequence of actions is the same: pump the brakes and hold the pedal - release the fitting to drain the fluid with air (the pedal goes down) - tighten the fitting - pump again. And so 4-5 times;
Step by Step Actions
The nuances of pumping depend directly on the ABS model. The location of individual components and the presence or absence of additional modules affect the order of the procedure.
The preparatory stage is the same regardless of the car brand. Turn off the ignition and press the brake pedal intensely several times.
Pumping using the example of Lada Granta
The car is placed on an overpass or driven into a pit. This is necessary so that you do not have to remove the disks for free access to the working surface. Next, turn on the ignition to open the solenoid valves. Start the procedure with the right rear wheel.
To bleed the brakes you need:
- Disconnect the wires from the tank cap;
- remove the cover;
- pour brake fluid into the reservoir (as much as will fit);
- remove the cap;
- use a spanner wrench to loosen the tension on the fitting;
- the prepared hose is connected to the tip of the fitting;
- place the second end of the hose in a container for waste liquid;
- press the brake pedal several times;
- fix the pedal in the lowest position and hold it;
- use a key to open the fitting;
- wait until the liquid has completely drained (at this moment the brake pedal will “fall” to the floor);
- close the fitting;
- pump the pedal again and repeat the procedure until the liquid flowing from the hose no longer contains air bubbles;
- tighten the fitting;
- remove the hose;
- reinstall all parts.
The process is repeated on each wheel in order of priority.
Bleeding the brakes of Lada Priora
The process of bleeding the ABS brake system for the Lada Priora is similar to the previous one. When bleeding the front wheels, the discs are removed, providing better access to the working surface.
After completing the process, you should not immediately drive out onto the road. First, they check the functionality of the system in a safe area, eliminating leaks and failures of the pedal.
Bleeding the front brakes of a VAZ
Let's move on to the front mechanisms. On a VAZ-2104 or any other “classic”, the difficulty of operating the front circuit lies in the fact that they have a block brake caliper, that is, each of the two brake pistons is actuated separately.
Therefore, in order to gain access to the external piston fitting in order to bleed the brakes on a VAZ-2105, you will have to remove the wheel. Here, too, the principle of distance between the mechanism and the main cylinder applies, so the left wheel is pumped first. Everything is done like this:
- Jack up the wheel and remove it;
- There is no need to touch the fitting of the internal piston (and it is not always available; instead, there may simply be a plugged hole). Next, pumping is carried out according to the already familiar scheme: pumping - draining - pumping (4-5 times);
- The right front wheel is pumped last. The algorithm of actions is identical;
2304-3-20-03
The fastest filling, as a rule, occurs in the case of a bottle in which the hose coming from the brake cylinder of the front left wheel is lowered. As soon as there is about 200 ml of liquid in the bottle of the front left wheel, wrap and tighten the fitting of the local cylinder. We repeat the same with the front right wheel. We complete the process on the rear axle - here 200-250 ml of liquid should pass through each fitting.
That's it, the brake fluid replacement is complete. All that remains is to make sure that all fittings are tightened tightly. We put on the protective caps, check the fluid level in the master cylinder reservoir - and off we go.
Features of work on models starting from VAZ-2108
Now let’s look at the specifics of the operation on other cars of the VAZ family. Starting with model 2108, the circuit diagram has changed, and therefore the sequence is somewhat different. And you need to know it before bleeding the brakes on the VAZ-2108, 2109, 21099.
These cars already use a diagonal arrangement of contours. That is, one of them combines the rear left and front right wheels, and the second - the other two.
Bleeding begins, as usual, from the farthest wheel, that is, from the rear right one. An operation to remove air from its brake mechanism is carried out according to the described sequence.
But there is one caveat. The design includes a pressure regulator for the rear wheel drive mechanisms. If the rear of the car is hung out before bleeding, this regulator must be unlocked. To do this, just install a screwdriver between the regulator rod and the thrust plate.
After all work it should be removed.
Then it is pumped to the second rear wheel, and the front left one, since it is the one that is combined with the circuit with the already pumped rear mechanism.
After pumping each mechanism, it is necessary to check the level in the tank. If you omit this point, then during operation the liquid will go into the system and air will enter it again.
Braking system design Grants
Before you start adjusting and checking, you should find out what the Lada brake system is like and what its features are. The design includes the following parts:
- brake regulator;
- pipelines;
- brake pads and cylinders;
- amplifier.
To ensure efficient and safe braking, Grant has a double-circuit (diagonal) pipeline system. The tasks of the first circuit include blocking the left rear and right front wheels. The second circuit is designed to block the left front and right rear wheels. The front wheels have disc brakes, and the rear wheels have drum brakes.
The process of controlling the master cylinder on the Lada Granta is carried out using a vacuum amplifier. This device is designed to improve controllability of the brake system. To do this, you need to press the appropriate pedal. It is necessary to take into account that an anti-lock braking system may be included in the Lada Granta, or ABS will be absent. The Lada Granta system under consideration is equipped with a hand brake that blocks the rear wheels by spreading the corresponding pads in the drums. These parts are moved through levers and by moving a steel cable located inside the vehicle.
The vacuum amplifier is a diaphragm. This element shares the rarefied atmosphere of the vacuum booster with external pressure. The pressure difference helps to reduce the effort exerted on the corresponding pedals. When the brakes are released, the atmospheric and vacuum chambers are connected to each other using a special valve.
This is interesting: Designations of electrical appliances Lada Largus
Self-pumping using the example of a VAZ-2110
On the Lada “Ten” everything is done in the same way as on the VAZ 2108-21099 models, since the design of the brake system is the same. Therefore, let’s look at how to bleed the brakes on models 2110-2112 yourself, without help.
To do this, you will need to use one additional element - an aerator, which you can buy or make, and a rubber hose with ends on both sides for connection to the nipple.
A homemade aerator is a lid from a “classic” brake reservoir (without a built-in sensor), into which a nipple from a tubeless wheel is installed.
The essence of pumping yourself is very simple and it is done like this:
- The car is immobilized. A bleeding hose is put on the fitting of the brake mechanism that is being pumped;
- The aerator is screwed onto the brake reservoir, and one end of the hose is connected to it. The second one is put on the nipple of an inflated car wheel (for example, a spare tire);
- Unscrew the fitting half a turn. In this case, the air pressure from the spare tire will begin to squeeze out the liquid. All that remains is to monitor when liquid flows through the tube without air bubbles, and tighten the fitting;
This way all mechanisms are pumped. The air pressure of one wheel is enough to completely bleed the system;
But there is one nuance in this - the pressure supplied to the tank should not be very high (no more than 1 atm). Otherwise, there is a risk of the lid falling off or the tank being damaged.
Bleeding the brakes using the described methods is also applicable for more modern VAZ models - 2114-2115, Priora, Kalina. And all because the design of the brakes is completely identical.
FAQ
One of the most common problems among motorists is the lack of effect from pumping the brakes. After the procedure, the pedal remains sluggish, and no improvements in the operation of the system are observed.
Two factors lead to this situation:
- lack of tightness of the system or any individual element;
- incorrect replacement of the master cylinder.
If all the air has not been removed from the cylinder during installation, it will subsequently be quite difficult to squeeze it out through the fitting.
Drivers are also interested in how much it is possible to bleed the brakes on their own, without the assistance of an assistant. To do this, purchase a special device that will make the procedure of bleeding the brakes easy and convenient without outside help.
You can bleed brakes with an ABS system at home without taking the car to a service station. The main thing is to follow all the basic rules of the procedure to prevent system breakdown.
Issues relating to motorists' rights are often more important than they appear at first glance. A driver may lose his license or suffer other severe penalties due to ignorance or misinterpretation of laws and regulations. Do not be lazy to dive deeply into the essence of the issue being studied, do not hesitate to ask advice from professionals.
Source
Features of work on the VAZ-2121 Niva
As for the VAZ-21213 Niva, this car has its own characteristics. And although the system on this car is dual-circuit, it is different from other VAZ cars.
On this SUV, one circuit combines all 4 brake mechanisms, and the second - only the front wheels. To ensure that the circuits are independent, the Niva uses a block caliper in front, to which two brake hoses fit; accordingly, there are two fittings for bleeding.
Bleeding the brakes on a Niva is done in the following sequence: first, air is expelled from the rear right mechanism, then from the rear left one. Next, the general circuit on the front brakes is pumped - first the right, then the left (the principle of the distance of the wheel from the master cylinder). In this case, it is important not to confuse the fittings - the upper one is responsible for the general contour, and it is this that should be used.
Only then is the front brake circuit pumped, for which the lower fitting is used. Here the pumping sequence does not matter; you can start with both the left and the right mechanism.
But the Chevrolet-Niva does not use such a brake design. A conventional diagonal dual-circuit system is installed there, so the pumping sequence is identical to the process on VAZ-2108 and higher cars.
Preparing for work
It is good to pump ABS brakes on an overpass or pit . Bleeding brakes with ABS, like bleeding a conventional brake system, is carried out with an assistant, starting the process of bleeding the brake system from the front wheels, then the rear (right and left). Shortly before starting work, it is recommended to inspect the threads of the brake bleeding fitting, for a smooth process: bleeding brakes
But first you need to determine what type of ABS system you have:
- If there is a simple ABS system, when all the components are in one housing, then it is enough to simply find the fuse, which in most cases is located in the system block. If you remove the fuse, the ABS system will be completely disabled. If you turn on the ignition, a light will come on, indicating that the ABS is faulty.
- Next, in the engine compartment, you need to find the cap on the expansion tank of the brake system and unscrew it. Before doing this, it is better to remove the connector from the electrical sensor.
- Then you need to look under the car, and near each wheel, find fittings for bleeding the working cylinders and loosen them. Here you need to make sure that the descenders do not break, because if they break, the work will take a long time. You can pre-treat the fittings with brake fluid or WD-40.
- In order to do the work accurately and at the highest level, you need to stock up on a flexible, clean hose whose internal diameter will be the same as the size of the fitting. And you need to pour about a third of the brake fluid into the bottle. By the way, you can buy brake fluid here: https://chaspik.org.ua/teh-jidkosti/tormoznyie-jidkosti/.
Why does the air interfere?
Liquid, unlike air, is practically incompressible, which means it transmits force in full. Along with the brake system, in modern cars the power steering and automatic transmission are hydraulic (operating due to fluid pressure).
Let's imagine a situation where there is a certain amount of air bubbles in the brake fluid pipe of one of the rear wheels.
What will happen in this case when you press the brake? Where there is no air, the fluid will transmit force and the wheel will lock immediately. The air will be compressed and the force transferred to the brake pads will not be enough, the wheel will continue to rotate. For this reason, the car may skid.
ABS system and why it is needed
ABS - Anti-lock Braking System, which is now installed on almost all modern cars . The essence of the system is that it prevents the wheels from completely locking during sudden braking, thus, when braking sharply on a slippery road, the car does not skid, and the driver can drive the car as usual. Therefore, we recommend that you carry out a procedure such as bleeding the brakes in a timely manner .
The ABS system has the following components:
- the control unit, which receives signals from sensors, monitors how the valves operate;
- valves installed in the brake system, they dose the amount of brake fluid that flows to them;
- brake sensors, they are mounted on the wheel hubs, they transmit data about the speed of the car.
Video review in which bleeding ABS brakes is quite simple:
When pumping is necessary
After renovation
The brakes will have to be pumped in all cases where the tightness of the system has been compromised:
- Replacement, repair of master or working brake cylinders;
- Damage and replacement of hoses, flaring of brake pipes;
- Repair of other components and elements of the brake system.
Periodic fluid replacement
There is no universal answer to the question “how often to change brake fluid”. If the technical documentation of your car does not clearly indicate the frequency of replacement, it is recommended to do this once every 2 years, or after 50 thousand mileage.
The main reason for replacement is the accumulation of moisture in the liquid. Why is this dangerous?
Moisture lowers the boiling point. Friction during braking causes the pads, calipers and the fluid itself to heat up, even to the point of boiling. When boiling, air bubbles are released, which is why air in the brake system is dangerous, as described above. In addition, water causes corrosion and can freeze. Both are fraught with consequences.
Unsatisfactory performance
As a rule, the driver notices a change in the operation of the brakes: decreased efficiency, pedal failure, slow response to pressure, and so on. In these and other cases, bleeding the brakes can be a solution to the problem.
ABS bleeding sequence
- First, we look for and remove the fuse in the fuse block that is responsible for the operation of the anti-lock braking system.
- Next, we jack up and remove one front wheel, and look for the brake wheel cylinder (BWC) fitting.
- After this, we put a hose on the fitting (from a hydraulic level, for example).
- Open the fitting one turn.
- One presses the brake pedal all the way and holds it in that position.
- Now turn the ignition key to turn on the hydraulic pump (the ABS indicator lights up on the instrument panel).
- The second person watches how air is removed through the hose and, after removing the air, tightens the fitting.
- We release the brake pedal only after tightening the fitting.
- Now, how do you know that all the air has escaped from the ABS? This shows the ABS icon on the dashboard, if it goes out after removing the air and tightening the fitting, then all the air has escaped.
The correct sequence for bleeding the ABS system
There is a special order for properly bleeding an anti-lock brake system: right front wheel, then rear, then rear right, and then rear left wheel. If during such work the fuel fluid leaks out of the system, it is necessary to fill the system with new fluid. And to do this, you need to know what fluids can be mixed and how much brake fluid is needed to replace.
Sequence of operation for the front wheels:
- Turn off the ignition (key position “0”).
- Remove the terminals from the brake fluid reservoir.
- Take a bottle with a small amount of brake fluid and a hose. We lower one end of the hose into the liquid, put the second on the fitting and open the fitting with an open-end wrench. It is advisable to use a transparent hose from the hydraulic level so that you can see whether air bubbles are coming out or not.
- Press the brake pedal and hold it in this position.
- The second person (at the wheel) looks to see if the air is coming out, and after the air bubbles have stopped coming out, he closes the fitting with a key.
How to bleed rear wheels with ABS:
The procedure differs for pumping the rear wheels. After the front wheels, the rear right wheel should be pumped in the following sequence:
- We also put the hose into the bottle of liquid and into the caliper fitting.
- Depress the brake pedal all the way.
- Turn the ignition key to position “2”.
- Hold the brake pedal until the hydraulic pump completely expels the air bubbles.
- Close the fitting and release the brake.
For effective bleeding, when working with the brake system of the rear left wheel, the procedure must be adjusted. Namely:
- As in other cases, put on the hose and unscrew the caliper fitting 1 turn. When pumping with the rear left wheel, the brake does not need to be applied immediately.
- Turn the ignition key to start the hydraulic pump.
- After the air comes out, press the brake pedal halfway and close the fitting.
- Next, release the brake and wait for the hydraulic pump to turn off.
- Turn off the ignition.
- We connect the disconnected connector of the brake fluid reservoir (TF).
This video shows how to bleed anti-lock brakes on Audi A4, Audi A6, Volkswagen Passat B5 and others.
Important points
Before you start pumping, you should remember a number of important rules that will help you avoid additional problems.
- Before work, inspect the main components for leaks. If the seal is broken somewhere, bleeding the brakes will be a waste of time and effort.
- Always monitor the brake fluid level in the expansion tank. If it becomes empty during operation, the system will become even more airy.
- Never use an open-end wrench to unscrew fittings - the edges are easily torn off.
- Be sure to clean the fittings from dirt; before pumping, it’s a good idea to spray them with WD-40 and wait 10-15 minutes. Often the fitting becomes tightly “stuck” to the brake cylinder and breaks off when you try to unscrew it. If the fitting does not budge, try gently heating and cooling it several times.
- On vehicles equipped with a brake force regulator (sorcerer), the rear of the vehicle must be loaded before bleeding. You can simulate loading by slipping a screwdriver between the regulator rod and the pressure plate.
- If there are no special instructions from the manufacturer regarding the bleeding order, the following scheme is recommended: rear right wheel, rear left, front right and front left.
How to bleed brakes in the field
What if you don’t have the necessary material on hand to modify the brake fluid reservoir cap? We return to the standard method of bleeding the brakes:
- Press the brake pedal several times until it becomes firm;
- We place a pry bar or any other tool of suitable length (for example, a stick) between the seat and the brake pedal;
- We unscrew the brake fitting and watch how the brake fluid comes out along with air bubbles;
- We repeat the process for each wheel starting from point No. 1.
In all cases of bleeding the brakes, monitor the fluid level in the reservoir. If you can’t unscrew the fitting, spray WD-40 on it and wait a couple of minutes for it to dry out.
If the brakes do not bleed, the system is not sealed or one or more components, such as the master cylinder or pipe, are faulty. Also, do not forget to flush your car's brake system on time.
How do you bleed the brakes on your car? Let us remind you that it is convenient to search for other operating and repair instructions by content for each Lada model: Granta, Kalina, Priora, Vesta, Niva, Largus or XRAY.
Keywords: lada xray brakes | Lada Vesta brakes | Lada Largus brakes | Lada Granta brakes | Lada Kalina brakes | Lada Priora brakes | 4x4 brakes | Niva brakes | universal article
Found an error? Select it and press Ctrl+Enter..
Self-leveling
There are two ways to bleed brakes alone: by gravity, and by air pressure.
Gravity flow
Gravity bleeding is more suitable for replacing fluid when there has been no serious airing. Since the old fluid is displaced without pressure, air bubbles may remain in the places where the tubes are bent, in the upper cavities of the cylinders.
The idea is simple: the fittings on the brake cylinders are unscrewed, and new “brake fluid” is constantly added to the reservoir. It is recommended to put transparent tubes on the fittings; they will allow you to see the moment when new liquid begins to flow out.
The disadvantages include low speed and low efficiency.
Air pressure
If you don’t have an assistant, you can bleed the brake system yourself by making a simple device. To do this, you will need an additional expansion tank cap and a tubeless tire nipple.
We cut the nipple into the lid and the primitive device for creating excess pressure is ready. The maximum pressure should not exceed 1-2 atmospheres, otherwise there is a high probability that the expansion tank will burst.
Pressure can be created by a pump, or by using a spare tire. In this case, you will have to make an additional accessory - a hose with valves at both ends.
Now all that remains is to unscrew the bleeder fittings one by one, starting with the wheel farthest from the expansion tank. One end of the transparent hose is put on the fitting, the other is immersed in a container of suitable size.
Slowly unscrew the fitting so that the brake fluid mixed with air bubbles begins to leave the system. When we see that the air has run out (for this we need a transparent tube), we tighten the fitting.
Before moving on to the next wheel, be sure to check the fluid level in the tank and top up if necessary. » alt=»»>
How to bleed brakes without an assistant
How to pump the brakes with a partner has already been described above. What to do if there is no such thing nearby, but you need to bleed the brakes? You can get out of this situation in several ways:
- You can bleed the brakes alone if you have a gas stop. The meaning is the same as when pumping with an assistant, only instead of him the gas stop will press on the pedal. Therefore, you need to press the pedal several times, keep it pressed, set the stop and begin to bleed the brake fluid. When the fluid begins to flow, the stop will begin to push the pedal to the floor to the limit.
- bleeding the brakes with a syringe. You need to hermetically embed the syringe into exactly the same lid as on the tank. Then, having first filled the syringe with brake fluid, replace the regular cap with this device, unscrew the fitting, place a container and apply pressure with the syringe.
- another method with a modified lid. You need to insert a car nipple into a cap similar to the one installed on the tank. Then put the lid with the nipple on the tank, then put one end of the hose with a connection clamp on the lid, and the other on the spare chamber, inflated to no more than 1 atmosphere. Open the fitting and bleed out the liquid with air bubbles.
Replacing brake fluid and bleeding brakes
Note! To bleed the brakes, the following tools are needed, namely: A wrench size “8”, a small long transparent hose that can be put on the bleeder fitting, as well as a container with a little new brake fluid poured into it and be sure to stock up on a rag, brake fluid nevertheless, it has a negative impact on human skin and paintwork, and if you get it on something listed above, be sure to wipe the area of contact with a cloth, otherwise problems may arise in the future!
Bleeding the brakes with an assistant
This method does not require additional devices; all actions are performed in the car with the ignition turned off. The assistant's task is to create pressure in the brake system.
If a person is doing this for the first time, explain to him how important coordination of actions is; he makes movements only at your command. Under no circumstances should you release the pedal before you tighten the fitting. If this happens, the system will suck in air and you will have to start the bleeding procedure all over again.
- Unscrew the cap of the expansion tank and fill it to the maximum possible level.
- Take a place at the right rear wheel, put a tube on the fitting, and immerse the other end in a container. It is important that the other end is in the liquid. Then, even if the assistant releases the pedal ahead of time, it will be drawn into the system, not air.
- On command, the assistant pumps the brake pedal until it becomes hard and loses its range.
- Without releasing pressure on the pedal, the assistant reports readiness.
- You slowly unscrew the fitting and watch how the “brake fluid” comes out along with air bubbles.
- When the pedal goes to the floor at about 3/4 of its travel, the assistant immediately reports this so that you tighten the fitting.
- As soon as this is done, the assistant begins to pump the pedal again. The number of iterations depends on the amount of air.
- If no air bubbles are observed after 3-5 iterations, move on to the next wheel. Don't forget to check the level in the tank.
How to fill brake fluid correctly
The brake reagent on the Lada Granta should be replaced after every 45 thousand kilometers traveled or after 2-3 years of use. It should be said that the replacement can be done with your own hands.
It must be said right away that the reagent is replaced on Grant, which is initially installed on the overpass. First you need to unscrew the cap from the neck of the tank to fill the liquid. Then the spent working fluid is pumped out. This is best done with a syringe or rubber bulb. Only after this is the previously unused brake fluid poured into the container.
During the process of filling brake fluid, you need to be as careful as possible and take special care. If liquid gets on painted surfaces, it will need to be cleaned up quickly as it may damage the paintwork. Then the hydraulic drive is pumped, through which the brake fluid flows.
Pumping is carried out until the moment when a liquid lighter than the used liquid comes out of the fittings on all pumped working cylinders. Bleeding is carried out with the engine turned off, first on one circuit, and then on the other.
The replacement procedure is as follows:
- The first to bleed is the brake system located on the right side of the rear wheel.
- Then the left front wheel mechanism is cleaned of the spent reagent.
- Next comes the turn of the left rear wheel system.
- The pumping mechanism ends with the right front wheel.
ABS brakes
The braking system is constantly being improved, and the presence of ABS in the first generations of the car did not in any way affect the method of pumping the brakes. Now EBD, BAS, ESP, SBC and other auxiliary functions have significantly complicated the process, and often made it impossible at home.
Hydraulic accumulator, pump, hydraulic valves - the presence in the system of these components controlled by the ECU requires serious diagnostic equipment. Therefore, if the instructions for the car do not contain clear instructions for bleeding and you are not sure of the correct actions, it is better to contact a service station.
Anti-lock braking system ABS: types, types
Depending on the type and type, ABS is classified into:
- One scheme of operation of the ABS system is when all the devices that make up the ABS are located in one unit. That is, the hydraulic valve block, hydraulic accumulator and pump are located in one unit.
- The second ABS scheme is when the component devices (hydraulic valve block, hydraulic accumulator and pump) are located in different places. In this type of braking system, in addition to the ABS module, there is also an ESP module and an SBC module.
Whether you can bleed the brake system yourself depends on what type of brake system is in your car.
If the car has a system of the first type, then it is easy to properly pump the ABS.
If the car has a system of the second type, then one cannot cope without a scanner; it needs to be pumped to a service center for maintenance.
The ABS system consists of:
Do-it-yourself replacement of brake fluid on a Lada Priora
Replacing brake fluid (BF) on a Priora must be done every 45-50 thousand km or once every three years if the car is rarely used and you have not reached 45 thousand. It is necessary to fill the Priora brake system with glycol fluid (FMVSS 116 not lower than DOT-3).
Before replacing the brake fluid, it is necessary to check the tightness of all connections and the brake system as a whole.
To work you need to prepare:
- Brake fluid (recommended by the manufacturer);
- Key to "8";
- A syringe or bulb for pumping out the old brake and a piece of tube, preferably transparent (for putting on the fitting);
- Dishes for draining fuel fluid;
- Rags;
- You will also need an assistant.
A few words about safety precautions
- Be careful when handling brake fluid as it is toxic.
- Avoid contact of TJ with skin and eyes.
- Do not allow brake fluid to come into contact with plastic or rubber products or paint surfaces.
- If liquid gets on any of the above, wipe them immediately using a clean cloth.
Note: Brake fluid is hygroscopic (capable of absorbing moisture and various substances from the air), so reuse or filtering is prohibited. TJ can only be stored in a closed container.
Step-by-step instructions - how to replace brake fluid on a Lada Priora
1. Raise the rear wheels and unlock the rear brake force adjuster by placing a screwdriver between the piston and the plate. When you're done, don't forget to take out your screwdriver.
2. Unscrew the plug of the GTZ tank.
3. Using a syringe or bulb, you need to pump out all the brake fluid, then pour in new fluid to the top of the reservoir.
4. Clean the right rear valve fitting from dirt, then remove the rubber cap from it. Place the rubber tube prepared earlier on the fitting and lower its end into an empty container.
5. The assistant’s task is to get into the car and pump the brake pedal 4-5 times, then press and hold it.
6. At this time, you are under the car and unscrew the air release valve with a key “8” by about 1.5-2 turns, generally a little until the old brake fluid flows from the hose. It will be significantly different from the new one in its characteristic dirty color. At the same time, the pedal will begin to smoothly fall to the floor. Your task is to quickly tighten the valve as soon as the liquid stops flowing through the tube.
7. Constantly monitor the liquid level in the tank; it should not fall below the minimum level; top up with clean fuel fluid to the upper level in time.
Follow all the steps described above until clean brake fluid flows from the hose. This way you will drive out the old fluid and pump in new fluid in its place. After you are done with the rear right wheel, move on to the other one, next you need to bleed the left front brake. Next, you should replace the fuel fluid on the rear left and front right fittings.
If mistakes were made during the replacement and the brake system became airy, you need to bleed the brakes, as described here.
Alternative solution to the issue
The owner's manual for a vehicle with ABS may discuss the presence of a drain fitting in the design of the anti-lock module. To maintain a similar system, a compressor or a homemade installation in the form of a pear and a converted brake water reservoir cap may be useful. Developing a replacement in this case looks much simpler:
- remove the used liquid from the container and fill it with new one;
- bleed all four brake cylinders in the traditional way according to the scheme discussed by the manufacturer;
- install instead of the “brake reservoir” cap a special adapter for the compressor or a home-made installation;
- connect a hose to the drain fitting of the anti-blocking module and unscrew it 1 turn;
- make the pressure about 1 BAR;
- identify the end of the release of old water and bubbles;
- relieve pressure.
In the process of replacing used brake water with the newest one in a system with ABS, the following notes should be taken into account:
- constant control over the water level in the tank is required: a drop below the low mark (MIN, Low) is not allowed;
- The permissible operating time of the hydraulic pump is 2 minutes; if it is exceeded, turn off the ignition and allow the unit to cool for 5-10 minutes.
- before draining the water, you need to “discharge” the system by pressing the brake pedal more than 20 times;
- It is strictly prohibited to pour used liquid or a composition that has stood for a long time in an open container;
- When you turn on the ignition and the drain plug is open, you should be prepared for a sudden release of water.
Possible mistakes
In order for the procedure to be effective and not lead to new problems, you should know common mistakes. The most common ones include:
- mixing two different brake fluids;
- reducing the fluid level in the system to critical;
- pressure too high.
If you mix two brake fluids with different parameters, the rubber seals are damaged. The system becomes clogged with clots and stops working.
When the fluid level in the reservoir is too low, air gets into the brake system and it fails. Also, do not use excessive force when pumping. The recommended pressure in the tank is 0.8 atmospheres. If excessive pressure is created, the tank will leak.