Check Engine Light comes on when your vehicle's computer detects a problem with the powertrain. This may indicate a serious or minor complication, but ignoring it will definitely make the problem worse, leading to significant damage and costly repairs. You can avoid all troubles if you know the reasons for the signal. However, it sometimes does not turn off despite solving the problem. In this case, it won’t hurt you to find out how to reset the “check”.
Most drivers get annoyed if the check light still does not go off, even if the car problem has been corrected. In this case, your car's computer is faulty and a little intervention is required to resolve the issue.
The engine error light came on: what to do and how to erase it
An error in engine operation causes the check engine warning light to light up on the dashboard. The indicator will remain on until the normal operation of the failed or malfunctioning element is restored. On some cars, after the operation is restored, the “check” stops lighting by itself; in addition, a so-called “reboot” of the controller may be required, which we will consider below, as well as a software reset of errors in the ECU.
Note that in some cases, even after eliminating the cause and attempting to reset, the “check” still continues to light. Often such errors are critical. In other words, it is impossible to remove such an engine error using simple methods. The fact is that a critical error is recorded in the memory of the electronic control unit and is not erased on its own. In this article we will talk about how engine errors are diagnosed, as well as how to reset the engine error yourself.
What is a check engine?
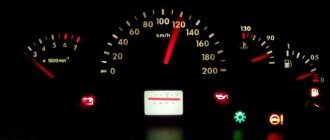
“Check Engine” is translated from English as “Check the engine.” On different cars, on the dashboard there is either such an inscription, or simply “Check”, or an engine icon. On the Priora, it is the yellow icon that lights up, resembling an engine in shape. “Check” lights up in two cases:
- Checking the functionality of the sensors. When you turn on the ignition, all the icons on the dashboard light up, indicating that there is a signal from the ECU and the system is ready to operate. After 2-3 seconds of turning on the ignition, the icon will go out.
- Malfunction of the engine operating system. There are several important aspects. Firstly, the ECU does not receive data about all breakdowns: it cannot technically record any mechanical damage. Secondly, the appearance of this icon may be erroneous. But you shouldn’t trust the opinion “it’s all for nothing” - a problem with the engine can grow like a snowball and cost a pretty penny if you ignore it. Regardless of whether the “check” on the Priora is on or flashing, the problem needs to be solved.
How to clear an engine error
Let's start with the fact that engine errors can occur for various reasons, since the control system includes a large number of sensors and controls the operation of individual components, systems and mechanisms. It should also be taken into account that different vehicles may differ in terms of the complexity of a particular system. On some cars, the “check” lights up, for example, only in the event of serious or critical errors (malfunctions in the operation of the air flow control valve, engine detonation error when the knock sensor is faulty, etc.).
At the same time, the check may not light up if there are problems with oil pressure, there are certain deviations from the norm in the throttle operation, etc. On simple cars the light comes on, on more technologically advanced cars in a similar situation the error “loss of engine power” or “oil pressure error” appears in the engine. For this reason, reading engine errors is a necessary diagnostic and preventative procedure, regardless of whether the check light is on or not.
Now about the reset. On many cars, especially in the budget segment, to reset the error in the ECU, you should perform the following steps:
- warm up the power unit to operating temperature;
- remove the “plus” terminal from the battery for 5-15 minutes, then connect the terminal back after the specified time;
- insert the key into the ignition switch and turn it to the last position before starting the internal combustion engine from the starter (the lights and indicators on the dashboard should be on);
- leave the key in the lock in this position for 1 minute, then return the key to its original position;
Such actions in some cases allow you to remove errors from the computer. Now you can start the engine (the check should go out after starting) and let it idle for 2-3 minutes (do not press the gas pedal while running). Now you should turn off the engine, and then repeat the procedure of starting and stopping the engine a couple more times.
Note that this method allows you to remove the “check” when the cause of its ignition was the operation of the engine with a disconnected or faulty sensor, refueling with the wrong type of fuel, ignition failures due to non-functioning spark plugs, etc. If otherwise, a problem occurred and the check light came on. The driver then found and corrected the cause and then reset the engine error.
To do this, you need to use a special diagnostic connector into which additional equipment is connected. Note that the vast majority of cars produced after the 2000s have a standard connector. This connector is called OBD2. The location of the connector may be the area near the pedal assembly, under the steering column, etc. For an accurate determination, you need to look at the technical manual for a specific vehicle model. On older models, such a connector may be located in the engine compartment and other places. Please note that to connect equipment in such a case, you may need a special adapter.
Allow the check engine light to go off on its own.
Wait until the “check” goes out on its own. The simplest method because you don't have to do anything. The computer system in most vehicles will automatically recheck for problems that may activate the error light. If it is a minor problem, it will automatically correct itself and the check will go off. However, if the check light is still on after three days, you need to apply the methods mentioned above to reset it.
If this continues to happen despite the following reset procedures, you should take your vehicle to your nearest auto repair shop and have it diagnosed by a professional mechanic. Professional diagnostics use more sophisticated tools and can identify precise problems.
REMEMBER: You can always contact our car service center, where your car will be happy to receive professional technical assistance. You can also make an appointment with us for a scheduled technical inspection! Please familiarize yourself with our car repair and diagnostic services.
When you turn the ignition key of a Priora car, all electronic systems are checked and the check light comes on for a few seconds, this is normal, as it should be. It’s bad when the check light doesn’t light up when you turn on the ignition, which means the check system isn’t working. If the checkbox on a Priora comes on and is lit when the car is started, the owner immediately falls into panic for some reason - at least in most cases. There's no need to panic, but I wouldn't recommend not paying attention. The engine has 16 valves - Priora is equipped with sensors in many components and this may indicate a breakdown. The check light is on on the dashboard of the Priora car, bottom left. Sometimes the check light comes on, you look, and it just drove through a puddle and the knock sensor got wet. The check light is on, it blinks when cold, but there is no need to panic, we need to look for the reasons. Let's make a reservation right away: there are false positives. Read the article and find out all the reasons why the check engine is triggered.
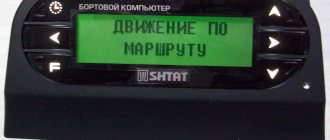
Diagnostics using the built-in BC
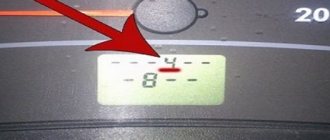
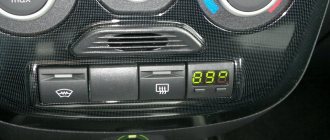
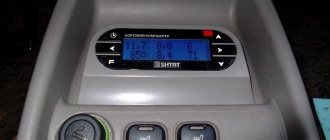
To view the error codes, you need to find the daily mileage reset button on the dashboard, press it and, holding it, turn the ignition key. The self-diagnosis mode will turn on. All arrows on the instruments should move from minimum to maximum values and back, and all positions on the LCD display should light up. You need to look: if any position does not light up or the arrow on any device does not move, then you should check the corresponding sensors, their networks or display for malfunctions.
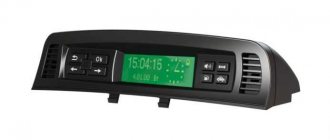
Priora on-board computer
In the same mode, press any button for switching modes of the built-in BC 2 times, after which digital codes may appear on the liquid crystal display:
- 2 - very strong voltage in the BS;
- 3 - errors in the fuel level sensor system in the gas tank;
- 4 - error in the coolant temperature sensor system;
- 5 - error in the air temperature sensor system outside the car;
- 6 — motor overheating;
- 7 — emergency low oil pressure;
- 8 - malfunctions in the brake system;
- 9 - battery is low;
- E - error in the data packet stored in the EEPROM.
Many drivers ask how to reset error codes on a Lada Priora. Perhaps their built-in BC is faulty, since a working on-board computer automatically exits the diagnostic mode after 30 seconds if you do not press any control buttons.
Failures in the idle speed system (IAC) and ESC
- P0500 - speed sensor is broken.
- P0506 - very low engine speed at idle.
- P0507 - too high speed at idle.
- P0511 - the XX regulator network is faulty.
- P0560 - BS voltage is below the minimum threshold.
- P0562 - very low voltage in the BS.
- P0563 - very high voltage in the BS.
- P0601 - ROM checksum error.
- P0615 - the wires of the additional starter relay are broken.
- P0616 - the same wires are shorted to ground.
- P0617 - they shorted at the BS.
- P0627 - the fuel pump relay wires are broken.
- P0628 - the same wires are shorted to ground.
- P0629 - they shorted it to the BS.
- P0645 - break in the wiring of the air conditioning compressor clutch relay.
- P0646 - the same wiring has shorted to ground.
- P0647 - she shorted to BS.
- P0650 - Malfunction indicator light circuit does not operate.
- P0654 - Tachometer control circuit is faulty.
- P0685 - the main relay electrical wire is broken.
- P0686 - the same electrical wire has shorted to ground.
- P0687 - he shorted it to the BS.
- P0691 - the electrical wiring of the fan control relay is shorted to ground.
- P0692 - the same wiring has shorted to the BS.
Note: in cases where the computer displays error codes that indicate a break in the electrical wiring of a device, before troubleshooting the problem and purchasing spare parts, you must first see if the electrical wiring plug has come out of the connector of the corresponding device. Such incidents happened. Testers and computers are, of course, good, but nothing can replace the eyes of a car enthusiast. Good luck with the repair.
All foreign cars currently have various sensors installed that monitor the operation and condition of the car. The modern Lada Priora is no exception to this series. The position and quality of many operating systems in a car depend precisely on how well these sensors perform their duties.
Their main problem is that if some sensors are turned off, the car will not disrupt its operation and can continue to move unhindered. However, the breakdown itself can be detected much later, when the negative consequences of disconnecting the sensors become apparent.
Depending on which sensor fails, fuel consumption may increase sharply, and some malfunctions in the operation of the car’s engine may also occur. In addition, a common “symptom” of sensor disconnection can be accelerated wear and tear of some elements in the car.
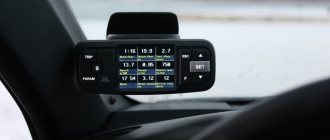
In order to check for certain errors on the Priora, you can use a special controller, which is built into the car specifically for this purpose. Thanks to this controller, you don't have to go into the engine compartment with a multimeter to look and identify the problem.
This controller is connected to a special tester, which is connected by manufacturers to the on-board computer. It won’t take much time to perform a full check of the car for any malfunctions in the operation of systems and sensors. You can start the process by pressing two buttons, and then all that remains is to correctly decipher the error codes.
How to check engine errors and erase the error in the ECU memory
To carry out engine diagnostics and read error codes, as well as to reset them, many drivers prefer to go to a service station where there is a scanner. Service station specialists, at the owner’s request, can issue a printout that will display the error codes recorded in the control unit’s memory. Note that this procedure is optimal in the case when the check is constantly on. If the error is “floating” (the check periodically lights up and goes out), then a visit to the service may not yield anything.
In such a situation, you can buy a scanner for personal use, but its cost and the need to study the features of the software make this method impractical, especially when it comes to diagnosing only one car. Let us add that the scanner is used in parallel with a laptop or personal computer, which creates additional inconvenience.
All kinds of third-party BCs (on-board computers) also rightly belong to similar ones in terms of ease of use, cost and feasibility of purchase. The solution is capable of reading and deciphering error codes and displaying additional information about the parameters and operating modes of the internal combustion engine. At the same time, the BCs require proper connection and separate installation in the cabin.
Taking into account the above, the most popular among car enthusiasts is the so-called OBD2-BT or wi-fi adapter. The device allows you to read and decrypt error codes, and also has a number of useful additional functions. For full operation, you will need the adapter itself, as well as a smartphone or tablet PC with Android, iOS or Winphone on board. Let's take a look at this diagnostic device and look at the principle of its operation in more detail.
Among the main advantages of such adapters is that the device is a small, compact “box” that is inserted into the diagnostic socket of your car. This means that the need to connect, lay wires, place the device itself in the cabin, use a PC and perform other additional actions is completely absent.
The adapter in the connector remains almost invisible and connects to a tablet or smartphone “over the air” thanks to bluetooth/wi-fi technology. This is especially convenient when the engine error lights up periodically. In other words, you can drive with the adapter in the connector as long as you like, and at the moment the check light comes on, immediately read the fault code. You only need to secure your smartphone or tablet to a stand or holder to be able to monitor the readings on the screen while driving.
As for the software, it may be supplied with the adapter. The necessary programs are also available in the Play Market for Android and similar solutions for devices on other operating systems. The software must be installed on a smartphone/tablet. Note that among the various available solutions, the Torque program is very popular (a free version of this application is available in the Market for Android). The program allows you to flexibly customize the interface, has the ability to not only read, but also decipher errors, and has the ability to reset engine errors.
Using the solution looks like this:
- The adapter is inserted into the vehicle's diagnostic connector;
- A smartphone/tablet with installed software is installed in the holder;
- Next, the car starts;
- Bluetooth is turned on on your smartphone or tablet;
- A program (for example, Torque) is launched on the phone/tablet;
Now you need to wait for the adapter and device to synchronize with the program, after which the parameters of the operating power unit are displayed. To determine why the check is on, you need to go to the appropriate subsection on your mobile device. Error codes will be displayed there, and it is also possible to provide options for decoding them. At the same time, it is possible to collect individual errors or all of them at once, as a result of which the check engine light goes out.
What's the result?
Ease of use and accessibility allow adapters for the diagnostic connector to significantly simplify the procedure for checking a car, reading and decoding ECU errors. It is also worth noting that the error can be quickly reset without having to disconnect the battery terminals, erase a critical error, etc.
Finally, we would like to add that among the commercially available adapters, there are devices that may not read errors recorded in the ABS unit and Airbag airbag modules. In other words, information on these items may not be available. For this reason, before purchasing an adapter, it is necessary to separately clarify the possibility of reading errors from the memory of the above and other ECM modules by one or another device.
Reset errors
Errors can appear for a variety of reasons. Moreover, most often car owners encounter errors in the operation of the power plant.
The control system, with which the on-board computer is connected, combines a huge number of sensors and monitors the functioning of various components, mechanisms and systems. We should not forget about the differences between the cars themselves, equipped with different on-board computers, electronic control units and sets of sensors connected to the BC.
On some machines, errors appear only when there are serious problems. It also happens that the electronics do not react to minor faults. But gradually, automakers are moving away from these shortcomings, trying to make cars as functional and smart as possible. That is, they enable the driver to find out about certain problems in time, simply by seeing the corresponding notification on the display of the on-board computer.
Motorists are interested in how to remove errors from the on-board computer. Here it is worth understanding that the BC closely interacts with the electronic control unit. It is with this that the on-board computer is connected, and then the information is transmitted to the BC and displayed on the display in the car’s interior. This allows you to install it separately even on cars without a factory on-board computer. To do this, purchase an appropriate device, connect it to the computer and install it somewhere in the area of the center console or dashboard.
For most budget cars, as well as for cars with outdated BCs, errors are reset by performing several sequential actions. Namely:
- the engine warms up to operating temperature, according to its characteristics;
- the positive terminal is removed from the battery;
- the battery remains disconnected for 5-15 minutes;
- after this the terminal returns to its place;
- the key is inserted into the ignition switch;
- the key is turned to the position before directly starting the engine;
- all indicators and lamps on the dashboard should turn on;
- in this state, the ignition key is left for 1-2 minutes;
- the key returns to its original position.
In certain situations, this method really allows you to get rid of errors. When all the steps have been completed, you need to start the engine again, leave it idling without pressing the gas pedal.
If it doesn’t work right away, you should turn off the engine again, start and stop it, as described earlier. Several repetitions of this type usually resolve the problem.
You can't just erase mistakes. First you need to figure out what exactly happened to the car, which caused the errors, and then eliminate them. Simply resetting the machine's brain is not recommended, as this could potentially lead to serious negative consequences.
And it is important to remember that not on all cars this method allows you to get rid of errors in the memory of the electronic control unit. If after these manipulations the codes still continue to be displayed on the on-board computer screen, then you will have to use an alternative software method.
It would be a good idea to find out how to decipher the error codes of your on-board computer. This can be done using the instruction manual, or by directly connecting special equipment for testing and resetting.
To watch online, click on the video ⤵
Removing errors on Priora Read more
Self-diagnosis of Priora. Decoding error codes Read more
resetting errors of the on-board computer on the priority mode Read more
How to reset a check?! Indescribably simple! More details
Reset device panel errors, Kalina. Diagnostic mode. More details
HOW TO RESET THE CHECK (Check Engine) CORRECTLY Read more
Resetting a check on Lada Priori Read more
Priora device panel test 2014 More details
Defect codes. How to decipher them. More details
Engine error reset check VAZ 21099, 2110, 2111, 2112, 2113, 2114, 2115, Kalina, Priora, Granta Read more
Resetting a check on Lada Priori Read more
Priority check is glowing Read more
The priority check is blazing Read more
The Lada Grant check is blazing Read more
The check on the Priora 16 valves is blazing, how to correct the error Read more
self-reset of errors on Lada Kalina Read more
Error 7. Lada Priora ..16 valve engine. More details
How to remove or remove a check on a car | Resetting “CHECK ENGINE” on Toyota Camry v 40 Read more
The Lada-Priora immobilizer light indicator is on Read more
Source: putinizm.ru
Using the Scanner
Using a scan tool is the easiest way to reset your check engine light. Here are 5 simple steps:
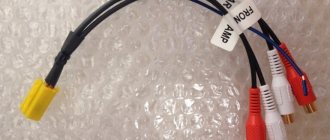
- Connect the scan tool to the OBD connector under the steering column. A laptop or tablet with the appropriate software is installed in the holder;
- Then turn on the car’s ignition and turn on all the gadgets accordingly;
- On your mobile device, in the appropriate section, press the “READ” button to view engine error codes. We write down the codes with a pen in the order in which they were received. This will be necessary for subsequent repairs.
We delete the error code. Press the “ERASE” button on the scanner. The Check Engine light will turn off when all error codes are cleared. Some scanning tools have many options, such as freeze frame, which captures the sensor readings. When deleting codes, these readings will also be deleted. Note: in some scanners, the option to clear codes may be automatic and use the “CLEAR” or “YES” button instead of the “ERASE” button. Don’t forget to turn on the ignition before clearing codes.
Battery disconnect method
Disconnecting the battery is an old way to reset the check engine light. Here are three steps to clear the check using this method: Step 1: Disconnect the cables from the battery. At this point, you should use a wrench to unscrew the positive and negative cables.
Step 2: Discharge the remaining electricity. The next thing you should do is press and hold the car horn for about 30 seconds. This action will help drain the car battery.
Step 3: Wait and reconnect the battery. After disconnecting the battery cables and draining the remaining electricity, all you have to do is wait about 15 minutes and then plug the battery back in. Error codes will be cleared. (Note: This method may not work on some vehicles.) If after this procedure the “check” lights up again, this may mean that the problem is still much more serious.
Priora error codes: self-diagnosis and decoding
The electronic control unit and on-board computer in modern car models help the driver quickly find a fault. But to understand electronics, a motorist must be able to decipher codes. In the material you will find a table with all the errors, as well as explanations of the most common codes: 1602, p0504, p0422, p1558. You will also learn how diagnostics are performed.
Decoding errors
Each code consists of five characters: P 0 1 4 0. Let's say right away about the fourth and fifth characters - they indicate the serial number of the error. Now it’s worth taking a closer look at what the codes consist of
The first character may vary depending on the vehicle system:
- P – malfunctions in the operation of the power plant; the symbol also indicates defects in the automatic transmission.
- U – you need to look for a fault in the interaction node between the system units.
- B – defects in the operation of body systems, which include electric lifts, airbags, etc.
- C – chassis sensors have detected a malfunction in the chassis system.
Let's move on to the second character:
- 3 – reserve.
- 2 and 1 – codes set by the manufacturer.
- 0 – common code for on-board diagnostics (OBD-II).
The third symbol indicates to the motorist the type of breakdown:
- 1 and 2 - indicate defects in the operation of the fuel unit or the appearance of malfunctions during the air supply.
- 3 – breakdowns in the ignition unit.
- 4 – indicates auxiliary control.
- 5 – in idle mode, some components do not work correctly.
- 6 – electronic unit or its circuits.
- 7 and 8 – defects in the operation of the gearbox.
Error 1602
If error 1602 appears on the on-board computer of the Lada Priora 16 valves, this means that the on-board voltage in the controller has dropped. As the experience of VAZ 2170 owners shows, error 1602 does not affect the operation of the car; if you remove the terminal from the battery, then 1602 will disappear, but after a while it will appear again. There may be several reasons for 1602:
- Problems with the generator. Measure its voltage; in good condition it produces 13.7-14 V.
- A large voltage drop during engine starting also leads to the appearance of 1602. The ECU records the voltage drop and automatically adjusts the time. First of all, you need to check the ground on the electronic control unit.
- Codes 1602 appear when the security system blocks one of the electrical circuits.
p0504
Also, many owners of a Lada Priora with 16 valves have questions about the appearance of error p0504. She tells the owner that there is a malfunction in the brake pedal sensor. To find out the exact reason for the appearance of p0504, you need to remove the sensor and disassemble it. Pay attention to its springs, one of them could burst - replace the damaged part.
Another reason is copper contacts, which can burn. Inspect them and clean them if necessary. Sometimes error p0504 pops up due to the incorrect position of the brake pedal sensor on Priora 16. Twist it and check whether codes p0504 remain on the screen or not.
Error 0422
The efficiency of the Priora 16 neutralizer has fallen below the normal level - this is what error p0422 reports to the owner of the Lada Priora 16 valves. As practice shows, codes 0422 pop up quite rarely. If code 0422 appears on the on-board computer screen, then you need to perform the following steps:
- We examine the catalytic collector. Its body and filling must be in good condition;
- If damage is found, the catalytic collector should be replaced with a serviceable one;
- If the catalytic converter is not the cause of the message, then the remaining actions to eliminate p0422 must be entrusted to specialists from the service center.
To get rid of 0422 you will need to reflash the cathode collector. If you have the equipment to set the settings, you can do the work yourself.
Priora: why the check is blinking or on - the main reasons
The diagnostic connector will help you “talk” to the electronic control unit and find out why the check light is on. Well, before you start diagnosing, check out the list of the most common Priora “errors”:
The reasons for the “Check” fire on a Priora (16 valves), as we see from the list, can be serious. There is no need to panic: when the “Check” light comes on, you need to immediately reach for the diagnostic connector. It’s funny, but earlier diagnostics were carried out in the service with special software, but today any error code can be displayed on your smartphone, deciphering it using a mobile reading device.
There is another reason for engine malfunction - low-quality gasoline.
If this causes the spark plugs to flood, you will see the “check” blinking. Low-quality gasoline can be sold at any gas station; experienced car enthusiasts advise carrying a couple of candles with them. Sometimes the “Check” light comes on due to gasoline and the engine stalls. If he continues to work intermittently, things will be bad.
Built-in ECU reset tools
A complete reset of errors is carried out through the diagnostic block - this is the law. Secondary on-board comments, read frivolous ones, can be deleted from memory using standard means. This is the dashboard and on-board computer control keys.
The sequence of actions that opens access to the list of existing errors and tools for removing them is different for each car. For example, on the latest VAZ 2110 and early Priors, to display fault codes on the on-board computer display, you must do the following:
- Press and hold the daily mileage button.
- Turn on the ignition, the daily mileage button is still clamped. The instrument panel will enter self-test mode when all needles move from the minimum to the maximum value. The button can be released.
- Press the daily mileage button again and again. Numbers and dashes will appear on the monochrome display. Each cell is responsible for a specific set of errors. If there is a dash in the cell, then there are no comments from the on-board system. If it is a number, then you should look for its decoding in a specialized manual for diagnosticians.
- You can reset errors in the same mode by holding down the odometer button for 2-3 seconds.
ECU records in old foreign cars with monochrome displays are reset in a similar way. As for new cars with display instrument panels and multimedia-intelligent control systems, here frivolous comments can be eliminated through the intelligent system menu. Serious errors can only be removed with the help of diagnostic equipment, through the block; removing the battery terminal is pointless.
Malfunctions of auxiliary systems and ignition
- P0300 - no spark in all cylinders;
- P0301 - no spark in cylinder No. 1;
- P0302 - no spark in cylinder No. 2;
- P0303 - no spark in cylinder No. 3;
- P0304 - cylinder No. 4, no spark;
- P0326 - knock sensor readings are outside the permissible limit;
- P0327 - poor signal in the circuit of the same device;
- P0328 - signal too strong in the same circuit;
- P0335 - crankshaft sensor circuit is faulty;
- P0336 - crankshaft sensor readings are outside the permissible limit;
Camshaft sensor location
P0337 - crankshaft sensor shorted to ground;
Return to contents
How to remove errors from a car's on-board computer
An on-board computer is present in almost all brands of modern cars. It can be very simple or high-tech.
Check light on, engine error
The reasons for such an error may be different, since the computer consists of a large number of sensors that monitor certain components, systems and mechanisms. Each vehicle has an individual complexity due to its different structure.
The “check” may light up depending on the type of car; in one it may appear only when serious errors occur; this may be a problem in the detonation of the engine sensor, or an error in the functioning of the air pressure control valve.
In addition, a “check” may appear if there are problems with oil pressure or incorrect throttle operation.
If the car is of a simpler configuration, the warning may be in the form of a light coming on; with more modern equipment, it shows an error - a loss of engine power or an error in oil pressure in the engine itself.
In this case, it is necessary to read the error, since this is a mandatory measure in diagnostics and prevention, and it does not matter what state the “check” is in, whether it is on or not.
The need to reset errors in the machine
The icon that displays the error appears after the ignition is turned on; it lights up in orange, a multimedia image on the engine. If the machine is fully operational, the error display sign disappears. If this does not happen, the error remains in its original state, then this does not always indicate a breakdown of any motor unit.
This happens because the computer memory can signal an error even if the car is working properly, so it needs to be reset.
An error may also appear due to problems with the operation of electrical circuits, breakdowns or short circuits of some sensors, loss of contact due to vibration or oxidation processes.
Air entering the gas tank when the cap is not tightly closed can also cause an error.
If an electronic system fails, you need to conduct a test to identify the cause of all problems. Diagnostic process:
- Determining the error code itself
- Drawing up a detailed plan for damage and its restoration
- After all these stages, when using special devices and scanners, the process of eliminating errors begins.
- Each vehicle has its own specific codes that indicate a particular malfunction, so it is better to entrust troubleshooting to professional and experienced specialists.
- During repair work, professionals will inspect and operate the engine, ignition system, and put the electronics system in order.
If the check light comes on when starting on a cold engine
If, when you turn on the ignition, there is no characteristic sound of fuel pumping, and the engine icon lights up on the panel, then most likely the relay supplying power to the fuel pump is faulty.
The exact location of this device depends on the specific vehicle model and may be in the immediate vicinity of the fuel injection control unit or near the fuse box. The reasons why the relay does not operate can be either a malfunction of the device itself or a failure of the fuse protecting it.
A faulty fuel pump relay must be replaced with a new one, and if the fuse blows, it is imperative to determine and eliminate the cause of this problem, since possible short circuits in the electrical wiring can lead to a car fire.
If there are problems with starting, a cold engine runs unstably, then the fuel injectors are probably clogged or their electrical wiring is faulty. To fix the problem, you need to flush the injection device and eliminate damage to the electrical control circuits.
The reason that the check signal lights up after starting the engine may be a malfunction of the device for absorbing gasoline vapors - the adsorber.
This happens if the absorbing element (activated carbon) becomes unusable or the solenoid control valve fails.
Many car owners remove the used adsorber due to the high cost of a new part. In this case, it is imperative to rewrite the firmware of the control unit in order to avoid the constant occurrence of errors in the system.
Often the warning indicator lights up without any problems with the motor due to simple inattention. A fuel tank filler cap that is poorly tightened in a hurry reduces the pressure in the gas lines by allowing air to pass through. This leads to increased gasoline consumption, which the ECU evaluates as a malfunction and then the check lamp turns on on the panel.
Another reason could be a faulty air flow sensor. To ensure the optimal composition of the fuel mixture, the control unit controls air consumption using readings from the mass air flow sensor (MAF). If the air filter is not regularly replaced, the working element of the air flow control valve becomes clogged with dust particles, which leads to distortion of its readings.
In such a situation, the ECU switches to calculating the air consumed by the engine using indirect methods and warns the driver of a malfunction through the “Check” switched on. Also, if the mass air flow sensor fails, the engine does not start well at subzero ambient temperatures.
Replacing an air flow sensor is quite simple, but the cost of the part itself, depending on the make and model of the car, can reach 10 - 15 thousand rubles. Therefore, it is better not to skimp on routine maintenance of the machine and promptly purchase and install a high-quality air purification filter.
The occurrence of detonations during the combustion of gasoline in the cylinders is monitored using a knock sensor. If there is no information or a low signal level from the sensor, the ECU sends an error message to the dashboard.
Error code: obd scanner honda buy at a low price on Aliexpress
Structurally, the sensor consists of a piezoelectric element and a resistor, so it cannot be repaired and can be replaced as an assembly.
The idle speed controller (IAC) is responsible for setting and maintaining the required speed in different engine operating modes. The regulator specially opens and closes the hole in the throttle body pipe for air dosing. As a result, the car can start moving immediately after starting the engine without a long warm-up.
Unstable operation of the engine at idle and an illuminated engine malfunction signal indicate a breakdown of the IAC and the need to replace it.
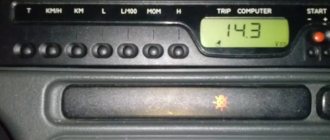
We dump our brains on Mitsubishi Karizma
According to the display, if there is no standard radio with a “Disp” button (it remains in a text file on the computer, I can’t check it now, but I think I tried it before, everything worked on the first Kara with a non-original radio).
Press and hold the left button, turn on the ignition (do not start the engine), while holding the left button pressed - the SET button - you can switch the computer readings
To see the consumption when the engine is on and the “power reserve” display is set, press M (with the left button pressed). The display proceeds to set the consumption readings: liters per kilometer or kilometers per liter, and at the same time displays the current consumption. Pressing Set returns everything to its place. Tested on cars with and without standard radio. The readings are reset with the same long press of the left button.
To switch modes, you need to simultaneously press the left and set. Doesn't have to be long. This all works when you turn on the ignition with set pressed. If you just turn on the ignition, the mode cannot be changed.
Hold the “A” button longer, the one closest to the steering wheel. And the reading that was selected will be reset to zero.
How to enter the display service mode
We press and hold the nameless button, turn on ACC, hold the button all the time, press H twice, then SET and enter the service, switching SET.
The reset is done this way: on the BC display, press and hold for 6 seconds (or until reset) the leftmost button.
We train our brains on Mitsubishi Karisma after resetting
- Warm up the engine to operating temperature, turn it off, remove the battery terminal for 10-20 seconds, and put it on.
- With consumers turned off, turn on the ignition for 10 s, turn off for 20 s, start the engine and let it idle for 10 minutes (all consumers should be turned off!).
- Turn off for 20 seconds, start again, turning on all possible loads (headlights, air conditioning, radio, heated seats, windows, interior lights, etc.), let it run for 10 minutes.
- Turn off the ignition for 10-20 s.
For everyone whose idle speed floats after they removed the terminals from the battery for some reason or reset their brains. After this, you need to train the computer XX again and this is described in detail in the instructions. For those who don’t have them, I’ll explain. Under the hood is a fuse and relay box. — Open the lid, find the air conditioning relay and its 25A fuse, after warming up the internal combustion engine to operating temperature, take out the whole thing. — Start the car and let it idle for 10 minutes, it may float a little but be patient. — After 10 minutes, turn off the car, put the relay and fuse in place, close the lid and hood, start it and enjoy smooth speed. PS This procedure perfectly regulates the idle speed, but only if the engine is OK.
What kind of word is Priora?
Priora
translated from Latin
means
priority, first and best among equals.
Interesting materials:
Lenovo tablet freezes when turned on, what should I do? The tablet started to slow down, what should I do? The tablet touch screen does not work, what should I do? The tablet does not see the memory card, what should I do? The tablet does not see the SD card, what should I do? The tablet does not see the network, what should I do? The tablet does not see the SIM card, what should I do? The tablet is very slow, what should I do? The tablet has stopped responding to touch, what should I do? The tablet does not receive Wifi well, what should I do?
Resetting the brains of VAZ
In order to “reset the brain” or reboot the computer of the VAZ car, press the daily mileage reset button, without releasing it, turn the key to start. The instrument combination goes into self-test mode. There is a threefold deviation of all needles (tachometer, speedometer, engine temp., fuel). If at this time you press the engine daily mileage button again on the mileage panel, the firmware version will appear, if you press it again it will show errors. If there are no errors, it shows ZERO. If there are errors, remember them, press the daily mileage key for 2-3 seconds and reset the error (ZERO appears).
Resetting the computer after removing the battery on a VAZ
When the battery is removed, the computer is reset and current data on the operation of the sensors is erased. This is where the main problem lies. Since when installing the battery back, the basic conditions for the normal further functioning of the car are not met. To do this, it is necessary to correctly connect the new battery so that the engine will subsequently delight you with its operation and not cause trouble.
- Warm up the engine to operating temperature, preferably while driving.
- We remove the NEGATIVE terminal from the battery for 3 minutes, the computer memory is “zeroed”.
- Reinstall the terminal. If the battery was completely removed, first connect the POSITIVE terminal
- WITHOUT touching the gas pedal, we start the engine.
- We warm up for 10-15 minutes, information is collected from the sensors of the on-board systems.
- Turn off the ignition to record data into the computer memory.
- We start the engine and accelerate to 50-60 km/h, followed by a complete stop.
- Turn off the ignition to record data from speed sensors, gearboxes, etc. into the computer memory. working while moving.
What does code P0507 mean?
Trouble code P0507 is triggered when the engine idle speed is higher than expected. All modern engines have a desired idle speed - usually between 600-1000 rpm.
The control unit uses position sensing and throttle adjustment to achieve these speeds. If the idle speed exceeds these set values and the maximum adjustment zone, the control unit will generate this error code.
Code P0507 is a common code for vehicles equipped with Electronic Throttle (E-Gas). Newer vehicles usually use E-gas.
The throttle valve is only called electronic. It replaces the old throttle body with a cable between the gas pedal and the throttle body.
The electronic throttle body uses sensors on the gas pedal and an electric motor in the throttle body to provide the desired acceleration. But this does not mean that this error code must necessarily be related to a faulty throttle valve. It can also have many other causes.
How to reset an error on Grant
There are three ways to get rid of the “Check Engine” icon:
- Fix the problem;
- Reset using OBD2 adapter;
- Reset without adapter manually.
We use OBD2 adapter
Do you have a high-quality diagnostic adapter and the necessary software on hand? Then resetting will not be difficult. What to do if there is no program or diagnostic scanner?
The easiest way out is to buy a scanner from China. Price – 200-300 rubles. The main condition: read reviews about compatibility. Whether he reads your car or not is a lottery.
Once you have the scanner, insert it into the OBD connector to the left of the glove compartment.
The connector is located in an easily accessible location to the left of the glove compartment lid.
- Download the TorqueLite program to your phone - free version, basic functions work;
- We start the car so that power goes to the adapter and error data appears;
- We turn on Bluetooth on the phone, add a new device in the settings (the adapter will be detected as OBDII);
- Open the Torque program - at the top of the screen there will be messages like Waiting for connection, Checking the CAN protocol, Connected successfully;
- Open the settings – Fault Codes – Show logged faults.
The saved codes will appear on the screen. There, using Clear logged faults, you can reset all errors and the “check” will go out. Not forever - until the problem appears again.
Open settings – Error codes – Show saved ones.
An option close to a scanner is installing an on-board computer. BC:
How to remove a check without an adapter
Everything is simpler here. When you don’t have OBD or a phone with software at hand, you just need to disconnect the terminal from the battery.
It makes no difference which terminal to remove. De-energize the car for 5-7 minutes and all errors should disappear.
The problem with the method: it works less and less often. Only the scanner is guaranteed to reset.
Drawing conclusions
The on-board computer is an important component of any modern car. With its help, you can obtain useful information, find out in time about problems with the engine and other systems, and read malfunctions using special codes that appear on the display.
Each machine may have its own fault encryption methods. Therefore, it is unlikely that you will be able to find universal lists with codes and their decoding. To understand what exactly happened to the car, you should look at the owner's manual and read about your standard on-board computer. If you installed the BC yourself, then the manual should also contain information about errors, their codes and explanations.
Using an adapter and a smartphone with the software, in some cases the phone screen will display not just error codes, but also their meaning. This depends on each specific situation.
On-board computers come in different types, functionality and have different capabilities. They also have their own nuances regarding cleaning and zeroing. In some places you need to hold down a button, in others you need to perform a combination of actions. You should take into account the BC model and build on the instructions for it. Do not try to remove errors yourself without first determining the cause of their occurrence on the on-board computer screen.
After resetting, retraining is often required. This is also not the easiest task, but you can do it yourself without turning to a car service center or diagnostic center for help.
Supply system
If the Priora engine (16 valves) is tripping, the reasons may be trivial. When there is no flash in the cylinder, perhaps there is simply no fuel there. If it has a normal compression ratio, it is worth diagnosing the power system. You should pay maximum attention to the air filter and the pipe. It is necessary to make sure that the clamps are securely tightened, whether the purifier body itself is intact, and whether there is any air leakage from the outside. Also pay attention to the tubes. They must be tightly secured to the throttle assembly. Fuel leaks, cracks, and broken plastic may indicate that some parts are faulty.