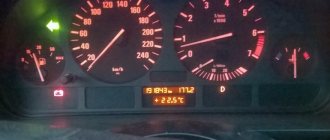
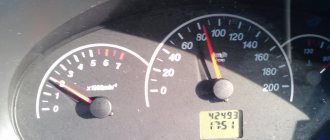
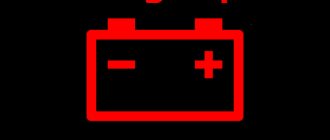
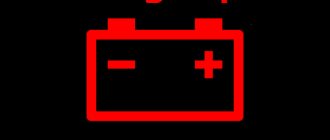
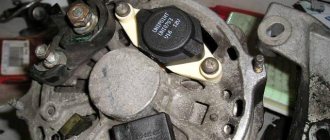
A burning battery light on the VAZ instrument panel indicates that the battery is discharged or that the light bulb has a malfunction. If it lights up at the moment when the car refuses to start, it is necessary to look for the cause on the spot. If the indicator turns on while the engine is running, do not turn off the ignition immediately, try to get to a place where it will be convenient to remove and install the battery. There is a possibility that you will have to get a generator. The optimal stopping place would be a garage with a lift or pit.
There may be several reasons why the battery on a VAZ is discharged, why the light on a VAZ 2107 is on. Let's look at them, as well as ways to solve problems.
The battery does not hold a charge
If the voltage at the terminals is less than 12.5 Volts, remove the battery for charging. After charging the battery to 12.7 V, leave it unused for 12-24 hours. Then check the voltage at the terminals or the density of the electrolyte. A working battery will not be discharged during such a period. The cause of the discharge could lie in overloading of power supplies by consumers, frequent short trips, or frost. There is a possibility that the generator is malfunctioning.
Find out the charging time of your battery
Buying a new battery before you are sure that the old one is unsuitable is irrational. But if you have a spare one and the ability to use a battery from another car, you can install it in place of yours while it is charging, and try to start the car and drive it for several kilometers.
If the light on the VAZ panel no longer lights up, the problem was a discharged battery. We are waiting for ours to charge. If it does not hold a charge, we buy a new one or, if we have the time, desire, and abilities, we restore the old one.
Attention! When experimenting with a battery from another car, make sure that it has a comparable capacity to yours. When installing a battery with a smaller capacity, you risk boiling it. If the capacity, on the contrary, is significantly greater (the difference is over 10-15Ah), the battery must be fully charged, since your generator will not be able to recharge it to the required level. Do not leave the ignition on without the engine running!
Reasons why the battery charge lamp is on
When the power supply is in good condition, the battery warning lamp on the dashboard lights up only when the engine starts, and after one or two seconds it goes out. If this does not happen, or, for example, the icon is activated when the engine is idling or while driving, this is a sign of a malfunction, and you need to look for the reason why the battery warning light is on. So, the causes of this malfunction may be problems with the following units.
Generator
Most often, the battery light comes on if the generator does not transfer energy to the battery after starting the engine. This happens when the following problems occur:
- Loosening the belt tension . Or a critical situation - its breakdown. In this case, the belt will slip along the pulley, due to which the generator pulley will not rotate at the required angular speed and, accordingly, generate electricity at a low voltage, insufficient for normal battery recharging. Another option for belt slippage is contamination of its inner surface and/or the surface of the generator pulley. In such situations, during the cold season, a whistle appears from under the hood.
- Brush wear . Over time, generator brushes wear out naturally, causing the generator to produce electricity at low voltage.
- Problems with the voltage regulator relay . The task of this unit is to limit the voltage transmitted from the generator to the battery. If the specified regulator fails, then usually the voltage is not transmitted to the battery at all, as a result of which the battery lamp on the panel lights up.
- Diode bridge . Its function is to convert the alternating current produced by the generator into direct current. Accordingly, if it fails, the generator will not charge the battery.
- Faulty generator pulley bearings . So, with significant wear (or with a very strong belt tension), significant bearing play or jamming may occur. This usually results in belt slippage with the consequences described above.
- Poor contact on the generator . Despite the fact that the terminal connection where the output wires of the generator are brought together is protected mechanically (usually by a cap or similar device), often over time the contacts can oxidize and become contaminated with dirt and/or oil. All this leads to poor contact and decreased conductivity. Similar reasoning is valid for “mass” contacts. If the ground is bad, the battery will not receive the proper charge, and accordingly, the battery icon will light up on the dashboard.
- Break in one of the phases of the generator winding (open circuit) . As a rule, this happens with contacts that are connected using a bolted connection. In particular, the bolt may unscrew over time and the contact between one of the phases and the diode rectifier may break. An open circuit is also possible if both power diodes on the rectifier unit fail. This can also happen with generators, where the contacts are connected not with bolts, but with soldering. Please note that in this case, the emergency lamp with battery on the dashboard will glow at half incandescence . And when you increase engine speed, it stops burning.
Battery
The battery icon on the panel lights up when the battery simply cannot accept a charge. The first reason for this is the old age of the battery or its partial failure. Alternatively, there is a low level of electrolyte in it. The second reason is oxidation of the terminals and contacts suitable for it or contamination of surfaces.
Signal lamp
On many domestic cars, for example, VAZ 2109, VAZ 2110, VAZ 2114, VAZ 2115, an old type lamp with a filament is installed as a battery warning lamp. On these models, it is possible to change this lamp when dismantling the instrument panel if it fails.
However, some car enthusiasts, due to inexperience or ignorance, install an LED lamp instead of an incandescent lamp. This leads to the fact that after starting the engine and idling, the lamp (at a voltage of just over 12 Volts) continues to burn. However, if you force the engine speed up to about 2000 rpm, the battery light goes out.
Wiring
Often the cause of incorrect operation of the battery lamp is damaged wiring. For example, when a lamp burns at half intensity or even dimmer, and in a variety of situations. Often the wiring is to blame. For example, a wire going from the battery to the generator. In particular, there are cases when, with a damaged wire (fracture, damage to the insulation), the lamp begins to glow a little even with a slight load on the battery.
Similarly, the battery lamp may burn at half incandescence due to poor contact on the voltage regulator (the so-called “chocolate bar”). Poor contact may be due to corrosion or mechanical damage.
Battery does not have enough charge
Battery diagnostics
A common reason why the battery does not have time to charge is a large number of on-board equipment. The power supplied by the generator should slightly exceed the total consumption of the vehicle's electronics. The battery is charged due to this difference. If you installed new speakers, a navigator, a recorder, etc., and your battery immediately began to discharge, most likely the generator simply cannot cope.
After charging the battery, disconnect some of the consumers from the car's electrical network; if the light no longer lights up, the reason was an overload. The most reasonable thing would be to abandon some of the on-board electronics. If you cannot remove it completely, try disconnecting it from the network, connecting it only when necessary to use it.
Installing a more powerful generator is not advisable, but if absolutely necessary, this should be done by an electrician. Not all generators are interchangeable. When installing an incompatible one, the risk of serious damage to the car is high. It is important to take into account the difference, for example, between the VAZ 2107 and 2114. The electronics of the VAZ 2114 places higher demands on the choice of generator.
Diode bridge
The diode bridge is used to convert alternating voltage to direct voltage. If at least one of the diodes breaks down, the device stops coping with its tasks, which is why a voltage that does not correspond to its parameters begins to flow into the on-board circuit of the machine. That is why the rectifying bridge must be checked in the case when the battery charging light is on, but there is charging (VAZ 2107, 2106).
You can also determine the health of the diodes using a multimeter in the appropriate mode. Turn on the tester and connect the red probe to the positive terminal of the bridge, and the black probe to one of the contacts marked “AC”. The threshold (pass) voltage for silicon diodes ranges from 400 to 1000 mV. If the device shows you a value that does not fit within the specified range, the bridge must be replaced. It is impossible to repair it.
Faulty wires at the generator
Attention! All work at the generator unit must be performed with rubber gloves! This is an electrician.
Generator
Inspect the generator assembly. White deposits indicate oxidation; carefully remove the deposits with sandpaper.
Broken wires and a characteristic smell indicate burnout; such wires must be replaced.
If visual faults are not visible, more in-depth diagnostics will be required.
Diagnostics and repair
When the battery charging indicator light is on, it is necessary to carry out diagnostics and determine the reason for its lighting. Initially, you need to make sure that the battery is charging or the light is signaling due to some other problem, i.e. determine whether the generator is working or not.
There are a couple of simple ways to check. If trouble occurs on the road, you need to pay attention to lighting devices (headlights, panel lights, interior lights); when there is no charging, the battery runs out and the brightness of the glow decreases. Can be used at night when the headlights are on (more noticeable).
During the day, you can use the “old” effective method, which does not require any instruments and equipment, which will certainly answer whether the generator is working or not. The diagnostic sequence is as follows:
- open the hood;
- start the internal combustion engine;
- turn on consumers, providing load on the network (headlights, heated rear window, etc.);
- remove the negative terminal from the ABK;
- if the engine continues to run and the headlights are on, then the generator is successfully generating electricity that can power all systems and charge the battery;
- If the engine stalls after removing the negative terminal, then the electromechanical power source is broken.
After making sure that the generator does not produce electricity, it must be carefully examined, installed and repaired. It is better to carry out the procedure in a garage and have the minimum necessary tools.
Generator belt
You need to start with the simplest action, i.e. Check the integrity of the drive belt and its tension.
The tension is checked by pressing the belt with a finger, at an equal distance from the pulleys, with a force of about 8 kg. The deflection rate of an old belt is up to 5 mm, a new one is up to 2 mm. If it falls within these parameters, then it’s fine; if not, then it needs to be tightened up. A too-tight belt won't do any good either. It will act on the bending of the shafts of the generator, water pump and other attachments, if any.
The integrity of the belt, if there is no obvious damage, is checked after its removal. Having loosened the tensioning device (it can be on the generator or installed separately in the form of rollers), remove the belt, turn it inside out and bend it. We carefully examine the inside; if there are cracks, the belt must be replaced.
Current collection brushes
Having finished with the belt, we move on to the brushes. On most vehicles, the location of the generator on the engine allows the brush block to be removed without removing it. The brush holder and the relay regulator are manufactured as a single unit.
To remove the brushes, you need to de-energize the power system by disconnecting the terminal with the minus sign. Next, remove the wire of the voltage regulator relay from the generator connector and unscrew the two screws securing the “chocolate”. After this, remove the relay and inspect the brushes. Both the contact planes and the brushes as a whole must be smooth, of a regular rectangular shape without chips. The length of the protruding part of the brushes must be at least 40 mm. If one of the requirements does not meet, they must be replaced. The installation process is in reverse order.
Voltage regulator
After diagnosing the brushes, you can immediately check the voltage regulator, you just need to put it in place. The check is not difficult, you can do it yourself. To do this, you need to have a multimeter with you.
The point of the test is to measure the voltage at the output from the generator at different engine speeds. Procedure:
- start the engine;
- in idle mode, measure the voltage, the limit should not go beyond 13.2 to 14 V;
- increase the crankshaft speed to 2000 - 2500 rpm, the voltage values should be in the range from 13.6 to 14.2 V;
- from 3500 rpm of the crankshaft and above, the voltage on the generator should not exceed 14.5 V.
If, during measurement, the parameters coincide with the above limits, then the regulator is normal and works perfectly in tandem with the electrical machine; if there are discrepancies, then you should think about changing the regulator.
It should be remembered that the voltage supplied from the generator under load (high beam headlights, heater or air conditioner, heated windows, etc.) should not be lower than 13.2 V, and without load at maximum speed no higher than 14.8 V.
There is an option to check the voltage regulator relay for operability in a dismantled state. To do this, you need to have a power supply with adjustable voltage and a 12-volt light bulb. The circuit is simple, shown in the figure.
If the relay is working properly, the light will glow in the range from 12 to 14.5 Volts. Before and beyond these values, it should not light up, otherwise the relay-regulator does not work.
Diode bridge
The diode bridge is designed to rectify the current supplied from the generator to the vehicle's power supply system, and its breakdown significantly affects the quality and quantity of electricity generated.
Before you start checking the rectifier in detail, you need to make sure that the bridge circuit is not short-circuited.
To do this, attach the ohmmeter probe to the generator terminal marked 30, and install the second probe on the housing. With a normal working diode rectifier, the reading on the device should tend to zero.
After making sure that there is no short circuit, check the diodes for breakdown. It is better to remove the diode bridge from the generator when carrying out this procedure, otherwise the readings may not correspond to reality, and it is more convenient to manipulate. The semiconductors in the rectifier are conventionally divided into “positive” with a red housing and “negative” with a black housing. Each diode needs to be checked.
Procedure:
- Set the multimeter to measure resistance in the range from 1 to 2 kOhm.
- Separately, each diode is checked with probes, touching the outputs of the semiconductors.
- First, the diode is checked in one direction, then the probes are swapped and checked in the other direction.
- Serviceable diodes in one direction should show a resistance from 400 Ohms to 800 Ohms, in the other “infinity”.
- If the measuring device shows resistance in both directions or “infinity,” then the diode is damaged.
The damaged bridge is replaced with a new one.
Bearing
A bearing malfunction is a purely mechanical failure, leading to unpleasant consequences, including mechanical damage to the rotor and stator of an electrical machine. Bearing failure occurs due to a highly tensioned belt, poor lubrication, and lack of protection against dirt. This malfunction cannot be ignored; it will make itself known as soon as it appears. In the initial stage, the generator pulley will wear out the belt intensively, then the generator may simply jam. To prevent this, you need to do an inspection more often - check the play in the generator bearing.
It’s easy to check, first inspect the belt to see if there is obvious wear, then with the belt removed, move the generator pulley up, down and from side to side, checking the play. If so, the bearing needs to be replaced. To do this, the front cover of the generator is removed, the bearing is pressed out, a new one is pressed in and the cover is put in place.
There is no contact at the generator terminals
To be even more convincing, once we are ready to fully examine the generator, it is necessary to check the positive contact of the generator output. This may also cause the battery charging indicator light to light up. This happens because under the influence of an aggressive environment and vibration, this contact oxidizes and corrosion appears on it, preventing the normal flow of current from the electromechanical power source to the network. Therefore, in any case, it is better to do prevention after examination. Clean, if possible tin the ends of the wires and secure firmly.
In parallel with the preventive maintenance on the generator, it would not hurt to completely inspect all the wires coming from it. Inspect the terminals, insulation and, if necessary, repair or replace.
Do the same with the wires to ground.
Open circuit of the generator
There are cases of generator phase failure, most often this happens at the points where the end of the winding with the diode bridge is attached. Therefore, after fixing the problem, it is worth checking the remaining bolted and soldered connections. If there are any violations, then it is necessary to clean the bolted connections from corrosion and tighten them well; the soldering should be well tinned and soldered.
It wouldn’t hurt to check the stator winding for insulation resistance and interturn short circuit. All measurements are made with an ohmmeter or multimeter.
If during measurement the parameters do not correspond to the norm, then the generator must be rewinded, or it can also be replaced with a working unit. The insulation resistance should tend to infinity, and the resistance of the turns is indicated in the passport of the electrical machine and should not deviate.
Alternator belt tension
The belt is tensioned by special tension rollers or a belt tensioner on the generator, depending on the engine design.
The photographs show a pair of belt tension adjustment devices, and the degree of tension and testing are described above.
Malfunctions in the timing belt
The belt may be torn, stretched, or simply wet.
Timing belt drive
- A belt that is torn or shows signs of physical wear must be replaced.
- Loose, without signs of wear - tighten it. A correctly tensioned belt should not bend by more than 1.5 cm when pressed.
Important! Excessive timing belt tension will damage the generator bearings, which will require time-consuming and expensive repairs. The deflection should be 1-1.5 cm.
- If there is moisture, dry it.
Loose or damaged alternator belt
During diagnostics, it is imperative to check the condition of the alternator belt. Sometimes it happens that due to its long-term operation or under the influence of other factors, it becomes deformed, as a result of which the generator drive misfires. Pay attention to the belt tension. Its weakening leads to the same effect.
If the belt is not deformed and has no visible damage, it can simply be tightened. Otherwise, it must be replaced. The normal belt tension is such that it can be rotated around the horizontal axis by 85-90 degrees.
Worn brushes or broken generator relay
Regulator relay
A multimeter or voltmeter will help determine the malfunction of the relay and brushes. It is necessary to measure the voltage at the terminals with the engine running and off.
Standards:
- with the engine off – 12.7V;
- with the engine running – 13.6-14.6V.
If the voltage decreases when you turn on the motor instead of increasing, inspect the diode bridge and brushes. Replace if found faulty. The diode bridge can often be independently soldered.
What can a constantly burning battery charging lamp indicate?
If the battery charging light is on in a VAZ 2107 or VAZ 2106, there can be only one reason - the battery is not receiving voltage from the generator, or is receiving it, but its value is insufficient. There may be several malfunctions that lead to this:
- violation of normal contact at the battery terminals;
- loose tension or damage to the alternator belt;
- lack of contact of its “negative” terminal with “ground”;
- break in the rotor excitation circuit or wear of the generator brushes;
- diode bridge malfunction.
- defective fuse;
- failure of the relay regulator.
Generator jammed
If there is no rotation inside the generator, the unit must be replaced.
Problems with the generator will also manifest themselves through dim headlights. If the battery is working properly, the engine starts trouble-free when the ignition is turned on, and there are no external manifestations of generator malfunctions, you should not disassemble it for the sole reason that the light is on.
On a VAZ, it sometimes indicates a glitch in the light bulb itself, especially if the car is not new. The most rational option would be to contact a reliable electrician. An alternative is to regularly measure the voltage at the terminals and observe, especially when the ignition is turned on. In-depth diagnostics of the generator is advisable when external signs of its malfunction appear (dim light, low voltage at the terminals, burning smell).
Some useful tips
To avoid problems associated with a faulty battery charging circuit, use the following tips.
- Pay more attention to your car's dashboard. This way you will know not only about the charging status of the battery, but also about the operation of other systems and mechanisms.
- Check the alternator belt regularly. The correct operation of the entire on-board network when the engine is running depends on its condition and tension. If you find the slightest defect in the belt, do not delay replacing it.
- Don’t be lazy at least once a month to check the voltage supplied by the generator to the battery terminals. If any discrepancies with the recommended values are detected, perform a full diagnostic of the on-board network.
- Periodically conduct a visual inspection of the condition of the battery terminals and generator terminals. Having discovered their oxidation, clean them with fine sandpaper and treat them with a liquid like VD-40.
- Do not allow water to get on the generator, battery and relay regulator. It can cause a short circuit in the electrical circuit. It is better to entrust engine washing to specialists.
- When repairing the battery charging circuit, avoid using spare parts that raise doubts about their quality.
Why does the battery icon on the VAZ 2114 dashboard not go out?
Secondly, a problem noticed in time often allows you to save a decent amount of money aimed at eliminating errors and repairing your iron friend.
Modern cars, even domestic ones, are equipped with various sensors, which, with minor changes in the operation of the car, display error data on the dashboard. If the battery lights up on the instrument panel and does not go out after the car is started, then the car owner needs to establish the cause as soon as possible in order to avoid big troubles. The figure below shows very well where this sensor is located. This is designation number 16.
Indicators on the dashboard of a VAZ 2114
Descriptions of other indicators can be found here.
The indicator can indicate problems in the system in different ways:
- The sensor is constantly on.
- Lights up periodically while driving.
- The battery charging lamp is dim. In this case, the light can sometimes only be seen at night.
What else to check
- Voltage regulator;
- Generator rectifier unit;
- Diodes;
- Generator for broken windings;
- Generator brush assembly;
- Contacts on the terminals of the generator, mounting block.
A malfunction of any of these elements leads to the fact that the charging system is inoperative and the VAZ 2107 battery is not charged.
Let's continue... Diodes are checked with a test light or multimeter. If one of them is broken, the entire rectifier will have to be replaced.
To check the stator winding you need the same device. The resistance between the fasteners of the rectifier unit is measured. If there are no contacts between them, you need to replace either the winding or the entire generator.
The generator itself often fails due to wear on the brushes. To check them, you need to remove the brush assembly and measure the length of the elements. If it is 5 mm or less, the brushes must be replaced.
Almost all of the above system components are replaced when they fail, since they cannot be repaired. Only some of the generator problems can be repaired, but this can only be done by a qualified auto electrician.
The worst thing is if problems with recharging occur while on the road. Without recharging the battery, it will eventually run out completely. And even if you manage to find the cause of the breakdown and eliminate it, you will no longer be able to start the engine with the starter. It will be possible to start a VAZ-2017 with a dead battery only from a tug or pusher.
How to find a fault
First of all, you need to check the battery charging, as well as the ground (contacts). It may be a simple matter of oxidation of the wires or terminals. But in frequent cases, the battery light comes on precisely when the generator or its parts are faulty.
The car generator is designed to measure the mechanical rotational power in the crankshaft and convert it into electrical power. With its help, the battery device is charged, and all energy consumers in the car are “powered”: the diagnostic system, the ignition system, the panel (on-board) computer. Poor charging of the VAZ 2114 battery, in the vast majority, is precisely a malfunction of the generator or its components.
There are few downsides to this: the battery is completely discharged and, as a result, you stop on the highway. I replaced the battery and moved on. But if the level of output power is greater than declared, then in this case the entire electrical system of the machine may fail. And then the cost of repairs increases significantly. But all this can be foreseen when the battery light is constantly on.
It is possible to replace the entire generator as a whole, but it will be cheaper to change some of its components. But before we get into that, we need to check the fuses and the unit itself. If a problem is found in it, then it must be replaced.
