This time we propose to consider such an important issue for every owner of not only the Lada Grant (2190), but also any car, as valve adjustment. Valves in every car are an integral and integral part of the gas distribution mechanism. Surely you know that each cylinder has at least two valves.
One of them is inlet, through which the combustible mixture enters, and the second is outlet, which releases the combustion chamber from exhaust gases. Every car enthusiast understands the importance of this system.
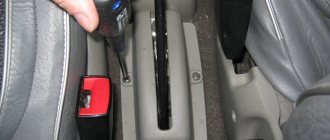
Timing belt of the Lada Granta car (2190)
Valve malfunctions, solutions
| Signs | Diagnosis/fix |
| Systematic smell of fuel in the car interior | The circulation of gases is disrupted, there is a leak. Due to the proximity to the air filter, gases enter the car interior. |
| Valve knock | To check the serviceability of the valve, it is enough to sharply accelerate; if the knocking does not disappear, the purge valve is faulty. Replace with a new one. |
| Increased fuel consumption | A faulty gas ventilation valve cannot fully control the flow. Install a new valve. |
| The flow of exhaust gases in the exhaust system has increased | The solenoid valve for purge the adsorber does not work properly. |
| Engine operation is accompanied by hissing | The first sign of excessive gas accumulation. Maintenance of the unit, replacement of worn elements. |
| Uncharacteristic sounds coming from the gas tank | At the same time, the valve can operate normally without giving any “signs”. Maintenance of the unit, dismantling the vapor trap. |
| Error - P0441 | Diagnostics of the on-board computer, deletion, elimination of data in the firmware. |
The procedure for selecting and installing new washers
At this stage, valve adjustment on the Lada Granta moves to the stage of replacing washers that have worn out during operation. Measurements of parts must be carried out using a micrometer.
So, the calculation system is quite simple: the thickness of the worn washer is added to the difference between the measured and normal gaps (subtracted in that order). The result will indicate the thickness of the new washer to be installed.
After the Lada Granta valve clearances have been set according to the standards, the engine is assembled.
You can first check the gaps again to finally make sure they meet the standards. After this, the lid is returned to its place (always with a new rubber band), and the pipes are connected.
The timing belt and its casing are installed, then the spark plugs are installed. Now the adjustment can be considered completely completed.
In order for the non-professional adjustment of the Lada Granta valves to the norm, which is based on the above measurements, to be successful, you need to carefully study the instructions. At the same time, the tuning kit and replacement washers are quite cheap. Therefore, the motorist will be able to save both on the cost of repairs and on setup time. You can purchase all the necessary tools and parts at any auto store.
Self-adjustment of valves on a Grant seems difficult at first glance. But the procedure is quite easy, it only requires the concentration of the performer and the premature preparation of the tools necessary for the work.
Using improvised items is highly discouraged. They will not only complicate the adjustment process, but can also cause damage to the valve system.
Useful tips
To make repairs easier in a dark garage, you may want to bring a flashlight to provide additional illumination. To cool the engine, car owners use a built-in cooling fan, for which they first disconnect the connector with the temperature sensor, located near the thermostat. On more modern Lada Granta models, adjustments are not made to improve the performance of the car; only replacement of the valves on a Granta with 16 valves is necessary.
A video with step-by-step instructions will help you understand the adjustment process in more detail.
We adjust the 8-valve Lada Granta engine with our own hands
Before adjusting and replacing the 8-valve Grant valves, a thorough diagnosis must be performed to identify the source of the problem. To do this, modern motorists use digital equipment, which allows them to conduct a full and quick inspection, assessing the technical condition of each engine component.
In this case, you must adhere to the standard rules. For example, during diagnostics it is necessary to focus on sound effects, listening to the operation of the motor. If knocking sounds are heard, then the cause of the breakdown lies in the gas distribution mechanism
You also need to pay attention to fuel consumption, acceleration dynamics, and the efficiency of the accelerator pedal. A failure of the engine idle speed may also indicate a malfunction and the need to adjust the Lada Granta valves
Conclusion
The timing mechanism on the 8-valve Lada Grant is a weak point. However, with systematic maintenance of the technical equipment and a non-aggressive driving style, the service life of the timing belt is extended by 5 - 10 thousand km.
High-quality fuel and motor oil with a viscosity index of at least 10W-40 will increase the service life by several thousand more. The timing interval is adjusted every 15,000 km.
Premature valve failures are most often caused by violation of operating conditions by the owners of technical equipment.
Valve adjustment: procedure
Adjusting valves using a feeler gauge
The car engine is designed in such a way that it has 2 valves per cylinder. This is necessary so that 1 valve starts the flammable liquid, and 2 gets rid of it. This entire process is regulated by a gas distribution mechanism. Valve clearances play a special role in this process. When the engine starts and reaches operating temperature, its moving elements expand.
This leads to the fact that insufficient gap sizes can cause motor failure due to overheating of its structural elements.
Increased valve clearances reduce engine power. This can be judged by hearing a metallic sound when the engine idle. Thus, incorrect valve adjustment will lead to increased fuel consumption and the need for expensive repairs of individual elements of the engine system.
The clearances are adjusted on a cold engine. You can check its operating temperature using a flat probe of the required thickness. Procedure:
Adjustment must begin by turning the engine rocker arms in the desired direction. Then you should raise the cylinder piston to the “dead” point. In this position, the engine valves are closed. To check the correctness of the actions performed, you need to slightly rock the valves. They must be in a free state, i.e. don’t run into anything (the same goes for cars with air conditioning). Then you should lower the nut on the adjusting screw. Using a feeler gauge, you can adjust the desired distance between the valves, i.e. adjust the gap. The next step is to tighten the locknut.
It is important to keep in mind that over-tightening may reduce the clearance. After each turn of the nut, check the size of the gap with a feeler gauge.
The best option is when the probe passes into the valve with little effort.
Similar actions are performed with other valves. To get to them, you need to rotate the crankshaft to a position where the piston is at the “dead” point. The clearance adjustment of the Lada Granta Liftback with an 8-valve engine is carried out according to the same scheme.
Which is better: 8 or 16 valve engine system?
As for the Lada Granta car with a 16-valve engine system, it is best suited for driving over long distances. With such engines you can develop a decent speed, which is a plus compared to the 8-valve option. Also, the noise from the engine will not interfere when driving at high speeds. As for the disadvantages, to increase driving speed, such engines use a lightweight piston system. This means that the piston of a 16-valve system is shorter than that of 8-valve cars. Simply put, it lacks the space needed to keep the piston from making contact with the valve if the timing belt breaks. The Granta with air conditioning is the same.
Source
Signs of the need to adjust the valves of the VAZ 2190
After the engine warms up as it operates, its parts naturally expand due to the release of heat. Thus, car manufacturers set certain timing clearances when cold. These clearances take into account changes in valve dimensions during heating. If the valves have the wrong clearance, then this is fraught with consequences. The efficiency of the power unit immediately decreases and the service life of some engine parts, including the valves themselves, decreases. For example, if the gap sizes are set small, the valve itself and its seat will burn. When large gaps are installed, the valves do not open completely. In the second case, the overall engine power decreases noticeably and a characteristic metallic knock appears. The manufacturer of the VAZ 2190 recommends monitoring and adjusting the valve mechanism every 20-30 thousand mileage.
This is interesting: How to drain coolant (antifreeze) on a VAZ-2110
Technical regulations of the AvtoVAZ plant for belt replacement
Cars of the Lada Granta family are equipped, as we have already said, with various engine modifications. Some of them do not have the problem that when the timing belt breaks, the valves bend, while others have a similar feature.
Only the 11183-50 engine does not bend the valve if the timing belt breaks; this engine is installed on the Lada Granta in the standard configuration. Read more about in which engines, when the timing belt breaks, the valves tear in this material.
To eliminate the occurrence of an emergency situation, the manufacturer recommends changing the belt once every seventy-five thousand kilometers. But you will have to monitor its condition more often - during each maintenance, that is, after 15 thousand kilometers. This statement is true for both 8-valve and 16-valve engines. Even though the most common Lada Granta engine, model 21116, is equipped with an imported cylinder head, it will also have to undergo expensive repairs as a result of a broken belt!
Naturally, the manufacturer does not recommend replacing the belt yourself, as well as checking it. If you try to do all the work yourself, there is a high probability that you will be denied subsequent warranty service. It is recommended to change only the filter yourself (replacing the cabin filter, replacing the air filter, replacing the fuel filter).
Granta 87ls valve adjustment
Adjusting thermal clearances in the valve drive of the gas distribution mechanism
We adjust the thermal clearances in the valve drive of the engine gas distribution mechanism in accordance with the maintenance regulations every 30 thousand km. We carry out operations on a cold engine.
Use a Phillips screwdriver to loosen the clamp securing the crankcase gas supply hose to the cylinder head cover...
...and remove the hose from the cover pipe.
Use a Phillips screwdriver to loosen the hose clamp (the main circuit of the crankcase ventilation system)…
...and remove the hose from the cylinder head cover pipe. Similarly, loosen the tightening of the hose clamp (the idle circuit of the crankcase ventilation system)…
...and remove the hose from the cylinder head cover pipe.
Using a 10mm socket, unscrew the three nuts securing the receiver bracket...
...and remove the bracket.
Two studs securing the bracket to the receiver are screwed into cage nuts installed in the grooves of the receiver.
Using a 10mm socket, unscrew the two cap nuts securing the cylinder head cover.
Remove the metal washer from the stud...
...and a rubber bushing. Similarly, remove the cover fastening parts from the other stud.
Remove the cylinder head cover. Remove the front upper timing belt cover (see “Checking the condition and replacing the timing belt”). The procedure for checking and adjusting the clearances in the valve drive mechanism is as follows. We turn the crankshaft by the bolt securing the generator drive pulley clockwise until the installation marks on the camshaft pulley and the rear timing belt cover align (see “Checking the condition and replacing the timing belt”). Then turn the crankshaft clockwise another 40–50° (2.5–3 teeth on the camshaft pulley). In this position of the shafts, we use a set of feeler gauges to check the gaps (between the adjusting washers of the pushers and the cams) at the first...
...and the third camshaft cam. The clearance between the camshaft cams and shims should be 0.20 mm for intake valves and 0.35 mm for exhaust valves. The clearance tolerance for all jaws is ±0.05 mm. The gap is equal to the thickness of the feeler gauge, which fits between the cams and the washer with a slight pinch. If the gap is different from the norm...
...then we install a device for adjusting the valves on the studs of the camshaft bearing housings.
We rotate the pusher so that the slot in its upper part faces forward (along the direction of the car). We insert the “fang” of the device between the cam and the washer (see figure below).
Recessing the valve pusher when replacing the adjusting washer
: 1 – device; 2 – pusher
By pressing down on the lever of the device, we recess the pusher with the “fang”...
...and install a clamp between the edge of the pusher and the camshaft, which holds the pusher in the lower position.
Fixing the valve tappet when replacing the adjusting washer
: 1 – retainer; 2 – adjusting washer Move the device lever to the upper position.
Use tweezers to pry the adjusting washer through the slot and remove it. If you do not have a device for adjusting the valves, you can use two screwdrivers. Using a powerful screwdriver, leaning on the cam, press the pusher down. By inserting the edge of another screwdriver (with a blade width of at least 10 mm) between the edge of the pusher and the camshaft, fix the pusher and remove the adjusting washer with tweezers. We adjust the gap by selecting an adjusting washer with the required thickness.
To do this, use a micrometer to measure the thickness of the removed washer. The thickness of the new adjusting washer is determined by the formula: H = B+ (A–C), mm,
where
A
is the measured gap;
B
– thickness of the removed washer;
C
– nominal gap;
N
– thickness of the new washer. The thickness of the new washer is marked on its surface with an electrograph. We install the new washer in the pusher with the marking down and remove the lock. Check the gap again. When adjusted correctly, a 0.20 or 0.35 mm feeler gauge should fit into the gap with slight pinching. Consistently turning the crankshaft half a turn, check and, if necessary, adjust the clearances of other valves in the sequence shown in the table:
We assemble the engine in the reverse order. Before installing the cylinder head cover...
...replace its sealing gasket with a new one.
Source
Necessary tool
In the case of an 8-valve power unit, it may be necessary to carry out adjustment work every twenty-five thousand kilometers. But to do this you will need to have a certain set of tools available.
Necessary tool
- First of all, we are talking about a set of shims. As a rule, such washers are supplied in thicknesses from 3 to 4.5 millimeters with an interval of 0.05 millimeters.
- In addition, you should have a dipstick at hand at a similar interval.
- And, of course, do not forget about adjustment devices. Its main feature can be considered that such a device will greatly facilitate the majority of work on replacing washers in the cylinder head.
- Tweezers with a clamp will not be superfluous, especially if you do not have very dexterous hands.
- The key is "17".
Sequence of work on an 8-valve engine
Before starting work, you need to completely cool the engine.
This needs to be unscrewed
- It is desirable that its temperature be between 20 and 30 degrees Celsius. For this purpose, you can use a standard fan, for which it will be enough to disconnect the connector from the temperature sensor, which is located near the thermostat, and turn on the ignition.
- After this, remove the spark plugs. This must be done in order not to damage the timing belt while the camshaft is moving.
- You will also need to unscrew the timing belt cover to completely remove it. Carefully disconnect all the pipes from the valve cover, removing them from the car.
- If there is oil around the valves (and most likely there is), then it needs to be removed from there using a regular syringe or a rubber bulb. For the most part, the oil is located in close proximity to the valve lifters.
- Now a special device for removing washers is installed. Next, utmost care on your part is important. The fact is that the valves are adjusted in a certain sequence, which looks like 1-3, 5-2, 8-6 and 4-7. In this case, the first number will indicate the exhaust valve, and the second will indicate the intake valve.
- We take the key “17” in our hands, with which we turn the engine by the camshaft. This must be done clockwise until the cam of the first exhaust valve reaches its base position.
- Using a feeler gauge, measure the existing gap. To do this, the principle is applied according to which, if 0.20 the probe passes, but 0.25 does not, then the gap should be considered equal to 0.20 with an error that does not exceed 0.02 millimeters.
- The normal clearance is considered to be 0.25 mm for intake valves with deviations of 0.05 millimeters, and for exhaust valves - 0.40 mm with deviations of up to 0.05 millimeters. Try to make the gap exactly like this.
- If the clearance of the first or third valve is outside the norm, then it is worth changing the washer. For this purpose, we hold the pusher in place and push it with the device down so that a lock can be installed between the camshaft and the glass.
- Using tweezers, remove the washer, fixing its size and calculating the size that is needed for the washer in order to set the appropriate gap. For example, if the normal gap is 0.40, then the washer should be 0.10 millimeters smaller. In the opposite situation, we take a large puck.
- Once the desired washer is found, place it in the pusher using tweezers. Check that the washer moves freely around its axis.
- Now we use the device again, with which we press the pusher down to remove the latch from there.
- We measure with a probe. If it is normal, then we continue to work with subsequent valves. After adjusting all the valves, you need to check the clearances again to avoid errors.
- Now we take the valve cover and clean it of the gasket, installing a new one. The old one cannot be used a second time.
My measurements
My measurements after adjusting the valves are as follows:
- 0.25 — release
- 0.20 - inlet
- 0.30 - inlet
- 0.30 — release
- 0.30 — release
- 0.27 - inlet
- 0.24 - inlet
- 0.35 — release
Checking the timing belt
According to the documents that come with the car, the belt synchronizing the movement of the shafts has a service life of 45 thousand kilometers. However, it may fail earlier due to increased loads or insufficient attention to the car engine.
A performance check must be carried out every 15 thousand kilometers. To do this, you will need to remove the cover from the timing belt drive.
- First of all, check the belt tension control tab: the cutout of the inner roller disk should coincide with the tab located on its rectangular bushing. Even with minor discrepancies, it is necessary to replace this consumable.
- Next, inspect the outside of this Lada Granta component. Make sure there are no signs of wear, oil, carbon deposits, or threads.
- At the end, the belt must be integral, without separation into layers and fibers.
Video on adjusting valves on Grant with 8-cl. engine
Well, below you can see everything in the form of photo reports.
Now we will tell you in order what and how to do. So, the first step is to remove the valve cover from the engine, as well as the side casing under which the timing drive is located. Then we align the gas distribution mechanism according to the marks so that the marks on the flywheel with the cover and on the timing sprocket with the protrusion on the shield coincide. Read more about this procedure here: How to set the timing belt according to the marks.
Then we lift the front right wheel of the car so that it is suspended, this will make it more convenient to turn the crankshaft. So, when the marks are set, we measure the gap between the pushers and the camshaft cams:
Attention: for the intake valve it should be 0.20 mm, and for the exhaust valve 0.35 mm. Of course, please allow 0.05mm error
If during measurement the gaps differ from the optimal values, adjustment must be made. In the position when the marks are set, valves 1,2,3 and 5 are adjusted. Accordingly, by turning the crankshaft one revolution, the remaining ones are adjusted.
To do this, we put the device on the valve cover mounting studs, as shown in the photo below, and use the stop lever to press the valve so that it rests all the way down:
And at this time we substitute a special lever that comes complete with the device and fix the pusher in the pressed position:
Then we take long-nose pliers and take out the adjusting washer, look at its size and, depending on whether the gap needs to be reduced or increased, we select a new washer of the required thickness. The price of one is 30 rubles.
The remaining valves are adjusted in a similar way. And you should definitely carry out this procedure only with a cold engine, at least 25 degrees, and even better 20. If you do not follow this recommendation, then you can make a mistake and all the work will go down the drain!
Adjusting the Lada Granta valves is a responsible process. The propulsion system of a car contains driving elements, the correct arrangement of which determines the power of the vehicle. Proper implementation will help to avoid problems in the operation of the motor.
This is due to the fact that the valve is the main element of the engine. It performs the function of monitoring the flow of gas and liquid inside the internal combustion engine. Traditionally, electromagnetic, electric, safety and control valves are distinguished. Each specific type is installed taking into account the engine power and the number of pistons (in the case of a Lada Granta car there are 8 or 16 valves).
Properly adjusted valves affect noise inside the engine. This is due to the presence of gaps. In a conventional valve, there are 2 gaps: for the entry of the working fluid and for its exit from the motor. The size of the gap is key: if it is too small, the engine will overheat, which will lead to failure of the main driving elements.
On the contrary, if the distance is too large, this will affect the functionality of the motor: it will not produce full power. It is recommended to check the condition of the valves every 30,000 km. A detailed description of the frequency of valve replacement (8 or 16) is contained in the technical regulations of the car. This is the average norm. This approach will reduce the risk of problems occurring in the vehicle’s propulsion system.
The main problems in the operation of the VAZ 21127 engine
Despite all the improvements made by AvtoVAZ designers in the 126th version of the engine, car enthusiasts note some problems in the operation of the 16-valve power unit of the VAZ 21127:
Options for 8-valve engines are well known to Lada Granta owners from previous AvtoVAZ models. These engines have indexes 11183 and (11186, 21116), their power is 82 and 87 horsepower, respectively.
Main article: What engines are installed on Lada Granta cars.
Domestic consumers are very afraid of a broken timing belt. Therefore, this issue plays an important role when choosing a car modification.
In the event of such a situation, bending of the valves may occur, which has given rise to the popular saying “fist of friendship.” There is even slang that refers to motors that bend valves as “plug-in”, and motors that do not have this disadvantage as “plug-in”.
To prevent the belt from breaking, it is necessary to change the belt on time (read more about when it is necessary to change the timing belt according to the recommendation of the factory and the experience of Grantovodov here).
“Heat load” of intake and exhaust valves
I want to start with the fact that these engine elements are very heat-loaded parts. They are quite miniature, often the valve stem diameter is only 5 mm, and the temperature in the combustion chamber can reach 1500 - 2000 ° C (albeit for a short time, but still).
As I wrote above, the clearances at the intake and exhaust valves differ; usually at the exhaust they are much larger (by about 30%). For example (on the engines of Korean cars), the “exhaust” ones have a thermal gap of about - 0.2 mm, and on the “exhaust” ones - about - 0.3 mm.
But why are the gaps larger at the outlet? The thing is that the exhaust valves “suffer” more than the intake valves. After all, HOT exhaust gases are discharged through them, and accordingly, they heat up more - therefore they expand (elongate) also more.
How to choose a quality spare part
The Lada Granta timing belt plays a primary role in engine operation, so you need to choose it carefully. During movement, this part can withstand enormous loads, and it must be of the highest quality. Today, there are several proven manufacturers whose products deserve high marks. The most famous and good timing belts for Granta brands: • Contitech • Gates • Dayco • Bosch Among domestic manufacturers, one can highlight the BalakovoRezinotekhnika (BRT) company, which provides Granta timing belt life and an affordable price.
For ease of selection for a 16-valve Grant, you can use the following table:
| Brand | Catalog number |
| BRT | 2112-61006040 |
| Lynx | 137FL22 |
| Conti | CT1137 |
| Bosch | 1987949662 |
| Gates | 5631XS |
| Contitech | CT1137 |
| Dayco | KTB944 |
When purchasing products from a well-known company, every driver thinks about which timing belt is best for Grant. But besides this, the car owner must be careful not to fall for a fake. It is necessary to check the presence of holograms and other identification marks used by a particular company, as well as the coincidence of the original part number and the inscription on the box.
Review of Manufacturer Prices
| Catalog items | Price, rub.) |
| Tensioner roller for internal combustion engines 1006120 0021647 | From 550 |
| Timing belt 1006040-10 | From 1500 |
| Automatic tension roller 1006226 | From 800 |
| Timing belt 1006040 | From 1500 |
| Roller key – 67.7812.9573 | From 350 |
| 67.7834.9525 | —/— |
| Timing belt GATES 5521 | From 1100 – 1400 |
| BOSCH 1987949095 | —/— |
| DAYCO 94089 | —/— |
| CONTITECH CT527 | —/— |
| Finwhale 1006040 | —/— |
| GATES 5670XS | —/— |
| CONTITECH CT1164 | —/— |
| QUARTZ QZ-5670XS | —/— |
*prices are current as of October 23, 2018.
Why is valve adjustment necessary?
Correctly adjusted clearances guarantee stable operation of the power unit at low and high speeds. At the same time, the best engine response and optimal fuel consumption are maintained. But the question arises: what is the valve clearance for? The fact is that they close thanks to a special spring resting against the cam. To prevent it from preventing the valve from closing completely, it is necessary to set a certain gap. And here you also need to take into account the heating of the valve stem (intake up to 300-400, exhaust up to 700-900 degrees), which causes an increase in its length. If the camshaft is located on top, then it directly or through a rocker arm acts on the rod, which causes increased wear. To prevent such a development of events, the end of the valve in some car models is covered with a “glass”: adjusting washers are placed between it and the camshaft cam. In other car models there are rocker arms: then adjustment between the metal parts is made using screws and locknuts.
Compensators
Most car engines are equipped with these devices today. Hydraulic compensators are installed on engines with more than two valves per cylinder.
These products themselves “select” the required valve clearance and guarantee the best timing operation under any conditions without adjustments. However, some car enthusiasts, not without reason, consider the traditional gas distribution mechanism with periodic checks of the gap to be more reliable. The thing is that compensators tend to break.
Signs that valve adjustment is necessary (video from “ICE Theory”)
There are certain signs in the operation of the car that will indicate that the valves need to be adjusted.
The most obvious of these is that the car's engine begins to shake and jerk at idle speed. Most often, the reason for this behavior is poor valve adjustment.
And, of course, you need to keep an eye out for extraneous sounds, which are not at all difficult to identify by ear. It is enough to simply place two cars next to each other, one with adjusted valves, and the other being tested. Start two cars in turn and compare the “noisiness” of the engines.
I was always afraid to repair anything in the car myself, but after reading this article, I decided to adjust the valves myself. After purchasing everything I needed, I got to work. I did everything exactly according to the instructions on the website. He completed this job very quickly. Thank you very much for such valuable and useful information.
The meeting of valves with pistons occurs due to a broken timing belt. Something is written here about valve guides and CYLINDER PARTICLES.
Author, look at the parameters after adjustment, you are writing some kind of nonsense
Yes, the author, it lifted my spirits, thank you! Read carefully what you wrote, I quote: - “excessive opening of the valve during engine operation, resulting in depressurization”; - “the chain of events will greatly reduce the life of the motor”; - “the gap between the valve seat and the side particles of the cylinder turned out to be excessively large”; - “if in addition the piston stroke is too large.” This is not yours, author, don’t make people laugh! People who know the adjustment process will laugh at you, but for beginners it will not be easy to understand such a presentation of “technical material”! And look again at how you adjusted the valves: 1. Issue. 0.25 - pressed like min at 0.05. ! 3. Ch. 0.30 - the gap is 0.05 more than required - the cam will hit the puck! 4 and 5 issues. 0.30 - barely met the tolerance! They definitely need to be checked after 1.5-2 thousand km! 6. Ch. - 0.27. - 0.02 more than permissible! The gap on this engine was written about in the magazine “Behind the Wheel”! Press the keyboard and take a look!
Intake 020 issue 035
all this is good, of course, but judging by the fact that the engine has never been washed, this is terrible, and you show the video all over the country - isn’t it a shame?
With a light piston group the clearances are 0.40 VP 0.25 +-0.05, see information letter number 44-12
Source
Does the Granta engine tend to bend the valves when the belt breaks?
The main concern of the owners of the Lada Granta, which has an 8-valve installation, is the risk of “getting” to overhaul the “heart” of the car after a break in the timing belt drive. This model is built on the basis of the time-tested Kalina, which has valves with increased strength parameters, which allows minimizing damage after a belt break. However, the unit will still have to be repaired due to this unpleasant situation.
The reason for the “unfriendly” meeting of the valves with the pistons is the design feature of the CPG parts. Unlike 8-valve engines, units with 16 valves have a piston design that provides for the presence of recesses on the surface of their bottoms. Here, the fact of rupture is not capable of causing harm to the motor, because the valves “do not reach” the bottoms at the moment of “meeting”, but stop just in the cavities of these “saving” recesses.
The Lada Granta in the liftback version has an engine with a lightweight piston group. This is implemented in order to increase its performance at high speeds, but leads to an insignificant loss of dynamic properties. To mitigate this aspect, a change in the design of the CPG elements, which led to the threat of bending of the valves at the moment of belt rupture.
A similar problem occurs on Priora units (modification “11186”). However, there is a belt with increased dimensions, which increases its strength and reduces the risk of breakage, and therefore engine failure. Now the fact of rupture is becoming a very rare incident and can occur if the need for replacement is ignored for a long time or other non-standard situations.
MMS 2190 Granta firmware
Wiper blades Lada Granta size
Which is better Lada Granta or Lada Kalina
When adjusting valves, it is also necessary to check the condition of the timing drive elements, especially the belt. It is prescribed to carry out adjustment measures regardless of the type of valve mechanism design.
How to adjust valves
All procedures must be carried out only on a cold engine. This is done to ensure that the setup results remain standard: this is exactly what they do at the manufacturing plants. It is worth noting that the procedure for adjusting the valves on each car is different: you can find it out from the instructions for the car or the relevant literature. The process is carried out by screwing in or unscrewing special adjusting screws, or by selecting flat washers. Each of these options is considered separately.
Using special tools
Engine valves are adjusted using a set of feeler gauges or a special rack and indicator. Both methods are quite widespread: the first is simple, accessible and requires minimal financial and time costs. To apply the second method, you will have to buy a device and a special device.
Adjustment using feeler gauge and locknuts
This method of setting the timing belt is typical for Russian rear-wheel drive cars (“classics”). Algorithm of actions:
- Remove the air filter housing and disconnect all tubes, cables and levers from the valve cover. To make it easier to turn the engine crankshaft, remove the spark plugs.
- Remove the valve cover and the front timing belt cover (if there is one, it may also be a chain).
- Set the piston of the cylinder from which the procedure will begin (for example, in the Zhiguli “classic” it is the 4th) to the top dead center position: the valves will be in the closed position.
- Observing the indentation mark on the engine shaft pulley, rotate it until it coincides with the mark on the lower front cover of the BC. The recessed point on the timing shaft sprocket should also coincide with the mark on its “bed” (housing).
- Use an open-end wrench to hold the adjusting hardware and at the same time loosen the locknut. Next, you need to use a set of feeler gauges to adjust the valves. Select the thin plate you need and insert it between the rocker arm and the valve stem. When adjusted normally, the feeler gauge will pass through with little friction. The gap value must be adjusted according to the table, which is different for each car (for VAZ2101-07 - 0.15 mm). Now tighten the locknut and check the clearance again. Repeat the operation if necessary. Follow the order of valve adjustment: for example, for a VAZ classic: 8-6, 4-7, 1-3, 5-2.
Adjustment using washers
This type of timing adjustment is more typical for front-wheel drive cars. To produce it, you need:
- Remove the valve cover.
- Find the marks on the engine block, timing belt pulley and, turning the crankshaft clockwise, make sure they match. As a result, the first piston will be in the TDC position.
- Determine the gap between the shim and the camshaft cam (they are the first when viewed from the pulley side).
- If there is a larger or smaller gap, select another washer (each has a corresponding marking; if not, use a caliper, or better yet, a micrometer).
- After installing the washer, check the gap again: the permissible deviation is no more than 0.05 mm in both directions.
- Do not forget that the gap size for the intake and exhaust valves is different - this parameter must be found out from the operating instructions for a particular car.
Adjustment using indicator and rack
This method is considered more accurate and was especially popular during the USSR. This adjustment method is good for engines that have been in operation for a long time, since the device and measuring rod take into account the wear on the surfaces of the parts. Progress of the procedure:
- Remove the valve cover, having first disconnected the levers and cables from it.
- Rotate the engine shaft until the marks match, just as when adjusting the valves using a feeler gauge.
- Take the rack and fix it on the cylinder head (fastening is carried out to the studs of the camshaft housing). There is a small nuance: you do not need to completely screw in all 3 nuts securing the rack, otherwise it will dangle. First of all, tighten the outer hardware, then begin to unscrew the middle bolt until the rail becomes motionless.
- Take the dial indicator and secure it to the rail, and place the device’s foot on the edge of the valve cam.
- Using the included grip, grab the cam and pull it up: the indicator needle should pass 52 divisions (at an air temperature of +20 degrees). If this is not the case, then you need to adjust the valve using one of the two methods described above.