Air conditioning can make a driver's life much easier in hot or cold weather. The problem is that when buying a new car, not all car enthusiasts have enough money for this option. Therefore, many car owners prefer to install air conditioners later, on their own. Let's look at how Priora owners do this.
- Operating principle of an air conditioner
Is it possible to install an air conditioner on a Priora?
- "August"
- Sequence of work
- Refueling
Video: how to refill the air conditioner
Air conditioning device "Priors"
The air conditioner of a Lada Priora car consists of several parts:
- blown radiator (condenser);
- heat exchanger;
- compressor;
- desiccant;
- heat pipes;
- expansion valve;
- pressure meter;
- temperature sensor;
- main controller;
- air ducts
The main element of any car air conditioner is a blown radiator, also known as a capacitor.
The above parts form a single system. The key to the successful operation of this system is its tightness, and its main element is the radiator.
Operating principle of the air conditioner
In a sealed air conditioning system, a refrigerant, freon, continuously circulates, which is mixed with a special lubricant that is resistant to freezing. A compressor is responsible for moving freon through the system, which builds up pressure in the heat pipes. After turning on the air conditioner, freon ends up in the heat exchanger located under the dashboard of the car. The internal structure of this device resembles a honeycomb. Once there, the refrigerant begins to take heat from the hot interior. At the same time, it quickly heats up and turns from a liquid into steam. Since the compressor continuously pumps up pressure in the system, the steam goes into the blown radiator, where it cools, again becoming a liquid, which again ends up in the heat exchanger.
Is it possible to install air conditioning on a Priora?
The Priora initially provides the design possibility of installing an air conditioner. A car owner who decides to install this device on his car will not have to make any modifications. All the necessary holes and buttons are already on the dashboard, and space for heat pipes and electrical wiring is also provided. Thus, installing an air conditioner on a Lada Priora is completely legal, and government officials will not have any questions for the driver.
Electrical circuit diagram of the air conditioning and heating system
Priora air conditioner wiring diagram
Addresses of contact blocks of the air conditioning and heating system ch1
Addresses of contact blocks of the air conditioning and heating system ch2
About choosing an air conditioner for Priora
Today, air conditioners of both domestic and foreign production are presented on the market. They all have both advantages and disadvantages. Let's list them.
"August"
Domestic air conditioners "August" are in constant high demand among Priora owners. First of all, because of the affordable price.
Air conditioners "August" are in great demand due to their affordable prices
But “August” also has disadvantages:
- the evaporator body is made of plastic, so it is very easy to damage;
- The reliability of the compressor raises questions. For some reason, this device almost always fails before all other elements of the air conditioner.
Halla and Panasonic
Halla air conditioners are produced in South Korea. AvtoVAZ began installing them on Prioras in 2010. And by 2012, Japanese air conditioners from Panasonic began to appear on cars.
Halla is one of the most expensive and most reliable air conditioners on Priora
Both devices are considered quite reliable, the differences between them are minimal:
- compressor design. Panasonic devices have vane compressors with a volume of 110 cm³. And the Halla air conditioner has a piston-type compressor, and its volume is larger - 160 cm³;
- in Halla air conditioners, cabin filters are held on by plastic latches, in Panasonic - on self-tapping screws;
- The heat pipes on Halla air conditioners are made of aluminum, while Panasonic has about half of metal pipes, the rest are flexible hoses.
The conclusion from all of the above can be drawn as follows: the choice of compressor for the Priora today is determined solely by the thickness of the car owner’s wallet. The best (and most expensive) option would be to install a Halla air conditioner. It was these air conditioners that were installed on almost all export Prioras. Their price is from 30 thousand rubles. The second number is Panasonic, which will cost the car enthusiast 25 thousand rubles. And if money is tight, you can buy “August”. Price - from 20 thousand rubles.
What compressors are in split systems
Anyone who has ever chosen a split system from a large number of models on the market has wondered which air conditioners are better and which are worse. In this article we will look at what compressors are in the most common air conditioning models in our country.
To begin with, what does the compressor of our split system look like
? Briefly what compressors are:
Rotary compressors
- the most common type in split systems. The bulk of rotary compressors are manufactured in China and Japan as well as the countries of Southeast Asia. The largest part, 80% of rotary compressors are manufactured in China.
Scroll compressors
-used mainly for cooling large residential and industrial buildings. Scroll compressors are used in domestic and semi-industrial air conditioners, as well as VRF systems, air-water heat pumps, as well as freezing and refrigeration units for industrial cold.
Screw compressors-
The main direction is industrial cold. Such compressors are used mainly in split systems of medium and high power, air- and water-cooled chillers. Screw compressors have also become used in commercial refrigeration applications.
Centrifugal compressors -
Most often used in industrial air conditioning systems.
Piston compressors
-The oldest type of compressors for air conditioners. Used in a variety of refrigeration equipment, split systems, etc.
Questions are often asked about which compressor is in the air conditioner. Which compressors are better?
The answer here is too complicated. We can only focus on the price of the products themselves, their technological level, the number of complaints, etc. Let’s try to tell you what is most often installed in household split systems. If you have questions about the main manufacturers on the market in our country (not to be confused with brands), then this article
will help you.
Compressors TOSHIBA-GMCC 410 Freon. (In the latest models R32 is possible)
This type is the most common type
of compressor in household air conditioners. GMCC is a manufacturer specialized in the research and development, production and marketing of rotary, reciprocating and other types of refrigeration, refrigerated warehouse and environmental air conditioner compressors, and its products are widely applied in air conditioners, refrigerators, refrigerated cabinets, heat pump systems. -heaters, dehumidifiers, refrigerators, water distribution equipment, etc.
About refilling the air conditioner
You need to pump 500 g of refrigerant into the Priora air conditioner. Until 1995, R12 freon was pumped into air conditioners, but it was considered toxic due to its high fluorine content. Therefore, R134A freon is now in use. Preparing for refueling looks like this:
- special cleaning foam from a can is pumped into the air conditioner radiator;
- the radiator closes. The car engine starts and idles. At the same time, the air conditioner turns on. It must run for at least 15 minutes so that the foam passes through the entire recirculation system;
- vacuum is performed. A pump is connected to the air conditioner, which removes air from the system along with foam and moisture.
Refueling
To refill the air conditioner, the driver must purchase a metrology station and a can of freon.
High pressure hoses in the station are always red, low pressure hoses are always blue
The station is a system of hoses, adapters and pressure gauges connected to the air conditioner.
- The station hose is connected to the low pressure fitting on the air conditioner pipeline (it is usually painted blue or has the English designation “low”).
Tube fittings are usually marked “high” and “low” - The engine starts and idles, and the number of revolutions per minute should not be lower than 1400 (for this you will have to fix the gas pedal with something, or ask someone for help).
- When the engine is running, maximum recirculation of the air conditioner is turned on, then the low pressure valve at the station smoothly opens.
- The freon cylinder is turned upside down, after which the tap is opened on it.
- The refrigerant begins to flow from the cylinder into the system. At the same time, the driver controls the pressure using a pressure gauge - it should not exceed 280 kPa.
- When the air in the cabin warms up to a temperature of 10–15°C, refueling stops.
Video: how to refill the air conditioner
How to Find an Air Conditioner Leak in Less Than 15 Minutes
Is there a freon leak in the air conditioner? If your system is too trickle charging or if the system is flat, you have a leak that needs to be found. This guide will show you how to find a refrigerant leak. There are several ways to find a leak, which depends on how big the leak is. If the leak occurs relatively quickly, you should hear it leaking very heavily. like a hole in a tire that is easy to find. Large leaks are usually caused by a blown hose or a frayed line on the frame or bracket in the engine bay.
Here's a video that will give you an idea of what you're in for when checking for leaks. When you finish watching the video, continue with the guide, which will give you more tips and updated information regularly.
SPONSORED LINKS
There is an alternative way to find leaks without using a leak detector. With the air conditioning system fully charged, have a spray bottle of water with a heavy soap solution ready. Then spray the product around the various components and when a leak is detected, bubbles will begin to appear indicating a leak. This method works well except for the compressor front seal and evaporator leak detection.
Additionally, some freon products contain dyes that, when installed in the system, will be detected by a black light, but again the front compressor seal and evaporator leak are difficult to detect.
A slow leak can be difficult to detect, most of the time you can visually see a slow leak due to oil stuck in the system along with the refrigerant that is leaking from. An oil leak indicates where the leak is located. Look at all refrigerant lines, compressor and condenser for signs of leakage. See example below:
The method below is the preferred way to find a leak.
SPONSORED LINKS
Step 1: Use a Leak Detector
If you don't hear a leak or detect any oil residue, then a detector is necessary. If you don't have a detector, you can buy one from Amazon for about $35. The detector consists of a main body that holds the sensing element, batteries, a switch and sensitivity controls. Here's what they typically look like in the image below.
At the end of the detector is a “sniffer” that extracts a small amount of air to analyze for traces of refrigerant when turned on.
Step 2: Check the system for leaks
Before testing begins, the system must be filled with freon so that the detector can do its job. If the system is flat or very low, the detector needs to be sniffed. In addition, the engine must be turned off and the vehicle must be in a place where there is no wind or breeze. Any air movement can push the freon away from the actual leak and give you a false reading or make detection more difficult. Another thing worth mentioning is that refrigerant is heavier than air, so try checking below or the bottom of the object for leaks.
SPONSORED LINKS
Dust and dirt can cause the detector to falsely "fire" and it can trick you into thinking there is a leak when in fact there isn't. If you do this, accidentally catch some dust in the detector tip and the detector will reset itself. Keep the nozzle away from vehicle dirt as much as possible.
Turn on the detector and set the sensitivity to minimum to begin testing. Here we are testing the O-ring on the receiving dryer with no response from the detector. O-rings are popular places to look for leaks. The Tester will indicate a leak by showing one or more red lights while beeping. If you have tested the entire system and no leaks are found, adjust the sensitivity to a higher value.
The pressure sensor for the system is also a popular place to look; check the base and electrical connector for leaks.
The condenser, located at the front of the vehicle, is subject to small stones and other road debris, which are easy to damage and leak. Check the entire condenser, including the hose connections.
SPONSORED LINKS
At the front of the compressor is the main shaft seal and a very popular location for freon leaks. You want to place the sniffer at the very front of the compressor and at the bottom of the coupling. Again, be careful not to get dirt into the nose of the detector.
The system's hose fittings look like this: This is an inverted hose barb that holds the rubber hose to the aluminum fitting or tube. Test at the bottom of the connection.
Here is a method to check the system's evaporator. Locate the water drain and insert the detector if a leak is detected. The evaporator core or the o-rings that connect it to the high and low pressure side hoses are leaking. This drain allows condensation that drips from the evaporator when it is in use and directs it away from the vehicle's interior. Do not allow water to enter the nose of the sniffer.
Have you ever seen ordinary water under your car? when does the air conditioner work or was it working? That's where it drains from.
Also when the car has regular water on the passenger side when the air conditioning is in use this tube is clogged preventing water from draining out. Use compressed air and blow out the drain to fix the problem. use a wire and insert it into the drain to remove the blockage.
SPONSORED LINKS
When the detector detects a leak, it will indicate this by quickly beeping and turning on the red lights on the detector. The system now needs to be discharged and the line removed and replaced. After the repair is completed, the system must be evacuated and recharged.
You should also be interested in:
If there are questions you would like to ask, please do so, our community of mechanics will happily help.
SPONSORED LINKS
Article published 06/11/2018
.
If the air conditioner does not turn on
Sometimes the air conditioner categorically refuses to turn on after installation. Here's why this might happen:
- problems with electrical wiring. It is necessary to carefully inspect the wires for damaged insulation and short circuits. You should also check the latches on all terminal blocks. Some of them, being new, do not always fit tightly into place, which leads to an open circuit;
- error when assembling the electrical circuit. This is another common option. Each air conditioner model has its own basic assembly diagram. It is difficult to make a mistake when assembling it, since all the important wires have insulation of different colors. However, an error cannot be ruled out. The solution is obvious: check the instructions again and find the error;
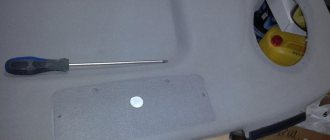
- The fuse has blown. Usually the same F9 that was mentioned above is lit. This can happen due to a short circuit in the electrical wiring, or due to an incorrectly assembled circuit. If the air conditioner does not turn on, you need to remove the fuse and inspect it. If it fails, the thread in it will be broken, and its body will be slightly melted. This fuse must be replaced. Then you should carefully check the wiring. And only after that you can try to start the air conditioner again.
A blown fuse always has a broken thread.
Turn on the “AUTO” function: step-by-step instructions
Despite the fact that this function has a complex technical meaning and independently “selects” the necessary actions, its purpose is to facilitate the operation of the split system. It turns on very simply:
- We connect the equipment to the network, i.e. Insert the cord and plug into the outlet. A characteristic signal may sound and the device’s blinds should return to their initial position;
- Using the remote control, press the “ON/OFF” button;
- Then press the “Mode” button several times so that the word “Auto” or the automatic mode indicator lights up on the remote control (can be indicated as a triangle, in the form of various circular arrows or the letter “A”). Each press of the button “responds” with a sound signal.
- Some models suggest the ability to change the temperature for the specified mode. We change it using the “+”/“-” keys, respectively increasing or decreasing the required temperature.
Important!
- Some air conditioner models can start immediately after plugging the plug into the socket. In this case, skip the second step (do not press the “ON/OFF” button).
- The fan speed is also displayed on the remote control of all air conditioners. This fan can have automatic speed. Those. “auto” may appear on the display, which refers specifically to the fan speed, and not to the “auto” mode . It is important to distinguish these two settings!
About installing a climate control system on Priora
Automotive climate control systems usually consist of several climate zones. Each zone in the cabin is responsible for its own electronic control unit. The average cost of such a block starts from 12 thousand rubles. The minimum number of blocks to form a climate control system is 2. That is, the owner of the Priora will have to pay at least 24 thousand for the blocks, which will then need to be connected. To do this, you will need a qualified auto electrician with special equipment. The average car owner simply cannot make such a connection in his garage. Auto electrician services for connecting climate control cost from 7 thousand rubles and more. The vast majority of Priora owners, having soberly assessed the above points, understand: the game is clearly not worth the candle. And they limit themselves to only air conditioning in their cars, leaving climate control to a few car enthusiasts.
So, installing an air conditioner on a Priora is a job that a car enthusiast can easily do on his own. Difficulties may arise only at the stage of connecting the device to the on-board network. But here the diagram that comes with each air conditioner model will come to the rescue.