There is no need to worry; replacing a muffler on a VAZ 2110 is not at all a regular job that will have to be done systematically.
Replacing the exhaust system is performed in several situations:
- The muffler begins to make a loud noise;
- Muffler elements burn out;
- Connecting pipes break.
The sound of a burnt out muffler.
On a VAZ 2110, you can replace the muffler with your own hands, which will allow you to significantly save on the services of a service station.
The exhaust system of the VAZ 2110 includes a downpipe (pants), a neutralizer, a resonator and a main muffler.
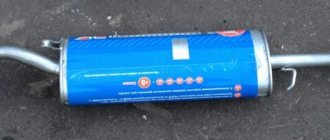
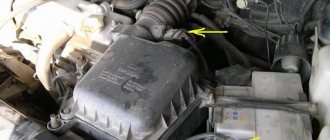
Photo of the new muffler on the VAZ 2110
Today we will tell you about replacing the muffler, as well as the resonator.
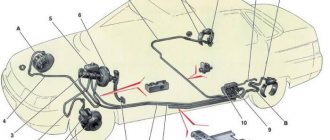
Exhaust system VAZ 2110
Replacing the muffler on a VAZ 2110
VAZ 2110 owners are quite lucky, since replacing the muffler is quite simple and does not require special skills or extensive experience. But you definitely need an inspection hole.
The replacement procedure sequence is as follows:
- The muffler is connected to the resonator through an O-ring on the pipe flare. Plus, the connection is compressed with a clamp, which consists of two parts.
- The clamp must be dismantled, so remove the ring. Since the O-rings used here are graphite, they should not stick to the metal.
- Now the old muffler can be dismantled quite easily.
- Be sure to check the condition of the suspension rubber bands located on different sides of the muffler body. They often end up stretched or covered with cracks. Rubber bands are quite cheap, so buy new ones and replace the old ones with them.
- The new muffler is first mounted on rubber bands, after which it is inserted into the same new graphite sealing ring between the flares. Use a clamp to compress the connection. Ready!
Types and their differences
There are several types of mufflers and each has its own individual characteristics. Each is described in detail below.
Reflective
They are sometimes called reactive. The operating principle is based on multiple reflections of sound. This is achieved by changing the diameter of the tubes or the number of branches.
Resonator
These are the same jets, but with a slightly modified design. Sound attenuation is achieved thanks to the weakly damped resonances of its elements.
There are several types of mufflers
Restrictive
This is the simplest type of device, based on replacing a large hole with a small one. Which significantly reduces engine power.
Absorption
A simple but not very effective muffler, the action of which is based on the absorption of sound waves in a noise-absorbing material. Usually this is basalt wool laid around the gas outlet pipe.
Changing the resonator
It is also advisable to replace the resonator on a VAZ 2110. This is done after changing the muffler.
New resonator for VAZ 2110
The work of replacing the resonator is performed in the following sequence:
- The resonator is secured to the muffler with a crimp clamp with an O-ring.
- It is attached to the neutralizer using a floating flange consisting of two bolts and a flare.
- On the opposite side of the element there is a so-called fist.
- Removing bolts is often quite difficult. So that you don't have to suffer, just cut them off with a grinder and buy new bolts. This is the simplest solution to the problem.
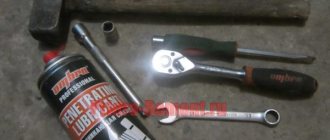
- If you couldn’t get a grinder, use a liquid key. This is a popular product among motorists - WD40 or its analogues. Treat the bolt attachment points with this compound, wait a while, after which the bolts should come off.
- After removing the bolts, remove the muffler clamp.
- Remove the resonator from the suspension rubber bands. Check the condition of the rubber bands. If they are worn out, replace them with new ones.
- Take a new resonator, secure them to rubber and connect them to the muffler so that the pipe leading to the muffler from the resonator is parallel to the ground.
- If you notice wear, burrs, or traces of rust on the neutralizer fist, be sure to coat the connection with sealant. Moreover, it must be a high-temperature sealant.
- Armed with new bolts and nuts, tighten the catalytic converter and resonator flanges.
- The neutralizer is fixed to the resonator with two bolts using a flange connection. The fastening occurs to the states, but there is a receiving pipe, using a spring-loaded connection and two flares. The space between them contains a sealing ring made of graphite or metal asbestos.
Muffler resonator in exhaust
Regardless of what make and model of car you own, as well as what year it was made, sooner or later you will have to face the fact that the time will come to replace any consumables, or repair some parts of the car. It’s worth noting right away that almost 99% of the replacement and repair work can be done with your own hands by almost any car owner. But in order to independently figure out what happened to your vehicle or find detailed instructions on how to fix this breakdown, read the block of repair articles on our website, which describes and clearly shows everything you need to know to bring your “swallow” into perfect condition!
The muffler resonator is an element of the exhaust mechanism; its functions include the ability to dampen low-frequency sounds that arise during engine operation. It will be useful for any car enthusiast to know the location of the resonator, as well as what possible problematic issues he will encounter during its operation. A malfunction of the exhaust pipe resonator is not critical, but it will cause a lot of trouble not only for the car owner, but also for those around him. You will learn further in this article about eliminating the problematic issue that has arisen, the method of dismantling and installing the unit, and the method of creating a resonator with your own hands.
Purpose of the resonator
First, let's look at why we need a resonator in a car. As mentioned above, this auto part is part of the exhaust system of the car engine. Its main task is to dampen the sound of low frequencies that arise when exhaust gases enter the gas exhaust system. There are two reasons why sounds appear in it:
- sounds from expanding gases;
- noise from vibration of exhaust system parts.
Resonator location
Together with the muffler, the functions of the resonator include reducing the speed of movement of exhaust gases. This happens thanks to the laws of physics, based on this, gases quickly move through a narrow pipe, when they enter a huge volume, their speed and, naturally, energy are lost. In the gas exhaust mechanism, the resonator is installed in front of the main muffler and is the initial link in the chain of sound muffling in the exhaust system. It turns out that its main functions are to first reduce noise and balance the pulsation of the exhaust gas flow.
Sometimes car owners call it the “middle silencer” (because it is located approximately in the middle of the bottom of the car) or the “second silencer”. But this is incorrect, since the exhaust system resonator and the muffler have different operating principles.
The resonator of the vehicle exhaust system also releases the engine exhaust from exhaust gases and creates equal pressure in it. This provides low resistance to the movement of exhaust gases and it becomes possible to use the full power of the engine.
Since the resonator can still take away part of the power by 10-15 percent, sports cars use so-called direct-flow mufflers and do not install resonators.
Resonator structure
By design, the resonator consists of a perforated pipe, which is placed in a metal housing. The device also has a choke hole, which is designed to increase the effect of damping wave oscillatory movements in the pipe. The cavity inside the resonator is divided into two or more unequal parts using partitions that are located in a transverse plane to the pipe. Even the most recent resonators use thermal insulation and/or sound insulation (often the same material) that is located at the bottom of the housing and is designed to reduce its temperature and/or sounds that come from the structure.
Internal structure of the resonator
The cavities inside come with different volumes in order to periodically narrow and expand the flow of exhaust gases, which also makes it possible to even out their unevenly distributed pulsation. In other words, each chamber has its own resonant frequency. In addition, they are slightly offset relative to the axis of the frame. This is necessary in order to achieve a change in the direction of the exhaust flow. And perforation inside the pipe is necessary to dampen the huge amplitudes of sound waves produced by gases.
The performance of the resonator is influenced by the following factors:
- its level of wear and tightness;
- the degree of contamination from carbon deposits (how clean is how effective);
- diametrical cross-section (the larger the diameter of the structure, the greater its efficiency).
Problems with the resonator
Like any auto part, the resonator breaks down from time to time. Because it is designed to pass through exhaust gases that have a temperature of hundreds of degrees. But in general, added to this are the aggressive chemical elements contained in the escaping gas mixture, which leads to inevitable burnout of the metal mechanism parts.
The main symptoms of a resonator malfunction:
- The performance of the muffler and exhaust system has deteriorated . This is revealed by the increased noise that comes from the exhaust pipe, this mainly concerns low-frequency sounds (roar).
- Exhaust gases appear from under the bottom of the car . This is a sure symptom of a depressurized resonator or other parts of the gas exhaust mechanism.
- There is a characteristic rattling metallic sound where the resonator is located . It happens due to the fact that one (or a couple) of components burns out inside the building. As a rule, in this case it begins to dangle or comes off and rattling begins in one of the chambers.
- Engine power drops significantly . Due to the breakdown, the resonator's ability to transmit is greatly reduced. Therefore, it will poorly or not at all dampen the uneven pulsating movements of exhaust gases. And this gives feedback on the deterioration of the power unit’s performance.
When you have a similar situation with 1 or several of the above-mentioned symptoms of a resonator malfunction, you need to quickly investigate its activity.
Checking the resonator
If the above problems are detected, the driver must know how to check the resonator. This will make it possible not only to make the operation of the engine and the exhaust gas release mechanism normal, but also to increase the comfort of using the car.
To check, you will need an inspection pit (or a jack). Diagnosis is made by visual inspection. You should carefully inspect whether the device itself and the tubes attached to it are intact (especially at the joints).
When working in a pit and using a jack, you must be careful and follow safety rules.
The real symptom of the problem is the condensation formed in the cooled resonator, which then begins to fall drop by drop to the ground. This indicates that the frame has lost its tightness and needs to be repaired or even replaced. You can check for the presence of condensation some time after turning off the engine (so that the resonator frame has cooled down). Please pay attention! Sometimes car lovers, when making resonators themselves, specially drill a slot in its frame to remove moisture. Therefore, when buying a car with such a resonator, this testing method will not suit you.
Broken resonator
The integrity of the frame can be determined by the presence of exhaust gases that come out of it. This also indicates depressurization and the need to change it. This fact is verified when the machine engine is running, by inspection under the bottom. To be sure, you can ask someone to rev it up so that a lot of exhaust gases pass through the mechanism. Another suspicion of depressurization arises when smoke appears from under the bottom of the car while driving or standing with the engine running.
In practice, it turns out that it is not worth repairing the resonator, since it is better to replace it. This is especially true for cars with significant mileage (more than one hundred thousand km).
Types of car resonators
If you choose an exhaust system resonator, you need to know what types exist today and what they are made of. Today, resonators that are made of aluminized steel and stainless steel are popular. The first ones are inexpensive, but do not work for long. Their frame is made of medium-gauge steel, which is coated with aluminum on top to prevent rust. But this anti-corrosion complex is not durable. Therefore, we do not advise you to purchase an exhaust resonator made of aluminized steel. It would be good to purchase a car resonator that is made of stainless steel. This material has a smooth layer on top (otherwise, there will be few turbulences in the mechanism), and is even more stable when operating in conditions of high and low temperatures.
DIY resonator
Before designing and assembling a resonator of your own production, you need to understand one simple thing. The thicker the material from which the exhaust system is made (including the resonator), the greater the effect will be in the fight against vibrating movements and emerging noise. That is why the exhaust manifold, which primarily receives gases from the cylinder head, can be of such impressive weight.
Parts of the exhaust systems of foreign cars are heavier than domestic ones. This means that they are quieter and more comfortable.
But, when choosing material, do not overdo it and do not choose very large blanks. Otherwise, the weight of the resonator will become large, and this will affect the dynamics of the car and the load on the chassis.
There are a number of reasons why car owners make exhaust resonators themselves. One of them is to reduce the noise produced by the standard factory muffler. As a rule, for this purpose another resonator is installed in the gas exhaust mechanism. Another reason is to make and install a direct-flow resonator for the car. Its advantages are:
DIY resonator
- engine power losses are reduced (really small, about 5-10 percent);
- the sound background of the engine and exhaust system changes (for those who like low sound).
To make a direct-flow resonator you will need:
- mechanic's tool kit;
- welding machine (it’s good to use current semi-automatic ones or inverters);
- angle grinder with a set of discs for cutting and grinding.
The structure of the resonator differs depending on the material you use. We will describe to you one of the ways to create a direct-flow resonator for a car with your own hands:
- Prepare the pipe for the internal base of the resonator in advance. It must be the same or slightly larger diameter than the factory one. It is necessary to ensure that it can then be easily glued by welding to the existing mechanism, so you should not choose a larger diameter (if it is not possible to connect the pipe with a flange).
- Next, in this tube you need to make a slot with a drill, similar to a stock resonator.
- Then you need to find a tube with a slightly larger diametrical cross-section (about 3-5 cm), it will become the outer frame. Its length must be reduced (depending on the structure, by approximately 5-10 cm at each end).
- They make plugs that are needed to seal the frame at the ends. To do this, they use sheet metal, where they mark with a pencil the diameters of the outer tubes, large and small. Then the workpieces are cut and processed with a grinding machine.
- A tube with a large diameter must be placed on a tube with a small diameter, and the cavity between them must be filled with glass wool (it’s good if you have modern mineral wool with good heat and sound insulation properties).
- Next, it is necessary to weld points at the ends along the edges of the tube with a large diametrical cross-section using previously prepared plugs.
- After welding, you need to clean the seams with an angle grinder.
- Finally, you need to weld a new resonator into the car exhaust gas mechanism. After all, you need to clean the seams after welding.
DIY resonator
The given scheme of work is approximate. There are many different options for resonators that you can make yourself. Sometimes they are simply thrown out of the mechanism, putting a piece of pipe in their place. But it is not recommended to do this, since it will not add much to the power of the car, but an extra roar from the exhaust pipe will be provided!
Additional problematic issues
After installing a self-made resonator, the car owner will most likely encounter a number of problematic issues that must be resolved without fail. First, the mass of the exhaust mechanism and, naturally, the vehicle as a whole will increase. This applies to you if you used heavy metal elements to create the resonator. Therefore, situations may arise where it is necessary to change brackets and/or shock absorbers. Or strengthen them, otherwise the car frame will “sag”, and the chassis will have to bear an additional load.
In addition, changing the resonator will entail a transformation in the ratio of air entering the engine and the volume of exhaust gases. Therefore, using an experimental method, you need to find out what good settings to choose and make the necessary adjustments in the supply of the fuel mixture and filtration of the air mass.
Resonator dismantling and installation
Many drivers are wondering how to remove the resonator? The answers will differ depending on the car brand, but in general, the action plan is something like this:
- we disconnect the resonator pipes where they are connected to the exhaust gas removal mechanism (in front, on the side of the engine or catalyst, behind where the muffler is);
- remove the resonator from its suspensions, which secure it to the bottom of the car;
- dismantle the resonator with its pipes.
Method for changing the Renault Logan resonator
Install the new device in the reverse order. When dismantling the resonator, do not damage the seal rings connecting its pipes to the rest of the exhaust gas removal mechanism.
As an example, we present to you two videos with instructions that demonstrate changing the resonator on the famous Renault Logan and front-wheel drive VAZ 2110, VAZ 2111, VAZ 2112, VAZ 2114, VAZ 2115, Kalina, Priora, Granta cars. .
Bottom line
Failure of a car exhaust system resonator, partially or completely, is a critical failure. Even an inexperienced car owner can find out about a malfunction. This will be indicated by a loss of power, exhaust gases will spread under the bottom and/or in the cabin, and the sound background during engine operation will increase. It is necessary to take into account that you can use the car in this case, but we do not advise you to delay repairs, since driving with a faulty resonator leads to failure of other parts of the car's exhaust gas release mechanism.
Replacing the neutralizer
As you can see, the exhaust system of the VAZ 2110 car is designed quite standardly, its repair is not difficult even for a motorist with little experience.
When changing the muffler and resonator, it is likely that you may need to replace the converter. This operation is simple and can be done in a few steps.
The neutralizer serves to dampen vibrations from the engine and prevent them from occurring in the exhaust system of the domestically produced VAZ 2110 car.
If it needs to be replaced, it is done like this:
- If the old springs and bolts are intact and have no obvious damage, you can continue to use them. They show characteristic signs of wear, be sure to buy new elements.
- The ring should be replaced in any case, no matter how well the old one is preserved. If gases begin to leak through the old ring, this will lead to very rapid wear and damage to the converter flare and the exhaust pipe.
- After installing the neutralizer, new bolts are put on, they are carefully but firmly tightened. Moreover, the first thing you need to do is tighten the bolts that secure the resonator.
Is the presence of black plaque always a sign of malfunction?
Black plaque is not always a wake-up call. Sometimes soot occurs due to an incorrectly tuned engine. For example, when the distributor in the car is set incorrectly, for later ignition. This drawback can be eliminated yourself by placing the distributor in a different position.
In some cases, you can simply try cleaning or replacing the spark plugs and changing the air filter.
Sometimes soot formation can occur when the car is parked for a long time and. In this case, the engine also runs on a richer mixture, which leads to the formation of a small amount of soot and is not a malfunction.
Replacing pants
Trousers
The exhaust pipe, also called pants (due to its appearance), is attached to the manifold using studs and nuts. Its fixation with the neutralizer is carried out by a spring-loaded connection.
- Remove the exhaust pipe, paying special attention to its attachment to the manifold. Studs are used here, not bolts. They are screwed into the manifold, and connecting nuts are screwed onto them.
- If the pin is damaged, it will be extremely difficult to replace it. Therefore, it is important to try to keep the old one intact and safe.
- Treat the nuts with WD40, a product we all know. This will allow you to avoid using excessive force and keep the studs intact. If that doesn't work, the studs are drilled out. The process is complex, lengthy, and requires experience and skill.
- There is a gasket between the manifold and the pants that needs to be replaced. Also install a new converter o-ring.
- Now firmly press the exhaust pipe using the nuts. To do this you will need to compress the gasket.
- Then tighten the bolts of the spring-loaded connection with the neutralizer of your VAZ 2110.
As you noticed, there is nothing complicated in this work. Each element is quite easily dismantled and a new one is installed in its place. Just be careful, act carefully and consistently. Plus, of course, do not forget about the importance of the quality of new parts. Buy only good spare parts that will ensure long-term and efficient service of the exhaust system on your VAZ 2110.
Composition of the output unit
The exhaust system for a VAZ 2110 car consists of the following elements:
- Exhaust manifold;
- Lambda probe;
- Receiving type pipes;
- Neutralizer;
- Two mufflers: main type and additional.
Not all exhaust components are disassembled; some parts, such as the converter, as well as both mufflers, are replaced entirely.
Exhaust system of VAZ 2110
Description of individual components
To make the structure of such an element as the discharge system clearer, it is necessary to give a detailed description of all components:
- Neutralizer. A unit designed for effective purification and suppression of emissions of harmful substances into the environment. When driving, a car produces substances such as non-combustible hydrocarbons, oxide compounds of nitrogen and carbon. The work of this system is aimed at eliminating them. The design itself is a combination of two ceramic-type components. The surface of these components is coated with special afterburning catalysts, which include rhodium, palladium and platinum. These substances make it possible to purify exhaust gases emitted into the environment by almost 100%;
- Lambda probe. It is a special sensor whose task is to control the composition and amount of fuel that enters the engine. The lambda probe thereby controls the purifier. If the lambda probe does not work properly, then the entire output assembly will quickly become unusable, after which it will have to be replaced;
- Reception pipe. Designed for forced removal of exhaust gases from the cylinders of a power unit. The pipe is made of stainless steel, and its fastening to the collector is carried out using special pins, of which there are four in total. The studs guarantee reliable fastening of the two outlet pipes and the element. In order to combine the exhaust pipe and the neutralizer, as well as an additional muffler, hinged fasteners are used;
- An exhaust manifold. A component that is cast from pure cast iron. The manifold is secured with four studs in the exhaust pipe. Heat-resistant gaskets reinforced with metal are installed between the manifold and cylinder heads.
- Silencers. Necessary for effectively suppressing the exhaust rate of burnt gases. This is necessary in order to significantly reduce the noise level in a type of transport such as the VAZ 2110. The distribution device in this part of the unit is carried out as follows: the additional one is followed by the main one. These two components are connected to each other by clamps and sealing rings and are covered with a special casing on top.
Nuances of operation
There are some points that need to be taken into account when operating the VAZ 2110 system:
- Under no circumstances should the vehicle be refueled with leaded fuel, as this will cause damage. It is very sensitive to lead compounds;
- When operating a VAZ 2110 car, you also need to monitor the proper, precise operation of the ignition, since its poor-quality operation leads to the neutralizing part being removed from its working condition. Fuel that does not burn when a spark passes during ignition enters the converter and burns out there. For this reason, the ceramic coating of the component quickly deteriorates;
- Frequent malfunctions will sooner or later lead to complete or partial blockage of the output system, in turn to the failure of the engine and its repair or replacement will be required.
VAZ 2110 REPLACING THE SILENCER ON YOUR OWN
Replacing a muffler for a VAZ 2110 or its parts is not work that needs to be done systematically. It is not necessary to change parts of the exhaust system often, in cases where the muffler begins to make noise, its elements burn out, or in the event of a break in the connecting pipes. You can change any part of the muffler with your own hands. The VAZ 2110 exhaust system consists of a reception pipe (another name for pants), a neutralizer, a resonator (additional muffler), and a main muffler.
Installing a new exhaust pipe
All work is done in reverse order. But there are several features that you definitely need to know:
- Install a new exhaust pipe.
- A new gasket needs to be installed between the exhaust manifold and the pants.
- Be sure to install a new O-ring between the neutralizer and the pants.
- Tighten the nuts on the exhaust manifold studs. Tighten them evenly in a crisscross pattern.
- Tighten the bolts that are on the spring-loaded connection to the converter.
This completes the repair of the exhaust system. The sound will be muffled as much as possible, the car will become almost silent. It is advisable to lubricate the new gasket with a CV joint type compound. This will improve the seal.
There is no need to worry; replacing a muffler on a VAZ 2110 is not at all a regular job that will have to be done systematically. Replacing the exhaust system is performed in several situations:
- The muffler begins to make a loud noise;
- Muffler elements burn out;
- Connecting pipes break.
The sound of a burnt out muffler.
On a VAZ 2110, you can replace the muffler with your own hands, which will allow you to significantly save on the services of a service station.
The exhaust system of the VAZ 2110 includes a downpipe (pants), a neutralizer, a resonator and a main muffler.
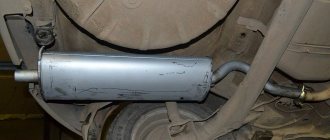
Photo of the new muffler on the VAZ 2110
Today we will tell you about replacing the muffler, as well as the resonator.
Exhaust system VAZ 2110
HOW TO REPLACE THE SILENCER ON A VAZ 2110
We are changing the muffler of the VAZ 2110, the replacement is made in the inspection hole:
- The muffler is connected to the resonator through an o-ring, which is installed in the pipe flare and compressed with a clamp that folds in two halves
- We remove the clamp, then the ring, it is graphite and does not stick to the metal.
Attaching the muffler to the resonator
- Removing the old muffler
- We check the condition of the suspension rubber bands located on the sides of the muffler body. If they have cracks or are stretched, they should be replaced.
VAZ 2110 muffler suspension rubber band
- We install a new muffler, first on the rubber bands, then insert a graphite ring (preferably a new one) between the flares and compress it with a clamp.
So we replaced the muffler on the VAZ 2110, replacing the resonator is the next step.
Removing and installing additional mufflers
The first and second additional silencers are not attached to the car body. Additional mufflers are connected to the inlet pipe of the main muffler using a clamp clamp. The replacement process will look like this:
1. First, remove the main muffler, as was described a little higher.
2. Loosen the clamp nut a little, use a screwdriver to separate the clamp and move it along the pipe. Rock the mufflers and disconnect them from the exhaust manifold pipe.
If at the junction the pipes are strongly stuck to each other and it is problematic to disconnect them manually, you can go a slightly different route. To do this we need a gas key. With its help, we turn the pipe with mufflers and remove it.
RESONATOR REPLACEMENT
Resonator VAZ 2110
So:
- The resonator is attached to the muffler using a crimp clamp with an O-ring;
- It is attached to the neutralizer by means of a floating flange (two bolts) and flaring;
- On the opposite side of the neutralizer there is a “fist”;
- It is often problematic to unscrew the knuckle mounting bolts; they are simply cut off with a grinder and replaced with new ones;
- If suddenly you don’t have a tool at hand, we clean the places where the bolts are attached and treat them with a “liquid wrench” (WD-40 or its equivalent);
- Unscrew the bolts and remove the muffler clamp;
- We remove the resonator from the suspension rubber bands, change the rubber bands if necessary;
- Then we hook a new resonator onto rubber bands and attach it to the muffler so that the pipe running from the resonator to the muffler is parallel to the ground;
- When there is wear on the neutralizer fist or there are burrs, grooves or rust on it, it is necessary to lubricate the connection with a special high-temperature sealant;
- Using new bolts and nuts, tighten the flanges of the catalyst and resonator;
- The neutralizer is attached to the resonator by means of a flange connection (two bolts), to the receiving pipe (pants) by means of a spring-loaded connection and a pair of flares, between which there is a graphite or metal-asbestos ring.
How to remove the resonator
The resonator needs to be changed only after a new muffler has been installed. The sequence of work aimed at dismantling the device:
- The resonator is secured using a crimp-type clamp and an O-ring.
- The connection to the neutralizer is made using a floating flange, which consists of flared pipes and two bolts.
- The fist is located on the opposite side of the resonator.
The work must be carried out on a cooled engine.
Quite often it is not possible to unscrew the bolts, so to make the work easier, you just need to cut them off using a grinder. Be sure to install new bolts during reassembly. If you don’t have a grinder at hand, then you need to use a penetrating lubricant, for example, WD-40. Apply this composition to all threaded connections, then wait 20-30 minutes.
Unscrew all the bolts and remove the clamps on the resonator. After this, you need to remove the old resonator from the rubber suspensions. Be sure to evaluate the condition of all rubber products. If they show signs of wear, install new ones during reassembly.
REPLACING THE CONVERTER
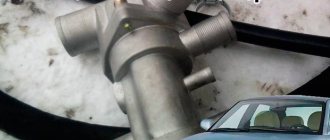
Attaching the neutralizer to the resonator
- This connection dampens engine vibrations and prevents them from reaching the exhaust system.
Attaching the converter to the exhaust pipe (pants)
- When replacing the neutralizer, we leave the old springs and bolts, provided they are intact.
- We definitely need to change the ring - gases escaping through it will quickly damage the flaring of the exhaust pipe and the converter
- Having installed the neutralizer, we tighten the mounting bolts, then tighten them, first tighten the bolts securing the resonator.
You can also watch the video.
Possible inconveniences associated with a quiet muffler
The car will now be quieter, which is what we wanted to achieve, but there may be some disadvantages - an increase in the overall weight of the exhaust system. Therefore, it is necessary to hang stronger brackets so that the exhaust pipe does not come off on rough roads. There are also cases when rubber shock absorbers are hung. But in fact, a homemade resonator will weigh about 2-3 kg.
It is also necessary to test in action how the exhaust system works so that gases exit normally through the exhaust pipe. Therefore, it is necessary to check at higher speeds, then it will be possible to draw the right conclusions. But as a rule, gases will escape through such a resonator without difficulty.
And then in the video there is another way to reduce the sound of the muffler, making a really very quiet exhaust system:
CHANGING PANTS
So:
- The receiving pipe (pants) is attached to the manifold by means of studs with nuts, and to the converter by means of a spring-loaded connection
- When removing the exhaust pipe, we pay special attention to attaching it to the manifold. Instead of bolts, there are studs screwed into the manifold, with nuts screwed onto them. Replacing a damaged stud is not easy, so it is very important to preserve them
Nuts securing the pants to the manifold
- The nuts should be sprayed with WD-40 so as not to use excessive force, and save the studs;
- Otherwise, you will have to drill out the stud if it breaks; this requires experience and considerable effort;
- We replace the gaskets between the pants and the manifold. We also install a new o-ring for the neutralizer;
- Then we firmly press the exhaust pipe using nuts to the manifold (squeezing the gasket);
- Tighten the bolts of the spring-loaded joint with the neutralizer.
Now replacing the muffler on a VAZ 2110 yourself is not a problem for you. If anything in our article remains unclear to you, watch the VAZ 2110 muffler replacement video.
Do-it-yourself exhaust for UAZ 469
To turn the classic UAZ-469 SUV into a two-seater off-road coupe, the authors of the concept had to completely abandon the bodywork of the Ulyanovsk enterprise. As a result, all that remained from the factory UAZ was the frame, modernized suspension components, steering and braking system. Many components were borrowed from its descendant - UAZ Patriot. The 75-liter fuel tank was moved back under the trunk for more optimal weight distribution, and the spare wheel was also located there. The entire design and assembly process, which generally lasted 1.5 years, was carried out in an ordinary garage. The standard engine was replaced with a 16-valve ZMZ-405 engine with a power of 155 hp, after chip tuning the power was increased to 170 hp. with a maximum torque of 7000 rpm. The exhaust system has also been completely redesigned and a zero-drag air filter has been installed. The gearbox and transfer case were left original (4 synchronized “short” gears) - the CRAB’s acceleration was not at all all-terrain. The maximum speed is up to 160 km/h, but there is still some reserve left.
The car was equipped with a snorkel (protecting the engine from dust and water), which is usually used by professional racers to overcome shallow streams, rivers and swampy areas during racing races. The maximum ford depth that the UAZ Crab can overcome on its own reaches 1.2 meters. The homemade exhaust was made direct-flow, with pipes running on both sides of the car. For 100 kilometers, the all-wheel drive two-seater Crab, weighing 1,600 kilograms, consumes from 15 to 17 liters of AI-95 gasoline.
The first sketches of the body were made from ordinary photos of the frame and components, scrupulously finishing everything in Photoshop. But the main modeling was done with our own hands using cardboard and foam plastic. For example, the hood was remade only in metal 3 times. The roof and doorways were borrowed from the Honda CR-X. The plumage and all other body parts are independently made from sheet iron, which is then puttied and painted. The name “Crab” came to mind to its creators already during construction. The car received this name thanks to its widely spaced front wheels, optical lighting technology and the bright red color of the body, which the designers decided to paint the car they were creating.
REPAIR OF EXHAUST SYSTEM PARTS
So:
- It is possible to weld parts of the exhaust system only if they have been damaged as a result of mechanical impact
- In the event that a pipe breaks, or a weld seam or tank burns out, you need to replace the entire element, it has already become unusable
- The only part to which this does not apply are metal expansion joints. They change regardless of the exhaust system itself
- The cost of the neutralizer in comparison with other elements of the system is decent. Therefore, many people change it to a stronger (flame arrester)
- The neutralizer is cut off, leaving only the connecting flanges, as well as a fist with flaring, and a flame arrester is welded in
- The cost of a flame arrester is much lower than a neutralizer. However, there is no afterburning of fuel residues. Therefore, its installation is permissible on cars with one lambda sensor. In addition, the flame arrester increases fuel consumption by about 10-15%.
Car owners often encounter the problem of fluid leaking from the cooling system. Often the reason lies in rusted or squeezed out plugs in the engine cylinder block. To fix the problem, just replace them with new ones.
Plug locations
So:
- There are plugs on the sides and ends of the cylinder block that are squeezed out of the block when the coolant freezes in it.
- Two plugs with a diameter of 34 mm are located on the cylinder block on the side of the coolant drain plug, and two more on the oil filter side
- There is another plug with a diameter of 17 millimeters on the rear end side of the crankcase
- The last plug with a diameter of 34 mm is located at the front end of the cylinder block
These plugs are changed if the coolant in the cylinder block is frozen. The plugs can be changed without removing the engine. On a VAZ 2110, replacing the cylinder block plugs is done using a special tool. To do this you will need:
- beard or chisel
- hammer
- pliers
- durable screwdriver
- telescopic magnetic pointer (purchased at any automotive store)
- new plug
- sealant
- skin
Replacing plugs for a VAZ 2110 engine block
- Remove the negative terminal from the battery
- Drain the antifreeze from the cylinder block and radiator
- Remove the air filter along with the hose
- We disconnect the exhaust pipe together with the bracket and lower it down a little so that the flange is removed from the manifold studs
- Turn the movable sector of the throttle valve drive all the way and disconnect the throttle valve drive rod
- We unscrew the bolts securing the throttle valve drive bracket. We move the bracket without disconnecting the rod to the side so that it does not interfere with us.
- Remove the belt protective cover and cylinder head cover
- We unscrew the nut securing the tension roller and remove the roller along with the axle and a special spacer ring, then remove the timing belt from the camshaft roller
- We unscrew the bolt securing the pulley and remove the pulley along with the key.
- Unscrew the nut securing the timing belt to the block head itself
- If necessary, unscrew the bolts securing the head and remove the block head.
Now that we have access to the plugs, we begin replacing the plug of the VAZ 2110 engine block.
- We take a beard or chisel in one hand, and a hammer in the other
- Place the chisel on the edge of the plug
- Gently tap the hammer on the striking part of the chisel. The plug turns (Photo below)
We tap with a hammer on the striking part of the chisel, the plug rotates
- We pry it up and pull it out using pliers
- If the plug does not turn, drill a small hole in it, screw a knob into it and remove the plug.
- We use a telescopic pointer with a magnet if it is necessary to remove a plug that has fallen inside. We pull the failed plug to its hole and remove it with pliers
- Clean the edges of the plug hole from rust using sandpaper
- To increase the tightness, coat the edges of the installed plug with sealant
- Attach the plug to the hole
- We press it in using a suitable mandrel and a hammer.
Press in the plug using a mandrel and a hammer
- Reinstalling the block head
- Fill the cooling system with antifreeze (antifreeze) or water
- Connect the negative terminal to the battery.
- Checking the engine operation
If everything is not clear when replacing the plug, this video will help you - replacing the plug for the VAZ 2110 cylinder block.
Exhaust system elements
In order to understand what the exhaust system on a VAZ-2112 is, you need to know all its elements:
Visual arrangement of exhaust system elements.
- Receiving pipe (they are also called “pants” - approx.).
- Neutralizer.
- Resonator (additional muffler - approx.).
- Main muffler.
Exhaust system breakdowns
Among the possible breakdowns in the exhaust system, the following facts can be highlighted:
Mechanical damage to the exhaust system can be solved by welding these parts. A crack in the area of the gander, from which exhaust gases escape. If one of the elements breaks, or a weld seam or tank burns out, it should be replaced only as a whole, since its restoration may not bring the desired results. And the only detail to which this fact cannot be attributed are metal expansion joints. They must be replaced independently of the entire exhaust system. Since the cost of a new neutralizer in comparison with other parts is quite decent, many VAZ-2112 owners replace it with a flame arrester (stronger - approx.). In this case, the neutralizer is simply cut off, leaving only the flanges and a fist with flaring, after which the flame arrester is welded. The cost of a flame arrester in comparison with a neutralizer is much less, however, unlike its analogue, it does not burn out residual fuel
Please note that this fact can cause the muffler to fire and increase fuel consumption by 10-15 percent. Therefore, when installing it, pay attention to the presence of a lambda sensor (oxygen sensor - approx.)
Passport data on fuel consumption for the VAZ-2112.
Mufflers for VAZ 2110 cars
The information contained in the operating manuals or electronic catalogs about the structure of the exhaust system of tenth-generation VAZ cars does not always correspond to reality, which causes some disagreement among car enthusiasts. The selection for cars is carried out on the basis of a specific body type: for example, in the case of front-wheel drive cars in a hatchback body, the muffler is much shorter than in models with sedan and station wagon bodies. The difference in length is explained by the length of the car body.
The parts installed on the tenth family are divided into two body types:
- Station wagon and sedan - VAZ 2110 and VAZ 2111;
- Hatchback - VAZ 2112.
Mufflers for VAZ 2110/2112 cars are classified according to body type
Classification is also carried out according to old and new models. The main difference from similar parts on the Lada Samara is that for the tenth family, subcategories play a significant role. The muffler mounts of older models are made in the form of a hook: they were produced until 2007, and then the mounts were converted to pins.
Mufflers of old and new models differ in the type of fastenings
Design
The main task of the muffler is to reduce the noise level while the car is moving and the engine is idling. The resonator, or additional muffler of the car, is an element located in the middle of the exhaust system. Its design consists of the following parts:
- frame;
- throttle;
- block;
- thermal insulation;
- perforated pipe.
Design of the exhaust system of tenth generation VAZ cars
The structure of the part itself is as follows:
- frame;
- middle obstacle;
- rear barrier;
- rear perforated pipe;
- middle perforated pipe;
- exhaust and inlet pipes.
The structure of the VAZ 2110 muffler and the direction of movement of exhaust gases in the system
The perforated tube is the main component of the direct-flow muffler design. Combustion products entering it effectively expand in its body due to perforation. This operating scheme allows you to speed up the process of removing combustion products several times. Installing such a muffler increases the level of exhaust system resistance by up to 10%, which is significantly higher than without its use.
Ways to muffle the exhaust sound
Before tuning the exhaust system, you need to understand the reasons why the sound of the engine becomes louder over time. The operation of the engine itself is a fairly loud process, but the muffler and other components of the exhaust system perfectly suppress this loud noise. Without a muffler, the engine noise is very loud.
The noise occurs because the fuel mixture explodes in the combustion chamber, releasing gases that then exit into the exhaust pipe. We will not talk in detail about the operation of the engine, you can read about this in another article, but here we will talk specifically about how to muffle the exhaust sound.
The explosion releases energy that pushes the piston, and when the piston has moved the required distance, the exhaust valve opens, through which the exhaust gases exit and go further through the exhaust system. To effectively absorb noise, thick metal parts are used. So, the thicker the metal used in the exhaust system, the quieter the car will drive due to the fact that there will be less vibration.
The exhaust manifold is the first one to absorb the noise, which is why it is made so large and thick, so it best dampens the noise that comes from the cylinder block. Even if you compare the exhaust pipe of any more or less normal foreign car with the exhaust pipe of a domestic car, you can see that in foreign cars the pipe is heavier and thicker, which is why such a car runs quieter.
This is why when you drive an old VAZ 2114, the noise is such that you can’t hear what the passengers in the rear seats are saying, which is why you start thinking about how to muffle the exhaust sound.
The exhaust system also has a resonator, which is needed to reduce the speed of gases through the exhaust pipe. And after the resonator comes a muffler. When exhaust gases pass through the resonator, they lose some energy and continue to flow more slowly.
Gases lose the largest share of their energy in the muffler. If we consider a good muffler, then it contains several separate housings, after passing through which little remains of the noise.
Troubleshooting
The operation of a machine is always associated with the occurrence of malfunctions in parts and mechanisms. If some parts become unusable, then they need to be replaced or repaired yourself.
To replace the additional muffler in the exhaust unit:
- unscrew the two bolts that secure the clamp, for this you need a 13mm wrench;
- remove the clamp itself;
- remove the ring;
- disconnect the additional suspension cushions;
- remove the unit.
After this, a replacement is made, it is mounted in place in the reverse order. These are basic troubleshooting repair steps.
In addition to replacing standard faulty components with the same ones, but only new ones, you can modify individual components of the exhaust system, or tune the entire assembly.
Repair with the power of sealant
Often inexperienced drivers think that any damage can be patched with sealants. But this is far from true; it simply serves as additional protection for connections. Sealants are most often used to coke hard knocks where different elements of the system and clamping rings meet. It can also be taken if the connecting elements were selected in the wrong sizes or the gasket was replaced with a new one. Sealing with a sealant allows you to simplify the process of disassembling the exhaust system in the future.
Source of the article: https://spark-welding.ru/raboty-i-obrabotka/rezonator-glushitelya-svoimi-rukami.html