Good visibility is essential for safe vehicle travel. During the process, the driver must constantly “keep his finger on the pulse” so as not to accidentally get into an accident. The manufacturer took care of the side mirrors on the Priora. The viewing angle is large enough to not move even when reversing, overtaking or changing lanes.
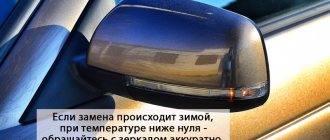
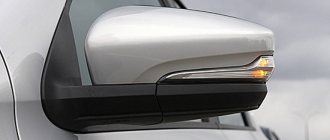
Visibility like in luxury cars. Drivers note that in other cars comparable to the Priora, you have to strain to see what is happening on the sides and behind the car. There are mirrors on the market for Priora with turn signals or repeaters.
This is a device for a special version of luxury cars. Naturally they cost more. The price difference is about 900 rubles. Mirrors from the luxury Priora can be installed on a standard car. Turn signals located in mirrors are quite a fashionable topic. They give the car an attractive look and also add safety while driving.
IMPORTANT : The side mirrors of the Lada Priora of the first version were improved during the restyling of the car. In the most complete configuration of the car - SE Luxury - the side mirrors have been improved to improve the driver's convenience. Many drivers who bought a car with a simpler configuration install such mirrors.
You can install the accessories yourself. You just need to properly disassemble the device and understand how the electrics work. There is an option to simplify the work. To improve the appearance, you can install mirror covers. The car will look much more solid.
Former owners of “classics” definitely get a thrill from driving a heated car. You no longer need to freeze your car in winter. The manufacturer implemented heated mirrors by installing spirals. If you turn it on in rain, slush or snowy weather, a mark “appears” on the glass. The spirals do not deteriorate even after 5-7 years of use.
Reasons for the need for replacement: all the pros and cons
If there are doubts about replacing the side mirrors on a Priora, then all positive and negative arguments should be given. Let's start with the advantages that mirrors from Priora SE really have a lot of, and they are very significant. These include:
- The process of replacing a mechanical part is technically extremely easy, and there is no need to drill, file or cut anything.
- Design - a car with new mirrors definitely looks better, which you can actually see for yourself by looking at the photo below.
- Increased level of safety - achieved through large mirrors with very good visibility without blind spots.
- A turn signal not only makes the car more attractive, but also has a positive effect on safety.
Now let's move on to familiarize ourselves with the negative sides. They really exist, and before you decide to replace the standard mirrors, you should familiarize yourself with them. These include:
- Price - new mirrors are more expensive. Their cost ranges from 3,000 thousand rubles. Of course, such a price hits the pocket hard, so not everyone can afford such a purchase. Even taking into account the fact that old mirrors can be sold (although the demand for them is very small), the price for many car owners is very high.
- The need to redo the connection diagram. This is one of the important disadvantages after the price, due to which not many people decide to replace it themselves and turn to specialists. The article describes in detail the process of connecting the new type of side mirrors on the Priora, and you can make sure that there is nothing complicated about it.
If you still decide to install new-style mirrors on the Priora, then first we’ll consider the process of dismantling the old elements.
How to improve the rear view of the VAZ-2107 “Classic”
The standard rear-view mirrors on the VAZ-2107 are very small and do not allow you to see blind spots behind the car, which creates great risks in modern urban driving conditions. Let's look at some improvements that will help us improve our review.
Firstly, this is an overview spherical rear view mirror, which is mounted on top of a standard salon one; it significantly improves side visibility, and is very convenient when overtaking and changing lanes - the rear hemisphere is fully visible.
Although, at first there are slight difficulties, since the mirror is spherical, it moves objects behind and it is difficult to get used to assessing the distance to them, but over time the eye quickly adapts to this.
Secondly, replacing factory mirrors with more advanced ones, for example, Politex mirrors - they have a better view and are more convenient to adjust. It is better, of course, to install them immediately with heating.
Thirdly, there are small additional mirrors on the side, they are also spherical, they are attached with ordinary double-sided tape and can be easily removed. We adjust them to the view of the rear wheels - they help not to run into a curb or other obstacle when reversing, and they are also good for assessing the lateral distance to cars when ahead of them and when driving through narrow places.
Removing side mirrors on a Priora in order to replace them
The process of dismantling mirrors on Priora is not complicated and takes no more than 5 minutes. It is implemented as follows:
- The decorative trim is pryed off from the interior side and dismantled.
- The three fasteners are unscrewed with a Phillips screwdriver.
- When unscrewing the last third fastener, it is necessary to support the mirror so that it does not fall to the ground, which in 100% of cases will lead to its deformation.
- Disconnect the electrical connections. This action can be performed either after unscrewing the fastening bolts, or beforehand (after removing the decorative trim).
- Remove the mirror. The mirror on the other door is removed in a similar manner. The manufacturer's instructions are as follows.
Assembly is performed in the reverse order of removal. At this point, the dismantling process is completed, and you can immediately begin replacing products. The need to remove mirrors arises not only for the purpose of replacing them, but also for repair, modernization or restoration of appearance.
The photo below shows the serial numbers of the side mirrors that were installed on Priors.
How the process of dismantling mirrors on a Priora and their subsequent disassembly for the purpose of repairing or replacing failed parts is carried out is shown in detail in the video clip.
Types of mirrors on Priora
It would not be fair to analyze the mirrors on the Priora and not mention what variants of these products the car was produced with. There are five types of mirrors for Priora:
- Autocomponent (Nizhny Novgorod plant) - mirrors that were installed on the first Prioras, transferred from the VAZ-2110. They have an electric drive, as well as a removable cover that can be removed for painting into the car body.
- The Dimitrovgrad plant is the next type of mirror that was installed on the Priora. They are distinguished by their simple design (they do not have a removable cover, so they are not intended for painting), as well as their heavy weight. Options were offered, both with electric drive and with cable drive.
- The third version of mirrors is from, which are equipped not only with electric drive, but also with heating. They have two connection blocks to the electrical circuit, and it is these options that are most often found on the restyled Priors of the “Standard” and “Norma” versions.
- The fourth option is with cable-driven adjustment. Installed on basic versions of the pre-restyling Prior. They are extremely rare.
- The fifth option is heated mirrors, electrically adjustable and a turn signal. It is these options that have become very popular. They were installed from the factory only on Prioras of the Luxury version (SE), but many car owners installed them on their cars of the budget “Standard” and “Norma” trim levels.
All of the above types of mirrors on Priora were installed from the factory. Today there are about 5 different versions of mirrors, so-called copies, which are produced by different companies, including Chinese ones. These are mainly modifications with turn signal indicators, which are in great demand and are popular among car owners.
Options for mirrors on the new Priora model for replacement
On Priora you can install new mirrors from two manufacturers:
- Automotive component or ATP. They are factory marked “2170-8201051-75”. The quality of this manufacturer's products is inferior to those of the next brand.
- SALINA from - products are characterized by high quality workmanship, and these are the options that should be chosen to replace the standard options.
If you want to get really high-quality mirrors with turn signals for a Priora, then these products are the best option.
You can choose suitable mirror models on the website solina-avto.ru, where products are presented in different designs and at affordable prices. The site also presents all the necessary elements for replacement, for example, a new type of plug, fender covers instead of standard repeaters.
Connecting SE mirrors on Priora: diagram and detailed description
Let's consider connecting new-style mirrors to the Priora, where old-style products were installed, but heated and adjustable. There are options where the Priors do not have heated mirrors or have a mechanical (cable) corrector installed. However, in this case, installing mirrors of a new type is more difficult and costly, since you will need to buy additional equipment. The rationality of this method depends on how much comfort you need and how much you are willing to pay for it. That is why below is a description of the process of connecting the new model mirrors to the Priora.
Important! When carrying out work on the electrical part, be sure to first remove the negative terminal from the battery.
To begin with, it is worth noting that if a car is equipped with mirrors of a new type, but without repeaters, then there is no need to change the entire product. To do this, you can buy repeaters with overlays in the color of the car, and simply install them. Of course, you will definitely need to connect them, but this is described in detail below. The cost of Lexus type repeaters with overlays in the color of the car will cost about 2,000 rubles.
How repeaters are installed on new mirrors is shown in the video below.
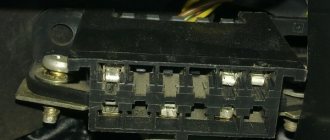
After the technical installation of the new model mirror on the door, we move on to the process of connecting it, that is, the electrical part. To do this, you need to know that the block on it has 6 outputs, that is, 6-pin. Below is a diagram of its pinout by color.
On a Priora with heated mirrors and corrector, two pads are used.
To combine them with a mirror, the following options are offered:
- Cut the wires and connect directly. However, this is a barbaric method that is only suitable as a last resort.
- Buy a plug for mirrors. It costs about 200 rubles, but you can only buy it on the Internet. It is important to understand that in this case you will have to cut the standard wires in the car in order to remove the old pads. Below is a photo of the block itself and a link to the website where you can order it.
- Cut off the plug on the mirror and install the standard two pads in its place. In this case, one wire will have to be connected through “male-female”. However, this option is not advisable either, since the mirrors will be under warranty, and if they soon fail, no one will replace them. Oh, and besides, old mirrors without plugs will be harder to resell.
- Replace wiring. The most expensive, but the most correct way. You can see how to implement it in the video below.
Actually, there are many options, but they all have their drawbacks, so you should decide for yourself. However, the best way is to buy a block for a new mirror and do everything more or less carefully.
Below is a wiring diagram for the new model mirror block with standard wiring in color.
Priora SE mirror block pinout
Then only the connection is made. There are no difficulties with heated mirrors, corrector and mass. The wire for powering the dimensions should be taken from the standard turn signal, which is installed on the wing. The wire should be tightened into the interior, having first disconnected it from the ceiling lamp (read the section below for how to dismantle the turn signal lamp on the Priora wing). To do this, you need to remove the rubber plug and tighten the wire. After this, cut off the chip and insert the wire into the door niche (naturally, its length is not enough, so we increase it).
You can use this wire if you plan to dismantle the repeaters in the wing, or make an insert into it. Likewise for the other mirror. As a result, after connecting, you will get something like the following picture, as in the photo below.
It is important to note one point that if you plan to connect a turn signal and marker, then the connection technique will be different. Possible ways to implement such functionality are discussed below.
Part malfunctions
Any accessories that attach to a regular mirror increase driving comfort. The repeater will tell other drivers where you plan to turn. Heating will remove moisture after rain. Stains and drops will not distort the image in the mirror. When operating a vehicle, you may encounter the following malfunctions:
- Loosening of fasteners. Each part is attached at several points. They can get so loose that it will be too late to pull them up. In most cases, replacing the fasteners helps.
- The heating does not work. In this case, you need to check the connection of the wire blocks. Most likely, the attachment points need to be strengthened so that they do not move away.
- The electric drive does not work. If you have to manually adjust the mirrors, check the electronics.
- The turn signal repeater is broken. If it does not blink, then the signal is not reaching. Look for a problem in the wiring.
- The mirror element is broken. The best option is to replace it with a new one. Be careful in the process. Be careful not to get any debris under the lid.
Connection diagram for turn signals and side markers in Priora mirrors: method 1
First, let's look at a simple way to connect turn signal indicators (RF) in Priora mirrors. To implement it, you will need two five-pin relays, as well as 3 meters of wire and heat shrink. The implementation diagram of this method is shown in the photo below.
Connection diagram for turns and dimensions on Priora
The photo shows a diagram of connecting turn signal indicators for one mirror. For the second one it is done in the same way. If you plan to implement a connection using this scheme, then you need to know that both dimensions and repeaters will work. However, repeaters will function by breaking the dimensional chain. To put it simply, the mirror LED will be supplied with power from the dimensions. When turning on the rotation, the power supply circuit of the LED will be interrupted, which will cause it to blink. However, it will not flash synchronously with the turns, but will light up at the time when the turns go out. This is not entirely correct operation of repeaters, however, it is quite appropriate, and especially does not require major modifications. It's very easy to implement.
The principle of implementing such a scheme is very simple. First, you will need to take a five-pin relay (it is important that it is five-pin, not four), and buy a terminal block for it. Next, based on the diagram above, make the connection. A wire from the mirror is supplied to contact “87A” of the relay, which is responsible for supplying power to the turn signal. This is a white-red wire on a chip from the mirror. To power it, you will need to run a single-core wire from the passenger compartment into the door niche, where it will be connected to the chip.
Contact “30” on the relay must be connected to any wire or contact that receives power when the dimensions are turned on. This could be the LCM (light control module), wiring in the sills, or a contact on the glove compartment light. However, it is important to understand here that when you connect this wire to the power supply of the dimensions, the repeater will work when the dimensions on the car are turned on
. If you want the repeaters to work when the ignition is turned on (in this case, the dimensions on the mirrors will work), you need to connect this wire (from the “30” relay contact) to the positive of the ignition switch.
It is important to know! Since today many people drive almost constantly on the dimensions, it is better to connect the wire from contact “30” of the relay to the power supply of the dimensions.
The further connection process involves connecting pin “86” on the relay with the wire from the side turn signal. Usually the repeater light on the wing is dismantled and a chrome “SE” trim is attached in its place, the cost of which is about 100 rubles. The positive wire from the repeater must be connected to contact “86”, and the negative wire to contact “85” of the relay (it is possible and vice versa, there is no difference here). At this point, the circuit is considered assembled, and is carried out similarly for the second mirror. It is recommended to insulate all connections with heat shrink (better than electrical tape).
The most interesting thing is how it all works. Everything is very simple. When the headlights are turned on, power will be supplied to the mirror LED. When the corresponding turn is turned on (the “guitar” lever is moved up or down), power will be intermittently supplied to the relay coil. As a result, the contact on relays “30” and “87A” will be broken, which will cause the LED to blink.
The video below shows how this method is implemented and how the marker/repeater will function.
Reviews
| № | Positive |
| 1. | Vitaly: There were no problems connecting the reflector. I installed it myself, the scheme is quite simple and intuitive. |
| 2. | Kirill: in winter the mirror on the left side cracked, I replaced it myself with a new one. There were no difficulties with disassembly, the design is quite simple, the connection diagram consists of two blocks. |
| 3. | Vasily: after a side impact, the right side mirror cracked. I had plenty of free time, so I installed the new one myself. At the same time, I replaced the rubber seal; it was deformed and moisture penetrated inside. |
| 4. | Alexander: after two years of operation of the Lada Granta Liftback, the insulation in the doorway on the wiring was worn out. Replaced the entire block with wires. Now the line is completely new. |
| 5. | Konstantin: when the reflector burst, I didn’t contact the experts, I installed a new one myself. The procedure is simple, the case is held on by three screws, the block with wires is connected to the standard connector. |
| 6. | Victor: the housing on the left mirror was cracked, I bought a new one at the car market. I transferred the filling myself, it turned out to be very simple. I didn’t contact the specialists at the service station, I did everything with my own hands and I advise you. |
| 7. | Gennady: the right turn signal suddenly stopped working, so I disassembled the reflector myself. The reason was poor contact at the terminal. I pressed it with pliers and everything works fine. |
| Negative | |
| 1. | Ignat: the design of the side reflectors is not perfect; they do not fit tightly, despite the presence of a rubber seal. I decided to buy a reflector block from Renault Logan, it has an identical mount. |
| 2. | Vasily: the quality of the wire insulation is poor; after two years of use, Granta replaced it with new wiring. Insulation cannot withstand freezing temperatures. |
| 3. | Sergey: I changed the left side mirror adjustment cables for the second time in a year. Low quality components. |
Conclusion The process of independently replacing side-view mirrors on the Lada Grante Liftback is not at all difficult. The design is fixed with three screws, connection to the power circuit is carried out by two blocks with wires. Following the recommendations given in this manual, replacing a new mirror will take no more than 10 minutes. Negative reviews from some owners are unfounded and are caused by violation of the operating conditions of the technical equipment and failure to comply with maintenance schedules.
Connection diagram for turn signals and side markers on Priora: method 2
The second method is more effective, as it will ensure synchronous operation of the repeaters with the main turns. However, its implementation requires a lot of time, effort and money. Below is a diagram for its implementation.
Connection diagram for Priora left mirror repeater
Connection diagram for Priora right mirror repeater
Important! Install a jumper between relay contacts “87A” and “87A”.
The method of implementing this scheme is more complicated than the previous one, but it is more popular. After all, its main advantage is that the turn signals in the mirrors will work synchronously with the main turn signals on the car. In addition, repeaters will work regardless of whether the dimensions are turned on or not. Using the diagram it is not difficult to understand the connection features, but for clarification some information:
- Contact “30” from the relay to the mirror repeater. This is a white-red wire (but may vary from manufacturer to manufacturer).
- Contacts “87” on the relay go to the right and left turns, that is, the positive contacts from those repeaters that are located in the wings. If they are dismantled, then the wires (positive) are connected to the relay, and the negative wires are simply “muffled”.
- Contact “87A” is connected to the dimensions contact. It can be taken from the driver's side on the MUS (light module, pin “58”).
- On the passenger side in the glove compartment illumination.
- Contact “86” is connected to the steering column switch. It is needed so that power is supplied to the relay coil when the corresponding turn is turned on. It is important to understand that the wire from the passenger door must be routed to the steering column switch. The main thing is not to mix up the wires so that the right turn works on the left door, and the left turn works on the left door.
- At “85” the contact is supplied by “+” from the ignition switch.
The scheme works as follows: when the dimensions are turned on, the LEDs in the mirrors will light up, indicating the size of the car at night. This is clearly visible from the relay contacts “87a” and “30”. When the turn on the “guitar” is turned on, regardless of whether the dimensions are on or not, the repeaters will blink. This is accomplished due to the fact that there will be intermittent voltage at the coil contacts “85” and “86”. In this case, the coil will open contact “87a”, turning off the marker, and close contact “87” to turn.
Based on the diagram described above, you can assemble it yourself. At the same time, it is very important to insulate all connections with heat shrink so that everything looks civilized and moisture does not get into the contacts. Otherwise, you will soon need to disassemble the entire circuit again and clean the connections.
Connection diagram for turn signals and side markers on a Priora: method 3
If you have the skills to use a soldering iron, then you can make some modifications to the relay, which will ensure the operation of the turn signals and markers in the exterior mirrors. Below is a diagram, the implementation of which will help ensure the operation of the backlight on the mirrors in the repeater and dimensions mode.
To implement the circuit you will need two diodes...
and two capacitors with a capacity of 4700 uF and a voltage of 35 V.
These semiconductor elements are soldered to the relay chip, as shown in the photo below.
This circuit uses a diode and a capacitor. If you compare it with the previous circuit, you can see the difference in the connection, whereby semiconductor elements are actually needed. They have a corresponding purpose, and if you decide to use this option, then consider the principle of operation of the circuit itself:
- When the dimensions are turned on, current will flow through the relay contacts “88” (aka 87A) and “30” to the LED elements of the mirror. As a result, the mirrors will work in size mode.
- When the turn signals are turned on, current will begin to flow through contacts “87” and “86” simultaneously. The positive wire of the wire is connected to these relay contacts, which powers the turn signals on the wing (it is important to connect the positive wire, not ground).
- Current is supplied to pin “86” through a diode, that is, in one direction. Next you will learn why a diode is needed. Since the second contact “85” of the relay coil is shorted to ground, it is activated. As a result, contacts “87” and “30” are closed, and the current flows directly to the LED element of the mirror. As a result, it works in turn repeater mode. Contact “88” (87A) on the relay opens while the turn signals are operating.
- It would seem that everything is simple, but why do we need a capacitor and a diode in the circuit? A capacitor is included in the circuit parallel to the coil. Its task is to prevent the coil from switching contact “88” to the operation of the dimensions while the rotation is in progress. The “86” relay contact is supplied with power from rotation. This is a positive wire through which current flows intermittently, which makes it possible for the turns to operate in the appropriate flashing mode. If you remove the capacitor from the circuit, then when turning on the turns, contacts “88” and “87” will alternately switch, which will ultimately lead to incorrect operation of the repeaters in the mirrors.
- It is precisely so that when turning on the turns, contacts “30” and “87” are closed, and do not open when the current disappears at contact “86”, a capacitor is included in the circuit. While the circuit is operating in the turning mode, it energizes the coil, which remains in the on position.
- In the circuit, a diode is needed to limit the flow of residual current generated by the capacitor back into the vehicle's electrical circuit.
Actually, this is how this scheme works, which is suitable for DIY implementation.
After this, assembly is carried out according to the above scheme, which will not be difficult. The video below shows how the repeaters and dimensions in the mirrors on a Priora function according to the diagram assembled above.
Chrome plating of rear view mirrors
Sometimes it is difficult to find a side mirror in a chrome housing suitable for the VAZ 2107 on sale. However, chrome plating can be done with your own hands. You can do this in two ways:
- applying chrome vinyl film to the mirror body;
- painting the mirror with special chrome paint followed by varnishing.
These methods do not require the use of special equipment and expensive materials.
Applying chrome vinyl film to the mirror body
To apply chrome vinyl film to a mirror you will need:
- stationery knife;
- squeegee (for smoothing the film over the surface of the body);
- construction hairdryer
The film is applied as follows:
- The surface of the mirror body is cleaned of dirt and dried. In this case, you can use any cleaning products.
- The paper backing is removed from a piece of film cut to the size of the mirror.
- Using a hair dryer, the film is heated to 50–60°C.
- The heated film stretches in all directions. It is more convenient to do this together, holding the film by the corners. The film is stretched so that its size increases by 15–20%. This is done so that wrinkles do not appear in the places where the film will be cut.
In my practice, I had to use film. In order to stick it successfully, you need to practice and acquire certain skills, without which you can ruin everything.
Connection diagram for turn signals and side markers on Priora: method 4
There is another way to connect turns and dimensions in the mirrors on a Priora. This method is proposed by a person who has knowledge of electronics and assembles a circuit from semiconductor elements. The diagram is presented below. Its main advantage over those described above is the absence of relay clicks when the turn signals operate.
Connection diagram for “American” in Priora mirrors
How functional it is can only be judged by the experience of its developer. However, if you want to try it out, you can contact its developer. Here is a link to the page: https://drive2.ru/l/531074287772107628/, which also describes in detail the process of connecting and manufacturing the board. The video below shows how repeaters work in mirrors using special boards based on semiconductor elements.
If you connect mirrors on which Lexus repeaters are installed (when the light moves step by step), then there is no need to implement the above steps. The situation is similar for those who want only repeaters without dimensions to work on mirrors. In this case, you just need to connect the positive wire from the turn to the contact of the repeater chip on the mirror (it is best to use the one that goes to the repeater on the wing).
Finally, SE decorative elements are installed instead of turn signals in the mirrors. There is nothing complicated here, and you just need to thoroughly clean the place where the standard turn signal indicators were located on the wing, then degrease and glue.
This completes the process of replacing mirrors without turn signal indicators with new products. All that remains is to admire the result.
It definitely looks beautiful both during the day and at night. At the same time, visibility in the new elements is much better, and there are practically no “blind spots”.
How to disassemble a mirror (left and right) on a Priora car - removal and installation
Replacing a device that is installed on a car of the “Norma” or “Standard” trim levels with the SE version becomes a good way of tuning. In order to disassemble these devices, you will have to disassemble the interior trim. Carry out the work as follows:
- Remove the screws that secure the A-pillar trim.
- Pull part of the trim towards you.
- The part is held in place by three bolts. First, lower the glass, then slowly unscrew the bolts, taking the reflective element with your other hand.
- Do not jerk the device. First, disconnect the wires - there should be two terminals going through them. The first is for heating, the second is for position adjustment.
- Place the new part in place of the old one and secure it with bolts.
Connecting the mirrors of a Priora car should be done according to the following diagram:
- the green wire goes to the black-green one;
- red wire - to blue-red;
- connect the blue wire to the black-blue one;
- brown wire - to red-blue (second block);
- black to black wire (second block; This is the “minus” for repeaters and heating).
If you change this part in winter, when the outside air temperature drops below zero, you will have to be more careful with the mirror element. Once you remove it, you should warm it up using a hair dryer or heat gun. The surface may become chipped or “burst,” so that it remains useless. You will have to prepare for the replacement in advance by obtaining the necessary tools.

