In modern realities, the likelihood of unauthorized access to a car increases significantly. Often, attackers get inside the salon, taking away radios, money, and documents. In addition, some of them manage to drain gasoline directly from the tank. And the fact that the gas tank flap on most modern LADA cars does not close, makes the task easier for all sorts of thieves. In addition, a mechanical trunk lock also does not protect against unauthorized entry 100%.
Article: 2110-2802030Н
Order code: 013390
- Buy with this product
- show more
Titanium protection offered on the domestic spare parts market is lighter, but has a higher stretch coefficient and, accordingly, does not provide the maximum guarantee of maintaining the integrity of the engine and gearbox.
To protect against counterfeiting, the assembly is marked with a yellow label indicating the drawing part number and the manufacturer's address.
Owners of VAZ models know that the VAZ 2110 crankcase protection installed at the factory is far from ideal. It is still suitable for short trips in urban conditions, protecting the engine compartment from dirt and water. But on country roads its effectiveness is highly questionable.
Many motorists completely remove the protection, arguing that in the forest or on a river it does more harm than good, because the VAZ crankcase protection reduces the ground clearance of the car. Let's try to understand its purpose and possibilities for increasing efficiency.
Kinds
Today you can find contact and contactless immobilizers, the latter of which are more in demand. The first ones are controlled using a key, and for the second ones a key fob or card is provided. They are combined with other anti-theft systems.
Key master
On the VAZ 2110, the immobilizer is found only on models with injection engines. When leaving the production line, the car's protective functions are not activated. A special set of keys is provided for this. One of them is red. This is the master key that activates the protection. The other two, which are black, are used by the car owner.
“Training”, that is, activation, is usually performed at a car dealership before preparing the car for sale. Although some clients are easily able to perform the procedure on their own.
The VAZ 2110 was the first to be equipped with APS-4 systems, but after some time improved APS-6 models appeared. The reading part is installed in the steering column, and the code is installed in the ignition key. APS-6 additionally serves to control fog lights and electric windows.
APS-6 module board
Sometimes an updated immobilizer comes in an old housing, which, apparently, was in abundance at production. If this is so, then there is a number 4 on the case, and the inscription APS 6 is printed on the board. Microcircuits may differ from each other due to different periods of their production.
Engine blocking with car alarm
If there are installed anti-theft systems, electrical equipment is responsible for blocking the engine start. Immobilizers or car alarms may be faulty and cause constant or occasional failures during operation.
It should be added that the severity of the problem will depend not on the specific model or brand of car, but on the complexity of the installed anti-theft security system.
Accidental activation of the engine lock function
First of all, carefully study the displayed icons on the alarm key fob. A common cause of blocking is accidental activation of additional functions. It is also necessary to monitor the readings of the LED indicator light (if equipped) in the vehicle interior, which serves as a light indicator of the alarm status. Flashing LED lamps in most cases indicate that the anti-theft function of the immobilizer is activated in the menu.
If, after turning the key in the lock and turning on the ignition, the warning lamp blinks frequently (for example, the StarLine car alarm) before starting the engine, and a pictogram with the inscription “immo” is displayed on the key fob itself:
- One way to solve the problem is to remove the key from the lock, after which you just need to press the button to open the central door lock on the key fob.
- You can also get out of the car, set the alarm to security mode, then disarm it and then start the engine.
How to prevent gasoline drainage on a classic VAZ 2101-2107
It's no secret that one of the most common problems in classic Lada cars is the lack of protection against illegal draining of gasoline from the tank. In domestic gas tanks there is neither a reinforced mesh nor other protective devices that would allow the car owner to sleep peacefully at night. One of the common ways to protect the tank from draining gasoline in classic VAZ 2101-2107 is a plastic cap with a key. Some classic car owners install a lock on the tank flap. Others put a button to open the hatch in the cabin. Particularly cunning ones install an alarm sensor on the hatch, which, when opened, triggers an audible signal and scares away thieves and intruders. And only a small proportion of car owners try to thoroughly protect themselves from any attempts to drain precious fuel. Let's look at this issue in order.
Replacement
The first thing you need to decide before replacing the protection is whether to keep the factory mudguard or not.
Dismantling works
Some believe that it is better to leave it, since this will provide double protection. Others are of the opinion that such layers of protection do not provide additional protective measures, but only collect dirt and accumulate snow and ice in the winter. The choice is yours.
But just in case, we will tell you how to correctly and quickly remove the factory mudguard from the pan of your car:
- The best option for working conditions is a lift. But if it is not there, you can use an overpass, or an ordinary pit in your own garage;
- Five self-locking nuts are used to secure the front of the factory mudguard. To dismantle them, you will need a regular 10 mm wrench;
- The protection is attached to the mudguards using four self-tapping screws. To remove them, a key of 8 millimeters is useful;
- There are two more mounting bolts at the rear. Here again we pick up a 10 mm key;
- After dismantling all the fasteners, all that remains is to pull the mudguard out of the engagement into which it fits with the mudguards.
Final assembly
That's it, the mudguard has been dismantled, so you can safely proceed directly to installing the newly purchased, new full-fledged protection.
- A pit, overpass or lift is suitable for work. Someone here already has what.
- Place the guard against the surface of the engine sump to ensure it fits into the existing holes.
- Screw the front mudguards to the protection.
- Next, self-tapping screws are attached to the side member brackets.
- The next step is to attach the protection to the mudguards.
- On the front bumper, all that remains is to tighten the five nuts that will finally hold the new metal plate in place.
Working under the bottom
Expert advice. If you want to make driving your own car more comfortable and enjoyable, consider installing a powertrain mounting bracket. It is mounted regardless of what type of protection you have chosen for your VAZ 2110.
Which protection to choose
The choice today is quite wide. “Glands” for protection are made from:
- Aluminum alloy.
They are lightweight, quite durable, and do not require a special mounting bracket as they usually fit exactly into existing mounts; Sports aluminum protection - Powder coated steel.
Durable, resistant to corrosion. Their main drawback is thin metal; Novline steel protection - Kamaz produces the thickest protections - from metal 4 mm thick. Reliable, massive. The main drawback is that they are so heavy that the fastenings are often simply torn out “with meat”. A special bracket is required. Steel protection. Manufacturer Kamaz - N. Chelny
It is better to take steel protection with a metal thickness of at least 2 mm. And definitely - with stamped stiffeners. Also, this part must have special technological holes for draining oil and blowing the engine. The fasteners must exactly match the existing holes on the VAZ 2110.
You can purchase protection either in a regular auto parts store or online with delivery; the price of metal engine protection for a VAZ 2110 is on average 700-1000 rubles.
Anticorrosive treatment stages
Preparation before treatment with anticorrosive VAZ 2110 can be divided into several stages:
1. Wash.
Before you start washing the bottom, you need to remove the wheel arch liners, if any. The best option is to place the machine on a lift to gain full access. It is better to rinse the treatment areas three times to get rid of large pieces of dirt. Apply detergent and then wash it all off. It is advisable to wash the bottom with hot water.
2. Drying.
In order to begin applying the protective composition, the bottom needs to be dry. It is best to dry it with compressed air, which will save a lot of time.
3. Cleaning from rust.
If there are areas covered with rust on the bottom, they need to be cleaned down to bare metal. If desired, anti-corrosion primer can be applied to the rust-free area. This will give better protection.
How do immobilizers work on VAZ 2110, 2112, 2111 cars?
The main features of all immobilizers are the same, but additional features differ from each other. Since we are talking about a standard VAZ 2110 immobilizer, it has the following capabilities and functions:
- when attempting to steal, it creates electrical interference that prevents the engine from performing its job properly;
- blocks all movement systems automatically and completely;
- can connect to the hood lock, control the closing or unlocking of door locks;
- There is a possibility of emergency shutdown of the system and its setting to service mode.
The standard immobilizer does not allow the VAZ owner to connect additional locking relays or use many keys to control the system.
Security is disabled only if the owner of the vehicle opens the car and has the immobilizer key with him. The system instantly recognizes this key and gives a command to terminate the security mode. The immobilizer and its key are a single system, but they work separately, which is very convenient.
safety
| Air pollution from exhaust gases causes significant harm to the environment and human health. It is the products of oxidation and combustion of gasoline and diesel fuel that make up a significant proportion of carcinogenic and toxic substances concentrated in the atmosphere. In closed spaces, exhaust gases can cause serious poisoning, including death. |
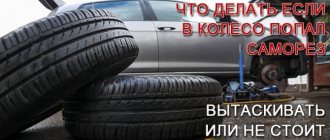
| During the operation of the car, troubles may occur, for example, the wheel is severely cut and the side cut does not allow the tire to be repaired. It is not possible to find similar tires on sale, the tire tread is already different, what should I do? Is it possible to install tires with different tread patterns? |
| Stealing state registration plates is illegal income for thieves. It takes less than 10 seconds to steal license plates from a car. To avoid becoming a victim of scammers, it is recommended to install vehicle license plate protection. |
Without a doubt, a fire extinguisher is needed in a car. However, in most cases it lies like a dead weight and takes up precious space in the trunk. You can place a car fire extinguisher under the driver's seat, thereby it will always be at hand and will not take up space in the luggage compartment of the car.
It's no secret that the LADA Largus is nothing more than an analogue of the Dacia Logan MCV (Renault). Let's look at the results of the Largus crash test in Russia, as well as the results of the Crash Test of the Dacia Logan MCV according to EURONCAP.
LADA Priora is the first domestic car equipped with an airbag as standard. In order to optimize its operation, the designers conducted many crash tests. LADA Priora luxury already has a reinforced body and two airbags (driver and passenger). Let's check the passive safety of both Priora trim levels.
To check the passive safety of the Lada Granta, a test was carried out during which the car collided with a barrier at a speed of 56 km/h. Let's talk about what crash test results the new AvtoVAZ product showed and how far Granta is in terms of safety compared to its predecessors.
After the release of the VAZ 2110 cars, its weak points were almost immediately found. A number of features that the designers missed make it possible to hack a VAZ quickly, literally in seconds. The designers surprised the world by releasing ten and showing how you can easily steal a car. We are learning to eliminate the weak points of cars of the tenth family.
After purchasing a new car, the happy owner has a question about how to protect the car from theft. The first thing that comes to mind is the installation of an alarm system, as well as various mechanical gearbox and hood locks. Is a car alarm really capable of protecting against theft and what kind of anti-theft protection is better?
Anyone who has experienced the theft of gasoline from their car begins to think about protecting the gas tank from theft. There are many options for protecting gasoline from scammers, and in this article we will focus on one of them - protecting the gas tank flap using an alarm.
How to protect a VAZ 2107 from draining gasoline
Content
Good day everyone, I decided to tell you how to protect your Zhiguli from draining gasoline. This is my first topic, so don’t judge harshly :) Not long ago I became the proud owner of a penny, and like probably everyone else, I was concerned about the issue related to protection against gasoline drainage. I searched the Internet for what people write about this, and here I list what I found and what I came up with myself: a) keep the gasoline level at a minimum (the simplest but impractical method); b) park with a hatch towards some object (100% method, but there is a risk of scratching the wing); c) installing a mesh in the neck to make it impossible to insert the hose (you need to make a special glass with a mesh and install it permanently; you need to remember that there is no trick against scrap, and an angry drainer can pour out sugar or sand); d) installing a lock on the gas tank hatch, including a barn one (one fine morning you can wake up with a mutilated body in the area of the hatch, as already mentioned - there is no trick against crowbar); e) weld/solder the filler neck and weld a new one on the trunk side (a high-quality method, but expensive and labor-intensive; after each refueling, the cabin smells of gasoline for several minutes); f) installing an alarm limit switch to the gas tank flap (the first time the drainer will run away, the second time he can outwit this protection, by the way, if you leave the flap open, then after five consecutive activations the alarm will consider that the sensor has failed and will turn it off); f) installation of a gas tank cap with a lock (opened with a screwdriver, both plastic and aluminum); g) installing a gas tank in the spare wheel well (I chose this method; I will describe the advantages and disadvantages below). So, the main tool: a 10-mm wrench, a 7-mm wrench, a hacksaw or grinder, a Phillips screwdriver, a flat-head screwdriver. Required materials: pieces of leather or rubber, two wires 1.5 meters long, 2 male and female contacts for the wires, electrical tape, a gas-resistant tube with an internal diameter of 6 mm (I took a translucent one with an external diameter of 8 mm and 3 meters long). Looking ahead, I will say that it is better to start work when there is a minimum of gasoline in the gas tank, this will make it easier to get it out. The first thing you need to do is turn off the ground, in other words, turn off the power to the car; this is necessary for safety reasons. After this, we take out the spare wheel and see that there is a bracket for the jack hanging on the wall of the wing - it must be sawed off, and under no circumstances try to break it off or knock it down with a chisel! I didn’t manage to cut it to the root; there was about 2 centimeters left. Unfortunately, I don’t have these photos, since I’m writing this article after the whole process. The next step is to disconnect all the wires from the gas tank - there are only three of them, two are removed (you need to remember which one from which socket) and to remove the third one - the negative one - unscrew the nut with a 7mm wrench.
Using a screwdriver, unscrew the fuel hose clamp and remove it; by the way, you need to prepare a jar in advance to drain the gasoline that will leak out of the hose, and also remove the air hose.
Using a 10mm wrench, unscrew the nut of the gas tank clamp,
then open the gas tank flap from the outside, unscrew the cap and, using a flat screwdriver, carefully remove the rubber gasket.
Now we can carefully remove the gas tank. You need to put some piece of rubber in the spare wheel niche, for example, I put a wheel tube. We first install the gas tank, determine where it contacts the body, then take it out, put pieces of rubber (or leather) in these places, and install the gas tank back. We secure it with a rubber tie from the spare tire.
We bend the aluminum part of the hose (without fanaticism, of course), and connect the fuel hose back.
To connect the wires, they must first be extended and insulated. But instead of the old air hose, we use a new one, and be sure to make a loop (as in Fig. 6) and then insert it into the leftmost hole of the rear shelf,
and stick it out through the very right one, there we again make a loop and take it out into the standard hole “outside”.
By the way, to prevent it from falling back, you need to either glue it, or use electrical tape, or melt the end a little with a lighter. The large hole in the rubber needs to be plugged with something; I used two wooden blocks with holes for bolts. That's the whole procedure.
Now it's time to talk about the shortcomings. The first one comes out from the location of the gas tank - you can only fill it with gasoline when the trunk is open, and after refueling, there will be a slight smell of gasoline in the cabin for three minutes. Second, it is advisable to have an alarm connected to the trunk, so that the dumper will no longer have the desire to open the trunk lock. Third - the spare wheel does not fit into the niche of the gas tank, there are two options - let it lie in the middle of the trunk or, as I did, sawed off the base part of the reversing light and installed LED strips there, as a result the spare wheel fit, but a little crookedly.
Seat belt warning light VAZ 2110
The seat belt warning is an interesting option in a car. When the seat belt alarm is installed, they want to turn it off, and when it is not there, they want to turn it off. In connection with the increase in fines for not fastening seat belts, some owners of dozens are thinking about installing such an alarm.
Faulty fuel pump relay as an anti-theft remedy to protect the car
Every car owner fears for the safety of his car and tries to prevent it from being stolen as much as possible.
This is the reason why motorists spend a lot of money on purchasing alarms and other security systems for their own cars. But even this does not provide a full guarantee that the car will not be stolen. But why buy a security system at a high cost if it is completely ineffective?
One way to protect your car from theft is to install a previously damaged fuel pump relay in it. The meaning of this method of protection is quite simple. When parking the car, you just need to remove the working relay from it and replace it with the faulty one. The result will be that when trying to steal, car thieves will face a problem, as they simply will not be able to start the car. The reason for this will be the fact that the engine simply will not start, because the damaged relay will refuse to start the fuel pump. This means that a spark from a candle will not be able to ignite anything. You can make this anti-theft system yourself.
Step 1. Find the fuel pump relay in the car. The first action you need to perform is to find out the location of this relay in the vehicle structure. To do this, you need to open the safety block, and having found this relay, remove it.
Stage 2. Detection of the relay power contact. The next step will be to examine the wiring in search of the contact from which this relay receives power at the moment when the key is turned in the ignition switch. The easiest way to determine this is to use a screwdriver with an indicator or a test lamp. When using these devices, it is worth checking all the existing teeth in order to determine which one will provide power to the pump.
Next, you should remember or write down the designation of those contacts from which power will not be supplied. This is determined by using an indicator screwdriver. It is worth checking all the contacts on the board into which the desired relay should be inserted. The contact on which the screwdriver does not light up should be used to create an anti-theft device.
It is worth taking into account that power will only be supplied when the ignition key is turned. Stage 3
Relay failure. Now it’s time to put the relay in an inoperative state, for which you will need to break off the contact through which power is supplied, which was determined using an indicator - a screwdriver. It's quite easy to break it off - you just have to move it from side to side
Stage 3. Relay failure. Now it’s time to put the relay in an inoperative state, for which you will need to break off the contact through which power is supplied, which was determined using an indicator - a screwdriver. It's quite easy to break it off - you just have to move it from side to side.
Now the driver has an effective remedy against car thieves in his hands. Due to the fact that there will be no power to the relay on the board, the motor simply will not be able to start. There is a very high probability that scammers will not be prepared for such a turn of events. Yes, if they are professionals, they will still be able to establish the cause, but for this they will need a slightly longer amount of time. In addition, if your car is also equipped with a standard alarm device, this can permanently discourage car thieves from messing with your car.
Bottom line. This type of homemade anti-theft device can become an indispensable option if you have to abandon your car in an unfamiliar parking lot. By using this device, you can have peace of mind while you are parked. Despite some inconveniences associated with the fact that the relay will have to be replaced every time, the safety of the car is worth it, and financially it is not that expensive.
Rain is a joy for us. Test drive of Viatti Bosco H/T V-238 SUV tires
See all photo news >>
Design and operation of a fuel tank in a car
Lada Priora Sedan 16kl Kvartsukha Logbook REPLACING THE FUEL FILTER
The fuel tank is one of the main components of any car. Even if this car is refueled with gasoline or diesel, it must have a gas tank, because otherwise there will be nowhere to fill the fuel
Also, for obvious reasons, it is very important that the gasoline container is sealed, durable, located in a protected location and has a fuel tank cap with a lock.
Volume and materials for the manufacture of fuel tanks
Fuel tank
Let's start with the fact that the volume of the fuel tank in passenger cars is on average 55-65 liters (of course, it can be 35 liters or 85). Regardless of the class of the car, the fuel used and other characteristics, this displacement should be enough to cover a distance of 500 kilometers or more.
Materials for the manufacture of fuel containers in cars are divided into three types:
- Steel
- Aluminum
- Compressed polyethylene (plastic)
Regarding these three materials, modern fuel tanks for passenger cars are made of plastic. This is done due to the fact that plastic is not susceptible to corrosion and its molecular density is ideal for flammable substances. And to increase the strength of the gas tank, the walls are thickened with additional layers, so the output is an excellent sealed container for fuel that can withstand high pressure.
As for metal gas tanks, sheets of metal are welded during their production. These gas tanks are best suited for diesel. Aluminum materials have taken root best in the use of liquid gas.
The principle of the fuel tank
The next thing that needs to be said is that gas tanks nowadays come in different shapes, these features depend on the car model, engine size and other similar differences. At the same time, the principle of operation remains similar, there are only small differences that do not affect the overall operation.
Car tank design
The part to start with is the fuel tank cap with a lock and the hatch that closes it. Immediately behind the cap there is the only part of the system that is visible to the naked eye - this is the neck of the fuel tank, through it, or rather through its filler part, fuel enters the “gasoline storage”. The location of the neck is usually the right rear of the car (above the rear fender). To prevent excess air and other debris from getting inside, you need a fuel tank cap with a lock.
Next, the neck is connected to the gas tank pipeline. The diameter and cross-section of the pipeline are such that the filling capacity is 50 liters of fuel per minute (quite an impressive figure, considering that the total volume of the fuel tank is about 55 liters).
Then there is a special fuel intake, thanks to which fuel enters the system and its excess is removed back into the fuel tank. It is also equipped with a mesh (filter) for additional purification of gasoline.
The next extremely important part is the electric fuel pump. With its help, gasoline enters the general engine system at the required pressure. The pump is also equipped with a special sensor that shows the level of gasoline filling the fuel tank. If there is little fuel left, the corresponding light on the dashboard will light up. It must be said that this must be monitored, because if there is constantly not enough gasoline, the pump will run idle and may burn out.
Ventilation system
Another factor in a properly functioning car is the pressure in the gasoline supply system and fuel compartment. This indicator is monitored by the fuel tank ventilation valve. It removes excess air remaining after refueling and balances the pressure caused by heating the fuel.
If the pressure is abnormal, the fuel tank may become deformed, which will lead to a decrease in volume or the impossibility of further refueling. It may also happen that under too much pressure the gas tank will simply burst. The least sorrow in such a situation is when the fuel tank cap fails, but in any case the pressure must be monitored.
conclusions
In general, the design of a fuel tank is not a simple thing. There are many nuances depending on weather conditions, gasoline quality, and mechanical damage that affect the operation of the entire fuel tank system. If you ignore any breakdowns associated with this mechanism, then in the end there may be big problems with the car, and in some cases, fuel detonation. So if you notice a breakdown, you must urgently contact a service center or auto repair shop, even if only the fuel tank cap with a lock is broken.
Engine crankcase protection VAZ 2114, 2110, 2109
July 31, 2022 — 14:31
Factory engine crankcase protection for VAZ 2114, 2110, 2109, of course, requires improvement. Most often, such cars have small metal plates installed in this capacity, which have a thickness of approximately 0.7 mm. Naturally, such parts will not be able to fully protect this vehicle mechanism, as well as the gearbox, from a wide variety of mechanical damage.
The only functional benefit that such elements can achieve is a slight improvement in aerodynamics and preventing dirt from entering the engine compartment.
Only an incredibly careful car enthusiast can be satisfied with such safety, because it is quite suitable for careful movement on city roads. But, having driven along the potholes and bumps of country roads, you can find that, unfortunately, there is nothing left of such factory protection.
In order to check whether you really got high-quality protection, you need to apply the acid that is on the battery to it, and then wipe it. If there are no traces left on the part, then it is really high quality. True, this medal also has two sides.
After all, using such a test it is impossible to determine in any way how the device will behave several years later or after the first winter. And, to be honest, there is practically no guarantee on this score; the only thing that remains is to simply trust the specific crankcase protection of the VAZ 2114 or another VAZ model.
This type of protection has some other disadvantages that you should know about before installation. So, all factory cars are equipped with special mudguards, which must be matched with plastic shields that cover the sides of the engine compartment. After removing the mudguard, it is necessary to install the shields in place. But, unfortunately, not a single purchased device is characterized by this. As a result, you can observe that the lower edges of the shields dangle loosely, which is bad.
But, it is worth noting that some options for crankcase protection for the VAZ 2109 and many other VAZ models still require installation even without removing the mudguards. Installation assumes that fastening must be done directly on site. And this option is not without its drawbacks.
The fact is that due to the protection installed in this way, the engine is blown from below quite poorly, and the entire space that is located between this device and the mudguards will constantly be filled with dust and dirt. The positive point is that all problems of this kind are solvable.
Of course, if you still decide to install engine crankcase protection on a VAZ 2110 or on any other VAZ car model, then you need to take very seriously the choice of truly high-quality products that will have only the best strength characteristics.
You can make a purchase on our website in a matter of minutes. There are 2 purchasing options: either you advertise and the supplier will contact you within some time, or you take the initiative into your own hands and contact the supplier yourself. But it is worth noting that both the first and second options are win-win, because in any case you will receive a good part that you need.
Types of protective caps on the gas tank for VAZ 2101-2107
Plastic caps with a key are the basic and simplest protection against gasoline drainage. According to statistics, on average, an experienced attacker needs less than 1 minute to open this security accessory. Its cost is not high, but so is the degree of protection.
Aluminum cover with a code - this protective accessory is convenient because to open it the car owner does not need to constantly carry an additional key with him, and these covers are stronger in physical properties than plastic ones. However, attackers have found a way to break this protection in 2-5 minutes. In addition, there is a large number of defective lids, which is due to many fakes. The metal is very soft, brittle and can crack with little physical impact. The cost of this cover with a code is 50-100% higher than the plastic one.
Bypassing the standard Renault Logan immobilizer using a car alarm via LIN
Connections for deactivating the standard immobilizer during autostart are made in the black connector of the BCM unit.
In the same connector there is a control wire for the immobilizer status LED on the dashboard - pin No. 32. When starting the engine using a keyless algorithm, this wire must be broken using a relay. The relay is controlled by an additional channel. We turn on the channel while the ignition is turned on (using the table of timer channels).
DATA (LIN) - pin 36, standard immo LED - pin 32
LED - purple, DATA LIN - white
Enter the 21st level of programming and do the following.
Security sensor for gas tank
Sometimes it happens that thieves drain gasoline from a car. This is especially convenient to do in classic Zhiguli models, where access through the neck of the gas tank is not protected by anything. Installing a lid with a lock or even a code lock does not solve the problem due to the fact that this design is quite easy to break into. It is more advisable to connect the gas tank filler hatch to the security alarm system, which will notify you of an attempt to drain gasoline. To do this, you need to add an additional sensor installed in the fuel refueling compartment.
When choosing a sensor type, it is necessary to proceed from the requirements of reliability, safety and ease of installation. Designs on reed switches are ideal for this. Possessing tightness and a large guaranteed number of operations, they satisfy all the listed requirements.
The sensor used as a basis is used in building security alarms and is installed on windows and doors. Models such as IO102-2, IO102-14 and IO102-16 are suitable for this. The sensors are made in the form of two independent housings, one of which contains a magnet, and the second contains a reed switch with wires brought out for connection.
The finished design requires a little modification. The fact is that they use reed switches with normally open contacts. When arming, these contacts close when a magnet is approached, and in the car security system, all sensors are in an open state. The modification is carried out by replacing the standard reed switch with the KEM-3 model with changeover contacts. Only a pair of normally closed contacts is used.
You need to dismantle the purchased housing and replace the old sensor reed switch with a new one. To do this, the single terminal of KEM-3 is shortened to fit the dimensions of the housing. Wires are soldered to the other two contacts. It is advisable to choose them with silicone insulation as they are more frost-resistant. Soldering points are sealed with heat-shrinkable tubes.
A new reed switch is inserted to replace the old one, and the housing is put back together. Checking the correct installation consists of detecting a short circuit with a tester connected to the sensor wires when a magnet is brought to the modified housing with a reed switch.
The magnet is attached to the inside of the gas door using epoxy glue. Before gluing, both surfaces must be lightly cleaned with coarse sandpaper and degreased with acetone. Before the resin is completely cured, you need to fix the parts with plasticine. The sensor with a reed switch is mounted in the same way in the neck niche opposite the magnet. When the hatch is closed, it is necessary to maintain a distance between the two parts of the structure within 1.5–2.5 cm.
The wires are led out through the hole into the luggage compartment and connected in parallel to the trunk opening sensor. The tester checks the reliability of the reed switch operation at different positions of the gas tank door. It is useful to install a return spring on it, which, after an attempt to unauthorizedly drain gasoline, will return the door to its original state and turn off the alarm signals of the security system.
Now the car is completely and reliably protected from attacks on gasoline.
Installing an electric lock on the trunk and gas tank flap in a car
In modern conditions, the possibility of unauthorized access to a car is increasing. Very often, intruders enter the salon and steal personal belongings. But such theft schemes have already faded into the background. Some thieves manage to siphon gasoline directly from the fuel tank. The task for such people is also simplified by the fact that on many cars the gas tank flap does not close. And a mechanical trunk lock cannot provide protection against such cases either.
When thieves get into a car, they can steal personal belongings and documents
To protect themselves and their cars from thieves, motorists began installing electric locks on the trunk. Using the Lada Granta as an example, you can see how to install a system with which the trunk will open by pressing a button on the alarm remote control. To do this, you must follow a certain algorithm. The first step is to find the wire in the wiring of the driver's door threshold that is responsible for controlling the trunk to open. It can be determined using a tester if you don’t have instructions at hand. When you press the trunk button in the cabin, a voltage of 12 volts should appear. Most often the wire is green and has a black stripe in the center.
As soon as the wire is found, you need to cut it and place a 5-pin relay in the center. It can be purchased with a connector separately or you can use the one that is included with the alarm. In order to create 12 volt power, the white and red wires must be connected. The constant plus is taken from the fuse block. Alternatively, you can remove the low beam control panel and connect to the pink wire. The yellow wire must be connected to the green one. The other end must be twisted with the blue cable. The black wire that comes from the relay must be connected to the black and yellow wire of the alarm channel. The second contact of the interior button is also connected here.
When the system is connected, the trunk can be opened from the alarm key fob
The first contact of the button should be connected to the negative of the on-board network. For these purposes, you can place the terminal under the nut of the standard fastener. As a result, when you press the interior button, the trunk will always open. You can open the cover by pressing the key on the alarm key fob. The operation will not require removing the alarm from the car.
Fuel theft protection . The car owner can also provide protection against theft of fuel from the fuel tank. To do this, install an electromechanical lock on the hatch. The work can be done by a service center, but if you know the design, you can do it yourself. The first step is to purchase a lock with an electromechanical system. For example, the Daewoo Nexia model is often found on the market. The cost of such equipment is 700 rubles. In the kit you need to purchase a lid opening button, wires, a 4-pin relay, a spring from a hairpin and a cardboard template. Work on installing the lock is carried out in a certain order:
To prevent fuel from draining from the gas tank, you can install an electric lock on the hatch
1) you need to drill 3 holes to attach the lock and rod. On the Xray model, a cardboard template and wire can be used to access the lock mechanism from the inside of the neck. Inside the lid you need to put a spring from a woman's hairpin. A hole is made inside the gas tank flap to secure the lock. The control key itself should be in the interior. It should be connected to a 4-pin relay. This is where the work ends. If you wish, you can contact a workshop to have specialists remove the bulge on the fuel tank cap. In this way you can protect yourself and your car from fuel theft.
Bottom line . The car owner can protect himself from thieves on his own. To do this, you can install an electric lock on the trunk and gas tank flap.
Repair of studs on the gas tank of a VAZ 2110
The fuel pump is attached to the gas tank using studs. They, like any other part, wear out and break over time. As a result, the driver is forced to repair them. For repairs you need the following:
- bolts for 8, 25 mm long (8 pieces);
- file;
- hacksaw for metal;
- M5 tap;
- electric drill with a 4.5 mm drill bit.
Stud repair sequence:
- Use a hacksaw to cut off all the old studs. The surface of the gas tank underneath is processed with a file.
- Now the pressure ring from the fuel pump is applied to the gas tank. This ring has 8 holes. New holes are drilled through them in the gas tank. In this case, it is necessary to ensure that the drilled holes do not coincide with the holes from the old studs.
- In the resulting holes, an M5 internal thread is cut using a tap.
- 8 bolts are screwed into the holes so that their heads are inside the tank.
- After this, the tank can be installed in place and the fuel pump connected to it.
Protection against gasoline drainage VAZ-2107 “Classic”
Draining gasoline on classic cars is the most pressing problem - the gas tank flap is not blocked in any way, and the caps available for sale, either with keys or with a combination lock, only slow down thieves for a couple of minutes. One way to combat this is to install a homemade fixation cable on the hatch.
To do this, at a building materials store we buy a furniture bolt with nuts and washers (you can take a bolt for fastening a chrome bumper trim, for example), a corner with holes for the “tongue”, a carabiner, a plastic-braided cable, and cable clamps. Also, we need a stiff spring.
We try it on and drill a hole in the hatch for the bolt, screw it together with the angle onto two nuts. We cut the cable to length, taking into account the spring, so that when the hatch is closed, it is pressed firmly enough and cannot be bent with your fingers. We make loops at both ends and put a carabiner into one of them. We insulate protruding metal parts with electrical tape or heat-shrink tubing to prevent sparks.
We push the other end of the cable through the hole in the boot where the gas tank bypass valve tube comes out or cut a new one.
We hook the spring to the bar with the hole from the gas tank casing or to any other place.
Ready.
The cover along with the bolt head can be painted to match the body color.
Almost unnoticed
After one unsuccessful attempt to drain the gasoline, the thieves finally left behind.
Chips from a screwdriver or awl
Instructions for disabling immo
If you don’t know how to turn off the alarm on a VAZ 2110, then first of all you need to disconnect the plug from the protection. This way you will let the computer know that the immo is physically absent. After disconnecting, you must erase all information about the device from the control unit’s memory. It would seem that everything is simple, but in practice this procedure is not clear to all car owners. So, how to disable the immobilizer on a VAZ 2110?
There are several options - cut the wires or reflash the device; the procedure for cutting the wires is as follows:
- First you need to find the system control unit. As we have already reported, in most cases it is installed behind the radio, in the dashboard.
- Feel for the connector with your hand and disconnect it from the unit. The connector itself has 20 pins.
- Next, you should first count contact number 9 from the plug, then contact 18. Take these wires and cut them with a knife. Next, these two wires must be connected to each other and insulated.
- After removing the device, it is necessary to restore the line through which diagnostics are carried out. To do this, you need to install a jumper that will restore communication between the control unit and the diagnostic block. When you cut the wires and then connect them to each other, this is how you restore the K-Line. After all the manipulations, the connector is put in place.
Correct cutting and connection of wires for disconnection As for flashing the device, for this you will need to prepare a soldering iron with a computer in advance (a laptop will do), as well as a special PAK loader programmer.
Once you have everything in hand, you need to do the following:
- Remove and disassemble the control unit.
- After disassembly, you need to find the controller plug and connect the PAK loader to it. Having done this, you can consider the standard firmware that was installed during the production of the car.
- Similarly, it is necessary to read data through the EEPROM output.
- On a laptop or desktop computer, you must save the previously read firmware installed at the factory.
- You need to upload a new, clean EEPROM into the control unit via the connector.
- Then you can disable the bootloader, assemble the controller and install the device in place.
If your car has a ROM sealed into the control unit, you will need to unsolder it and then perform chip tuning. If you don’t want to do this, then there is a way out - you can use a utility, for example, Combiset, which has the option of clearing EEPROM without the need to resolder the board.
An immobilizer is a vehicle’s protection against theft; if you install an alarm system with auto start, then an immobilizer bypass is sold, but experts do not recommend simply picking the brain and removing it from it.
Installing a lock on the tank flap VAZ 2101-2107
You can install a lock like a mailbox, but these locks can be opened with almost any powerful screwdriver or wrench. Personally, when I lost my key and came to a car service for advice. The master broke the internal insert in 15 seconds and opened the hatch.
Some car owners install an electric lock and place a button directly in the passenger compartment to open the tank hatch. Let's imagine that an attacker wants to drain gasoline and sees that there are no locks, but the hatch does not open as usual. Most likely he will try to pry off the hatch with a screwdriver or crowbar. As a result, you will receive a scratched and bent rear wing element, the cost of which will cost much more than the cost of gasoline. Agree, this is not a very bright prospect.
There is a way to install an alarm sensor on the gas tank flap. In principle, it’s a pretty effective way to protect your gasoline from being drained. However, if thieves are constantly operating in your area, then in the end, the alarm going off every night can infuriate all the neighbors of your house and ruin your relationship with them. Personally, my choice in solving this issue fell on a metal glass, which I installed in the neck of the tank. After that, for more than a year, no one tried to drain the gasoline from my seven, although earlier in a week I could come to an empty tank up to 3-4 times in a row. In addition, I took several photographs of the already installed glass in the neck of the VAZ 2107 tank. Scheme of the design of the glass to protect against gasoline drainage. After watching a bunch of videos on YouTube on the Internet and reading quite a few articles, I realized that many craftsmen make this glass either from an old stabilizer bar or from a metal pipe of different diameters. Personally, I made my glass from 2 plumbing pipes. You can see the diagram in the figure. I will explain my choice of this design by the following factors. First I made a regular 150 mm glass from a pipe. When I first poured gasoline from the pistol, I encountered a problem that the fuel under high pressure did not have time to escape and the pistol was constantly firing. The use of a longer glass, as well as an increase in the diameter and number of holes, would improve the passage of fuel. However, in this case it is necessary to always not add a decent amount of fuel. In my case, I often go to the country and the distance between gas stations is quite long, especially in rural areas. It is for this reason that I radically changed the design of the glass and additionally welded a tube of a smaller diameter to the bottom, where I placed a pair of wires at the ends to make it impossible to insert hoses of any diameter. In this case, when filling, the fuel goes out with a bang and does not have time to fill the glass even with strong fuel pressure. The design of the glass does not allow it to damage its weak points at the place where the wire is welded using either a crowbar or another tool and, accordingly, to get to the desired fuel.
Didn't find the information you are looking for? on our forum.
Important nuances
When replacing the gas tank and the studs on it, we must not forget about several important points:
- Fire safety. Work on the gas tank, as well as on any part of the vehicle’s fuel system, should only be carried out in a well-ventilated area or in the open air. There should be no sources of open fire or flammable materials nearby. And, of course, you should always have a fire extinguisher at hand;
- If a car owner is going to change the tank on his car, he needs to try to use up as much gasoline as possible. It's simple: the more gasoline is consumed, the less it will remain in the tank and the easier it will be to remove this tank;
- You can change the studs only on a completely dry gas tank. As mentioned above, it takes at least 3 days to completely dry the tank. And this is a situation in which haste is categorically unacceptable. Even if the tank looks dry, this does not mean that it is. We should not forget about gasoline vapors that may remain in the tank. If this is so, then any accidental spark from the file will lead to the ignition of these vapors and the explosion of the gas tank;
- Before screwing new bolts into the gas tank, it is recommended to treat them with anaerobic sealant. The best option for this is the professional sealant THREADLOCKER, which improves the tightness of the threaded connection and reliably protects it from corrosion.
Replacing the tank is not a very complicated procedure. Even a novice car enthusiast can do it. To successfully complete this operation, he will need not so much repair skills as physical strength: removing a large tank with remaining gasoline from under the car is quite difficult. And if the car owner cannot boast of a strong physique, then at this stage he cannot do without an assistant.
Protection against gasoline drainage Club of classic VAZ-2107, VAZ 2106 lovers
Fuel tank volume Renault Logan
The idea with a limit switch or a reed switch is good, but it did not suit me due to the lack of an alarm on my car (like many classic drivers). I don’t install an alarm because I think that no one but me needs this car. Even if they climb in for a ride, they won’t be able to start it (there are mechanical anti-theft devices), and there’s not much to steal from it.
The idea of removing the tank and moving it to the left wing, or welding the neck inside the trunk, or welding a mesh into the neck did not work, due to the high labor intensity of removing and washing the tank, etc.
Having examined the filler neck of my car in more detail, I discovered that there was a small step of 1-1.5 mm in it. width. (Marked in the photo with an arrow.)
My car is 92. therefore, the neck is with an external thread, but I looked at younger cars that have a neck with an internal thread; such a step also exists.
Then the pneumatic cylinder body was drilled out from the shoulder side so that the filling nozzle could fit into it freely. On the other side, a piece of pipe of the same diameter is welded to increase the length. The bottom of the resulting glass was tightly welded and using a grinder and a 5mm drill, many holes were made in the bottom and walls of the glass.
I inserted this glass into the filling neck, and so that it could not be taken out from there, I opened it along the edges, closer to the walls of the neck. After that he was stuck there tightly.
True, later it had to be taken out from there using a curved reinforcement because... At first I didn’t make enough holes, the gasoline didn’t have time to flow through them and the refueling nozzle shot off. It was VERY difficult to get him out of there. So you need to immediately make as many holes as possible, at least 2 times more than in the photo, because they show the original version.
The glass in the neck looks like this:
Of course, not everyone has a housing from a KamAZ auxiliary brake pneumatic cylinder lying around in their garage, but you can use any pipe of a suitable diameter instead. Somewhere I even saw that a similar glass was made from an old shock absorber. The main thing is that the resulting glass clings to the step in the filler neck.
Therefore, a sketch of a glass with dimensions is attached:
It is advisable to take the tube for the glass from a soft metal, and the core from a hard one, in order to eliminate the possibility of sparks during core work.
After such protection, there were several attempts to drain, but the pioneers did not get gasoline, the hose did not fit into the tank... After a while, even the attempts stopped, apparently all the drainers in the area already knew that they would not be able to drain my car.
True, such protection has a small disadvantage. It is necessary to ensure that the level of gasoline in the tank is below the level of the bottom of the glass. In my case it turned out to be about 20 liters, which is enough for city driving. And on a long trip, you can fill up the tank full, but you will still run out of gas.
In my opinion, the combination of such protection with a limit switch or reed switch, for Zhiguli cars with alarms, makes the car practically impossible to drain.