Adjustment methods
Currently, there are three main methods of tensioning the alternator belt in cars:
- Using a special arc-shaped strip. In this case, the generator has two mounting points. One of them is an axis around which it can move within small limits. The other is the nut on the adjustment bar. If you release it, you can move the pulley to the required distance. This method is now considered obsolete. It is mainly used on VAZ classics.
- The generator is moved by rotating the adjusting bolt. This system has become widespread in cars of the tenth family.
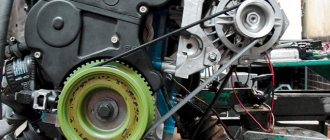
- Using a tensioner. This is a special movable roller that rests on the belt between the generator and crankshaft pulleys. It is equipped with a screw mechanism. By rotating it, you can adjust the pressing force. This is exactly the kind of alternator belt tensioner on the Lada Kalina.
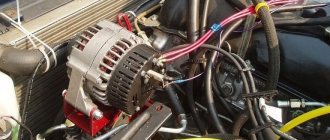
Generator Lada Kalina
Lada Kalina cars are equipped with three-phase generators that produce alternating current; to produce direct current, a rectifier unit is included in the generator circuit.
AvtoVAZ equips VAZ 1118 cars with generators of the type 5132.3771
or
9402.3701-06
, there are many different manufacturers producing spare parts for VAZ cars.
The generator for the Lada Kalina can be of different power; the industry produces current sources of 85, 100, 90, 115, 120, 135 Amperes.
Among the most famous manufacturers of VAZ parts are:
- Pramo;
- StartVOLT;
- KZATE;
- LKD (China);
- Eldix (Bulgaria);
- ISKRA (Slovenia);
- BATE (Belarus);
- Bosch.
Advantages of a tensioner
Why weren't designers happy with the previous adjustment methods? Why did they add an extra video? It's not just about convenience. The tensioner significantly increases the service life of the generator. Without a roller, the entire load falls on its bearings. If the belt is tensioned normally, then there is nothing to worry about. In this case, the generator will last many thousands of kilometers. However, very often car owners overtighten the belt, and this is bad.
The load on the bearings increases many times over, so they quickly fail. In itself, this is not so scary and expensive, although repairing a generator is quite labor-intensive. But the car owner does not always recognize the breakdown in time. The bearings gradually “break”, the rotor moves and begins to cling to the stator winding. The result is the need to purchase a new generator. Of course, the Kalina generator belt tensioner pulley can also fail, which happens quite regularly, but that’s only 400 rubles, not twelve thousand.
Design
The main element of the tensioner is the pressure roller. It is made of plastic, and a sealed bearing is pressed inside. The roller is mounted on its own bracket, which, with the help of a threaded rod, can move in a vertical plane. This ensures the required moment of pressure on the belt. To prevent the bracket from moving spontaneously when the car is moving due to engine vibration, the pin is tightened on top with a locknut. The entire structure is placed on the generator bracket. There are two holes in it for attaching the Kalina generator belt tensioner.
Most common faults
During operation, the surface of the roller is constantly in contact with the generator belt. In addition, it is in continuous rotation, which places additional demands on the reliability of its bearings. The tensioner bracket is also subject to heavy load. Hence the main problems:
- Bearing wear. It simply runs out of service life or becomes unusable due to dust and dirt getting on it.
- Damage to the work surface. As already mentioned, the roller itself is made of plastic. Despite its high wear resistance, it often cannot withstand loads. This manifests itself in the form of scratches and chips, which quickly render the alternator belt unusable.
- Misalignment. This means that the belt and tensioner are at a certain angle to each other. Alignment can be disrupted in both the horizontal and vertical planes (due to the curvature of the bracket). This always causes rapid wear of the belt and the roller itself.
Often the cause of the malfunction is the driver himself. When trying to make adjustments, he forgets or does not loosen the locknut enough. As a result, the hexagon of the stud breaks off, and the Kalina generator belt tensioner fails.
Rotor and stator repair
First of all, you will need to examine the stator and rotor windings for breaks. To do this, you do not need to remove the generator from the car. It will be necessary to dismantle only its diode bridge. This will require a two- or three-jaw puller, as well as an artificial frame borrowed from a cup puller.
Carefully straighten the wires in the winding and remove the diode bridge. To avoid getting confused during reassembly, you need to mark with a marker the placement points of the front and rear casing of the generator. Using a size 8 socket wrench, unscrew the 4 bolts that hold both trims in place. Carefully remove the front trim using a flathead screwdriver. After this, slide the rear casing and remove the connecting bolt along with the insulating washer, as well as the plastic plug from the bearing.
To check you will need an ohmmeter tester. Having connected its plugs to the rotor rings, check the winding for breaks. In this case, the winding resistance should be 5-10 Ohms. After this, connect the tester plugs to any of the slip rings and to the rotor. Now you need to check the winding for short breaks to ground. If the winding has no breaks and is working correctly, the tester will show the highest resistance value.
In the same way, it is necessary to connect the plugs to the stator and check the winding for breaks. If they are absent and the part is working properly, the tester will show extremely low electrical resistance. When checking for short-term ground breaks, the tester should also show the highest electrical resistance value.
To ensure proper operation of the rectifier unit, its diodes must transmit electric current in only one direction. If they conduct electricity in 2 directions or do not conduct it at all, then the diodes have become unusable and need to be replaced.
Attach the tester plug with a negative value to the diode itself, and the plug with a positive value to the part body or plate in which it is located. A functioning diode will not conduct electric current, and the tester will show the highest resistance value. After this, you will need to swap the plugs and perform the test again. If the diode is working correctly, the tester will show electrical resistance. In the same way, it is necessary to test the remaining diodes in the diode bridge circuit.
Symptoms of a problem
Damage to the tensioner is usually easy to diagnose. It is often noticeable visually. Running the car for a short time without an alternator belt helps to identify the problem. This often allows the damage to be localized. You should think about replacing the Kalina generator belt tensioner in the following cases:
- Presence of traces of rust and corrosion on the roller axis.
- A characteristic whistle when the engine is running.
- Short service life of the alternator belt.
- Curvature of the roller relative to the belt.
Prevention
As a measure to prevent breakdowns, experienced specialists recommend periodically performing maintenance on electrical circuits. This requires a complete review of all wires and disconnectors twice a year for damage to the braiding and oxidation of copper contacts. Damaged parts or loose joints must be replaced with new ones.
The pinout of panels of the Kalina car from Lada is distinguished by its simplicity and reliability. There are no complex controllers or blocks here. Consequently, system maintenance and troubleshooting do not require in-depth knowledge of electronics or expensive tools.
Source
Replacing the tensioner
The device consists of several elements, each of which is removable. Therefore, the need to replace the Lada-Kalina alternator belt tensioner assembly does not arise so often. As a rule, it is associated with mechanical damage to the bracket and stud.
Replacement work must begin with preparing the tool. No special variety is required; keys 8, 13 and 19 are sufficient. Replacement is carried out in the following sequence:
- Use a 19mm wrench to loosen the tensioner locknut.
- Using a 8 key, rotate the pin clockwise. Here you need to be careful and not put in much effort. If rotation is difficult, it is better to loosen the locknut a little more.
- The pin is released until the roller no longer acts on the belt.
- By unscrewing two 13mm bolts, you can completely remove the tensioner.
Here you need to pay attention to one point. Bushings are inserted into the tensioner mounting holes. When removed, they often fall out and get lost, and they may not be present on the new tensioner. Bushings are necessarily included in the kit, but not everyone knows about their existence, so they don’t check it when purchasing. Installation of the Kalina generator belt tensioner is carried out in the reverse order. The pin is tightened with a force of 0.18 kgf/m.
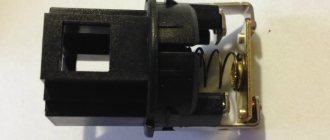
Brush wear
As the generator brushes wear out on the Lada Kalina, charging begins to disappear - the indicator of insufficient battery charging periodically lights up (blinks) on the instrument panel.
The brush assembly of the VAZ 1118 generator is located in the relay-regulator, so the entire part is changed entirely.
The wear of the brushes can be easily measured - they must have a minimum length of at least 5 mm.
Forced tuning
Unfortunately, since 2011, designers have abolished the tensioner on Kalina. They were guided primarily by considerations of economy, but they did this without any modification to the generator. In practice, cases of its premature failure immediately became more frequent. Therefore, owners began to install the tensioner on their cars themselves.
It's not very difficult to do this. True, you will have to purchase not only the tensioner itself, but also the generator bracket. The only problem is removing the standard belt. It is very difficult to remove because it is very tight at the factory. You can simply cut it, as you will have to buy a new one. The fact is that the Kalina generator belt without a tensioner has a size of 820 mm, but 880 will be needed.
Search
How to remove a generator from a caliber
Replacing a generator with Kalina
It seems there is nothing difficult in removing and replacing the Lada Kalin generator.
Replace the 16 cell generator. You will need a warm garage with a pit and a set of keys: 13, 19; heads: 8, 10 and 13.
Be sure to remove the terminal from the battery.
Remove: the plastic engine guard and washer reservoir (after all, it would be better to unscrew a few extra nuts than expose them later). Therefore, disconnect the connectors from the washer motor and use buttons “8” and “10” to unscrew the nuts that secure the barrel. The barrel is screwed in 2 places.
Then we remove the generator tape and remove the chip from the “genes”.
If there is protection on the bottom of the engine, remove it. Disconnect the generator wires later.

