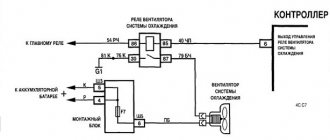
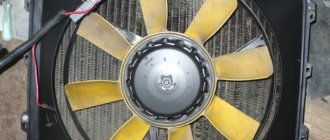
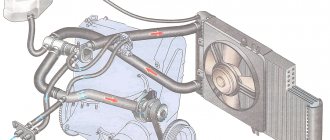
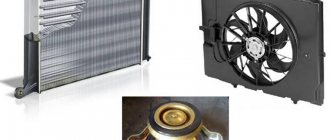
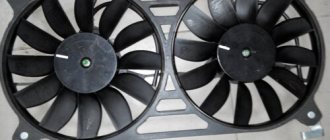
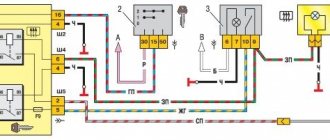
All the main electrical circuits and modifications for connecting the liquid cooling fan (CO) in VAZ cars of various models are provided. What is the essence of VO’s work? An electric motor with an impeller on a shaft is installed inside a rectangular metal frame, with which it is attached to the back of the radiator. When voltage (12 V) is applied to the contacts of the drive, it begins to work, rotating the blades and creating a directed stream of air, which, in fact, cools the antifreeze or antifreeze.
If the cooling fan does not work, do not rush to contact a car service. You can determine the cause of the malfunction yourself. Moreover, it is not at all necessary to have special skills for this - just study the reference material from 2shemi.ru and follow the instructions for checking/replacing it.
Fan connection 2108, 2109, 21099
Until 1998, on cars with the old mounting fuse block 17.3722 (finger type fuses), relay 113.3747 was included in the fan circuit. After 1998 there is no such relay.
Also, before 1998, the TM-108 switching sensor was used (the closing temperature of its contacts is 99±3ºС, the opening temperature is 94±3ºС), after 1998 the TM-108-10 with similar temperature ranges or its analogues from different manufacturers. The TM-108 sensor only works in conjunction with a relay; the TM-108-10, reinforced for high current, can work both with and without a relay.
Scheme for switching on the engine cooling fan on a VAZ 2109 with mounting block 17.3722
- Fan motor
- Motor start sensor
- Mounting block
- Ignition switch
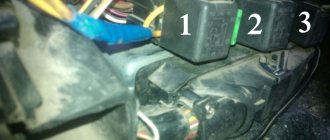
K9 - Relay for turning on the fan motor. A - To terminal “30” of the generator
Scheme for switching on the engine cooling fan on a VAZ 2109 with mounting block 2114-3722010-60
- Fan motor
- Sensor 66.3710 for turning on the electric motor
- Mounting block
A - To terminal “30” of the generator
Description of DTOZH and DVV
Where is the coolant temperature and fan activation sensor located in 2109 with an injector or carburetor engine, what should I do if the device does not work? First, let's look at the basic questions regarding the purpose, device and principle of operation.
Purpose and functions
The main purpose of the DVV is to activate and deactivate the ventilation device on the engine radiator in order to cool the power unit. The device turns the fan on and off based on the temperature of the liquid in the cooling system. On injection machines, this is DTOZH; turning the fan on and off is controlled by the brain according to the readings of this sensor.
As for the TOZh controller in the VAZ 21093, this device is intended to display readings about the antifreeze temperature on the car’s dashboard in the cabin. With its help, the driver can find out about possible overheating of the power unit.
Location
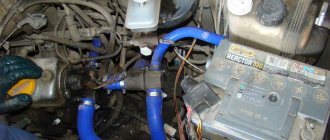
As for the location, in models 2108, 2109 and 21099 the DTOZH is located between the engine cylinder head and the thermostat, in particular, on the intake hose. The DVV is installed in the threaded hole of the expansion tank with coolant. If you look in the direction of travel of the car, the refrigerant container is installed on the right.
Principle of operation
First, let's look at the operating principle of the antifreeze temperature controller. This device is a thermistor-resistor that operates with a negative coefficient. The amount of resistance in this case can be measured as a result of a decrease or increase in the temperature range. When the car engine heats up, the resistance on the device decreases, and when the power unit cools down, this value increases. For example, when the engine is fully warmed up, the resistance value on the device is 180 Ohms, and at low negative temperatures (-40 degrees) this figure will increase to 100,700 Ohms.
When the driver activates the ignition by turning the key in the lock, the control module (ECU) begins to supply voltage to the controller using a resistor. The DTOZH itself, as mentioned above, is a thermistor; accordingly, the incoming voltage will change in accordance with the temperature of the liquid. When this value decreases, the control module analyzes this, according to which the required volume of fuel for injection into the cylinders is determined. As the car engine warms up, the volume of fuel used for injection will drop.
As for the DVV, it is installed in the negative cable gap, which is connected to the ventilator activation relay in the fuse box. When the temperature value increases to 99 degrees, a short circuit occurs at the controller contacts due to the bimetallic plate. As a result, the current through the device flows to a relay located in the block, from where it is supplied to the electric motor of the device on the fan, ultimately activating the latter (author of the video channel AndRamons).
In “Nines” produced after 1998 and equipped with safety blocks from the VAZ 2114, there is no relay in this section of the circuit. Therefore, the regulator itself is also mounted in the gap of the negative cable, but only the one that is connected directly to the fan. In this case, the closure occurs at a similar temperature. If the antifreeze cools, the plate opens the contacts, causing the electric motor to turn off.
If the cooling fan does not work
To drive the fan, a DC electric motor with excitation from permanent magnets ME-272 or similar is installed. Technical data of the electric fan and fan switch sensor:
- Rated rotation speed of the electric motor shaft with impeller, 2500 – 2800 rpm.
- Electric motor current consumption, 14 A
- Sensor contact closure temperature, 82±2 degrees.
- Sensor contact opening temperature, 87±2 degrees.
Useful: VAZ-2190 Lada Granta diagram
The cooling system fan may not turn on due to:
- electric drive malfunctions;
- blown fuse;
- faulty thermostat;
- a failed thermal sensor for turning on the cooler;
- faulty VO relay;
- broken electrical wiring;
- faulty expansion tank plug.
To check the VAZ fan electric motor itself, we apply 12 V voltage from the battery to its terminals - a working motor will work. If the problem is with the fan, you can try to repair it. The problem is usually the brushes or bearings. But it happens that the electric motor fails due to a short circuit or break in the windings. In such cases, it is better to replace the entire drive.
The BO fuse is located in the mounting block of the car's engine compartment and is designated F7 (20 A). The test is carried out using a car tester turned on in probe mode.
- In a car with a carburetor engine, you need to check the sensor - turn on the ignition and short-circuit the two wires going to the sensor. The fan should turn on. If this does not happen, the problem is definitely not with the sensor.
- For injection cars, it is necessary to warm up the engine to operating temperature and disconnect the sensor connector, disconnecting it from the vehicle’s on-board network. In this case, the controller must start the fan in emergency mode. The electronic unit perceives this as a failure in the cooling system and forces the fan drive to operate in constant mode. If the drive starts, the sensor is faulty.
Methods for checking DTOZH
How to check the TOZ index on your own? To do this, you can use one of several methods; diagnostics are performed using a multimeter.
- First, the negative probe of the tester should be connected to the cylinder head, and then activate the ignition by turning the key in the lock.
- Then, using a multimeter, you need to determine exactly what voltage appears at the output.
- If the controller is working, then the value of this parameter should be at least 12 volts, of course, if the battery is fully charged. If the diagnostics showed that the obtained values were lower, then you need to do repairs or change the regulator (the author of the video about diagnostics is the Mechanical Technician channel).
Another check option:
- To implement it, you will need to configure the tester in voltmeter operating mode. The measurement procedure should be carried out in the operating range from 100 Ohm to 10 kOhm. In addition, for diagnosis you will need a thermometer, and it is important that it can determine a temperature value of more than 100 degrees. The controller itself is removed from its seat and lowered into a reservoir with refrigerant, which you will heat. This point must be taken into account when choosing a container for coolant.
- Now you will need to warm up the refrigerant in the system. When the temperature value increases, you need to carefully monitor the values produced by the tester and the thermometer placed in the container.
- Using a tester, you will need to check the fluid resistance level at different temperatures. The readings obtained as a result of the diagnosis must be compared with the normalized ones, which are indicated in the table.
Replacing an electric fan in a car
- We park the car on a flat surface and immobilize it with the parking brake.
- Open the hood and disconnect the negative terminal.
- Using a 10mm wrench, unscrew the fastenings of the air filter housing.
- Using a screwdriver, loosen the air duct clamp on the air flow sensor and remove the corrugation.
- We unscrew the screws securing the cover of the air filter housing and remove the filter element.
- Using a size 8 wrench, unscrew the air intake mount and remove it.
- Using a 10mm wrench, then an 8mm wrench, unscrew the nuts securing the fan casing around the perimeter (6 pieces in total).
- Disconnect the wire block on the fan connector.
- Carefully remove the fan casing along with the drive.
- Using a 10mm wrench, unscrew the 3 bolts holding the electric motor to the casing.
- We put a new one in its place.
- We install the structure in place, fix it, and connect the connector.
- We carry out further installation in the reverse order.
Control circuit modernization
This problem can be solved in two ways: adjust the switch-on temperature in the “brains” or make a button. We'll focus on the second one. Turning on the fan from the button is very convenient: if you get into a traffic jam, turn it on, drive out, turn it off, and no overheating occurs.
A button for selecting the fan operating mode was installed in the cabin (always off, constantly on, automatically turned on via a sensor) - this “tuning” is not mandatory, but will be a very useful addition.
There will be a large current at relay contacts 87, 30, on the wire from the battery to the fuse and the fan ground, and therefore we must use wires there with a cross-section of at least 2 mm, otherwise the thinner wire will not withstand it and will burn out.
Causes of fan malfunction
In a VAZ 2109 car, the cooling system fan may make extraneous sounds during operation. There can be many reasons for this behavior:
- The radiator is not installed correctly. That is, he is not in his place. Perhaps it lies on the cross member of the suspension, which is also not very good.
- The fan may have broken on one side, causing an imbalance.
Note: it is not necessary to change it completely. It is enough just to replace the damaged part.
- There is dirt on the impeller. This seems like a complete trifle, but it leads to an imbalance. The result is an incomprehensible tapping sound.
VAZ 2109 turning on the cooling fan
- The cushions are not clamped well, so they do not hold the motor well. The cushions may be compressed (this happens after long-term use). As a result, the motor vibrates.
Note: this problem can be corrected by replacing the pillows or inserting rubber gaskets.
- If the fan makes a loud noise, it means it lacks lubrication (you need to urgently lubricate the engine with oil).
- The bearing broke. This problem occurs because the impeller has been damaged for a long time, so there is an imbalance in the system.
Note: there is only one way to solve this problem - replace the bearing. However, before this, you need to correct the position of the impeller, since another bearing may soon be damaged due to it.
Malfunctions in the VAZ 2109 engine cooling system and methods for eliminating them
Simple systems are usually very reliable. This also applies to the SO VAZ 2109. Basically, it does not cause problems, especially with proper care.
Most often, there are breaks, pipes jumping off, the radiator may leak, and temperature sensors also fail. In addition, a common problem is the thermostat getting stuck and the pump failing.
Replacing the pump (pump) on a VAZ 2109
The pump may simply wear out. One of its elements may be damaged, a manufacturing defect - there are many reasons.
In fact, fluid leaks and fogging in the drainage area do not necessarily indicate the need to change the pump. It may be enough to apply sealant to the leakage areas and change the sealing gaskets. Most often, the cause of the breakdown is a leak in the oil seal or rubber cuff, aggravated by low-quality antifreeze.
To replace the pump you will need:
If the belt on the gear has shifted by a tooth, the engine will not start after assembly and you need to remove the belt, tighten the gear, and tighten the belt again (correctly).
How to balance an impeller
VAZ 2109 fan does not cool
There are two balancing options:
Note: a regular drill can serve as an axis. The role of two horizontal supports can be performed by two tables.
You can replace the four-blade impeller (this is a standard part) with an eight-blade one.
Note: we cannot say that the latter cool much better than the former, but certainly not worse. Often, after replacing the impeller, extraneous sounds in the cooling fan completely disappear.
VAZ 2109 cooling fan does not work
Note: there are models costing from 100 to 1000 rubles.
How to replace a fan
VAZ 2109 cooling fan
If replacing the impeller does not help, then you will have to take extreme measures - replace the cooling fan itself.
VAZ 2109 connecting a cooling fan
To do this you need to do the following:
- Open the hood.
- Remove the air filter housing.
Note: After this there will be enough space to carry out further work.
VAZ 2109 cooling fan relay
- Protrude the impeller. Any convenient tool will do for this.
Note: the impeller itself is very fragile, so work with it should be carried out carefully.
- Using a 13mm socket, unscrew the nut that secures the impeller.
- Under no circumstances should you lose the key that is inserted into the motor shaft. Otherwise, you will have to make something similar to it yourself, and this is not so easy.
- Replace impeller blades.
VAZ 2109 cooling fan diagram
- Insert it into place (if necessary, you can use a new impeller). The nut needs to be tightened as tightly as possible, because if the impeller dangles, it will soon break again.
VAZ 2109 cooling fan switching diagram
- Before you put the fan in place, you need to install two rubber washers. This will ensure that the vibration coming from the fan will be less noticeable on the body of the vases.
- To easily put the mount back on the stud, you can make a small slot in the lower mount of the frame.
VAZ 21093 cooling fan
- Insert the fan. Tighten all the nuts that secure it.
Double fan
Cooling fan impeller for VAZ 2109
In the summer, the “nines” especially overheat. Therefore, in order to ensure maximum engine cooling, you can replace one fan with two. To do this:
- First of all, you need to make another mount for the fan.
- In addition, you also need to make a small hole in the fan itself so that it can be easily installed in place.
- Disassemble the motor and remove the magnets (it is better to use a screwdriver to prevent them from breaking).
Note: it is important not to confuse the order in which the magnets were placed, so they need to be marked.
- Use a grinder to cut off the previous cylinder fasteners and weld new ones in their place.
- Reassemble the motor in reverse order.
- Screw the frame to the motor.
- Install the blades.
- Connect two fans to the blades.
Note: one fan will already be connected (since it is standard). The other can be turned on as needed by making a special button in the cabin.
Add a commentAdd a commentWe recommend reading
Scheme for switching on a VAZ 2109 fan using a relay
But when driving for a long time in the starting mode and instantly stopping, the antifreeze in the cooling system simply boils. Today we will look at the reasons why the VAZ 2109 fan does not turn on in automatic mode, replace the temperature sensor, and also draw up a small diagram for forcing the fan to start. The latter turns out to be useful, since the quality of thermal switches leaves much to be desired.
CO elements
The cooling system used on the VAZ 2109 operates at low pressure. After studying the components, you will learn about their functions and features.
Element
Peculiarities
It ensures efficient, stable operation of the system. The pump is used to pump cooling liquid, which facilitates its movement along a small or large circuit. The pump consists of a housing, an axle with a pulley located on it connecting to the timing belt, and a plastic impeller. The latter allows the coolant to move. A bearing lubricated with antifreeze is installed between the axle and the housing. Because of this, the presence of water in the system is unacceptable. Otherwise the bearing will collapse
Plays an important role, although in practice the CO can do without it. The system works in such a way that the engine first warms up to operating temperature (about 90 degrees Celsius), after which it is necessary to further cool the liquid. First, the coolant moves along a small circuit - through the jacket into the stove radiator, and then the excess is returned to the expansion tank. But when the operating temperature is reached, the thermostat begins to move the coolant flow into the radiator. A thermostat can be called a mechanical valve that automates the operation of the CO. Hot liquid acting on the bimetallic plate of the thermostat deforms it, which is why the coolant supply valve to the radiator can open or close
The SO VAZ 2109 has a pair of radiators - a stove and a main one. Their design is the same regardless of whether you have a carburetor or an injector. At the same time, there is a noticeable difference between the main and stove radiators. The main one is larger in size, they perform different functions, plus the main one has holes for a sensor that turns off the fan. If the stove radiator can be connected to operation at any time by pressing a button, then the main radiator operates in automatic mode when certain operating parameters of the CO are achieved
Expansion tank with plug
A constant pressure is maintained inside the CO, which ensures efficient coolant circulation. On the VAZ 2109, the system is designed so that at high pressure the liquid does not boil when it reaches 100 degrees, but at higher parameters. This increases engine reliability. Pressure support is provided by an expansion tank with a cap and a pair of mechanical valves - inlet and outlet. The inlet valve is activated if the pressure drops to 0.13 atm. The second one comes into operation at the moment when the pressure is above 1.3 Atm.
Do not underestimate the role of pipes and clamps in the CO, since it is through them that the coolant is supplied to the required points. When replacing, under no circumstances use cuttings from other pipes that do not correspond to the parameters used previously. Plus, if at least one pipe is damaged, everything will have to be replaced as a set, and not separately
Why doesn't the electric fan work?
There are not many reasons:
- The motor winding burned out.
- The thermal switch has failed.
- Destruction of electrical wiring.
So, what to do if the fan suddenly stops turning on? First of all, open the heater tap, this will increase the circulation of coolant. Don't forget to turn on the heater radiator fan to help it cool faster.
When the temperature begins to drop slightly, turn off the engine. You open the hood and you see a not very pleasant picture - the antifreeze is gone, half of the compartment is wet. It is necessary to add fluid to the expansion tank. If this happens in the summer, then you can add water (the main thing is to change it to antifreeze before winter).
Check the operation of the electric motor - disconnect the connection block and directly supply power from the battery to it. Is the propeller spinning? This means that everything is fine with the winding, put the block in place. On later modifications, only the sensor switch is responsible for turning on the VAZ 2109 fan.
To check it, you need to remove two wires from it and connect them. If the rotor begins to rotate, then the fault lies in the sensor. The way out of this situation is to continue moving by connecting these two wires. There is no need to isolate them, since the activation of the VAZ 2109 fan is controlled by ground (if a bare wire gets caught on a part of the body, then it’s okay).
And the third reason is broken wires. There are two wires to the VAZ 2109 fan sensor: directly from the fan and ground (body). If no problems have arisen before, then try to make a reliable ground, since by default in nines the negative wire from the fan sensor goes towards the fuse box and is lost there.
Find a place near the radiator where you can connect the negative power cable. These are all the malfunctions that may await you. Now it’s worth talking about the useful button for forced airflow.
https://youtu.be/https://youtu.be/wdpTUvxVWFU
_
