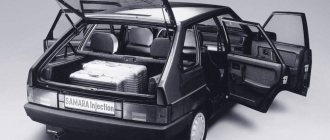
Lada Granta is a popular and reliable car of the Russian concern AvtoVAZ, which was developed on the basis of the Lada Kalina model.
This is an inexpensive “people’s” car with front-wheel drive, which has firmly won its niche in the market. Its factory marking is VAZ 2190, serial production began in October 2011.
Technical characteristics : in terms of body type, the Lada Granta is a five-seater four-door sedan or liftback (hatchback) with an engine capacity of 1.6 liters. Manual 5 or automatic 4-speed gearbox, depending on the model.
The car is equipped with front-wheel drive, independent front and semi-independent rear suspension. Available in “standard”, “norm” and “luxury” trim levels.
The “luxury” package includes electric power steering, an ABS system, power windows, air conditioning and a modern audio system.
The disadvantage of this car is flaws in the design, not always high-quality assembly and frequent problems with starting the engine.
Problems with the immobilizer (APS)
Often the Lada Granta does not start due to improper operation of the APS. If it is activated, the key is read and the engine starts. The immobilizer (APS) identifies the “native” key by reading the code from it.
If it is incorrect, then the APS blocks the operation of all vehicle systems. Here it is necessary to immediately clarify that APS is not activated upon sale in all trim levels. Lada Granta sedan is equipped with an anti-theft alarm in models 023, 024 and 050.
Lada Granta liftback in the 711, 713, 750 and 751 configurations. Many car dealers cheat when selling and say that the immobilizer cannot be activated. But by law they must do this at the request of the car owner.
If the key is not registered, the indicator lights up continuously for about 20 seconds. without blinking, and then goes out. During training, blinking occurs at a frequency of 5 Hz, at the end of training at a frequency of 10 Hz. When problems arise in the system, a sound alert is added to the light indication; it appears at the 10th and 20th second.
Decoding signals:
1 signal + flashing indicator – the code from the key cannot be read, possible reasons:
- problems in the communication coil circuit. In this case, you need to check the resistance and inspect the circuit;
- There is no transponder in the key. To eliminate the problem in the training key, you should check the presence of the transponder and its markings; if it is missing, then use a “clean” key and the CSUD to retrain the entire system;
- The transponder (located in the red key, you need to remove the red head) may be broken. In this case, for a training key, you need to retrain the system with a clean key, and for a working key with a remote control, you need to replace the remote control with a new one and train the system again;
2 beeps + flashing indicator – the relationship between the APS and the ICS is broken, possible malfunctions:
- There was a communication failure on the w line. In this case, it is necessary to eliminate violations in the chain between the APS and the ICS;
- violation in the APS and KSUD chain. It is necessary to replace them one by one to identify where the malfunction occurred;
- there is no voltage on the APS and KSUD power supply. In this case, you need to check and restore the voltage.
3 beeps + intermittent indication - “foreign” key or APS. In this case, it is necessary to carry out training using a “clean” key and a “clean” KSUD. For APS, you need to configure the system using a training key native to the ICS.
4 signals + flashing indicator – the controller does not provide confirmation to start the engine. This suggests that the KSUD has already been trained with another system; it needs to be changed to a clean one and retrained.
To find out exactly the cause, it is necessary to make a diagnosis. If the controller is broken, it must be replaced and re-learned.
If there is an APS, then you need to replace it and train it along with all the working keys, since structurally in the Lada Granta the APS is located in the instrument cluster.
If there is a suspicion that the keys have been read, then retraining should also be done.
Step-by-step instructions for training the immobilizer and working keys:
- close the driver's door tightly;
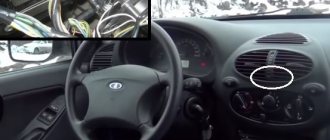
- turn on the ignition using the red key;
- turn off the ignition and remove the key, the indicator flashes at a frequency of 5 Hz;
- quickly (within the next 6 seconds) turn on the ignition using the black key;
- further: we hear 3 beeps and after 6 seconds - 2 beeps;
- turn off the ignition and remove the key;
- if you need to train several more working keys, then you need to repeat steps 4 to 6 (the maximum number for training is 4 keys);
- over the next 6 seconds, turn on using the red training key;
- then: 3 beeps, after 6 seconds - 2 beeps;
- turn off the ignition, after 6 seconds we hear 1 signal;
- the indicator starts blinking very quickly (with a frequency of 10 Hz);
- turn on the ignition - we hear 3 beeps, the indicator goes out, the learning process is completed;
- turn off the ignition;
- Now you need to check the immobilizer: to do this, you need to turn on the ignition with a working or training key, if the indication does not light up, then everything went well, we try to start the engine.
A detailed algorithm for reconfiguring the immobilizer
First of all, you need to close all the interior doors and insert the so-called training “red” key and activate the engine ignition. If the indicator glows steadily, it means that the training procedure should be carried out. Next, you need to turn off the ignition and wait until the immobilizer flashes. Remove the “red” key and immediately insert the regular one, turn on the ignition as usual. At the same time, you will first hear three short beeps in a row, and after a short period of time a couple more. Then turn off the ignition again and reinsert the first training key - three short beeps must sound in the same way and after the same two short beeps. Turn off the ignition and do not remove the learning key. This will be followed by one short signal, and the indicator will quickly and quickly flash. Turn the ignition on and off again, after which 3 beeps will sound and the indicator will turn off completely. Now you can remove the training first “red” key and use the usual one to test start the engine. This is how the immobilizer for Lada Granta works.
The starter does not turn
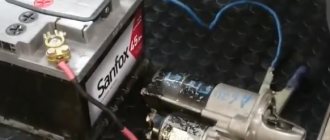
If you are sure that the problem is not in the APS, then most likely the starter is not working. The Lada Granta is equipped with a cable-driven gearbox and the starter often acts up, especially with a new gearbox.
It is very easy to find out that the starter is not turning: when you turn the ignition key, you do not hear the specific sound of its operation.
Sometimes a car with a robot does not turn the starter, this is due to a weak battery, we recommend charging it and trying again, although sometimes it helps to simply remove and put on the terminals.
The main causes of starter failure are the battery, the starter itself, or problems in the switching circuit.
The main causes and troubleshooting of the starter:
- The battery is low or damaged. It is not difficult to check its condition: you will immediately notice this by the fact that the light bulbs and panel sensors do not light up, and when you start the engine, you hear a specific crackling noise under the hood. But if they light up normally, then to be sure, you need to turn on the headlights to high beam and evaluate their brightness; if the light is dim, then the battery is not completely discharged, but its power is not enough to start the starter. To resolve the problem, you need to charge or replace the battery.
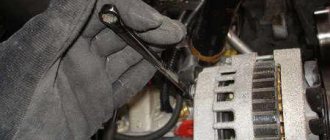
- Problems with battery terminals, faulty wiring, insufficient contact with ground. The terminals may be loose, poorly seated, or oxidized. To fix this problem, you need to clean it, thoroughly coat it with machine Vaseline and tighten the bolt on the starter and the ground on the thermostat stud. Using a multi-meter you need to check the ground for breakdowns. To do this, you need to switch it to voltmeter mode and connect one wire to the starter “ground” on the thermostat pin, and the other to the engine; there should be no voltage.
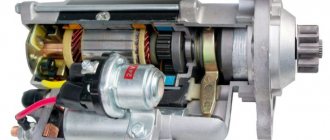
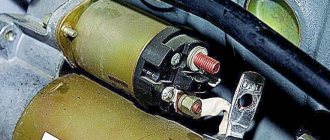
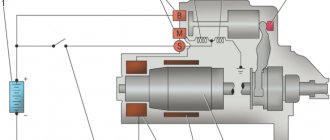
- If everything is normal in the circuit, you need to remove the starter itself and look at the operation of the traction relay. If you turn the key to the second position, the relay does not work and you cannot hear a click. This can be checked by applying voltage to the contact of the traction relay. The relay, wiring or ignition switch needs to be replaced. If there is current, but the starter still does not turn, then the problem is in itself.
- Faults in the starter itself. It is necessary to inspect, there may be damage to the flywheel teeth or starter gear, repair or replace if necessary.
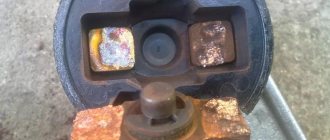
- The commutator on the starter was burnt, the brushes were severely worn, and there was a break in the armature winding. How to determine this? The armature does not rotate at all or too slowly. Inspect the traction relay and supply current from the battery to the starter contact directly. To fix the problem, it is necessary to repair or replace the armature or the starter itself.
- Poor performance and clutch slipping. This happens when the starter spins but the flywheel does not. In this case, change the clutch or the starter itself.
Battery, wiring, terminals
As a rule, relay clicks indicate that the device is working. When the relay clicks, but the starter does not turn, the car does not start most often due to the fact that the starter does not have enough electric current to spin the crankshaft. If there was no power supplied to the starter at all, we would not hear any clicks.
Most often, this situation arises due to a banal battery discharge (or simply a low charge level). It is not difficult to identify this problem; if, when you turn the ignition key, the solenoid relay clicks and the lights on the instrument panel go out, then the problem is in the battery.
Remember that sometimes you won’t be able to solve the problem by simply charging the battery. First of all, it is worth finding out the reason for the battery discharge, so as not to encounter this problem in the future. It’s good if the cause of the discharge was a light that was not turned off or another source of consumption, but if the problem is, for example, in the generator or the battery itself, then no amount of recharging will help you.
We also recommend reading the material on the topic: how to extend the life of a car battery. After reading this article, you will also learn about the reasons for battery discharge and signs that the battery will soon fail.
The next most common cause of starter inoperability is damage to the ground wire going to the engine or poor contact. If there is not just one click, but a whole series, this is probably the problem.
And if only one click is heard, then the problem should be looked for in the contacts of the starter, or rather its relay. The starter is powered by a current of approximately 200 amperes, but due to poor contact in any place, the current can reach much lower values. It may be enough to trigger the retractor relay, but this current strength will not be enough to ensure the rotation of the crankshaft.
In some cases, the contacts of the starter relay may burn out, as a result, there is no spark necessary to ensure correct operation of the starter. Actually, a click is not a characteristic sign of serviceability of the starter relay, it only indicates that the relay core is retracted, but the holding winding sometimes cannot fix it.
Computer malfunction
The unit itself is very reliable and rarely fails without external intervention.
But water can get on it, and this is the main reason for malfunction. There are significant flaws in the body design; the drainage holes near the filter are often clogged with dirt and water gets into the block through them.
To do this, you need to check and clean the drainage more often. Also, water can flood the ECU after installing the alarm, when the plugs are not installed tightly or they are completely forgotten to be installed.
You can try to dry the block, but if this does not help, you will have to replace it. This problem can be partially solved by wrapping the block with film or filling it with sealant, but then this is fraught with the appearance of condensation inside the ECU.
It is not difficult to remove the ECU; it is located opposite the front passenger seat, under the glove compartment, behind the soundproofing upholstery, almost on the floor, near the passenger’s feet.
ECU removal sequence:
- Disconnect the on-board network.
- Remove the screw that secures the upholstery.
- Carefully peel back the upholstery and sound insulation layer.
- Unscrew the three nuts securing the ECU.
- Carefully move the unit to the side and remove the two wire clamps one by one.
After unscrewing the computer, you need to disassemble it and assess the extent of the damage. We remove the board from the case and carefully inspect it. If it is partially burnt out and blackened, then nothing can be done about it; it needs to be replaced.
But if the board has no visible damage or only the output key has burned out, then in this case the key must be replaced, and the board must be washed and dried. First, you need to wipe it with a clean rag, then rinse it with WD-40 and blow it out with a compressor.
After this, rinse with alcohol several times and blow again. Now the most crucial moment is drying. Using a hair dryer set for a maximum of 1.5 hours, we blow through the board on both sides.
Engine and spark plugs
Often candles simply flood, especially in winter. This could be due to a weak battery spark, wiring problems, or unsuitable spark plugs.
The most primitive way to dry them is to press on the gas and crank the engine for 10 seconds using the starter.
But in winter this rarely helps, and the candles need to be dried. To do this, they need to be removed and thoroughly cleaned of dirt. This can be done with a toothbrush. In this case, you need to leave the same gap of 0.7-1 mm .
After cleaning, the candles need to be dried. This can be done using a hair dryer. Thrifty and experienced drivers recommend carrying spare spark plugs with you and, if necessary, simply replacing them on the road. To reduce the risk of flooding, monitor the battery charge and once every three days, load the engine up to 5000 rpm for a few seconds. for cleaning and preventing contamination .
Fuel system
It happens that the tank simply runs out of gas, do not forget to monitor its level. You also need to pay attention to its quality. Due to low-quality gasoline, spark plugs often flood, the filter becomes dirty, and moisture forms.
If you have filled in with low-quality fuel, then in this case you need to remove the gas tank and change the coarse and fine filters, you can try to blow out the fuel pipes.
If the injectors are dirty, they can be cleaned using any available method. When there is a lot of water in gasoline, you can add a little alcohol to the tank.
But if there are a lot of impurities and dirt, then only strong cleaning will help. You see that the starter is spinning, but the engine refuses to work and you can’t hear the fuel pump pumping. It may fail, there is no tightness in the power system or the pressure regulator is malfunctioning.
The first thing you need to do is check the pressure in the rail, the normal value is 3.5-4 atmospheres .
Then you need to remove the hatch and measure the voltage in the connector; the light bulb can be inserted into the two terminals in the middle and cranked with the starter. It should light up and if the voltage reaches, but there is no pressure, you can try to hit it. The brushes could simply be stuck. If they are normal, then the coarse mesh may be clogged, it needs to be cleaned or replaced; in winter it may freeze up.
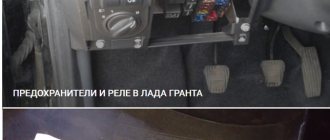
If electricity is not supplied, you need to check fuse F21 and relay k12. The relays (power coils) need to be removed, tapped on them a little, or simply warmed thoroughly in the palms of your hands.
Crankshaft sensor
If the starter turns normally, the fuel pump works, the spark plugs and the “brains” are normal, you need to check the sensor. You need to look at the tachometer; if there is a failure, the revolutions are not visible.
You need to remove it and connect it to a multi-meter. You need to quickly wave a screwdriver in front of the sensor.
If there are no power surges, then it has “died” and needs to be replaced.
You can check it by testing the resistance; it should be approximately 750 Ohms.
If jumps are still observed and the resistance is normal, you need to look carefully to see if contamination has appeared and, if necessary, cleaning should be done.
Timing belt, valves and damper
The gas distribution mechanism often breaks. The belt breaks only when the car is moving. Unfortunately, no one is immune from rupture, and to prevent this from happening to you, you need to pay attention to its rubbing more often and change it in time.
Sometimes the valves come into contact with the pistons and they bend. To solve this problem, you can install pistons with special grooves. Sometimes the engine does not start due to the damper being turned several teeth, in which case the sensor makes a mistake and shows the wrong phase.
To check the damper, you need to unscrew it and check that its marks match the marks on the timing belt cover. If the marks do not match, you need to turn the pulley until they match.
Signaling
Alarm failures are not uncommon, regardless of the quality and modification of the security system. Both a new security system and one with an impressive “mileage” can block a car’s engine for no reason.
Obviously, without experience, you are not able to turn off the power to the secret police on your own. In such cases, use the workshop service. Any car owner who has already encountered a breakdown knows that they need to disconnect the standard immobilizer. Of course, in cold weather this is quite difficult, but it is possible.
Ignition coils
Custom ignition coil
The Lada Granda has two types of ignition coils: individual and four-terminal, they are controlled by the engine controller.
One of the signs of poor coil performance is poor idling, a drop in power and high gasoline consumption. The car starts poorly or stalls.
If the coils are partially broken, then paired misfires and ignition in the cylinders often occur. To remove the coil, you need to reset the terminals from the AMB and remove the leads from the controller. Then disconnect all high voltage wiring.
After this, the coil must be disconnected from the bracket by unscrewing the mounting screws. If you plan to replace the coil, make a note of its markings.
There are several ways to test the coil for faults:
- Testing a short to ground. To do this, using an ohmmeter, you need to connect the wire from the coil to the first end of the ohmmeter, and the body to the second. It should show an infinite value, if you see a specific value then there is a leak.
- We check the primary winding for a break. To do this, you need to connect the ends of the device to the contacts; if the device shows an infinite value, then one of the coils is broken and needs to be replaced with a new one.
- We check the secondary winding (for a 4-lead coil). To do this, first test the winding on the 1st and 4th cylinders using an ohmmeter. If it shows an infinite value, then the coil is working. Repeat these steps with the winding on the 2nd and 3rd cylinder.
- Checking high voltage wiring. The wires are checked one by one. To do this, connect an ohmmeter to the wire, measuring the resistance with a maximum value of 20 kOhm. The normal value is approximately 3 to 8 kΩ. If it shows infinity, then the wire must be replaced. It is advisable to carry out such a check annually.
After installing the coils in their place, you must strictly observe their markings; the cylinder number must match the number on the wire.
If the Lada Granda started and immediately stalled. The most common reasons:
- Damage to the ignition coil connections. Needs to be repaired or replaced with new ones.
- Low fuel pressure.
- Poor sealing in parts of the catalytic manifold or receiver.
- Poor performance of the engine control system.
The Lada Granda has many design flaws, but if you know all the weak points of this car, then finding the cause of the breakdown will not be difficult. Carefully monitor your car, undergo regular maintenance, replace parts in a timely manner, and the Lada Granda will serve you for many years.
Probable Causes
When the starter does not turn when trying to activate the engine, this often indicates problems with the battery. Insufficient charge of the latter interferes with the functioning of the device in question, because it consumes a lot of energy.
Also, the Lada does not start due to damage to the starter electrical circuit or individual elements included in it. Inspect all wires leading to the device. Also check the fuse and relay if not already done.
The next obvious problem: oxidation of the battery terminals. Over time, a film of high resistance forms on them, which prevents the supply of current of the required strength. Clean them with fine sandpaper and tighten them with a wrench so that the wires do not dangle.
The ignition switch often prevents the Grant from starting. It is easy to make sure that it is faulty - just short-circuit the wiring leading to it. After this, the power plant should start.
When none of the above helped, and the Grant still does not start, it is permissible to assume the worst - a malfunction of the starter itself. Here, in particular, the following may fail:
- the electric motor itself (armature or winding);
- traction relay;
- flywheel;
- drive unit.
It is difficult to perform diagnostics in the field, because the starter will have to be dismantled and disassembled.
Failed elements are not repaired, but replaced with serviceable ones. All that can be done on the spot is to inspect the wires going to the device, remove them and clean them. Before doing this, do not forget to disconnect the negative cable from the battery. As practice shows, the most common reason why the engine refuses to start and the starter does not turn is a weak battery charge, poor contact in the terminals or a breakdown of the Lada ignition switch. Other malfunctions occur much less frequently. Next we will tell you how to check.
The fuel pump does not turn on and the viburnum does not turn
Moderator: Kolya Taran
The fuel pump does not turn on and the viburnum does not turn
kotc » Aug 16, 2022 02:04 pm
I will repeat the topic because... she was there, but she was gone!
Kalina, 2013, 1.6, 81 hp, ecu 11183-1411020-52 I444CI07 itelma. the brains are located like on a grant under the glove compartment. problem for more than a year: the fuel pump periodically does not turn on and the starter does not turn, 2 buzzer sounds sound and the warning light flashes
At my request, the service station at Pristanskaya turned off the immo, they removed the block programmatically, the immo indication changed to inactive, and in the evening everything happened again - it won’t turn on b The fuel pump doesn’t turn, the starter sounds 2 buzzer beeps and the immo warning light flashes
Sometimes the fuel pump starts with a delay of 20 seconds or more after turning on the ignition and then everything works normally. Now in this situation I leave the key in the ignition position for 3-5 minutes, after such a delay it happens that the fuel pump starts and everything works normally. The floating problem is absolutely unpredictable. I drove for a week and then got up for half an hour, where I called and they said there is no point in driving a working car to check or there is no desire to dig, and the problem is very floating. Visually, under the console where the relay is dry, under the upholstery the brains are dry.
Re: fuel pump does not turn on and viburnum does not turn on
AABKUM » 17 Aug 2022, 08:47
Re: fuel pump does not turn on and viburnum does not turn on
kotc » 17 Aug 2022, 09:25
Re: fuel pump does not turn on and viburnum does not turn on
kotc » 13 Oct 2022, 22:50
The fuel pump does not turn on and the viburnum does not turn
kotc » Jun 29, 2022 08:58
Marat » June 29, 2022, 09:11
The fuel pump does not turn on and the viburnum does not turn
XanD » June 29, 2022, 09:51
The fuel pump does not turn on and the viburnum does not turn
SGordon » Jun 29, 2022 09:59 AM
The fuel pump does not turn on and the viburnum does not turn
kotc » Jun 29, 2022 11:38 am
water is a low probability, all because it’s dry then and now, but then I’ll open the old block, there are no errors there either, it just blocks the start, in general, I’m moving with this topic to the specialized forum https://www.lkforum.ru/showthread.php?p = . ost6843197
They advise here immo-off firmware, maybe it’s worth considering, I’ll clarify
The fuel pump does not turn on and the viburnum does not turn
kotc » Jun 29, 2022 8:23 pm
in general they wrote in Ladakalin that
I disassembled the old one, everything is fine on the front, like new, the back is flooded, apparently the new one is also... wow..
The fuel pump does not turn on and the viburnum does not turn
Marat » Mar 09, 2022, 06:11
The fuel pump does not turn on and the viburnum does not turn
Len » March 09, 2022, 09:31
The fuel pump does not turn on and the viburnum does not turn
OJIeGi4 » 09 Mar 2022, 13:07
There was viburnum a couple of years ago. There was also a problem with a leaking heater radiator. At a mileage of about 100 thousand, I began to notice (especially after an overnight stay) drops or streams of antifreeze on the driver's mat. Fortunately, the previous owner moved the ECU under the passenger mat. Replacing this radiator is still hemorrhoids on Kalina
Marat, this summer the grant had exactly the same problem. It all ended with my wife going to work one morning, starting the car, and the starter continued to turn with terrible sounds, and this continued even after the ignition was turned off)) As a result, smoke started pouring out from under the hood)) I had to buy a new battery and starter
The fuel pump does not turn on and the viburnum does not turn
Marat » 09 Mar 2022, 15:46
The fuel pump does not turn on and the viburnum does not turn
Marat » Mar 16, 2022, 06:26
Who's on the forum now?
Registered users: Bing [Bot], GoGo.Ru [Bot], MDN, SlaFF, Yandex [Bot]
- List of forums
- Mobile view • Our team • Delete forum cookies • Time zone: UTC + 2 hours [Summer Time]
Quoting information from the site is welcome with mandatory indication of the source WWW.SPL43.RU
While on the site, users consent to the processing of personal data that is processed for the purposes of the operation of the site. Age limit: 18+
The editors are not responsible for comments left by users.
#1 Chinese pilot
In a nutshell, I drove to the garage, turned off the engine, after 3 hours I started it - no start, the pump in the tank did not hum, the starter did not oil.
Maybe someone can tell me a clever idea where the goiter is buried.
I don't really want to remove the starter and gas tank.
And the worst thing is that all the relays are working and the fuses are intact.
Power to the starter retractor and the pump from the relay in the engine compartment block goes to consumers, the head is broken.
I missed it, the ground wires are all in place, the contact is good.
VAZ components, as well as imported analogues
At first, KZATE starters were supplied to the VAZ plant. And after 2011, Valeo became the main supplier. Therefore, the list of components looks like this:
- 21120-3708010-00 (KATEK, KZATE, ZiT) - there is one analogue, Fenox ST32101C3;
- 21901-3708010-00 (VALEO) – also known as VALEO TS12E901;
- 21902-3708010-00 (VALEO) – also known as VALEO TS12E902.
It was not possible to find any other imported analogues.
None of the three starters are interchangeable with the other. The last two differ in the number of teeth (11 and 9, respectively), but the VALEO and KZATE starters are not compatible in terms of fastening.
