Repair of the gearbox on the VAZ 21099 is required quite often. If the car owner has never carried out such repairs with his own hands, then it is better to contact specialists.
For the first time, you can invite an experienced mechanic to help. If the car owner does not have experience in such repairs, then he will do more harm than correct the situation. Besides, it all depends on the breakdown. Perhaps it is not significant and every car owner can handle it.
If you still decide to repair the gearbox yourself, then you need to have step-by-step instructions and a video for repairs with you.
The gearbox on the VAZ 21099 has the same device and requires the same repairs as on the eight and nine.
First, let's figure out what the gearbox on the VAZ 21099 consists of.
Gearbox device
A manual five-speed gearbox is a complex mechanism consisting of gear ratios, a housing, and gears. There are different configurations of the VAZ 21099 car. With four-speed and five-speed gearboxes.
Device:
- closing cover on the crankcase;
- drive gears of each gear, reverse, axle;
- bearings;
- gearbox housing;
- bushings;
- shaft bearings;
- synchronizers for each gear;
- oil seals;
- satellites;
- breather;
- primary, secondary shafts;
- couplings;
- bushings;
- differential box;
- bearings;
- drain plug for transmission oil;
- rings and half rings;
- gear shift fork.
Useful tips
It is extremely important to monitor the serviceability of the gearbox, and if signs of breakdown are detected, fix them immediately. Do it yourself or with the help of a car service - this is your personal decision.
When operating a car in city conditions, you have to change gears more often. Therefore, it is recommended to use motor oil here. This ensures that the synchronizers remain effective longer. Transmission oil is better suited for highways, increasing the life of bearings and gears, although the synchronizer lasts less.
Internal structure of the box
Signs and causes of gearbox malfunction
- Transmission malfunctions can be caused by:
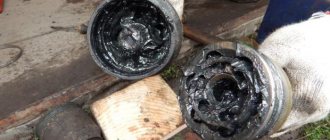
- natural wear and tear of parts;
- mechanical damage as a result of an accident;
- systematically not fully squeezing gears;
- sealant is damaged;
- sudden release of the clutch pedal;
- regularly engaging reverse gear when the car moves forward;
- low level of transmission oil in the gearbox;
- irregular gearbox oil changes;
- Frequent wheel slipping when starting off (grinding).
Signs of a breakdown of the VAZ 21099 gearbox include:
- The gearshift lever is loose;
- extraneous sounds in the box;
- when there is a load on the box, the speeds go off (when driving in tension);
- grinding noise when changing gears;
- transmission oil leakage;
- jerking when driving.
What exactly is making noise and why?
Let's try to understand this issue. The main causes of noise coming from the gearbox are:
- improper operation of the gearbox, in particular the use of counterfeit transmission fluid purchased on the black market and operation of a vehicle with a non-working clutch;
- poor quality of gearbox components;
- maximum service life of manual transmission;
- unskilled technical work on diagnostics and repair of gearboxes.
New manual gearbox from VAZ 2109
Repair of gearbox VAZ 2109,2110,2112,2114,2170,1118.
Thank you so much for watching my videos
, tell your friends, leave comments, subscribe...
Repair of VAZ gearbox (1 part). Do it yourself!
Complete box repair
speeds of a front-wheel drive
VAZ
, at home.
I make it from a VAZ 2109
. Principle…
In addition, the main malfunctions that can result in noise in the gearbox are:
- sudden difficulty switching on speed: in order to engage one or another gear, the driver will sometimes need to move the gearbox lever several times to the neutral position with the clutch depressed;
- The box automatically switches off the car’s gear while driving;
- Transmission fluid may leak from the gearbox.
It should also be noted that the VAZ 2109 gearbox can make noise in various conditions: at neutral speed, while shifting gears, or simply while driving at a certain speed. And each of these noises can indicate a different malfunction of the box.
In addition, during diagnostics, one must not forget that only one external sign may indicate several malfunctions in the gearbox. Therefore, it is virtually impossible to visually (i.e., by the type of hum) calculate which component of the box has failed. The damage can only be determined by removing and disassembling the box.
It is also necessary to add that repairing a transmission and eliminating defects requires a lot of knowledge, so it is better not to do this at home. The gearbox is an important unit in the structure of any vehicle, so it is better to entrust its repair and diagnostics to a qualified specialist.
Tuned VAZ 2109
Often the hum of the unit manifests itself:
- when you press the clutch;
- when turning on the third and fourth speeds;
- at neutral speed;
- when driving a car at high speeds.
Most domestic VAZ 2109 car owners face such problems. But if when you press the clutch, extraneous sounds disappear, then this may indicate several breakdowns. In particular, the fifth speed or reverse gear may fail. In addition, the input shaft bearing or release bearing may be faulty.
Gearbox oil drain
First of all, drain the oil from the box. If you do not know how to remove the gearbox, then use the following instructions:
- Place the car on a flat surface
- We place wheel chocks on both sides under the rear wheels.
- Disconnect the car.
- The mounting bolts are unscrewed from the crankcase and its protection is removed.
- The ground wire connected to the crankcase is unscrewed.
- Unscrew the nuts on the clutch cable.
- Completely remove the clutch cable. We disconnect it from the box.
- Remove all wires from the starter.
- We remove the starter. To do this, unscrew the bolts that hold it in place.
- The drive rod, which switches speeds, is disconnected from the hinge.
- Disconnect the speedometer and cable that drive it.
- Unscrew the bolts and nuts securing the rod.
- The hinge pin is removed from the strut arm.
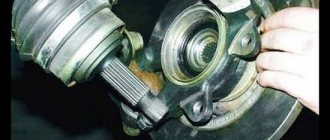
- The suspension joint and steering knuckle are separated.
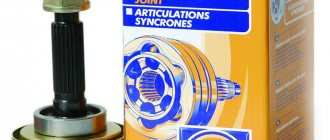
- The CV joints are removed.
- The shield is removed.
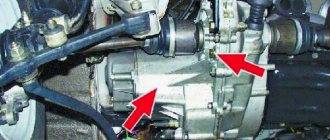
- The box is attached to the engine with bolts. We unscrew them.
- We remove the box.
We will prepare a gearbox switching diagram in advance.
Installation rules
Before you begin repair work, you need to figure out how to remove the gearbox. This device is disassembled to diagnose it. The gearbox is dismantled in a certain sequence. First, disconnect the battery terminals and drain the oil.
Then the crankcase protection is removed. The next step is to disconnect the ground wire. After loosening the nuts, the cable end is removed. Then the wire is disconnected from the relay and the starter is dismantled.
The finger is pulled out from the corresponding lever. The hinge is disconnected from the fist of the first element. The next step involves dismantling the CV joints. To do this, the first element is squeezed out and moved away from the gearbox. Then 2 CV joints are disconnected. The final stage is dismantling the gearbox.
Auto mechanics recommend moving the gearbox to a horizontal plane before performing this procedure. This procedure must be carried out without damaging the clutch spring petals.
Return to contents
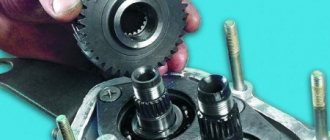
Analysis of the gearbox
Now we disassemble the box and find out the causes of the problems. If you hear extraneous knocks in the gearbox or the gearshift lever rattles, then the reason for this may be wear of parts. They need to be replaced. We disassemble:
- the outside of the box is cleaned;
- placed vertically;
- covers are removed;
- use a rubber hammer to break off the lid of the box;
- We turn on fourth or third gear (otherwise the assembly will not be carried out correctly);
- after unscrewing the bolt that secures fifth gear, turn it on;
- unscrew the nuts of the front and rear shafts;
- remove the fork and 5th gear synchronizer;
- remove the reverse gears;
- disconnect the secondary shaft from the gear;
- the bearing is secured with a plate, remove it;
- the gear, which is the drive gear, is removed from the shaft;
- the bearing plate is removed;
- the rings of the primary and secondary shafts are removed;
- there is a plug on the latch, unscrew it;
- carefully pull out the spring and locking ball;
- We also take out the other two balls;
- there is a power unit in the back of the box, remove its support;
- The shift box housing is secured to the clutch housing;
- remove the crankcase;
- unscrew the bolts securing the gears;
- remove the plug;
- stock too;
- the forks and rod are removed from the gearbox.
After we have disassembled the gearbox, we will diagnose it. Let's prepare replacement parts and begin putting the box back together. We do this carefully. An incorrectly assembled box will not work or will not work correctly.
Peculiarities
Both types of gearboxes are unpretentious in maintenance , which also applies to new gearboxes. After break-in or the next oil change, you can use inexpensive TNK Trans KP 80W-85 oil. 3.4 liters for every 75,000 km will be enough
It is worth noting that both boxes are interchangeable , as they fit a standard 1.6 liter engine and withstand 120 Nm. In such an operating mode, the resource of the node reaches 150,000 km .
The box for the VAZ 2109 is fully compatible with the VAZ 2113, 2114, 2115 cars. This is such, since the latter are a deep restyling of the 2108-2109 - built on their basis.
Reinstalling the gearbox
Gearbox assembly:
- we change all non-working elements;
- workers clean with a rag;
- assembly is carried out;
- degrease parts with threads;
- if necessary, lubricate the elements;
- change gaskets;
- insert the balls and bearings into place;
- we assemble the synchronizer;
- We put all the springs in place and tighten the bolts. When assembling, lubricate all connections with sealant;
- attach the box to the engine;
- add oil;
- connect the battery;
- we start the car and check it.
The VAZ 21099 gearbox is adjusted during assembly. Also, after installing the gearbox, you need to adjust the gearshift lever. It is important to adjust the gearbox and gearshift lever correctly.
It should be remembered that prevention can help avoid repairs and troubles along the way. Taking good care of the gearbox is the key to its long-term operation.
General recommendations for assembling the VAZ 21099 gearbox
- Do not change the tapered differential bearings unless necessary - otherwise you will have to adjust the gap between the teeth of the main gear gears;
- It is better to replace all the needle bearings of the gears;
- When assembling, install only new oil seals;
- pay attention to the installation of the synchronizer blocking rings - opposite the grooves for the sliding clutch cotters there should be smaller protrusions on the ring;
- install the bolts securing the forks to the rods and the thrust plate of the bearings with thread sealant;
- It is better to use cardboard gaskets between the crankcase parts rather than paronite ones;
- While the gearbox is removed and disassembled, it will not be superfluous to replace the front starter bushing and clutch fork bushing.
Finally, before installing the gearbox, remove the clutch basket to assess the condition of the clutch discs while it is still accessible.
Where can I buy?
It is best to buy a gearbox for a VAZ 2109 in those places where it is possible to visually monitor the condition and eliminate the possibility of pre-sale preparation . As for new gearboxes, they can be purchased in any store or online platform, since such products are subject to a refund policy within the first 14 days. The warranty is usually 3 months. Moreover, you can pay for the goods upon receipt at the TC branch.
Sources used:
- https://masteravaza.ru/korobka-peredach/remont-korobki-peredach-korobka-peredach/vaz-21099-korobka-peredach-remont-70
- https://carmanuals.ru/vaz/vaz-21099/transmissiya/razborka-korobki-peredach
- https://expertvaz.ru/21099/korobka-peredach-ustroystvo-remont-kpp.html
- https://www.retrov.ru/threads/vaz-21099-na-avtomate.2651/
- https://skolkos.ru/skolko-stoit-korobka-peredach-na-vaz-2109/