Removing the bipod
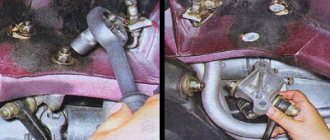
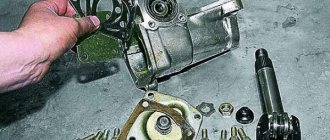
Remove the steering from the car. We wet the connection of the bipod with the shaft in advance with kerosene or WD-40 liquid.
| Using a 30mm wrench, unscrew the bipod fastening nut. |
| Using a special extractor (see Appendices), we press the bipod away from the thrust. |
If you don't have an extractor, you can try knocking it off with a hammer.
| We rest the shaft of the bipod against the block. Using a heavy hammer (sledgehammer), we press on one stop of the bipod, and hit the second with another hammer. |
In some cases, you will have to sacrifice the bipod by cutting it off with a cutting machine.
In modern cars, the front wheels turn through a rack connected to the steering wheel shaft. The VAZ 2107 and other classic Zhiguli models use an outdated system of articulated rods, the so-called trapezoid. The reliability of the mechanism leaves much to be desired: the parts literally wear out within 20-30 thousand km, the maximum service life is 50 thousand km. A positive point: knowing the techniques of construction and disassembly, the owner of the “seven” can save money and replace the elements himself.
Purpose and operation scheme of the trapezoid
The lever system acts as an intermediary between the steering shaft and the steering knuckles of the front hubs. The purpose of the mechanism is to synchronously turn the wheels in one direction or another, obeying the rotation of the steering wheel. The trapezoid is located under the engine at the level of the bottom of the car, attached to the body stiffening elements: the lower side members.
The steering part in question consists of 3 main parts:
- the central link is screwed to two bipods: the pendulum arm and the wheel arch of the worm gear;
- the right link is attached to the swing arm of the pendulum and to the steering knuckle of the right front wheel (in the direction of travel of the car);
- The left link is connected to the gearbox bipod and to the stamp of the left front hub.
The method of connecting swivel brackets to trapezoidal parts is that a conical pin is inserted into the connecting hole in the bipod and secured with a nut. The pendulum and gearbox are rigidly fixed to the side members with long bolts.
The central link is a hollow metal rod with two hinges. The two side rods are prefabricated elements consisting of two ends - long and short. The parts are connected to each other by a threaded clamp secured with two bolts.
How does a trapezoid work:
- The driver turns the steering wheel, turning the transmission shaft and rod. The worm gear transmits fewer revolutions to the bipod, but increases torque (force).
- The bipod begins to turn to the right, dragging the left and central rod with it. The latter transmits force to the right rod through the pendulum bracket.
- All 3 elements move in one direction, causing the front wheels to rotate synchronously.
- The pendulum, attached to the second spar, acts as an additional hinged suspension for the system. In old versions of pendulums, the bipod rotates on a bushing, in new elements - on a rolling bearing.
- Ball pins at the ends of all links allow the trapezoid to move in one horizontal plane regardless of the compression of the front suspension springs.
The increased torque from the worm gear eliminates the need for hydraulic and electric power steering. On the other hand, the driver physically feels problems with the chassis: the ball joint or the end of the stem has to sour, and it becomes much more difficult to turn the steering wheel.
STEERING WHEEL PLAY
The appearance of steering play can be caused by two reasons. First, the nut securing the steering wheel to the shaft is loosened. If the nut is not tightened promptly, the splines on the handlebar and shaft will become damaged over time and one of these parts may need to be replaced. The second reason may be wear of the worm gear. To eliminate this malfunction, a special device is provided - an adjusting bolt with a lock nut.
In order to adjust the worm gear, the nut is released, the screw is turned using a screwdriver until the backlash is eliminated, after which the nut is tightened to prevent spontaneous unscrewing. If it is impossible to eliminate the backlash by adjustment, it means that the gearbox needs to be repaired and the worm pair replaced.
To prevent premature wear of gearbox parts, periodic monitoring of the oil level and its replacement is recommended. Level control is carried out as follows:
- Using a 8 key, unscrew the filler plug;
- Use a screwdriver or other object to check the oil level. It should be level with the bottom edge of the filler hole.
- If necessary, add oil using a special supercharger until it begins to flow out of the hole.
To change the oil, unscrew the screws securing the gearbox cover, having previously placed a container under it to collect used oil. Since complete removal of the cap is not required, it is moved to the side and the oil is drained. This operation is best performed on a hot engine. Warm oil has greater fluidity and drains faster. After all the oil has drained out, the cap is screwed into place and new oil is poured into the gearbox using the method described above.
Arrangement of rods and tips
The one-piece central trapezoidal element has the simplest design - an iron rod with two loops at the ends. The pressure pins are inserted into the second holes of the bipod (counting from the end of the lever), screwed in with 22 mm castle nuts and secured with cotter pins.
Note: The center link rod is bent forward slightly to prevent shifting. If you place the part backwards, problems are inevitable - the bend will begin to rub against the gearbox housing, which will make it very difficult to drive the car.
Not all service station mechanics know the correct installation of the central trapezoidal rod. My friend was convinced of this when he came to the service center to change a VAZ 2107 steering rod kit. The inexperienced master installed the middle section with a bend back, so it was not possible to go far - exactly until the first turn.
The side bars consist of the following parts:
- short ball point (external;
- long sock (inside) with zipper;
- connection clamp with 2 bolts and nuts M8 for 13 mm wrench.
The element is removable for adjusting the toe angle of the front wheels. The length of the lever can be changed by turning the threaded clamp and thus adjusting the position of the wheel for straight movement. The threads of the tips and inside the clamp are different - right and left, so when rotating the rod lengthens or shortens.
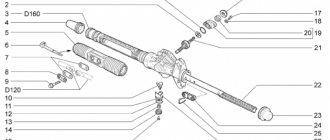
The design of all articulated ends is the same and includes the following parts (the numbering coincides with the diagram):
- Ball pin with M14 x 1.5 thread for 22mm castle nut. The radius of the ball is 11 mm; a hole for a cotter pin is made in the threaded part.
- The cover is rubber (or silicone), splash-proof, also known as a boot;
- Metal body welded to M16 x 1 threaded rod.
- The support insert is made of composite material, otherwise it is a burglar.
- Spring.
- The lid is pressed into the body.
Some lever manufacturers insert a small attachment called a grease gun into the cap for periodic lubrication.
The short outer ends of the side rods are the same, but the long ones are different. You can identify the part by its bend - on the right side there is a lever bent to the right. The side link ball pins are attached to the first holes of the swingarm and gearbox.
A well-known automotive technician suggests distinguishing between long points as follows: Grasp the loop with your right hand, pointing the ball finger downward, as if you were holding a gun. If the muzzle is bent to the left, you have a left-handed pusher tip.
Video: design of the rod end for VAZ 2101—2107
Troubleshooting
While the car is moving, the ball fingers rotate in different planes and gradually wear out the cracks, causing recoil. The following signs indicate critical tip wear (or more):
- obvious dull touch when moving over any uneven surfaces;
- the vibration of the ball pin play is transmitted to the steering wheel;
- on a flat section of the road the car spontaneously moves off the straight road;
- It is difficult to rotate the steering wheel and a creaking sound is heard from below.
If it takes a lot of effort to turn the steering wheel, the worn tip should be replaced immediately. The symptom indicates that the ball pin is stuck inside the housing. If measurements are not taken in time, the loop may jump out of the socket and the machine will become uncontrollable.
A similar story happened to my relative. When there was literally half a kilometer left to the garage, the right steering column on the G7 broke. The driver showed ingenuity: he tied the end of the missing link to the suspension arm, straightened the steering wheel with his hands and continued to drive slowly. When it was necessary to turn, he stopped, got out of the car and manually adjusted the wheel in the desired direction. The 500 m long route was completed in 40 minutes (including entering the garage).
Steering rods of Zhiguli cars become unusable for various reasons:
- Natural wear and tear. Recoil and detonation appear at 20-30 thousand kilometers, depending on conditions and driving style.
- Operation with torn hinge boots. Through the holes, water enters the unit, dust and sand penetrate. Corrosion and abrasion quickly damage the ball pin.
- Lack of lubrication leads to increased friction and accelerated wear. Before installing the part on the vehicle, you should check the presence of lubricant.
- Shaft deflection due to impact with a stone or other obstacle. If successful, the element can be removed and leveled by heating with a torch.
When the wear of all tips reaches a critical limit, the front wheels have large play in the horizontal plane. To drive straight, the driver must fully “take” the car. How to diagnose wear on steering rods and not confuse them with suspension defects:
- Park the car on a picturesque ditch or overpass and apply the “handbrake” to the brakes.
- Go down into the hole and carefully inspect the trapezoid, especially after hitting the bottom.
- Grasp the rod near the tip with your hand and twist it up and down. If you feel freedom of movement, replace the worn element. Repeat the operation on all loops.
The method of traction accumulation in diagnosis is of great importance. It is useless to rotate the lever around its own axis: this is its normal working stroke. If the regulator shows a slight play, it is considered that the loop is working correctly - this is the internal spring working.
Video: how to check the steering linkage of a Zhiguli
(281/366) On September 9, serial production of the penny began
The first “Kopeyka” was produced at the new plant on April 19, 1970, and today mass production of this legendary and iconic Pepelats began, which gave rise to a whole series of cars, the so-called “classics”, produced in Tolyatti until 2012. Yes, the development is not entirely ours, all units and production technologies were purchased from Fiat, but in the process of localizing the Fiat 124 model to our roads and realities, the original has changed a lot and has become more reliable. It seems that it is believed that VAZ was never able to assemble anything more reliable than Kopeika. Well, and a special congratulations to the entire movement of the Battle Classics, happy holiday!
Selecting new trapezoid parts
Since production of the VAZ 2107 car has been discontinued, finding original spare parts is becoming increasingly difficult. On the roads of the CIS countries, steering rods quite often become unusable, so the supply of “original” spare parts has long been exhausted. Recently, trapezoid sets have been supplied to the market by several well-known manufacturers:
A special feature of tie rod repair is that worn ends can be replaced one at a time. Few Zhiguli owners put on full sets due to a broken ball pin. As a result, the “seven” trapezoid is often assembled from spare parts from different manufacturers.
The quality of steering rods from these manufacturers is approximately the same, as evidenced by reviews from motorists on the forums. Therefore, choosing a new spare part comes down to the following 3 rules:
- Beware of fakes and do not buy spare parts from dubious outlets.
- Do not buy tie rods from unknown manufacturers at a bargain price.
- Do not confuse the left long tip with the right when changing parts of the trapezoid.
Turning out wheels for drifting on a classic with your own hands - work process
The sequence of work to increase the angle of rotation of the wheels of VAZ cars is as follows. It is not difficult to perform it, understanding why each action is performed.
- Cut off the limiters on the levers.
- Cut off the limiters on the steering gearbox.
- Buy 4 extended bolts with washers for the VAZ G8 generator.
- Install negative camber by replacing the bolts from the kit with purchased generator ones.
- Making a bipod.
The eversion axis is a straight line passing through the ball joints. The steering tip must be moved to this axis as much as possible.
To do this, carry out welding work on the bipod. You should know that the bipod is made of good metal that can be welded using any welding method.
Look at how you can tune the Lada Kalina!
When marking the bipod for trimming, it is necessary to align the rotation axis with the steering knuckle as much as possible, while the attachment point on the rod should be at the same level. Try to create a gap between the steering tip and the bipod lever at maximum eversion.
In the event that the shortened bipod that has been manufactured does come into contact with the brake caliper, it can always be moved forward.
Replacing the outer short tip
Since access to the outside of the trapezoid is possible from the wheel side, disassembly can be done without an inspection hole. What tools and materials will be needed:
- 13 and 22 mm keys;
- pliers;
- hammer;
- extractor - “glass” type of perforation;
- a ruler at least 20 cm long or a tape measure;
- wheel pullers - jack, wheel wrench, wheel wedge;
- rags, fabric gloves.
Also, before you begin, prepare a new cotter pin, WD-40 spray lubricant, and a wire brush to remove any dirt from the shaft.
Why is it customary to replace nozzles rather than repair them:
- High-quality factory parts are made non-separable; in a garage it is impossible to remove a worn rattle - the hinge cover is pressed tightly into the body.
- Homemade collapsible rods using a lathe are considered unreliable. The reason is the “lap” profile inside the body; under load, the ball axis can squeeze out the cover and jump out.
Preparatory stage
Before removing the nozzle, perform a number of preparatory steps:
- Secure the car to the platform and unscrew the desired wheel. For maximum access to the tip, turn the steering wheel left or right as far as it will go.
Take this opportunity to check the condition of the boots on the other tips. If you notice cracks, completely disassemble the trapezoid and install new silicone covers.
Disassembly instructions
Dismantling the old part and installing a new drill is carried out in the following order:
- Using a 13mm wrench, loosen the circlip nut closest to the wheel. Do not touch the second nut.
Some car enthusiasts, instead of measuring the length, count the turns when they unscrew the tip. This method is not suitable - the length of the threaded part on parts from different manufacturers may differ by 2-3 mm. I had to personally encounter this problem: after the replacement, the car began to climb to the right and “eat” the edge of the tire. The issue was resolved at a car service: the technician adjusted the wheel alignment angle.
If you can't find the extractor, try removing the pin from the flapper by hitting the pin with a hammer. Method two: Lower the wheel hub onto the block, thread the nut onto the pin threads, and hit it with a hammer through the wood spacer.
Disconnecting is not the best way to unmount a connection. Accidental rivet of the wire is possible, in addition, shocks are transmitted to the hub bearing. It is better to buy an inexpensive puller - it will come in handy with replacement hinges.
Video: how to change the tie rod end
Complete disassembly of the trapezoid
Removing all rods is practiced in two cases: when replacing complete levers or a set of anthers on hinges. The technology of work is similar to dismantling the outer toe, but is carried out in a different order:
- Carry out the preparatory stage - insert the machine into the hole, clean the hinges, lubricate and remove the cotter pins. There is no need to turn or remove the wheels.
- Using a 22mm wrench, unscrew the nuts securing the two side link ball studs without touching the clamp bolts.
Be sure to position your midsection correctly by leaning forward. After replacing, it is worth driving along a flat section of the road and observing the behavior of the car. If the car is driving sideways, go to a gas station to adjust the camber angles of the front wheels.
Video: replacing steering rods on a VAZ 2107
The operation of replacing tips or rod assemblies can hardly be called complex. Having a puller and a little experience, you can change the parts of the VAZ 2107 trapezoid in 2-3 hours. The main thing is not to confuse the right lever with the left one and install the middle part correctly. There is a reliable way to protect yourself from mistakes: before disassembling, take a photo of the position of the rods with your smartphone camera.
The pendulum on cars is called such a unit with the help of which both wheels rotate when the need arises. This is a type of lever that provides synchronous change in the angle of inclination of both front wheels. When you turn the steering wheel left or right, the wheels change direction accordingly. If there were no pendulum, the wheels would change direction asynchronously, which would lead to a number of unpleasant consequences. In this material we will look at how to replace the VAZ 2107 pendulum, where this part is located and how to determine its malfunction.
How to make a twist on a classic by removing the Ackermann angle.
and cut ourselves out
4) Throw the hell out of the unnecessary things.
Really, why did they put so much stuff in there?
in the photo the levers are not stock but orange stinger judging by the photo) on stock levers the angle will be smaller
and the steering wheel will fucking jam!
What's the point? It seems to me that if you turn the steering wheel like that, the wheels will fly off the six.
How to identify a faulty pendulum
The easiest way to determine if the lever is faulty is to listen to the impacts when driving on rough roads. You shouldn’t deliberately drive into a hole or run over a bump, so you can pull over to the side of the road and experiment. But this is not the only way to determine the malfunction of such an important part as the pendulum.
The second way to determine whether the VAZ 2107 pendulum arm is faulty is the presence of large play in the steering wheel. Determining it is quite simple, for which you need to turn the steering wheel in one direction and the other. But the most common case of pendulum failure is the presence of load when turning the steering wheel. But these factors do not always indicate that the swing arm is at fault. Malfunctions with such symptoms may include loosening of the bolts or overtightening of the adjusting nut. Therefore, before replacing the device, make sure that it is damaged. This can be done after disassembling it. The first sign of a part malfunction is the presence of defects in its constituent elements, so to determine the malfunction you will need to disassemble the mechanism.
Location of the pendulum on the VAZ 2107
This product is located on a VAZ 2107 car at the bottom of the engine compartment. You can see the swingarm by opening the hood and looking at the underside of the car from the passenger side. It is more convenient to disassemble or inspect the device from below from an inspection hole or on an overpass.
The bipod, which controls the rotation of the front wheels of the VAZ 2107, starts from the pendulum. The photo below shows a view of the pendulum lever on the VAZ 2107.
Removal and repair of the pendulum
To carry out the work, you will need to stock up on a standard set of tools and a steering rod puller, and then begin the work process:
- Initially, it is necessary to disconnect the two steering rod ball joints from the device.
- Using two “17” wrenches, you need to unscrew the fastenings of the pendulum arm. After unscrewing the bolts and nuts, pay attention to the position of the washers. When reassembling, these washers must be reinstalled in the same place. The photo below shows the location of bolted connections and washers.
- After removing the bolts, you can disassemble the product.
After removal of the product, it is replaced or repaired. Installing a new pendulum is the opposite of removing it. It is recommended to replace the pendulum only if it cannot be repaired. In frequent cases, the product can be repaired, which many motorists do on their own.
Repair of the mechanism is carried out in the following procedures:
- Secure the disassembled part in a vice.
- Using pliers, remove the cotter pin and unscrew the nut.
- Remove the washer located under the nut.
- Now you need to disassemble another washer, whose diameter is larger than the previous one. You can use a screwdriver for this.
- Remove the plastic bushing along with the O-ring.
- Now you can remove the bracket from the axis of the product.
- The second O-ring and the second bushing are removed.
- After this, the condition of the removed parts and the body of the device itself is inspected. It is recommended that after disassembling the unit, install new bushings from the repair kit. They're inexpensive, but once replaced, you won't have to remove the swingarm again any time soon. If there is the slightest defect in the case, the product must be replaced.
The product is assembled in the reverse order of removal, but initially all parts must be lubricated with Litol-24. This completes the replacement of such an important device on the VAZ 2107. After assembly, check the steering play. Pendulum arms with rolling bearings are also sold on the market today. There are several reviews about the reliability of this option. Everyone is told that a pendulum on bearings makes it easier to rotate the steering wheel, works several times longer than the factory one, but cannot be repaired. In the end, the choice is yours.
Making a twist on the classics
How to build a cramp | Useful information No comments
Hi all! Today we’ll look at ways to increase the eversion angle on the classics.
And so let's get straight to the point. There are a great many ways to increase the steering angle of the wheels, but there are still two main ones. A system like Wisefab and our favorite style “collective farm tuning” or as the clear guys call it custom tuning. With Wisefab everything is more or less clear, I saved some money, bought it, fitted it, and now the inversion is already 65+ degrees. More details about Wisefab are discussed here: Eversion on a Nissan Silvia.
Let's move on to our favorite topic: do-it-yourself tuning or custom tuning of vases.
To begin with, we cut the limiters on the levers and on the steering gear. On the levers:
On the steering gear:
Go ahead. To create the required negative camber, there were not enough standard bolts; to replace them, buy bolts from a VAZ 2108 generator, 4 pcs., and used washers to make the negative camber. It looks something like this:
The goal is to move the steering tip closer to the eversion axis (the upper and lower ball joints facing each other are the steering axis). And don’t be afraid to weld, the bipod is made of such metal that it will not fall apart, and the welding site will NEVER fall apart if it’s simply welded, most likely all the levers will bend (checked) and the spars will go away before the bipod bursts.
