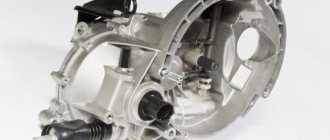
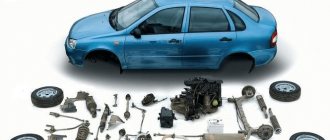
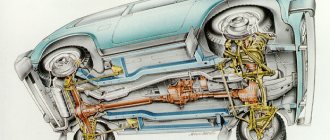
When buying a car, many drivers give preference to manual transmission, considering it more reliable. A manual gearbox has several advantages, the main one of which is its unpretentiousness. If we compare a manual transmission with an automatic transmission or a variator, then in the event of damage or failure of any elements of the manual transmission, repairs will cost the driver relatively inexpensively.
With proper operation and timely maintenance, a manual transmission will not require special attention. However, in practice, problems may arise over time in the operation of a manual transmission, as in other components of the car. One of the common problems with manual transmissions is the crunching noise that occurs when shifting the gear lever. In this case, the driver needs to determine the cause and fix the problem.
How does a crunching sound manifest in a gearbox?
There is an unspoken rule among drivers - to start driving a car with the radio turned off. This is necessary to immediately check whether there are any extraneous knocks, noises or other sounds that may indicate a malfunction of a particular unit. The following sounds will indicate problems with the gearbox:
- A crunching sound when engaging a gear, and often it can only appear in one of the gears, for example, in reverse;
- Crackling noise when returning the gearshift lever to neutral.
If you notice one or both of the symptoms in the operation of your box, you should determine and eliminate the cause as soon as possible.
We determine which CV joint crunches, the inner or outer one
Several methods are used to diagnose CV joints. The simplest of them is a visual inspection of the anthers and checking the shafts.
The main cause of problems associated with the appearance of crunching is the ingress of dirt into the nodes, which can only occur due to damage to the boot.
If the rubber element is torn, then upon inspection there will be traces of leaking lubricant on it, from which you can understand which of the units got sand and dust.
Also, during inspection, you should try to move the drive shaft in the transverse and longitudinal directions by hand. CV joints are highly precision-manufactured units, and if it feels like they have play, it’s time to take action.
If, during a visual inspection, no leaks in the boot are detected, but symptoms of a joint malfunction appear, several simple methods can be used to identify which of the CV joints is problematic.
Diagnostics of external hinges
External hinges are tested by placing a strong load on them. To do this, simply turn the wheels all the way to the right or left and try to start moving at higher speeds. Afterwards, we carry out the same procedure again, but this time when turning the wheels in the other direction.
When checking CV joints using this method, starting to move with the wheels turning to the left will create a significant load on the right unit, and if it has play, it will begin to crunch.
By turning the wheels to the right, the left hinge is checked. But we note that a crunching noise can also be produced by the outer CV joint on the side where the turn is being made.
Therefore, when checking, it would not be superfluous to have an assistant present, who, being near the car, will establish by ear which side the sound is coming from.
Checking internal components
To determine which inner CV joint is crunching, a different method is used. To carry it out, you need a flat section of the road, but with a bump (hole).
The essence of the test comes down to driving through a hole at a moderate speed with one of the front wheels. Then everything is repeated, but with the second wheel entering the hole.
When a wheel hits a bump, a shock load occurs on the inner joint, and if there is play in it, they will manifest themselves in the form of knocks or soft crunches.
Universal method
The only drawback of the method of driving into a hole at speed is the fact that there is not always a suitable section of road with a bump. Therefore, another method can be used for diagnostics, and it is universal and allows you to check both internal and external CV joints.
The algorithm of actions is as follows:
- Use a jack to jack up one of the drive wheels;
- We place a stop under the car and apply the handbrake;
- We start the engine, engage first gear and gradually release the clutch pedal (we simulate the beginning of movement. At the same time, thanks to the differential, the suspended wheel will begin to rotate, and the one standing on the ground will remain motionless);
- Having gained engine speed, we begin to slow down the rotating wheel with the brakes (we do not touch the clutch pedal. Thus, with the brake mechanisms we create a load on the internal unit, and if it is problematic, it will immediately manifest itself with knocks and crunches);
- After checking the internal hinge, we determine the condition of the external one. To do this, just release the brake pedal, pick up speed, turn the wheels all the way to one side and use the brakes again. A large drive angle and brake force will create the necessary load, which will cause the external assembly to crunch if it is not working properly.
After checking on one side, we repeat similar work with the drive of the second wheel.
Why does the gearbox crunch?
There are many reasons why a crunching noise occurs when the gearbox operates. Eliminating some of them does not require much intervention in the mechanism, while others require a near-overhaul of the box. Most often, the gearbox crunches when changing gears for the following reasons:
Synchronizer malfunction. The problem may lie either in the failure of the element or in the insufficient amount of lubricant in the part. If the synchronizer has “crumbled” due to age, the lubricating components with the resulting “garbage” risk causing serious damage to the entire unit, so the situation needs to be corrected as soon as possible;
If you have a mechanic
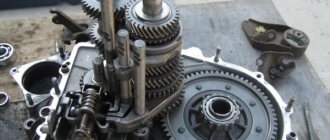
Gears shift poorly in a car with a manual transmission for three reasons. The first of these is a malfunction of the clutch when it does not completely disengage (drive). The first sign of this malfunction is that the reverse gear is engaged with a characteristic crash. The rear one reacts to this anomaly more noticeably than other gears, because it is the only one not equipped with a synchronizer.
The second reason is a defect in the gear selection mechanism of the gearbox. And finally, the third is excessive wear of the gearbox synchronizers.
There are also several clutch malfunctions in which manual transmission gears shift poorly:
- Air in the clutch release hydraulic drive or fluid leakage from it. The malfunction is eliminated by replacing failed components of the hydraulic system and pumping it.
- Worn or broken clutch release fork. The part requires replacement or repair.
- Warping (runout greater than 0.5 mm) or too thick new driven disk.
- Failure of the basket (temperature deformation of the pressure plate or its distortion).
- Loss of mobility of the support bearing of the gearbox input shaft (at the end of the crankshaft to which the flywheel is attached).
- Jamming of the clutch driven disc hub on the splines of the gearbox input shaft. To eliminate the defect, clean the splines of the gearbox hub and input shaft. It wouldn’t hurt to lubricate them a little with lithol.
- There is too much free play in the clutch release fork. Its value needs to be clarified with the manufacturer, since it is slightly different for different cars. Until you find out the value of this parameter for your car, set it from 5 to 8 mm. Too little free play of the fork is also undesirable, as it leads to clutch slipping and increased wear of the release bearing.
Excessive wear of synchronizers mainly occurs in those gears that are engaged more often: these are usually first, second and third. The rear one is not included in this list because it does not have a synchronizer. When your gear shifts poorly, and you assume that the reason for this is wear of the synchronizers, firstly, you should only have difficulties with this while driving. Secondly, in this case it switches better if you use double squeeze.
How to avoid crunching noises in the gearbox
Most often, gearbox malfunction occurs due to improper care of it. Manual transmissions require regular lubrication, which drivers often forget about, assuming that such procedures are only required for automatic transmissions. If the lubricant loses its properties, this can lead to serious consequences, including failure of individual components and mechanisms.
Experts recommend replacing the lubricant in a manual transmission every 45-50 thousand kilometers. If the vehicle is driven under particularly severe conditions, change the oil more often.
Please note: It is especially important to promptly change the lubricant on a front-wheel drive vehicle.
By lubricating gearbox and suspension elements in a timely manner, you can avoid expensive repairs and early failure.
Hello everyone. The second gear shifts with a crunch. I know it's synchronous. Tell me, how much does a synchronous replacement cost and how long can you drive?
Bolts from casting will be used for dies
by Adminrive · Published 10/24/2015
It seems to be a little cold
by Adminrive · Published 05/12/2016
Dismantling and repairing the locking mechanism
About theory.
The solenoid power circuit in the Lada Kalina car includes a switch ring located in the gear selector handle. The device operates as follows. By lifting the ring, the driver activates the power supply to the solenoid, which in turn causes the reverse speed control unit to unlock. Access to activating this transfer is now open. When the lever is moved to the required position, the limit switch located on the Lada Kalina transmission housing is activated. This allows you to activate the rear brake lights and an audible warning signal sent through the interior speaker.
Failures that cause crunching when changing gears
Crunching noise when shifting gears can be caused by several factors. The first and, admittedly, most popular is considered to be the breakdown of any unit, and the crunch in this case is only a symptom. Among the main breakdowns that cause such unpleasant sounds when switching gears are: 1. Failure of synchronizers . Synchronizers are responsible for smooth gear shifting. Over time, they wear out and cause a crunching sound when changing gears. Fixing the problem is quite easy - you need to replace these same synchronizers. However, only professionals should be trusted to carry out this type of repair. 2. The falling out of the clutch basket can also cause a crunching sound when changing gears. Replacing the clutch basket will eliminate this defect. 3. Clutch malfunction . Well, here words are superfluous - go for diagnostics, they will establish an accurate diagnosis. 4. Problems related to the gearbox shaft . The problem can be solved by replacing this unit.
The main problems of automatic transmission and manual transmission
Problems with the Lada Granta (automatic) in the transmission area are associated with the electronic control unit (automatic transmission ECU or manual transmission) and actuators, although there are mechanical malfunctions. Main malfunctions of both transmissions:
- kicks (jerks) when turning on some mode;
- kicks or jerks when starting to move or when changing gears;
- random switching to neutral gear;
- untimely transition to the next or previous gear;
- transition to emergency mode;
- overheat;
- howl;
- blocking in some gear;
- oil leakage.
These manifestations are only a consequence of more serious problems, but the diagnosis of malfunctions begins with an assessment of the symptoms.
Kicks or jerks
It doesn’t matter which mode is turned on, which causes the Granta automatic transmission to kick, that is, the car twitches noticeably, because the reason for this is always the same - incomplete disconnection of the gear shift mechanism from the engine flywheel. In a hydraulic automatic transmission, the torque converter and the first clutch are responsible for this process, disconnecting the box from the torque converter.
If the oil in the torque converter is dirty or too thick, then at idle speed it rotates the automatic transmission shaft too quickly, which leads to a kick when engaging any mode other than neutral (N) or parking (P). The same situation is with the front clutch, which disconnects the automatic transmission from the torque converter in modes N or P. If its discs are not sufficiently compressed or there is dirty thick oil between them, then a kick is inevitable. In addition, jerking is often caused by clogging of the valve body with dirty oil with remnants of burnt clutches.
In a manual transmission, the clutch and its actuator are responsible for disconnecting the engine from the gearbox, which, accurate to hundredths of a millimeter, presses the release fork, thereby moving the clutch basket away from the driven disk. If the clutch, consisting of the clutch, its actuator and the computer, is not configured, then either the clutch will not be depressed or it will be released too quickly when starting to move. Setting up this bundle is called adaptation, initialization or training of the manual transmission. During adaptation, all actuators are adjusted, thanks to which even problems associated with incomplete or unclear gear engagement disappear.
Automatic transmission bearing for Lada Granta
Jerks when shifting gears in a hydraulic automatic transmission are always associated with dirty oil, due to which the hydraulic system of the box cannot work as expected. In turn, the oil becomes dirty only due to burnt friction linings. Therefore, even a complete replacement of the lubricating fluid will not improve the condition of the unit, because it needs, at a minimum, replacement of clutches, and, at maximum, elimination of the reasons why they failed.
Jerking when shifting manual transmission gears is usually associated with improper driving (the driver keeps the engine speed at a very low level or at too high a speed and starts climbing a mountain in a higher gear) or clutch problems. Without diagnostics, it is impossible to determine the exact cause. If scanning shows an error, then after decoding it you can determine which part is the problem. Otherwise, you will have to disassemble half the car and it is not a fact that after repair the problem will disappear.
Unexpected shift into neutral gear
There can be many reasons for this behavior of a hydraulic automatic machine, but they are always related to the valve body, ECU or wiring. The electric or hydraulic “brains” of the machine incorrectly evaluate the operating mode of the box, and also cannot determine which gears should be engaged. Sometimes a complete oil change with flushing helps for a short time, but the clutches are already worn out, so the unit will not last long.
On machines with a robot, this problem is always related to the ECU, wiring or sensors.
Regardless of the type of transmission, only a specialist can determine the exact cause and restore the unit. Moreover, you will have to completely check all the wiring and sensors, and in the case of a hydraulic automatic machine, remove and open the box.
Untimely shifting to the next or previous gear
This malfunction is always associated with devices responsible for selecting the transmission operating mode, that is, the ECU or valve body, as well as the incorrect operation of some sensors or their wiring. Regardless of where the breakdown occurs, the algorithm for the failure to occur is always the same: incorrect sensor data or some malfunction of the ECU leads to the control unit issuing a command at the wrong time. One of the most common reasons for this behavior of a hydraulic machine is dirty oil, but flushing will only temporarily eliminate the problem. Because dirt in the oil appears only as a result of friction clutches burning out due to overload or overheating of the transmission.
In robotic transmissions, the explanation for this behavior is some kind of electrical defect, ranging from dirty contacts of one of the sensors to an ECU failure. Therefore, a comprehensive diagnosis is necessary to determine the exact cause. Very rarely, a manual transmission going into neutral occurs due to defects in the mechanical part along with defects in the gearshift actuators, and only on gearboxes whose mileage has exceeded 100 thousand km. If diagnostics of the electronic part do not produce results, then it is necessary to remove the unit to disassemble and troubleshoot all parts.
Switching to emergency mode
Emergency mode is the normal reaction of the transmission to overheating of the box or clutch itself. The ability to turn it on is available both on the robot and on the hydraulic automatic machine. The transition to this mode is accompanied by the inclusion of an indicator (gear) on the instrument panel, as well as a sharp drop in speed, regardless of the position of the gas pedal. In especially severe cases, it is possible to independently switch to neutral mode, and the lever also moves to position (N).
Incorrect operation of the transmission, as the cause of a crunching sound when shifting gears
It is fair to say that often a crunching sound when shifting gears may indicate that the manual transmission is not being used properly. Therefore, it would not be amiss to provide some recommendations that will extend the service life of the manual transmission.
1. Timely replacement of transmission fluid in the box . Few people know, but in a manual transmission, just like in an automatic transmission, the oil should be changed periodically. A manual transmission does not require replacement as often as an automatic transmission, but still, after 70,000 kilometers, you should stop by a service station. If you ignore this recommendation, metal shavings and dirt will begin to accumulate in the oil, resulting in insufficient lubrication and crunching.
2. An insufficient amount of oil in the transmission can also cause a crunching sound when shifting gears. The solution is to add oil or, better yet, replace it .
As you can see, it’s quite easy to avoid crunching noise when changing gears!
Elimination of crunches and knocks, restoring the operation of CV joints
How to find out which CV joint is crunching - we figured it out, now about the measures that should be taken to fix the problem, since it is undesirable to operate a car with problematic joints.
One of the disadvantages of CV joints is their non-repairability, that is, if the joint crunches, then it is worn out and requires replacement. The only thing that can be done is to “extend the life” of the node and delay its replacement.
Since the main reason for the appearance of crunches is dust and dirt, when they appear, you should immediately inspect all the anthers for damage. If none are found, we determine which CV joint is crunching using one of the above methods.
After identifying the problematic hinge, we try to extend its service life. To do this you need:
- Remove the drive from the car;
- Disassemble the CV joint;
- Thoroughly wash all components with gasoline, solvent or other means (white spirit, etc.);
- Apply new CV joint grease or equivalents (see above) and assemble the hinge;
- Install a new boot;
- Install the rebuilt drive on the car.
At the initial stage of wear, these measures are enough to get rid of the crunches, but they will eventually return (when the wear intensifies) and then the hinge will have to be replaced.
Example in the video: the synchronizer does not help
Diagnostics and replacement of the speed sensor
Let's start answering the last question. Never, under any circumstances, attempt to remove the speed sensor.
It is mounted on the gearbox housing and is accessible. But this does not mean that the sensor is easy to replace.
Speed sensor on box 2181
Even when installing the “old” sensor, it will not be possible to achieve complete tightness. The oil will gradually leave the crankcase, and adding it to the 2181 gearbox will be difficult.
So, the reader understands: dismantling the sensor is prohibited, even if it is not removed for the purpose of replacement.
When gears shift poorly, driving a car becomes not only unpleasant, but also unsafe. Let's look at the main reasons why gears shift poorly or don't shift at all. And since the automatic transmission and manual transmission are too different, we will consider them separately.
Basket
If the gears are engaged with the engine running, but no grinding noise is heard. Most likely the problem is in the shopping cart. In this case, the clutch does not engage completely. In this case, many drivers prefer to completely replace the basket, but this is not always necessary. To clarify the reason, in any case, you will have to remove the box.
First you need to check the release bearing. It should move freely along the input shaft. If it is jammed or moves with difficulty in some places, this is the reason. A faulty bearing prevents the clutch from engaging completely. This problem is solved by replacing the problematic part.
Another reason is high disc wear. To determine its condition, it is necessary to disassemble the basket and assess its condition visually. There should be no visible rivets on the friction linings, and there should be no carbon deposits on them. If there is at least one of these signs, then you should install a new disk. Most likely, the problem with shifting gears will be solved.
It is somewhat more difficult to determine if the basket is faulty. Over time, the level of wear on the petals becomes prohibitive. As a result, they become susceptible to high temperatures. Once heated, such a basket cannot completely retract the pressure disk.
In some cases, it is enough to visually look at the basket. The petals will be slightly bent and will show signs of overheating or damage. Another diagnostic method, available in any garage, is to install a known working part on the car. If the car started to work as it should, the reason was in the basket.
Hydraulic booster. In this case, the problem may appear periodically. Most often on the move. This is due to a lack of fluid in the system and/or the presence of air there. This can be determined visually by simply looking into the tank. If a fluid leak is detected, all drive components should be checked. Be sure to inspect the tubes, hoses, and release cylinder. All identified leaks are eliminated. After which you should bleed the system.


