A headlight is a source of directional light that is installed at the front of the car, designed to illuminate the surrounding area and the road. Headlights are often considered an item for tuning or modification. Before starting work, we suggest that you study the design of the Kalina headlight unit.
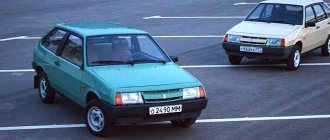
The Lada Kalina has two headlights with three sections:
- low beam;
- high beam and side lights;
- turn indicator.
When you turn on the low beam of the headlights, only the low beam lamps are lit, and when you turn on the high beam, the low and high beam lamps are lit. The sections of the front direction indicators have transparent lenses and orange turn signal lamps.
| Name | EEC | Power, W | Number in photo |
| Low beam lamp | H7 | 55 | 1 |
| High beam lamp | H1 | 55 | 2 |
| Front turn signal lamp | PY21W | 21 | 3 |
| Side light lamp | W5W | 5 | 4 |
To adjust the headlights, the car is equipped with a headlight range control with an electromechanical drive. Kalina's electric headlight corrector consists of a regulator on the instrument panel, electric drives installed in the headlights and connecting wires.
The manufacturer installed headlights from two different manufacturers on the Lada Kalina: Avtosvet JSC Kirzhach and Bosch. To find out the manufacturer of the headlight, just inspect the headlight unit. If the material used is glass with the “AL” symbol, then the manufacturer is Bosch (Russia). Headlights from the same manufacturer can be made of polycarbonate without a low beam lamp cap. Another headlight manufacturer, Kirzhach, also uses polycarbonate, a distinctive feature is the presence of a low-beam lamp cap.
The Lada Kalina headlight consists of:
- Housings;
- Wires;
- Glass;
- Lamp;
- Reflector;
- Decorative insert (headlight mask);
- Headlight plugs.
Let us remind you that without any special skills you can install PTF on a Lada Kalina with your own hands.
Key words: headlights Lada Kalina
The headlight is a source of directional lighting on the Lada 1118. It is installed in front of the car, illuminating the road surface and the surrounding area. Due to the huge range of lighting systems to choose from, the elements of which can be installed on the Kalina, lights are often the subject of replacement or modification. To replace the Kalina headlight unit, it is worth first considering its structure. On this model, the car manufacturer installs 2 headlights equipped with 3 sections:
- low beam;
- side and main beam;
- turn signals.
Block headlight of Lada Kalina
When you turn on the low beam, only the low beam lights come on, and when you turn on the high beam on the 1118 model, the low and high beam complex with a power of 55 W each starts to burn. The sections of the front indicators have transparent light diffusers. The 21 W turning lights have an orange glow.
To be able to adjust the headlights on the Lada 1118, the package includes a headlight leveler with an electromechanical drive. The adjustment system has a device that is installed on the dashboard, as well as a connection wire and electric drives pre-installed in the lights.
The plant where Kalina is produced provides for installed lights from two manufacturers:
- Bosch;
- Avtosvet CJSC (Kirzhach).
Kalina front optics
Why bad light may occur on a VAZ 2114
To solve the problem, you need to understand all the nuances of the headlights. Simply replacing headlights may not give the desired effect. In some cases, changing lamps will be a waste of money.
Causes of headlight malfunction:
- One of the most common reasons is dirty windows. Dirt, which may appear on the headlights after prolonged use, can reduce illumination by approximately 50%. It also happens that it is quite difficult to notice any dirt on the headlights. This is due to the fact that they may not be noticeable. How to remove dirt from headlights? This may not be so easy to do, because using a dry rag is prohibited. It leaves small and unnoticeable scratches on the glass that can ruin the glass.
- Minor scratches are another common cause of dim headlights. Scratches can appear for a variety of reasons. The thing is that by wiping the headlights with a regular rag or even a glove or some item of clothing, you can actually clean the surface of the headlight, but small scratches will also appear on it. As long as the number of scratches is small, this will not have any serious effect on the performance of the headlights, but after a long time there may be so many scratches that the headlights will be exceptionally dim.
- In some situations, the glass may even burst. There are many reasons for this. In Russia and other CIS countries this can happen due to temperature. If a car enthusiast notices any crack, he needs to remove the headlamp as soon as possible and replace it with a new one. If this is not done, the headlight may stop working while driving. The consequences of unexpectedly turning off the lights can be unpredictable.
- Another reason for deterioration in illumination is the age of the headlight. Over time, the headlights become increasingly cloudy. This is due to the fact that while driving, various small debris, as well as sand and dust, fall onto the surface of the headlight. As a result, very small scratches begin to appear on them. Despite the fact that they are practically invisible, these scratches are capable of refracting light according to the principle of a prism. This is an extremely unpleasant effect. It is because of this that the glass has to be replaced. How to protect the headlight from such unpleasant consequences? In this case, it is recommended to cover them with a special protective film, which can be purchased at a car store.
Step-by-step replacement instructions
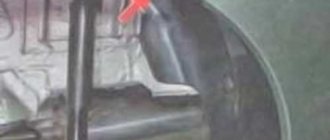
Each H7 standard bulb has an iron base, which is pressed to the headlamp with a wire clamp. To bend this bracket, just get close to the plane of the headlight from behind. Let's open the hood and see what exactly will bother us.
Engine compartment of Kalina-2 (VAZ-2192, 2194)
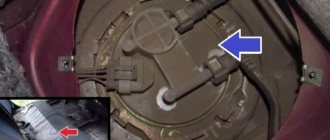
Behind the headlight on the right is a washer reservoir. It is dismantled like this: disconnect the electric motor terminals, tighten the plug harder, find one nut and one fastening bolt. The fastening elements are unscrewed with a 10mm wrench, then the tank is placed on the engine. Next we could look at how to remove the headlight on Kalina-2, but in this case this is not required.
Before performing any manipulations with electrical equipment, always disconnect the negative terminal of the battery. It is better to connect this terminal last (before closing the hood). Be careful.
Replacement sequence:
- Remove the rubber cover covering the low beam lamp compartment;
- Disconnect both terminals from the lamp contacts;
- The fastening bracket is removed from the grooves by first pressing on it, then the bracket is moved to the side;
- They take out the lamp, install a new one in its place, and return the bracket to its place.
Next, perform steps “2” and “1” in reverse order. The connection diagram is not important - there are only two contacts, and both go to the filament. Now, if we connected LEDs, then everything would look more complicated.
The bracket presses the cartridge to the plane of the headlight
When installing a halogen light source, you must remember: the surface of the lamp glass must be perfectly clean. Do not allow grease marks to remain on the flask. Installation is carried out using only cotton gloves. The glass of the flask is cleaned with industrial alcohol or Secunda.
Troubleshooting and replacement of VAZ 2110 headlight hydraulic corrector
On a VAZ 2110 car, the hydraulic headlight corrector “2110-3718010” or “2110-3718010-10” is usually used. Quite often, especially in winter, due to temperature changes, as well as the not very high quality of rubber seals, leakage of working fluid occurs and then it is impossible to do without replacing the VAZ 2110 hydraulic corrector.
The principle of operation of the VAZ 2110 headlight hydraulic corrector
Design features
The design of the hydraulic corrector includes the following components:
- The master cylinder, which is mounted on the dashboard;
- Actuator cylinders, which are mounted on the headlights and turn them;
- Connecting pipelines of the hydraulic corrector, fixed with clamps;
- A working fluid that is characterized by increased frost resistance.
A hydraulic corrector works like this: a normal, working corrector maintains the pressure required for operation. If the driver needs to direct the headlights downwards, then the pressure in the system decreases.
In this case, the rod turns the optics down using a piston.
If the liquid leaks, the corrector pistons are fixed in one position, and adjusting the direction of the headlights becomes impossible.
VAZ 2110 headlight hydraulic corrector diagram
Fault detection
If it is impossible to adjust the headlights, it may not be advisable to rush to immediately change the corrector, because it is quite possible that the problem is something else.
If you have made sure that there is no leakage of liquid, and the direction of the light flux cannot be changed with the adjusting screws, measure the stroke of the rods.
note
To do this, remove the actuator cylinders and take measurements. The stroke is considered normal if it is 6.5-7.5 mm.
VAZ did not provide for the repair of the corrector; its design is not collapsible. That is why, if the need arises, the entire structure, including tubes and cylinders, is replaced.
Replacement procedure
For inexperienced drivers, replacing the corrector often causes difficulties, as evidenced by numerous discussions on VAZ owner forums. And yet, changing the hydraulic corrector is not so difficult. This is done in this order:
- Fastenings. First you need to disconnect all the clamps securing the hydraulic corrector tubes to the body;
- Cabin management. Remove the corrector switch handle located on the panel in the passenger compartment. To do this, just pull it towards you;
- Space for renovation. In the VAZ 2110, repairing the headlight hydraulic corrector is difficult precisely because of the inconvenient location of the hole through which the corrector tubes are threaded. At this stage, the whole process “slows down” for many. To get to the hole, you need to somehow remove the antifreeze reservoir. You just need to clear the “approach” from above so that you can work;
- We take out the cylinder. Further repairs take place from the interior. On the panel you need to sharply pull the switch towards you (pull it off), it will come off. Then unscrew the cylinder using the “22” socket. Open the cover with the fuses located there and, pulling, pull out the cylinder so that it hangs on the hoses;
- We take out the hydraulic corrector. The hydraulic corrector has a latch for the actuator cylinder; you need to press it. Then turn clockwise until it stops (90°) and remove it from the socket. Do the same steps with the other headlight;
- Push it inside the cabin and remove the hydraulic corrector;
- The new corrector is installed in the reverse order;
- Control. Check how the new hydraulic corrector works. Be sure to test whether the new device changes the angle of the headlights. If the repair is successful, then the luminous flux will be optimal and obedient to your adjustments.
Features of operation
The new corrector will last a long time and will not need repairs for a long time if the replacement is done correctly. During operation, the corrector must be checked regarding the integrity of the pipeline. If a leak is detected, the entire set must be replaced again.
- Benjamin
Adjusting Lada Kalina headlights with your own hands - photo, video
/ Domestic auto industry / In head optics, low beam lamps most often have to be replaced. For a Lada Kalina car, the low beam lamp is a halogen lamp with an “H7” socket, the power of which is 55 watts (no more). Osram bulbs may come from the factory, but others will do. After replacement, the filament will occupy a new position, and the headlight adjustment may be lost. So, checking the settings, and, if necessary, adjusting the headlights is carried out immediately after replacing the lamps, which on the Lada Kalina is done without dismantling the headlight unit.
Adjustment features
Since Lada Kalina is a representative of the budget segment, it is equipped with a minimum of required lighting devices
Here we focus on head optical devices. Headlights allow the driver to have sufficient visibility when driving, and also serve to identify a specific vehicle on the roadway.
Adjustment of the Lada Kalina headlight beam is carried out using a specialized device during a technical inspection. Mechanics advise owners to periodically check the correct beam and adjust the headlights (if necessary) and if necessary, know how to adjust the headlights yourself. The indicated procedure can be carried out independently.
The settings of the Lada Kalina lighting devices are interconnected with the condition of the load-bearing elements of the chassis, lamps and tire pressure. Before adjusting the lighting devices, it is recommended to check the points indicated here to ensure they are in good condition and that the indicator (pressure) is correct. If there are deviations from standard values, then the identified deficiencies should be eliminated immediately. For example, the pressure parameter should be the same on both sides of the car. Darkened lamps will also need to be replaced with new analogues.
To adjust the optics in the Lada Kalina, the owner will need the following tools:
- cardboard sheet;
- five-meter tape measure;
- "hexagon" (6 mm).
Adjustments should be made in a dark box or at the appropriate time of day. Also one of the main conditions is the presence of a vertical wall. We install the car on a level area five meters from the designated structure. We adjust the corrector to the zero position.
A cardboard sheet is required to periodically block the beam of headlights. The adjustment process itself is carried out using a hex key with a dimension of 6 mm. The light beam of each headlight is individually compared with a special circuit. Here it is necessary to achieve the correct direction of the beam, which will allow the driver not to dazzle oncoming traffic participants in the dark.
How to independently adjust the headlights on a Lada Kalina
The car enthusiast will need to make a minimum of effort; for convenience, below is a complete list of necessary components
- An additional pair of hands in the person of an assistant.
- Five meter tape measure.
- The nearest flat vertical surface, be it the wall of a house or a fence.
- Cardboard sheet. It is necessary to cover the adjustable headlight.
Scheme for adjusting the head light Armed with everything you need and waiting until it gets dark, you can begin the adjustment process. It is worth remembering that the car must have the correct tire pressure, without excess load, and the corrector must be set to the zero position.
On the selected surface it is necessary to draw a screen according to the diagram shown.
How to check functionality
Body position sensors may be different. For example, the service life of potentiometric sensors is 10-15 years. The electromechanical drive may also fail. If there is automatic adjustment, you can hear the characteristic buzzing of the adjustment drive when you turn on the ignition and low beam. If you cannot hear it, then this is a malfunction signal.
The performance of the system can also be checked by mechanically changing the position of the car body. If the luminous flux changes, then the system works. The cause of the breakdown may be electrical wiring. In this case, service diagnostics are necessary.
Headlight range control is an important safety element. Many drivers do not attach much importance to this. But you need to understand that the wrong or blinding light can lead to dire consequences. This is especially true for cars with xenon headlights. You shouldn't put others in danger.
Headlight device
Traditionally, the lighting system of the car model in question is represented by blocks distributed into three sections, due to which the low, high and side beams are activated, and also indicate a turn. Activating the low beam requires the use of bulbs designed specifically for this purpose.
Turning on the main beam ensures the simultaneous operation of the blocks that are responsible for low and high beam lighting, and the power of each is equal to 55 W. Special transparent diffusers are mounted on the front of each of the mentioned sections.
Using a special corrector allows you to adjust the headlights. The operation of the electric corrector is based on an electromechanical drive. Traditionally, the adjustment system has a device mounted on the instrument panel, as well as a special drive, due to which the electrical wires in the headlights are connected.
Setting up such an electrical corrector requires complete disassembly of the headlights. There are other reasons for dismantling the lighting system. This could be the installation of new lighting elements or tuning.
Electromechanical types of correctors
This type of device is high-tech, it is the most popular and widespread. Its design is simple, consisting of several elements:
- Geared motors for each headlight.
- 4 position switch.
- Wiring.
- Fuse.
If you use such a device, you will need to do the following:
- Remove (if installed) the hydraulic corrector drive.
- If you plan to install the switch in another location, then the first step is not necessary. The most suitable place to mount the switch is to the left of the steering wheel.
- Lay the electrical wiring to each headlight. It is advisable to connect the wires to the harnesses with special plastic ties.
- Install new stepper motors in place of the adjusting rods of the old hydraulic corrector.
- Connect the wires to the stepper motors.
- Since this device consumes, albeit a small current, it is necessary to install a 7.5 Ampere fuse in the positive gap of the power supply. This device will save you from a short circuit. But it is best to calculate the maximum current consumed by the entire system. Based on this value, select a suitable fuse with a margin of 25%.
Replacing the LED in the side lights of Chevrolet Lacetti
Reinstall the headlight protective cover and turn it in a clockwise direction until it is secured. Replacing the high beam lamp To replace the high beam lamp, you will need to dismantle the inner cover of the headlight unit; to do this, turn it in the reverse clockwise direction.
Disconnect the block with the wire harness from the light bulb.
Installation of electric headlight corrector for VAZ 2114
There is nothing complicated in installing the electric headlight corrector on a VAZ 2114; it is installed in standard places instead of the hydraulic corrector and works on the same principle.
If your hydraulic corrector fails, it is better to immediately purchase a much more reliable electric corrector; there is nothing complicated in installing it:
- Remove the instrument panel light knob.
- Remove the hydraulic corrector handle.
- Use a screwdriver to pry up the lining with the corrector scale printed on it and remove it.
- Remove the light guide; it is fastened with a Phillips screw and ensures uniform illumination of the scale.
- The main cylinder is screwed with a nut 21, unscrew it and press on the cylinder, then remove it from under the instrument panel.
- To remove the working cylinders from the headlights, press the lock and turn it counterclockwise, after which it can be removed from the headlight housing.
- After cutting the tubes with side cutters, remove all parts of the hydraulic corrector from the car.
After all this, you can start installing the electric corrector on the VAZ 2114:
- Route the wire harnesses into the factory holes with rubber seals along the stock wiring.
- Insert the electric correctors in place of the hydraulic correctors into the headlight housings.
- Connect the wire block to them.
- Connect the negative wire to the vehicle ground, and the positive wire to the power that appears when the ignition is turned on.
- Connect the wire block to the regulator.
- Install the regulator in place of the hydraulic corrector master cylinder in the reverse order of removal.
Chevrolet Lacetti Replacing lamps in a Chevrolet Lacetti headlight
How to change a light bulb in a Lacheti headlight
Here, do not rush to tighten the fasteners, first make sure that everything works as expected. By pressing down on the spring clamp, we disengage it from the hook and move it to the side. Attach the headlight protection cover and turn it in a clockwise direction until secure.
Find out which side light bulbs you need?
To replace the low beam bulb, disconnect the block with wiring harnesses from it.
Mount the new lamp, clamp it with the clamp and connect the block with the wiring harness to it. Replacing side light bulbs To replace the side light bulb, you need to remove the socket together with the lamp assembly from the hole located in the headlight reflector.
Remove the lamp from the socket. Insert a new light bulb into the socket and mount the entire structure in place.
Diode lamps in dimensions — Lacetti — logbook Chevrolet Lacetti 5D MISTY LAKE on DRIVE2
Reinstall the headlight protective cover and turn it in a clockwise direction until it is secured. Replacing the high beam lamp To replace the high beam lamp, you will need to dismantle the inner cover of the headlight unit; to do this, turn it in the reverse clockwise direction.
Disconnect the block with the wire harness from the light bulb. Clamp the spring clamp, slide it up, for the right headlight there will be a shift in the opposite direction - down, and fold it back.
Install a new light bulb, clamp it with the clamp and connect the block with the wire harnesses. Attach the headlight protection cover and turn it in a clockwise direction until secure. Replacing the turn signal bulb To replace the turn signal bulb, you need to slightly turn the socket in the reverse clockwise direction and remove it from the base of the headlight.
By pressing down on the spring clamp, we disengage it from the hook and move it to the side. Remove the lamp from the headlamp housing. The high beam lamp is halogen.
You should not touch its glass bulb with your fingers, as traces from them will cause the lamp to darken when heated and deteriorate the glow. You can remove dirt from the flask with a clean rag soaked in alcohol.
Some Title Here
The process of replacing side lamps in Chevrolet Lacetti headlights takes about minutes, depending on the skill of the car enthusiast. In order to change lamps, you need to have a new lamp, a screwdriver and hands that grow from the right place.
How to get to the low beam bulbs without breaking anything on a Chevrolet lacetti sedan
https://youtube.com/watch?v=NPoBOdMWsuo
So, now that everything is collected, we could begin the process. It is worth noting that in order to replace the side lights, you will have to dismantle the headlights, and this process is labor-intensive and not everyone can do it.
As a result, the sequence of actions that will lead to replacing the lamps: First, you should open the hood and remove the negative terminal from the battery. This is necessary in order not to accidentally short-circuit anything and to comply with safety regulations when carrying out repair operations.
To remove the headlight you will have to remove the radiator grille. To do this, you need to unscrew the fixing screws or remove the clips. After carrying out the preparatory activities associated with dismantling the headlight unit, you can begin replacing the light bulbs. Replacing low beam bulbs From the back of the headlight unit, unscrew the outer protective cover by turning it in the opposite direction to the clockwise movement.
To replace the low beam bulb, disconnect the block with wiring harnesses from it. Press the spring clamp and slide it up; on the right headlight, the clamp will move in the opposite direction, i.e.
Mount the new lamp, clamp it with the clamp and connect the block with the wiring harness to it. Replacing side light bulbs To replace the side light bulb, you need to remove the socket together with the lamp assembly from the hole located in the headlight reflector.
Remove the lamp from the socket. Insert a new light bulb into the socket and mount the entire structure in place.
How to install electric headlight corrector on a grant
The article will be useful not only to owners of VAZ cars, which are equipped with an unreliable hydraulic corrector from the factory, but also to car enthusiasts who want to install xenon on their car with their own hands. In this case, installing an automatic headlight range control is mandatory.
We recommend that you familiarize yourself with the operating principle of the headlight range control. Understanding the device will help you understand exactly what parts are needed for the system to function properly. Perhaps, after reading the article about the DIY repair of the hydraulic corrector and electric corrector, the idea of finding a breakdown due to which the headlight range control does not work and restoring the standard system will seem more attractive to you.
Selecting and purchasing an installation kit
Minimum installation kit:
- 2 servos;
- Control block;
- switch;
- wiring, connectors of gear motors, control unit.
Nowadays, it is very difficult to find a car that is not equipped with headlight range control from the factory. Therefore, you can assemble all the necessary elements from new or used parts. For many cars, there are unified installation kits on sale (for example, EMKF 11 for VAZ 2110, 2111, 2112).
For installation, you can select parts from another car. The only important parameter is the overhang of the servo rod. Each headlight model has a certain range of adjustment of the reflector angle, so a “non-original” servo drive with a large rod overhang can damage the headlight. In some cases, the extension of the rod can be adjusted by selecting resistors of a certain value, so everything depends on the design features of the control unit.
Unlike a manual corrector, not every car is equipped with a system for automatically adjusting the cut-off line of low beam headlights. By and large, systems are classified according to the type of body position sensor, which allows the autocorrector to automatically change the angle of the headlight unit.
Automatic headlight leveling
Main types of systems:
- using one tilt angle sensor. Similar sensors are used in smartphones to determine the position of the device in space. The sensor is installed on a horizontal surface at the rear of the car. The system is the easiest to install, so it is often included in kits for self-installation of xenon together with a headlight washer. Autocorrectors with an ultrasonic tilt angle sensor, which is installed on a hinged suspension in the rear part of the body, are the best solution among similar systems. If an electric corrector is already installed on your car, then you can implement automatic control by purchasing a kit consisting only of a control unit, a sensor, an adjustment device, the necessary connectors and wires (for example, automatic headlight corrector ALS-1);
- using several ride height sensors based on the Hall effect. The sensor consists of a moving part, in which a permanent magnet is built, and a stationary part - a Hall sensor. One part of the meter is installed on a stationary part of the body, the second is attached to the suspension elements. The change in body position is transmitted to the sensor through the rod. This is exactly the system that cars are equipped with at the factory. If an automatic headlight leveler is installed on your car model in expensive configurations, then most likely there will be ready-made holes in the body for mounting sensors, which greatly simplifies installing the system yourself. If desired, you can install a universal automatic corrector of this type on each car.
Electromechanical system instead of hydraulic corrector
Let's consider installing a standard electromechanical corrector instead of a hydraulic corrector using the example of a VAZ 2110.
- Disconnect the negative terminal of the battery. Remove the headlight hydraulic corrector. The removal procedure is described in detail in the article “Why the headlight range control does not work.”
- Instead of hydraulic corrector actuators, install gearmotors.
- Connect the connectors of the servo drives, lay the wiring along the places where the hydraulic corrector tubes run. The tubes enter the interior through a special seal. After cutting off the tubes, make a hole in it of sufficient diameter for the passage of the wiring harness.
- Instead of the main cylinder of the hydraulic corrector, install an electronic control unit for the electric headlight corrector. Connect the positive wire of the ECU to the pin on which “+” appears after turning on the low beam headlights (in the VAZ 2110 mounting block this is pin 20 of the Ш2 block). The negative terminal can be secured with a bolt terminal to one of the body studs under the instrument panel.
Video instruction
- Open the hood, find the battery and remove the negative terminal from it.
- Unscrew the three bolts securing the parking brake handle, which is located above the central tunnel. We disassemble the handbrake limit switch.
- Unscrew the rear mounting screw and other screws on the sides.
- Remove the cover from the gear shift lever, then lift the tunnel cover.
- Disconnect the power plug coming from the electrical wiring circuit.
- We clamp the special latches that hold the device itself. Once it comes out, it can be replaced.
- Next, we install a new part on the Lada Kalina and carry out the reassembly process.
The video below will help you understand where it is and how to replace the cigarette lighter fuse of the Lada Kalina model.
Author of the material: Dumchenkov Mikhail
- Audi
- Shine
- Faw
- Ford
- Chevrolet
- Citroen
- Geely
- Haval
- Changan
- Chery
- Datsun
- Great Wall
- Hyundai
- Duck
- She gives it
- Volkswagen
- Renault
- Nissan
- Toyota
- Honda
- Mitsubishi
- Opel
- Lifan
- Mazda
- Skoda
- Rest
Did you like the material? Share with friends:
Types and purpose of corrector
The corrector, using a drive, changes the headlight adjustment, raising or lowering the cut-off line.
It can be of several types:
- With automatic control;
- With manual, forced regulation.
Automatic ones use sensors to determine the position of the car body, the subsidence of the front and rear suspension, and based on these data they adjust the headlight beam. In this case, no human assistance is required; all settings are included in the corrector control unit by the manufacturer.
Manual correctors have several positions, and there is a switch between them in the cabin. Most often, on the threshold of the car on the driver's side there is a table with recommended positions for different vehicle loads. It can also be adjusted while moving, for example, if you have poor lighting, you need to raise the beam, or if oncoming cars signal that you are blinding them, you need to lower the beam.
The corrector drive can also be of several types:
- electric corrector;
- hydrocorrector;
- mechanical corrector.
Changing positions with a mechanical corrector occurs with the help of a cable; this is a fairly reliable solution, but over time the shirt can fray and the cable can jam, so it has not been used for quite a long time.
The hydraulic corrector is installed on the VAZ 2114 from the factory; it works on the principle of changing the fluid pressure in the tubes. The liquid is frost-resistant, and the system is closed, but this solution is considered unreliable and often fails, and accuracy is also poor due to the effect of temperatures on the density of the liquid.
The electrical corrector is reliable and accurate. It uses electrical actuators to change the cut-off line. The headlight electric corrector kit for the VAZ 2114 is installed instead of the hydraulic corrector without any modifications and does not cost much more, but lasts much longer.
Circuit breakers
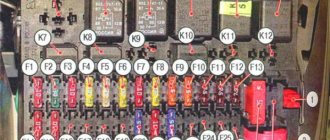
Relay and fuse mounting block: F1-F31 - fuses; K1-K6 - large relay; K7-K12 - small-sized relays; 1 — tweezers for removing fuses and relays; 2 - large tweezers for removing large relays
Modern motorists rarely use this socket for its intended purpose. Additional devices such as charging a phone or other devices are connected to the cigarette lighter socket. The most common:
- electric compressor;
- GPS navigator for route calculation;
- video recorder;
- charger for mobile phone, laptop or tablet.
Over time, this device may break down: fuses - burnt or melted wires. This is fraught with many disadvantages even for a non-smoking driver. Below we describe how to replace the cigarette lighter fuse of a Lada Kalina car, where the mounting block is located and other nuances of operation.
Price for headlight correctors: large selection
Headlight correctors can be a standard system, or they can be installed independently. Also, the driver, if desired, can replace the corrector on his car with a more advanced one. Today, trading enterprises offer their customers these devices from various manufacturers of various classes. Prices for headlight correctors vary, depending on their type, over a very wide range. Thus, a VAZ driver can purchase a hydraulic corrector at a very reasonable price - from 280 rubles. up to 450 rub. And an electromechanical corrector will cost 1,700 - 1,900 rubles.
As for the universal Hella headlight auto-corrector, which can be installed on almost any car, you will have to pay 13,900 - 14,200 rubles for it. Devices of the same class differ in cost from other manufacturers, both downward and upward. A headlight range control for GEELY CK can be purchased, for example, for an average of 1 thousand rubles; prices for this device for Lanos fluctuate in the same range. The main thing is that when purchasing, we must not forget that for xenon headlights, regardless of the car model, the installation of an automatic leveler is mandatory. Video:
Automatic headlight leveler Hella
Among the many companies that produce this module, the German company Hella is currently leading. You will receive a quality product that is thought out to the smallest detail, with it you will forever forget about such a problem as the dissatisfaction of oncoming drivers. In addition, you will know that your car will always pass a technical inspection. Hella headlight leveler can be installed on any make and model of car. It can be used as a stand-alone device or to complement a manual corrector. The kit comes with instructions so you can install it yourself. The calibration process is very simple. The built-in indicator displays all information about angles and projections of change, both automatically and manually. Modes are switched independently as needed.
Features of the Hella autocorrector
- Automatic headlight angle correction;
- The programmable angle of the optics depends on the machine load;
- An ultrasonic sensor calculates the position of the car body relative to the road surface;
- Powered by 12 V car, there are kits designed for 24 V;
- If you have standard xenon, autocorrectors are required for maintenance.
Autocorrector SmartEye
This model of autocorrector (additional option) is intended mainly for re-equipment of factory machine systems that are equipped with an electromechanical device. The kit includes:
- Electronic unit with position sensor;
- The monitor with which the adjustment is made;
- Wiring;
- Two types of plugs for connecting to a device monitor.
The module is not equipped with its own activators for changing the headlight angle. The operating principle of this device is to determine the position of the car body in relation to the plane of the road. The sensor reads information and is installed on the housing. Then a command is sent to change the angle of the headlights in relation to the vehicle load.
Adjusting the optics of Kalina in the hatchback body version
For this type of LADA Kalina body, the head lighting equipment has a similar design as that of the sedan. These devices are distinguished by the fact that adjusting the headlights is simple and accessible. The adjustment procedure is carried out to achieve optimal illumination of the section of road ahead, and the risk of dazzling drivers of oncoming cars must be completely eliminated.
To conveniently carry out the adjustment process, the owner will need a chalk and a tape measure. You should first ensure that at the time of adjustment there is 50% fuel volume in the tank. Mechanics advise hiring an assistant who will be present in the driver’s seat during the procedure. How to adjust headlights step by step:
Adjusting headlights on Ford Focus 2 restyling with your own hands video (video)
- The car is placed on a similar flat area close to the wall, on which the center of the car and the centers of the headlights are marked with chalk.
- Next, using a tape measure, we measure a distance of 7.5 meters, where we place a mark.
- We drive the LADA Kalina car exactly to this mark.
- We connect the marked centers of the optical devices with a straight line drawn with chalk. We also draw vertical lines through these centers.
- Next, we retreat 75 mm from the horizontally drawn line and draw a straight line parallel to it. To be more correct, we first measure this distance in several places.
- We adjust the headlights while they are on and one at a time. At the moment the process is performed on the first optical device, we cover the second with the indicated cardboard sheet.
- We achieve the correct position of the reflector by rotating the screws. Here it is necessary to achieve such a position of the light beam at which the top of the corner of the light spot on the wall intersects the vertical straight line previously drawn through the central point of the headlight.
We combine the section of the upper border of the beam with the lower line.
We carry out similar manipulations for the second headlight.
Hydrocorrector
In the article “Why the headlight range control does not work,” we examined the main malfunctions of the system, as well as the repair method by completely replacing all components of the system. However, in most cases the hydraulic corrector is perfectly repairable. In order for the hydraulic corrector to stop working normally, the loss of even a small amount of working fluid is sufficient. You can make up for the loss with regular antifreeze.
6 – knob for adjusting the light beam; 1 – main adjustment mechanism; 2 – working cylinders with a rod acting on the headlight reflector.
Barbaric repair method
Many drivers do not burden themselves with either repair or replacement of the hydraulic corrector. When the headlights begin to shine downwards, they simply screw in screws from the back of the working cylinder. Adjustment of the position of the rod and the level of tilt of the headlights is carried out by screwing in and unscrewing the screws.
After such a repair, the concept of a headlight range control is no longer applicable to the system, since the possibility of quickly adjusting the angle of the headlight reflector from the passenger compartment disappears. But such repairs have a right to life if the malfunction caught you on the road and there is simply no other way to raise the headlights.
Recovery without removal
- Pull the actuators out of the headlight assembly.
- Remove the tubes from their seats, and then secure the tubes so that the remaining working fluid does not leak out of them. It is better to preheat the landing site, but you can simply cut the tubes at the edge of the landing sites. Check the stroke of the actuator cylinders by moving them by the rod using pliers. The pistons should move without jamming.
- Each actuator has a plug for bleeding the system, which must first be pulled out.
- Turn the switch on the dashboard to position O. Fill the tubes with antifreeze so that a small drop remains on top, then put them on the fittings of the actuators.
- Position the slave cylinder bodies so that the bleeder hole is the highest point.
- Holding the rod in the maximum retracted position, fill the working cylinder with liquid until a small “hill” forms above the bleeder hole.
- Close the plug.
The system should work, but since the seals of the connections at the main cylinder, the regulator at the dashboard and the seals of the working cylinders were not checked, one cannot be sure of the long service life of the hydraulic corrector after such repairs. This restoration method will not work if the system is airy at the master cylinder in the cabin.
Restoration of headlight hydraulic corrector
You need to know where the headlight hydraulic corrector is located and how to remove it, since for a complete troubleshooting you will need to dismantle the working cylinders and the main adjustment mechanism. Take 2 small pieces of tube to connect the working cylinders to the main mechanism after removal, fill the system with water. If the device is operational, set the switch to the maximum headlight raise mode and leave the mechanisms in this position for several hours. If no leaks have appeared during this time, the system can be filled with antifreeze and installed on the car. If the leak does not appear in the pipe connections, it is better to replace the hydraulic corrector with a new one or install an electric corrector instead.
Only new coolant should be used so that dirt particles do not interfere with the normal movement of the pistons. Remember that the system must be completely filled with working fluid. To restore, you will need a syringe and a blunt needle so as not to damage the cylinder seals. Do-it-yourself repairs, the assembly and disassembly process are perfectly shown in the video.
The procedure for dismantling the lights
You should know that the Lada Kalina 1118 flashlight system consists of:
- housings;
- glass (polycarbonate);
- lamps;
- reflector;
- wiring;
- lamp plugs;
- decorative inserts (masks).
As for the ease of removal and subsequent replacement of the lamp on the 1118 model, the process usually involves removing the front bumper. After this, the screws on the top and bottom of the lighting fasteners become accessible. After dismantling them, you can immediately remove the headlight unit, not forgetting to first remove the blocks with wires.
Removing the front optics
However, not all car enthusiasts have a lot of time to replace the lighting system or experience in removing the bumper. For this reason, a more popular method is to change the Kalina headlight without removing the bumper.
To do this you will need to use:
- key for 8 and 10;
- a set of screwdrivers (flat and Phillips);
- new lighting system component.
A set of tools
in order to adjust the block lighting on the Lada. You will need to complete the following steps:
- Remove the air filter housing, as well as the coolant unit.
- Remove the PTF plug using a screwdriver.
- Unscrew the bolt on the lower fastener of the lighting component using a 10mm wrench. Insert your hand into the PTF hole.
- Remove the bolts located on the upper fastener of the light block component. They are located closer to the radiator. Use the key at 8.
- Unscrew the screw securing the product to the car fender using a large Phillips screwdriver.
- Expand the Lada Kalina headlamp so as to move the part closest to the radiator closer to the car engine. This measure will allow you to remove the lower fasteners from the seat.
- Remove the lower iron fasteners of the headlight. To do this, you will need to remove a couple of bolts with a short head.
Removing the headlight on Kalina
- Remove the car light by moving towards you. At the same time, try not to damage the paint layer, since during dismantling the lamp will be located as close as possible to the bumper and fender.
After this, you can install a similar device in reverse order.
Adjusting the position of the headlights must be done every 20 thousand km or as needed. On the Lada Kalina, this adjustment operation is not carried out often, since deviations from the norm rarely occur (in most cases, due to road accidents).
Checking and adjusting the headlights of the Lada Kalina VAZ 1118 is carried out with a fully filled fuel tank, a set of tools and a spare wheel.
1. First check the air pressure on all tires of the car with a pressure gauge. If necessary, bring it to normal.
2. Place the Lada Kalina car perpendicular to a smooth wall (for example, a garage) at a distance of 5 m. Place an additional weight weighing 75 kg on the driver’s seat.
3. Mark the screen on the wall as shown in the headlight adjustment diagram.
4. Draw a vertical center line O on the screen, lying in the plane of symmetry of the car (the distance from it to the center of the left and right headlights should be equal). To the left and right of it, draw two more symmetrical lines A and B , which should coincide with the centers of the left and right headlights.
5. At a height h corresponding to the distance of the centers of the headlights from the ground, draw a horizontal line 1, and 75 mm below it - line 2 .
6. Turn on the low beam headlights on the Lada Kalina car by turning the headlight range control of the Lada Kalina 1118 to position “0” (this position corresponds to the load of the Lada Kalina car with one driver).
7. Closing each headlight in turn, check that the light limit corresponds to the adjustment diagram previously marked on the screen. The boundary must follow line 2. The inclined segments must begin at the intersection points.
8. Insert the "6" hexagon into the regulator socket through the hole in the upper cross member of the radiator frame.
9. By turning the hexagonal adjuster 1 , located closer to the wing, adjust the position of the headlight beam in the horizontal plane.
10. By turning regulator 2 , located closer to the radiator, adjust the position of the light beam in the vertical plane. Make sure that the upper boundary of the light beam coincides with the lower horizontal line, and the break point of the beam (the point of intersection of the horizontal and inclined sections of the light flux) with the vertical line corresponding to the center of the headlight.
11. Similarly, adjust the direction of the light beam of the other headlight.
We set the electric headlight adjustment to “tens”
On some VAZ models of the 2110-2110 family, headlight hydraulic correctors are initially installed by the manufacturer. However, these devices cause a lot of criticism from car enthusiasts; they often fail due to their not entirely successful design. Let's see how you can install an electric corrector, make headlight adjustment more reliable and thus get rid of unnecessary headaches. Why do you need headlight range control at all? It changes the angle of the light beam. In total, these devices come in three types: electromechanical, hydraulic and automatic.
We will focus on the electrical corrector. Why on it? This device is the most reliable of all those listed. Car enthusiasts, having installed an electric headlight corrector, as a rule, then do not repair it; it practically does not fail! First of all, we need to remove the standard hydraulic corrector. Then we take the wires from the new device and lay them in the places where the tubes from the hydraulic corrector passed. All that remains is to connect the device and enjoy the result. If you understand how this is done, then read no further. If not, then let's look at the installation process in more detail.
So, the procedure for installing an electric corrector is: first, disconnect the negative terminal from the battery. Then we need to remove the hydraulic corrector working cylinder from the headlight. This is done simply by turning it counterclockwise. Then we change the O-ring and proceed to fastening the electric corrector mechanism. We need to remove the standard corrector master cylinder handle from inside.
We find block Ш2 and socket 20 in the mounting block, and connect the positive wire of the device being installed to it. The minus wire can be secured under the dashboard to one of the body studs, for example. The wiring must be routed along a standard wiring harness. Then we connect the electrical corrector connectors to the actuators, put the negative terminal on the battery again and check how the device works.
The price for an electric corrector is not very high, and almost every car owner can afford to install such a mechanism. But there is an alternative to your car: you can install an electric corrector from GAZ. The headlight range control from this car, for example, is ideal for the VAZ 2110, and you don’t have to make any unnecessary modifications. But it also has its drawback: the device will not work in all positions (and there are 16 of them), but this problem can be eliminated if desired.
It will be necessary to shorten the length of the corrector rod so that the rod can move forward as much as possible. We cut it out in the marked place and file it down, leaving a diameter of 9 mm. Then, using superglue, we glue the shortened rod into its regular place.
There is another way with which you can modify the GAZ corrector to a ten. We need to purchase open-frame resistors and solder them directly onto the switch. Thus, we will be able to avoid unnecessary hassle and fiddling with wires. We take alcohol and clean the surface of the board from rosin, then cover the top of the board with nail polish. It will be better if you bend the legs of the resistors so that the soldering will not be damaged during shaking.
As you can see, there is nothing complicated in installing an electrical corrector. Whether to install this device or not is, of course, up to you.
This video clearly shows how the electric headlight corrector for a GAZ 3110, installed at 10 (with xenon), works.
Which optics is better to choose
While using the machine, the lights are subject to sudden temperature changes, impacts from stones and small grains of sand. These factors negatively affect glass, reducing its transparency, worsening light characteristics.
High-quality headlights that meet safety requirements are installed from the factory. Unofficial replacements are equipped with xenon lenses, “angel eyes” and modified reflector geometry. These lights look beautiful, but wear out faster due to poor quality materials and can fog up in humid weather.
When choosing new optics, it is better to trust the official ones. When purchasing, it is important to clarify the modification of the body and the year of manufacture of Kalina. Depending on the configuration, there are darkened masks or improved lighting characteristics.
Depending on the body type, Kalina has different parts installed:
- sedan, hatchback – standard optics;
- sport, station wagon - are equipped with a more elongated reflector with an increased area to increase the lighting area by 20%.
To connect improved optics to Kalina, you do not need to lay additional wires or change contact connectors. The optics are no different in mounting points and shape.
When purchasing flashlights, you should pay attention to original parts with improved performance. This will improve the characteristics of the beam without interfering with the wiring or altering the standard fasteners.
When buying new PTFs, it is better to choose from original parts. Standard lights are equipped with durable glass and a high-quality reflector that directs the beam in accordance with GOST.
Fog lights for Kalina are produced by:
- Bosch;
- "Kirzhach".
The models differ in the shape of the glass, but there is no difference in quality. The headlights are connected to the standard wiring and installed in the mounts on the bumper. There are no fog lights in the basic trim levels. To connect them, you will have to additionally purchase a button for the interior, a PTF relay, and remove the bumper plugs.
In stores you can find modernized flashlights with lenses for gas-discharge lamps or LED modules. Such products are not certified for use in Kalina because they do not meet transport safety requirements. For such parts you can receive a fine and an order to eliminate the malfunction within 10 working days.
Replacement with a new one
Manufacturers of auto parts assure us that the hydraulic corrector cannot be repaired. Let's believe them for a moment and decide to replace him. The price of a new part starts from 400 rubles.
- Service life from 1 to 3 years. Even if you don’t use it, it will find ways to fail and bring you a lot of “hemorrhoids”
- Replacing the old one is another quest. It is installed differently on different VAZ models, but you will have to lie upside down in the cabin
Now think for yourself, if it will serve you faithfully when new, and you will use it once a month, at best, and it will break in a year, then why would you again pay 400 rubles and stand on your own to replace it? How feasible is this procedure? Based on my experience working at a service station, not many people come to us to replace it. Why? - because after one or two cases of replacement, everyone “forgets” about it and drives as is.
If you still decide to change the VAZ hydraulic corrector, then watch the video:
Fuse marking on a Lada station wagon
- Do not connect several powerful devices to the Lada Kalina at once (via a splitter). Otherwise the fuse will blow. The total power of the connected devices is calculated from the value (P = I * A, where I is the voltage of 12 volts and A is the current). For the first generation this figure is 180 W, for the second - 240 W.
- Do not install a fuse with an amperage higher than that recommended by the manufacturer.
- Avoid loosening the handle or making poor contact with the cartridge as this may cause a short circuit.
Useful tips
The main and fog headlights are often configured according to a single scheme, although these options have their own characteristics and require an individual approach. For independent adjustments, the help of a second person is desirable and a level surface is required.
Marking a wall is not fun, it is mandatory. Without markings, it is virtually impossible to make precise adjustments. At the end, be sure to check the adjustment screws on the optics.
Sometimes problems in Kalina are caused by the light module - it’s worth checking it
Types, design and functionality of lighting control units
Structurally, the MUS is made in a separate plastic block, which is installed in the appropriate place on the car’s dashboard - usually on the left hand of the driver. The block contains lighting controls in the form of rotary multi-position switches, buttons and regulators. To connect the unit, standard electrical connectors or one standard block with blade contacts are used.
Light control units can be divided into two groups according to functionality:
- With standard functionality;
- With extended functionality.
The difference in the functionality of these ICUs lies, as a rule, in additional adjustments - control of the headlight angle and the level of illumination of the instrument cluster (dashboard). The differences between different types of ICC are summarized in the table:
| Functional | ICC with standard functionality | ICC with expanded functionality |
| Headlight control switch (exterior lighting) | Three-, four- or five-position | |
| Front fog light switch | Optional, if available - installed on the left side of the block (may have a light indicator for turning on) | |
| Rear fog lamp (light) switch | Must be present (possibly with light indication of inclusion), installed on the right side of the block | |
| Instrument cluster lighting level control | Absent | Present |
| Headlight adjustment control | Absent | Present |
Typically, the first type of MUS has a vertical layout - the buttons to turn off the fog lights and flashlights are located under the exterior lighting switch. And the blocks of the second type are made with a horizontal layout - the dashboard lighting controls and headlight range control, as well as the buttons for fog lights and flashlights are located to the right of the headlight switch.
As indicated in the table above, lighting control units can be equipped with external lighting switches of different functionality - three-, four- and five-position. Detailed information about the functionality of the switches is presented in the table:
| Switch positions | 3 position switch | 4 position switch | 5 position switch |
| Lights off | + | + | + |
| Only side lights are on | + | + | + |
| Headlights (and DRLs) on | + | + | + |
| Automatic mode (when the ignition is turned on, the low beam headlights, side lights, instrument panel illumination and license plate illumination turn on) | — | + | + |
| “Parking” mode (P, when the ignition is turned off, the license plate illumination and side lights remain on) | — | — | + |
Separately, it should be said about the headlight range control regulator. It involves smooth adjustment of the angle of the headlights, but has step markings in conventional units from 0 to 3 - this marking allows you to approximately set the angle of inclination depending on the degree of vehicle load. For example, in the “0” position, the headlights have the correct angle when there is only a driver or a driver and a passenger in the cabin; in position “1” - when the cabin is completely filled; in position “2” - if there are passengers and cargo in the trunk; in position “3” - when the trunk is loaded. You can also select intermediate positions depending on the actual loading conditions of the vehicle.
All positions of the ICC controls have standard pictograms showing the purpose of the buttons/switches/controls and the operating modes of the lighting devices.