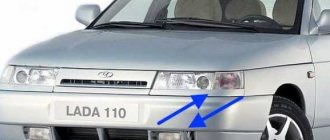
Today's article will be devoted to the head light. I will tell you how to install xenon on a VAZ 2110 with your own hands. That is, thanks to this photo report you will be able to pump up the headlights of your “ten” yourself.
This work is not particularly difficult and is quite feasible for the average car enthusiast.
Those who thought that today we will install “little blue light bulbs” that glow coolly, I will say that this is not so, no pseudo-xenon. We will install original full xenon lamps. I won’t delve into the history of the origin of xenon lamps; there are search engines for that; whoever needs it will find it. Today we will talk about how to install this miracle of technology on our VAZ 2110.
Legal connection
You should know that the PTF may already have bi-xenon lamps and corresponding lenses installed from the factory. This is a PTF of the so-called class D, such a light is absolutely legal, inspectors cannot “find fault” with it.
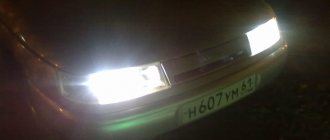
To install xenon on a VAZ 2110 in foglights, as well as conventional headlights, it is necessary that the entire kit, which uses bi-xenon lamps, be legal. That is, these are, for example, licensed headlights or PTF. There must be a letter D on the glass itself, it is this that indicates that bi-xenon lamps need to be connected to this headlight. In this case, xenon is legal and will not cause any complaints.
If N is written on the headlight glass itself, then halogens are used here, and problems with the traffic police are quite likely.
An article dedicated to tuning the instrument panel in a VAZ 2110 car is located here: https://vazweb.ru/desyatka/salon/panel-priborov.html
Tips for choosing PTF
Consider the following recommendations when choosing PTF:
- Give preference to serious manufacturers;
- Do not be deceived by the tempting prices of Chinese fog lights (see Installing fog lights on VAZ);
- Choose a PTF with a plastic body, in which it is possible to make a hole for a lamp.
Xenon fog lights for VAZ 2109
Note. The fact is that there is one point that most people encounter when installing xenon. The H3 lamp has a long base and bulb, which makes it difficult to close the PTF. If you make a hole, then everything will “sort out” by itself. As for the open part of the lamp, it can be covered with a cap for the wiring.
Advantages and possible disadvantages
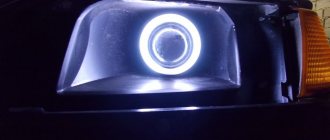
Actually, bi-xenon lenses illuminate the road perfectly - this applies to both conventional headlights and PTF. They produce bright white and blue light.
Another thing is that the PTF light should be low-directional, “piercing” the fog, but not blinding oncoming drivers. For example, in Boshevsky PTF there is no lens, there is only a reflector, which is why a low beam of light is not created.
This is why you need to install a focusing lens, then the bi-xenon lamps will behave in the best way - the driver can clearly see the road, and oncoming drivers do not feel the desire to take a brick and break your bi-xenon PTFs.
Dismantling
Before installing xenon on a VAZ 2110, you need to dismantle the old headlight unit. It happens like this:
- We de-energize the car by removing the negative from the battery;
- Disconnect all connectors from the headlights;
- Unscrew the mounting bolts from the upper mount;
- Remove the grille from the radiator;
- Unscrew one bolt securing the headlight unit from below;
- Use a screwdriver to pry up the cover and remove it;
- Using a 10mm wrench, unscrew the nut securing it to the bracket;
- We take out the headlight unit;
- We pry it with a screwdriver, turn the hydraulic corrector cylinder lock, and remove it;
- Remove the turn signal by unscrewing a couple of bolts.
Preparation. I'll remove the headlights.
- At the very beginning of this modification, you need to remove the headlight, for this:
- Remove the negative from the battery.
- Disconnect power from the headlight. (disconnecting the chip from the wires)
- We unscrew a couple of bolts on top of the headlight, which secure it to the body.
- Now you need to remove the plastic radiator grille, as it covers another bolt.
- Using a screwdriver, pry the decorative trim towards the center and pull it out.
- Here it is, the nut that secures the headlight to the bracket. Using a key set to “10”, unscrew it.
- Now turn off the hydraulic corrector. Using a screwdriver, pry up the retainer, turn the corrector and remove it from the headlight.
- At this stage you need to remove the turn signal; this is done simply by unscrewing a couple of bolts.
Preparations for installing xenon are completed, now we begin the process itself.
It is advisable to purchase 4 “mothers” (at the ends of the wires) for ease of connection, so as not to make twists.
Installing a new module
However, there are slight differences with those installed on the VAZ 2110, so they will need to be slightly modified.
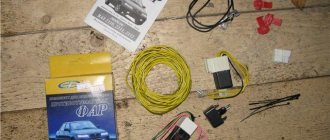
You will need 2 pieces:
- Hella lenses;
- Ignitor;
- Ignition unit;
- Bi-xenon lamps.
The price of this kit, provided that used lenses are used, will be about 3,500 rubles.
Finalization and installation process:
- We change the seat intended for the standard Kirzhach module under Hella;
- We connect the wiring of the bi-xenon lamps to the standard one - everything here fits and matches;
- Install a new module;
- We fix the ignition unit in a way that is convenient for you (there is enough space).
Subtleties of installation and operation
In the same case, when installing conventional xenon or bi-xenon, in other words, installing a set of adaptive equipment, there is no need to change the glass or polish them. This is due to the fact that bi-xenon is simply not compatible with the corrugated type of optical elements. This condition is determined by the fact that when bi-xenon is installed in this type of structure, the light becomes diffused, and subsequently, when turned on while driving along the road, causes a kind of discomfort to drivers of vehicles in the oncoming lane. Consequently, incorrect selection of elements reduces the level of traffic safety on the road, thus increasing the likelihood of a car getting into an accident.
It should be noted that the installation of the element is relevant in the PTF, which also concerns the subsequent effectiveness of both high and low lighting modes. In this case, a budget option can be called the use of special lamps with an H1 type base. If necessary, a more modern, high-power product can be selected. The use of modern designs will ensure the safety of lighting for drivers of oncoming vehicles. It is recommended that lenses be installed in a specialized workshop, where professionals will select the optimal solution for a specific car model.
It is no secret that the quality of vehicle lighting has a direct impact on the level of safety. Both for the motorist and his passengers, and for other sections of the road.
Many believe that xenon on the VAZ 2110 is installed illegally, and any inspector can fine you a tidy sum of money. Today we will talk about the legality of xenon and the features of its installation on the domestic “ten”.
Legal equipment
Therefore, to install xenon as fog lights and main headlights, you will need to purchase a set of legal equipment. There must be an inscription in the form of the letter D on the headlight glass. It indicates that bi-xenon lights are connected to these headlights. Consequently, everything is legal, and therefore there is no need to fear the traffic police post.
If you have xenons but have an H on your headlight glass, you will have problems. This is because such an inscription indicates that halogen lamps must be located under the glass.
Bi-xenon does an excellent job of illuminating the roadway and adjacent areas. This applies to both headlights and fog lights. A characteristic feature of xenon is that it emits bright white light with a blue tint.
Xenon in headlights and PTF
Fog lights from Bosch, which are installed on the VAZ 2110, do not have lenses. Instead, reflectors are provided here. This makes the beam of light not low enough.
Therefore, when installing xenon, it is very important to install focusing lenses so that the bi-xenon behaves appropriately. That is, it illuminated the road efficiently and did not blind oncoming cars.
Set
Of course, without dismantling the old headlights it will be impossible to install xenon devices. Dismantling is performed as follows.
- The vehicle is deprived of power by removing the negative terminal from the battery.
- The connectors going to the headlights are disconnected. All without exception.
- The fasteners are removed from the top mount. The bolts are located there.
- The radiator grille is dismantled.
- The bolt that holds the headlight unit in its lower part is removed. He's there alone.
- Next, pry up the cover using a flat-head screwdriver and remove it.
- Now take a 10 mm wrench and use it to remove the fixing nut to the bracket.
- All that remains is to remove the headlight unit.
- Do not forget to pry the hydraulic correction cylinder retainer using the same flat-head screwdriver to remove the unit.
- The direction indicators are removed. To do this, simply unscrew a couple of bolts.
If you want the installation of xenon on a VAZ 2110 to be carried out within the law, buy a new approved module.
Kirzhach in analysis
Just be sure to take into account the fact that the “Bavarian” Hella Lens G2 modules are suitable for the VAZ 2110. This is a second generation module with wider lenses. The first generation is not suitable for us.
Of course, the cars are structurally different, so the installation will have to be slightly adjusted.
To get started, purchase the necessary materials. Just two pieces:
If you take used lenses rather than new ones, purchasing the entire set will cost you about 3.5 thousand rubles. Since you will install them yourself, there should be no additional financial costs.
The revision process looks like this.
- Measure the size of the seat where the standard Kirzhach module is mounted. Now the Hella module will be located there. The place should be prepared in advance.
- The standard wiring is connected to the wiring from the bi-xenon optics. There are no problems here, since everything matches perfectly.
- Now the new bi-xenon module is put in place.
- You can fix the ignition unit in any way convenient for you, since there is more than enough space for installation in the VAZ 2110.
Xenon in a regular headlight unit
If you decide to install bi-xenon lamps in the standard Kirzhach headlight unit, then proceed as follows:
- Getting the wires ready. Traditionally, plus is yellow, and minus is brown. We crimp two minuses, as well as two pluses, in turn, carefully insulating them;
- The holes for the lamps should be slightly processed with a file when trying on the lamps, so as not to overdo it;
- Install bi-xenon lamps;
- The wiring from the lamp should be routed into the protective cover. But for this you will need to drill a corresponding hole;
- Install and secure the headlight in the base without reversing the polarity;
- The ignition unit is connected according to the circuit that should come with the lamp;
- Reinstall the lights.
Now you can reconnect the battery and check how the new lighting works. Don't forget about adjustments!
The possibility of installing xenon or LED light sources depends on the design of the headlight. Simply put, if the latter is designed for this type of lamp and received type approval during the development of the car, then it is possible. Otherwise, no. But there are 2 possibilities when this becomes possible if certain conditions are met: if the car is discontinued or if changes to the design are officially made by the traffic police. How this applies to VAZ cars and how to legally install xenon and LED headlights on them, we will discuss in this article.
What is
An ignition unit or automobile ballast is a starting device powered by high voltage to create a spark for lighting discharge lamps and lanterns in the exterior lighting of a vehicle.
Without this device, no xenon lamp will last long, or rather, it will almost immediately fail or will not light up at all.
Each light source requires one ballast, whose operating principle is as follows:
- In order to ignite the gas mixture (xenon) in the flask, a spark is needed, creating an electric arc inside the flask.
- In a car, the voltage supply to the lights directly is 12 V, and to ignite a gas-discharge lamp you will need 30 kV (sometimes even 50 kV, depending on the type of lamp).
- The voltage needed to burn a lamp is much less - already 25, 30, 55, 80 V (again, it all depends on the type of lamp itself).
- Conclusion - high-voltage current will only be needed for the spark supplied to the electric current converter.
- The ignition unit also serves as such a current converter. By receiving high voltage in the form of a short discharge, the ballast uses a spark to transform the arc into the bulb.
- The gas is ignited from an electric arc and produces a glow of a certain intensity (range of the light beam), color, and brightness.
The ballast kit includes the following:
- Directly the box of the unit itself with the internal microcircuit and other parts.
- Wire, block and connector for high voltage power supply.
- Wires and contacts for the lamp.
- Unit power connector
Externally, the unit looks like a compact box installed next to the headlight connections, or on the lamp itself, depending on the model of the kit.
Nowadays, many people use Slim ballasts - a new generation of devices that are smaller than the palm of your hand. Large-sized structures are used less frequently, although they belong to standard standard blocks.
The body of the structure is rubberized with a special material, which, like a sealant, insulates the installation from moisture and other interference.
On one side, the unit is connected through special connectors to the electrical system of the on-board general power supply system.
On the other hand, two wires supply high voltage directly to the xenon lamp (two contacts per lamp).
To understand, for example, why the lamps do not light up, it is enough to check how tightly the contacts “fit”.
Often the problem can be their weakening as a result of long-term use and frequent shaking of the car when driving on uneven roads.
The internal structure of the block consists of the following parts:
- microcircuit with transistors;
- capacitors;
- part of the ballast receiving high voltage voltage;
- the part of the ballast that receives the “rectified” current to the winding;
- spark gap (“spark generator”);
- transformer (“ignitor”) or coil;
- power switches on transistors (bipolar or field-effect);
- rectifier diodes.
Is xenon allowed on VAZ from the factory?
No. As of 2022, none of the VAZ car models are equipped with the ability to use gas-discharge lamps. And this also applies to new models, the most common of which in Russia:
- Lada Vesta - even in top trim levels, xenon lamps cannot be installed on this Tolyatti model,
- Priora,
- Kalina,
- Granta,
- and even old VAZ 2106-2115 and Niva.
The point here is the design of the headlight, which provides only a halogen light source. We discussed the possibility of such an installation in more detail in a special article about xenon. But, in addition to the design, for this, the design of the car itself must have:
- ignition blocks,
- autocorrector,
- headlight washer.
And, if the ignition unit is used exclusively for xenon headlights, then washers and auto-correctors are also equipped for halogen ones. But on VAZs there is neither one nor the other, nor the third.
Thus, xenon lamps cannot be installed on a VAZ. But there are exceptions, which we will talk about a little below.
Compliance with safety regulations
You need to understand that the unit runs on electricity; it has a voltage multiplier, which can be hidden inside the housing.
For this reason, there are risks of electric shocks. Even to check with a tester the serviceability of a part that is not connected to the vehicle's power source, precautions are required.
Before turning on the ballast, please consider the following safety tips:
- The unit is turned on and started only when it is connected to the lamp. Otherwise, the controller will constantly operate, protecting a person from electric shocks if the lamp is “unscrewed”. And in this position, when the controller is triggered, the unit will not work.
- The unit must be placed on a dry and non-conductive surface. You can place it on a rubberized glove or rubber mat.
- The device must not be placed near objects or substances that are easily ignited by a spark. This is especially true for aerosols, gas cans and other things.
- Do not touch the switched-on device with bare hands. To exclude the possibility of a shock from high-voltage current (30-35 kV), you must wear rubber (or rubberized fabric) gloves. Gloves and hands should not be wet or oily.
- After the unit has started, it should cool down a bit. Therefore, it is turned off for 2-3 minutes immediately after starting.
- Paraffin, and not its analogues, is suitable for liquid waterproofing of a microcircuit. Because the silicone is difficult to remove if you need to open the block box again. In addition, the composition of chemical substances in silicone or similar waterproofing negatively affects their contacts when the elements of the microcircuit are heated.
- After “washing” the parts and the microcircuit with an alcohol solution, you need to let everything dry before checking its serviceability by connecting it to an electric current.
Repairing a xenon ignition unit does not seem difficult if you understand everything well from the very beginning.
Before you decide to repair the unit, you must first carry out a complete diagnosis of it and determine all the causes of failure using special instrumentation.
You can use the standard connection instructions to guide you. It will help both when checking faults and when installing a repaired (or new) xenon lamp ignition unit.
How to put xenon in reverse is shown in the article: xenon in reverse.
How to check the xenon ignition unit at home, see the page.
Find out about xenon in Moscow from this information.
What about LEDs?
The LED light source is also not installed on domestic cars. We have already explained the issue of installing LEDs, when it is possible and when it is not.
In general, this is a more modern type of head light, and has come into fashion quite recently. A number of manufacturers for their models have even begun to provide documentation for the possibility of installing LED lamps in such headlights when obtaining vehicle type approval. These include, for example, Hyundai and Kia. This, of course, does not mean that you can simply replace the halogen lamps in such cars with LED ones. But changes are made in a somewhat simplified mode. In addition, even the most budget models - Kia Rio and Hyundai Solaris - are equipped with xenon.
But we are talking about VAZ cars. And for them, LED lamps in headlights, unfortunately, are prohibited, since the design of their light source module does not provide for the installation of anything other than incandescent (halogen) lamps.
Some information about xenon
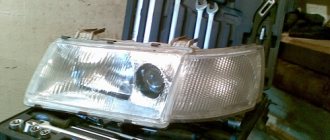
Xenon lamps for car VAZ 2110
Where did xenon come from and what is it? This question might be asked by a person who has never heard of xenon lamps, but such people have become fewer and fewer lately. The first xenon lamp was invented back in 1940, and was presented to the public after the war. Xenon lamps became very popular after that, as they first found their application in the film industry, where they managed to retire the antediluvian carbon arc lamps. A characteristic feature of xenon lamps is their light - bluish-white and very bright. Today, xenon lamps have found application not only in the film industry, but also in automotive production. Without them, it is impossible to talk about progress or modernization of the automotive industry. Almost half of our domestic cars produced after the 90s are not equipped with xenon lamps. Owners often carry out this installation themselves when tuning the car. The result always exceeds expectations.
Principle of operation
Xenon lamps for VAZ 2110
Why does a xenon lamp shine brighter than a regular incandescent lamp? It turns out that the main flow of light is emitted in this case directly near the cathode. In addition, the luminous area of the light bulb is made in a cone shape, which has its own effect. As you move exponentially away from the cathode, the glow intensity decreases. It is for these reasons that the light of xenon lamps is similar to daylight and practically no different from it.
When is it possible?
And yet there is one possibility when LEDs and xenon can be installed in headlights. But, unfortunately, this opportunity will not make it any easier for us.
The fact is that the mandatory compliance of the light source with the headlight design is enshrined in the Basic Provisions of the Traffic Regulations. There is also a note that if the car is old and out of production, then you can install lighting devices from other models and even brands of cars on it.
Does this mean that VAZ can be equipped with other headlights, including those with xenon or LED? No, that doesn't mean it. According to the Technical Regulations, in any case, such a light source must be certified and tested as part of the vehicle on which it is installed. This means that if the old VAZ provided only halogen lamps, then the headlights will have to be installed only with a halogen light source.
In addition, with such an installation, you will have to go through the procedure of making changes to the design of the machine, which is quite labor-intensive and expensive.
Which xenon to choose?
In this section I will not advertise any companies. As they say, there is no comrade according to taste. Here I want to talk about the glow temperature: 4300 K, 5000 K, 6000 K and so on. How are they different? Xenon lamps with a glow temperature of 4300 K and 5000 K appear bright white. 6000 K - blue tint. 8000 K - pinkish tint. Initially, many are mistaken that the higher the temperature, the better the visibility - this is not true, especially in rain or fog. Xenon light with a high combustion temperature is very strongly reflected from wet asphalt and from fog. Therefore, my advice to you is to use xenon at 5000 K. This is the best option.
Fine or deprivation of rights?
Until recently, the responsibility for installing xenon or LED lamps in halogen headlights was quite acute. The fact is that the courts imposed punishment in the form of deprivation of rights under Part 3 of Article 12.5 of the Code of Administrative Offenses for changing the operating mode and color of lighting devices.
But from time immemorial this was illegal, because in most cases the color does not change when changing the type of headlights. Only occasionally, when installing “cold” xenon light, does a blue effect appear. But for the courts this was unconvincing.
Why until recently? Because the Supreme Court of the Russian Federation recently put an end to this issue, indicating everything that we described above for lower courts. That is, for the illegal installation of xenon or LED in halogen headlights, only a fine of 500 rubles is imposed under Part 1 of Article 12.5 of the Administrative Code.
Just a few years ago, the press paid a lot of attention to the installation of xenon bulbs in car headlights. The traffic police also monitored the installation of xenon quite closely.
In 2022, much more attention is paid to LED bulbs, which are much easier to install.
This article will discuss whether it is worth installing xenon bulbs in a car whose design requires the installation of other (halogen) headlights. In addition, possible fines for the use of xenon in 2021 will be considered:
Video
The “Fire & Ice” channel presented instructions for troubleshooting problems in the operation of a standard ignition module using the example of a Mazda car.
"""""For skeptics: in the future, LENSES and GLASSES for lenses, or lensed optics will be purchased and installed""""" Hello everyone. As promised, I installed Sho-me 5000k bi-xenon. I picked up the box for 3 days , looked at it and put it back)))) And finally it matured))) And so in more detail:
To whom the information was useful, leave likes and comments. Subscribe. Happiness to everyone and fewer fools on the road))
For skeptics: in the future, LENSES and GLASSES for lenses, or lensed optics, will be purchased and installed
Which bulbs provide the best visibility?
Let's start with the fact that both xenon and halogen bulbs have both supporters and opponents. Frequent disputes regarding lamps usually end in favor of xenon ones. But are such lamps really better?
Supporters of xenon bulbs cite the fact that when using them, the headlights shine stronger and the road is seen better. In fact, you can't argue with this, since the xenon headlights are actually brighter. But do such bulbs improve visibility?
The visibility of the road depends not only on the light bulbs, but also on the design of the headlight itself, namely, the reflective elements in it.
Please note that the headlight is designed exclusively for a specific type of bulb. We can say that first the light bulbs are selected, and only then the reflective elements of the headlight are adjusted to them.
The light produced by xenon and halogen bulbs is very different, so it is easy to imagine that using xenon bulbs in headlights not designed for that purpose will degrade the performance of the headlights.
Note. If xenon headlights are installed on a vehicle from the factory, then they use suitable reflectors, i.e. visibility is not impaired.
Video: the ignition unit does not work
Modern cars use no less modern lighting equipment, for example xenon.
It works on the basis of gas, which is filled with a lamp placed in the headlights, and when an electric current passes through it using electrodes, the gas flares up and provides illumination.
Actually, the task of lighting the lamp is performed by a special unit, which is absolutely necessary in the system and ensures full operation, since without it it will not be possible to turn on the road lighting.
Therefore, it is necessary to understand what a xenon ignition unit is in 2022, since this is a rather important technical element of the lighting system as a whole.
Problems that xenon bulbs create
Let's look at the main problems that incorrectly installed xenon bulbs create:
Firstly, the light of xenon lamps blinds drivers of oncoming and passing cars. This happens because when used with “halogen” reflectors, the light from xenon lamps can be directed incorrectly, that is, not towards the road. In particular, non-standard light bulbs can shine on neighboring and oncoming cars, creating discomfort for drivers.
Of course, we can say that this is a problem for other road users, but to think so is at least stupid. First of all, this is a problem for the driver himself, whose car has non-standard incandescent lamps installed. It is obvious that an oncoming car with a blinded driver will most likely crash into its “offender”, i.e. into a car with incorrectly installed xenon bulbs. So don't tempt fate.
Secondly, there is a common misconception that xenon lamps improve road visibility, i.e. the more light, the better you can see. Moreover, many drivers of cars with “collective farm” xenon firmly believe in this.
With xenon bulbs, the car glows like a Christmas tree. There really is more light. But because of the “non-xenon” reflectors, the headlights don’t shine as well as they should. The light falls too close to the car, i.e. The actual illumination of the road with xenon headlights is much worse. This is confirmed by comparative tests of the same headlights with different types of bulbs. However, many drivers want their car to sparkle in the dark and trust that their bulbs are the best.
Device Features
To understand how a xenon ignition unit works, you need to understand the features of its choice, the average cost of the available range, as well as the most common problems and breakdowns that are quite common in such devices.
The ignition unit itself consists of two circuits - a low-voltage circuit, which ensures constant operation of the lamp, and a high-voltage circuit, which ensures high-quality ignition of the lamp itself.
By design, the blocks can be monoblock or have a separate block, and the monoblock version is located in one case, and the separate ones are divided along the contours and placed in separate boxes.
Photo: xenon lamp diagram
How to choose it correctly
To select a high-quality device, you need to determine which xenon optics are in the car - standard or universal.
The standard one provides for the presence of xenon in the factory version of the car, and the universal one allows for its addition if necessary during operation.
The size of the blocks also plays a role, because there are standard ones that are suitable for large cars and those that have a lot of space under the hood, and there are also slim versions that are perfect for small cars with limited space.
Next, you should focus on the main parameters, for example, price and manufacturer, as well as quality, which consists of technical characteristics and passed state certification.
The presence of a warranty on the device, as well as the type itself, will play an important role. In addition, there is also the option of choosing by brand and its promotion, on which the cost of the device largely depends.
And of course, in any case, it is necessary to focus on compatibility with a specific car model and optics, because not all xenon devices are suitable for this parameter, so the question of which xenon ignition unit is better is quite subjective.
Operating principle (diagram)
As already mentioned, the ignition unit is divided into low-voltage and high-voltage circuits, which perform different tasks.
In a low-voltage circuit, the main one is a generator from a microcircuit, which converts low voltage into alternating voltage.
Then it goes into an amplifier and a high-voltage transformer, and a voltage of about 500 V is generated across the capacitor.
Only after this does the current pass to the high-voltage equipment, where there is also a high-frequency transformer and a capacitor. It is at this stage that the current transforms and intensifies.
The low-voltage circuit also contains a lamp power control circuit that comes into operation after the ignition process, while the high-voltage circuit is simply not involved.
It regulates the operation of the light bulb, providing a constant voltage of 80 V. The low-voltage circuit contains protection against short circuits, changes in the polarity of connecting light bulbs and incorrect diagnosis.
Where to see the number and series of a driver's license, see the article: driver's license number.
If you are interested in the question of what international rights look like, read here.
If malfunctions occur or an attempt is made to access the high-voltage system, the protection will work and the unit will turn off completely, so that, firstly, no harm is caused to a person, and secondly, so that high voltage readings do not provoke a breakdown of other equipment.
How to check without a lamp
To check the functionality of the unit without a lamp, you will have to have the necessary testing equipment, otherwise the idea will not be successful.
Motorists say that you can check the ignition unit for a spark by connecting a regular spark plug, and also use an energy-saving lamp or a fluorescent lamp.
To do this, you need to remove the board and connect the ends of the lamp spirals from different ends; this will answer the question of how to check the xenon ignition unit at home.
If it glows, then the unit is working and the problem is in the light bulb itself. But still, a more convenient option would be to check with a replacement lamp, which will be known to be in good working order and can show whether the ignition unit is alive.
How much does it cost (price)
Ignition units may vary in price depending on the brand, country and quality level.
Thus, the most inexpensive units that are present in the assortment will cost about 600 rubles, but you should not expect long-term operation or trouble-free operation from them, since usually at this price you can purchase a low-quality device.
If possible, you can purchase products from inexpensive Korean brands, for example Sho-me, the ignition unit from which will cost from 1000 rubles, but its quality is rated as good.
The more expensive the ignition unit, the higher the quality and service life it will have.
But even among inexpensive brands there are also quality products, so to choose the best one, it is better to contact specialists who can select or recommend high-quality ignition units that work like expensive samples.
Video: how XENON works
What could be the reasons for the malfunction?
Regardless of the type and price, any ignition units can fail. The reasons for this may be different, but there are some of the most common ones that you simply need to know about.
So, the block may lose its seal and dirt, moisture and other foreign particles get inside.
Therefore, if the lamp begins to flicker or blink, or does not even light up, then you should carefully open the unit and check the internal structure.
If there is rust or other abnormalities inside, then the problem is the tightness and the unit will need to be replaced.
The unit may simply lose the signal from the controller if it is burned out and does not work.
Another problem will be the loss of current through the multiplier or winding, which leads to flickering or turning off the light bulbs, and this is typical for inexpensive universal units.
Finally, there can be various problems with the transistor, which can happen with all types of blocks.
Do-it-yourself ways to restore performance (repair)
If the driver has skills in working with electronics, he can try to repair the unit himself.
At the first stage, the microcircuit should be changed, then the transistor should be replaced, the third stage involves re-soldering the contacts and at the last the resistor is changed.
These steps should help bring the device back to life and give it new life. It should only be noted that if water gets into it, it burns out, or the controller is damaged, then it will be impossible to repair the ignition, and all that remains is to replace it with a new one.
But it’s always better to contact the service and ask what can be done. Checking your car for theft? There they will be able to determine exactly what has gone wrong and fix what is currently not functioning as expected.
In addition, it is advisable to take measures to prevent breakdown. So, the blocks should be placed away from heated parts, in places where they cannot be exposed to moisture or dust.
Do not extend the wiring, and after connecting it, you need to check the integrity of the connection and the strength of the fastening.
To avoid errors in operation, you need to choose only universal lamps for universal lamps, which also applies to standard lamps, and if the ignition has obvious external damage, then it cannot be used further, you should only replace it.
Where to see who issued a driver's license on an old license
Is it possible to install bi-xenon with your own hands? Read here.
What is better to install xenon or LEDs in the low beam, see here.
The xenon ignition unit performs an important function, first of all igniting the gas lamp, and subsequently maintaining its combustion at the optimal voltage level.
This is a rather complex technical device, which is made of many additional parts that can fail.
If this happens, you should not carry out repairs yourself; it is better to contact a service center, where they can diagnose the problem and carry out high-quality repairs as soon as possible.
If the device is not repaired in time, there is a risk of failure of the entire system as a whole, and this will mean that a lot of money will be required to restore operation.
This phenomenon, when manufacturers install standard xenon lamps in a vehicle, is now not something criminal or unusual.
Bright road lighting is convenient not only for the driver of a car with xenon, but now it is also comfortable for those driving oncoming.
Such headlights can easily be adjusted to automatically switch the intensity of the glow. There are several varieties of these ignition units, which we will consider along with prices and recommendations on how to connect such a device.
Deprivation of rights for xenon until 2022
Well, if you still want to use xenon headlights, then you should refer to the regulatory documents, namely the list of faults and conditions under which the operation of vehicles is prohibited and the Code of Administrative Offenses (Article 12.5, Part 3):
This List establishes malfunctions of cars, buses, road trains, trailers, motorcycles, mopeds, tractors, and other self-propelled vehicles and the conditions under which their operation is prohibited.
3.4. Light fixtures do not have lenses or use lenses and lamps that do not match the type of light fixture.
3. Driving a vehicle on the front of which there are installed lighting devices with red lights or red reflective devices, as well as lighting devices, the color of the lights and the mode of operation of which do not comply with the requirements of the Basic Regulations for the admission of vehicles to operation and the duties of officials ensuring road safety, -
entails deprivation of the right to drive vehicles for a period of six months to one year with confiscation of the specified instruments and accessories.
Until mid-2022, judges considered the use of xenon bulbs as a violation falling under Part 3 of Article 12.5 of the Code of Administrative Offences. That is, you can find examples of decisions in which violators were deprived of their rights for xenon for a period of 6 to 12 months.
Replacing the device
When soldering transistors or other contacts on the microcircuit does not help, the unit still does not function, then you will have to buy a new copy of it.
It is best to find exactly the same block, or a universal one, but in any case, the connectors of the wires included in the kit must necessarily fit the “receiver” of the lamps.
To replace, the following devices and parts are needed:
- screwdriver;
- rubberized gloves;
- serviceable (new) ignition unit;
- serviceable (possibly new) xenon lighting lamps suitable for the unit.
After purchasing a new block and, if necessary, installing it yourself in place of the old one, you need to follow a certain algorithm of actions:
- First, you should disconnect the positive terminals on the car battery.
- Then you need to open the fuse box to check the serviceability of the element that is responsible for supplying the car's external optics. Medical examination for a driver's license? If it is noticed that it has failed (burned out), it should be replaced.
- Then you need to check all the electrics that supply current to the headlights (and, accordingly, to the ballast if there is xenon in the lighting). All wires and contacts must be intact and firmly connected.
Here the adapters in the headlights are also checked if the system was installed by yourself (not standard, not factory).
- After all checks for serviceability, we connect the wires from the unit to the main electrical power supply of the car, as well as to each lamp by connecting terminals - two for each lamp.
- All wiring should be securely tightened with clamps, and excess wires should be neatly twisted into a ring.
- It would be a good idea to secure the block itself by attaching it with sealant or adhesive tape to a stationary part that should not be live.
When purchasing ballast for xeno-lighting of a machine, the kit includes instructions that outline a clear diagram of the correct connection.
You can use it as a guide to avoid mistakes when installing a new ignition unit.
Fines for xenon in 2022
6. Installation on the front of the vehicle of lighting devices with red lights or red reflective devices, as well as lighting devices, the color of the lights and the mode of operation of which do not comply with the requirements of the Basic Provisions for the admission of vehicles to operation and the duties of officials to ensure road safety movement (hereinafter referred to as the Basic Provisions), entails administrative liability under Part 1 of Article 12.4 of the Code of Administrative Offenses of the Russian Federation. In this case, driving a vehicle on the front of which the specified lighting devices or retroreflective devices are installed, as well as putting such a vehicle on the line, is subject to qualification, respectively, under Part 3 of Article 12.5 of the Code of Administrative Offenses of the Russian Federation or Part 3 of Article 12.31 of this Code. . When applying the above standards, it should be taken into account that the objective side of the relevant administrative offense can only occur in the event of a simultaneous discrepancy between the color of the lights and the operating mode of such devices with the requirements specified by the manufacturer in the operational documentation, and in cases of installation of additional lighting devices - with an assessment of the compliance of the introduced changes to the design of the vehicle (clause 3.1 of the List of faults and conditions under which the operation of vehicles is prohibited (appendix to the Basic Provisions).
At the same time, if only the color or operating mode of the light devices installed on the vehicle does not comply with the above requirements, driving such a vehicle can be qualified under Part 1 of Article 12.5 of the Code of Administrative Offenses of the Russian Federation.
The essence of this paragraph is that deprivation of rights should be imposed only for the use of light bulbs whose color and mode of operation are both “wrong”. As a rule, when installing xenon bulbs, the color of the lights remains the same. That is, only a fine can be imposed on the driver under Part 1 of Article 12.5 of the Code of Administrative Offenses:
1. Driving a vehicle in the presence of malfunctions or conditions under which, in accordance with the Basic Provisions for the admission of vehicles to operation and the duties of officials to ensure road safety, operation of the vehicle is prohibited, with the exception of malfunctions and conditions specified in parts 2 - 7 of this article, -
entails a warning or the imposition of an administrative fine in the amount of five hundred rubles.
The fine is 500 rubles.
In addition, the installation of xenon is an unauthorized change in the design of the car, that is, in addition to a fine, forced cancellation of the vehicle registration is also possible:
I note that if the design of your car requires the installation of xenon bulbs, then xenon headlights should not create any problems and a fine for xenon cannot be imposed.
Until January 25, 2015, a car could only be checked for xenon bulbs at a stationary traffic police post. However, in 2022 this requirement does not apply, i.e. You can check your car's headlights anywhere (as well as the light transmission of the windows).
In the recent past, it was possible to install xenon on a VAZ 2110 absolutely free and was allowed to anyone who wanted it. Today there are certain requirements that must be met, unless the driver, of course, wants to lose his driver’s license.
Even previously installed xenon VAZ 2110 must be modernized in a certain way so that the installation of the device is considered official and permitted.
Legal xenon VAZ 2110
However, if these gas-discharge lighting sources were made in production, you probably won’t have to worry. Since they are already certified and, accordingly, meet all standards and regulations (including the relevant GOST, which talks about uniform requirements regarding the legal approval of automobile headlights with gas-discharge lighting sources).
But if we talk about xenon VAZ 2110, here the situation turns out to be more complicated. If you install the lenses inside the headlights yourself, this is considered to be making certain changes to the car design. It turns out that the changes made require official confirmation.
Official requirements
First, you should consider certain requirements for xenons (more complete information can be found in government decree dated September 10, 2010, number 706, which concerns changes to technical regulations on vehicle safety).
Headlights responsible for low beam and being gas-discharge lamps must be equipped with a special headlight cleaner, as well as a functional automatic device that corrects the angle of inclination.
In the countries that are part of the European Union, a headlight washer is considered a mandatory attribute of xenon. It is needed due to the fact that dirty glass makes the headlights very unclear and oncoming traffic participants have to be dazzled.
Light autocorrectors
The automatic leveling device maintains a regularly inclined beam of light emitted by the headlights directed towards the road, regardless of how loaded the vehicle is. As you initially adjust, everything will remain so.
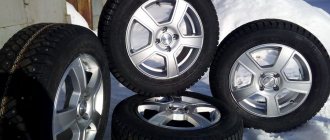
The following devices are recommended for installation on the VAZ 2110:
You can separately purchase transparent glass that is installed in front of the lens. It can be made of acrylic or simply polished.
Drawing up an application
To officially register the xenon VAZ 2110, it is necessary to draw up a corresponding application, which is subsequently submitted to the traffic police (where the vehicle is registered). By the way, there is a prescribed form for this application. Once compiled, it refers to the head of the registration department of the traffic police. There this application is considered and a certain decision is made.
In essence, the law obliges the traffic police to accept the changes made, as it describes the necessary procedure for registration and subsequent issuance of an official conclusion.
Obtaining a conclusion
To receive the conclusion made, you should contact NAMI-PTIA-FUND. Copies of the application written for the traffic police, the resolution, the car passport, and the registration certificate are sent separately by email. A description of the work and several photographs that prove it are also sent.
When the conclusion is received, the planned changes can be made (conversion procedures are often ordered from a certified service). Then you should fill out an application about what kind of changes were made to the VAZ 2110 xenon (if qualified craftsmen worked on the changes, they are the ones who must fill out the above application). By the way, making changes independently is allowed only to those owners who have a diploma in auto mechanics.
Checking technical condition
The next step will be to check the technical condition of the car for compliance with accepted standards regarding safe driving on the road. Such procedures are carried out at special government stations that carry out technical inspection of the machine. And also at points where technical inspection is carried out. After this, the owner receives a diagnostic card along with an official certificate stating that the car complies with the standards for the operation of VAZ 2110 xenon equipment.
Already, traffic police officers are issuing new and final documentation indicating that all changes were made legally.
All procedures will cost approximately 4.5 thousand rubles. Of which 3,000 rubles will need to be paid for the conclusion. Another 500 rubles for consideration of an application related to re-equipment. And a little more than 1000 rubles are due for a technical inspection, registration certificate, and a mark in the PTS.
Everyone strives for personal comfort and safety. This also applies to vehicle lighting of the road at night. Therefore, many car enthusiasts are interested in how to ensure that the installation of xenon on a VAZ 2110 is successful, but at the same time does not cause complaints from the traffic police? In principle, this can be solved for both conventional headlights and fog lights. More on this later in the article.
Installation Guide
Installing fog lights on a VAZ 2110 or even installing xenon in PTF is a completely reasonable solution, because these optics can perfectly cope with the problem of illuminating the road in fog. If a car owner has never encountered such a problem before, then he will probably be interested in learning how to connect fog lights on a VAZ 2110 on his own. We will tell you more about this below.
LED fog lights for VAZ 2110
Tools and materials
- The headlights themselves, which can be purchased at any store. Domestic stores can supply headlights in two variations - for old-style center consoles it is optimal to use PTF for “ten”, but if your car is equipped with a new torpedo, then you will need optics for the VAZ 2115. In this case, the difference lies in the buttons for turning on the optics.
- Multimeter for measuring voltage.
- Indicator light with wire.
- Insulating tape.
- Heat shrink packaging.
If you decide to use xenon in fog lights, then you will also need an additional xenon kit.
Connection diagram
How to properly connect fog lights to your car:
- First you need to open the fuse box and unscrew one screw, after which the device itself needs to be unfolded. The wires that will need to be connected additionally are marked in green in the photo. The number 1 marks the cable that transmits a positive charge, which can be checked using a test lamp. The connection of this wire is made from the relay to connector 20, as for the wire numbered 2, this is also a plus and it needs to be connected to the relay on pin 87.
- Next, you need to connect wires to the safety elements, which will subsequently split into the left and right lights. The wiring is installed, and the corresponding wire (also with a female output at both ends) is connected to the output with a double “female” contact, the length of which should be 30 cm.
- After these steps, you need to insert the cable with single female contacts into the white connector on the block. As for the double female connector, it must be removed from the block and connected to the male output, which is located behind the trunk opening button.
- Next, the black cable, which is marked with the number 3 and comes from output 87, should be routed from the top of the power supply; this wire is a minus. Here you can see the wires that were installed at the factory; they are connected under a nut that can be opened with a 10 key. The cable, which is marked with the number 4, ensures activation and deactivation of the optics.
There are several options where you can lay the foglight control cable:
As an option - from the side lights directly, without using a switch. In this case, the fog lights will automatically turn on along with the side lights.
- Another option is from the same side lights in a sequential manner, but using a switch. In this case, when the side lights turn on, voltage will be supplied to the fog light switching regulator. However, the optics will only turn on if the button is pressed.
- Another option is from the ignition system via a switch. That is, when the driver turns on the ignition, there will be a plus on the optics switch. As in the previous case, the lights will turn on only after the switches are activated.
Optics installation
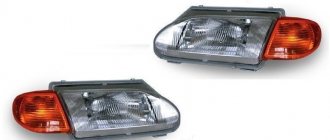
- First you need to choose a place for installation - as a rule, this is a special compartment under the front bumper. In the case of the “ten” there are several options for fog lights. They can be corrugated, which diffuse the light, or transparent, in the latter case the light will come out in spots. The transparent option today is more fashionable and in demand among our compatriots, but it is less useful.
- In the engine compartment, disconnect the wires that are connected to the fluid control regulator and the washer expansion tank. To do this, unscrew the washer fixing nut and remove the block with wires, which is located under the left side member.
- For the Ш-1 connector you will need three cables - one yellow and two black-yellow.
- After this, you will need to cut two pieces from the yellow cable - they should be pulled into the vehicle interior. The wiring is thoroughly cleaned and male terminals are connected to it. Having completed these steps, the connectors must be connected to the block in such a way that the marked cable is connected to the black and yellow wire. Next, the block must be connected and two yellow cables attached to the harness. Having done this, the washer reservoir can be installed in place.
- After this, you will need two more pieces of wire, each should be 0.5 m long. You need to connect a ground terminal to these wires, and then fix it to the stud along with the ground cable from the optics.
- The cable from the PTF must be pulled from the front side member and brought out to where the lamp itself will be fixed. A ground terminal must be connected to each cable.
- After these steps, the brackets are mounted on the bumper itself, and the terminal blocks are connected to the wires. The final stage will be the installation of light bulbs in the lanterns (the author of the video is the proVAZ-2110 channel).
Xenon PTF, when connecting xenon is not against the law
In order to install xenon in the fog and/or regular headlights of a VAZ 2110, it is necessary that the entire kit, which uses bi-xenon lamps, be absolutely legal. The letter D must be present on the glass itself, which indicates that bi-xenon lamps must be connected to this headlight. In this case, xenon is legal and will not cause any complaints.
If there is a letter H on the headlight glass, then halogens are used, and problems with the traffic police are quite possible.
Necessary tools and elements
Before purchasing everything you need, decide on the color. Today, white optics are most popular among VAZ 2110 owners, but you can also find classic yellow. Now to the purchase: some people prefer to take a ready-made kit, which includes wiring, while others choose the parts separately. The second option is not only cheaper, but also provides more installation options.
To work we will need:
- Headlight kit;
- Key as well as indication;
- Relay;
- Plastic pads;
- Headlight frames;
- Terminals called “male/female.” Recommended to be purchased separately, no wiring included;
- The terminal that will go to ground;
- Wiring.
The wires of the VAZ 2110 need to be given special attention. It is recommended to go to a specialized electronics store to get them. We need an option with two copper cores, as well as double insulation. As for the cross section, here you need to build on the power of the lamp. If the power indicator is high, then it is better to take 0.75 millimeters. At normal power, 0.5 mm wires are used.
Advantages and disadvantages of xenon
This significantly saves battery power and reduces the load on the generator. In addition to everything else, xenon optics are more protected from melting, since their heating during operation is no more than 60 percent of the temperature of halogen optics.
Other problems are also possible. Adjusting the lamps can be significantly difficult due to the fact that the diffuser is unsuitable for such variations in luminous flux. In addition, self-diagnosis systems of new cars in some cases do not perceive xenon optics as an efficient circuit component. Thus, the on-board computer detects the lamp burnout as a result of its lower power consumption. In other words, the lack of standard power consumption by the lamp is diagnosed by the computer as burnt out.
Required Tools
When carrying out tuning, you need to use a special set of power tools, which includes pliers with a protective case that meet all safety requirements when working with electrical equipment. Also, the tool kit must include a screwdriver with attachments for various bolt connections, with which you can easily unscrew the element with a slight movement. It is first important to check that there is no power supply to the element, which will avoid electric shock.
Pro Tip: A focusing lens will help you avoid blinding oncoming drivers.
To avoid dazzling oncoming drivers, it is necessary to install a focusing lens, which provides a stream of light of high brightness and high clarity, as well as excellent quality of the light beam as a result of the special lens glass that is included in the kit. In addition, focusing lenses are capable of uniformly dispersing headlight light, thereby creating a clear boundary between illuminated and darkened areas. Therefore, when using such lenses, it is impossible to blind pedestrians or oncoming motorists.
What is the imperfection of the VAZ 2110 headlights
The stream of light yellow beams emitted by ordinary low and high beams deserves many-sided criticism in many respects. Quite often you can meet a "tens" driver who claims that it is impossible to adjust the direction of the beam, usually even in bench conditions.
It is worth noting that the headlights for the VAZ 2110 were manufactured by two companies
:
Bosch and Kirzhach
. The former show slightly better lighting, although not perfect. The Russian block has a lens in its composition, the beam of which is too narrow. In this case, it is recommended to use PTF to improve the situation a little.
Read:
By installing good halogen lamps in Bosch lighting elements, you can try to achieve an acceptable level of illumination. Kirzhach defects cannot fix even the upper halogen
. This is explained:
- poor headlight seal, resulting in the inside of the lens being dirty (lost efficiency up to 40%),
- non-functional optical design (focal length is quite large)
- no headlight washers.
Legal modules for legal installation
But there are minor differences with those installed on the VAZ 2110, as a result of which they should be slightly modified.
You will need two pieces:
- Bi-xenon lamps.
- Ignition block.
- Ignitor.
- Hella lenses.
Preparing to install fog lights
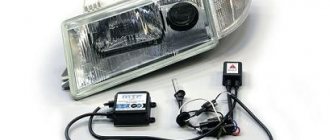
Before purchasing a xenon kit, determine whether the standard headlights are suitable for installing gas discharge lamps. If they are intended for halogen lamps or there are no PTFs at all, then buy lensed fog lights. Such devices produce a balanced flow of light and do not require complex installation and adjustment work. If standard PTFs are suitable for installing xenon, then you should select a set of lamps, ignition units, and wires. The optimal glow temperature is 4300K - white light with a lemon tint. If you prefer a white glow, then pay attention to elements marked 5000K.
The electrical circuit for connecting xenon to fog lights is almost identical to connecting halogen lamps. The main difference is the need for the location of the ignition units. A visual diagram in the image below.