“Kalina” is a symbol of the domestic automobile industry, of course we are talking about a car. In 2004, the first copy rolled off the assembly line. Until 2013, the car was not subject to changes or restyling. Everything was the same, no improvements. Few people paid attention to the model and preferred foreign options. But after 2014, everything changed dramatically. The exterior and interior have changed significantly; The designers took into account the clients' comments.
The machine is manufactured in various variations. The engine is equipped with a direct injection system and electronic ignition. The body structure strictly complies with basic safety standards. Maneuverability has been increased by shortening the overall body length. Since the beginning of 2012, all Kalina models have been equipped with an electronic gas accelerator pedal.
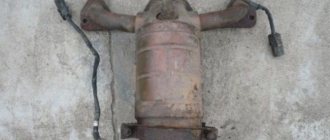
Among the bulk of frequent breakdowns and shortcomings, many owners experience difficulties when the standard catalytic filler fails. Using the example of a Lada Kalina with an 8-valve engine, we will consider the algorithm for removing and replacing the seal.
The main reasons for replacing the catalyst gasket
One of the main reasons for catalytic converter failure is that the exhaust channels become clogged. The formation of plugs leads to the deposition of soot, soot, and other solid deposits. Sources of clogging can be:
- low quality fuel;
- the use by the owner of the technical equipment of all kinds of chemical additives in the combustible mixture (these reagents only have a detrimental effect on the performance of the fuel system);
- possible mechanical damage to the housing or internal connections;
- long-term operation without replacement or prevention;
- faulty engine ignition system;
- unstable operation of the oxygen sensor, due to which the combustible mixture is lean or enriched, which also has an extremely detrimental effect on the performance of the entire system.
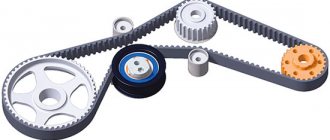
Variable geometry receiver
This is a relatively new development that has recently received more and more supporters. Now there are several principles for implementing this design. One of them assumes the presence of two channels through which the mixture or oxygen can move. One channel is short, the other is long. Under a certain operating mode, the installed valve will close a short path.
Please note that when replacing the intake receiver, the gasket must always be new. If you install the old one, the seal will be broken. There is a possibility of air leaks and, as a result, unstable engine operation, as well as increased fuel appetite.
We will also consider the second principle of implementing variable reservoir geometry. Here the valve is mounted in the receiving pipe. When certain conditions are reached, the shutter will reduce the internal volume of the chamber. As a rule, this scheme is practiced on internal combustion engines with a small number of cylinders. On larger engines, more complex systems are implemented that also make it possible to turn off some of the cylinders in order to save fuel. Thus, the part of the chamber to which the channels of half the cylinders are connected is blocked by a damper.
Replacing the Kalina catalyst gasket (8 valves)
Replacing the catalyst gasket on an 8-valve Lada Kalina begins with the preparatory stage: a set of tools, socket heads, rags, heat-resistant sealant, a new gasket - seal.
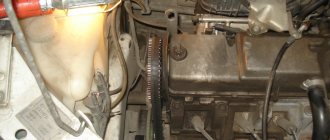
Dismantling work affects both the engine compartment and the underbody of the car. The service station master starts with the hood space:
- Opens the hood and removes the decorative plastic engine cover. Unscrews the four rubber clips located around the perimeter, as well as the plastic oil filler cap.
- Be sure to reduce the pressure in the fuel system of the power unit. To do this, you need to turn off the engine, remove the fuses from the block in the tunnel, and start the engine. Let it run again until all the fuel is used up, then insert the fuses.
- Resets the negative terminal from the battery.
- Removes the injection module. Unscrews the standard fasteners around the perimeter with a figured screwdriver.
- Disconnects the contact board of the wires from the fuel injectors and the engine, and moves the gasoline supply hose to the side.
- Disconnects the catalyst from the standard pipe of the additional muffler. Removes the rubber suspensions and the receiving pipe flange from the seat.
- Disconnects the contact group of oxygen sensor wires.
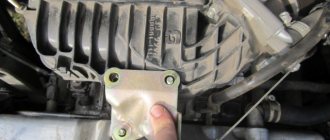
- Unscrews the heat-insulating shield from the motor housing.
- Unscrews the inlet pipe from its seat.
- Removes the spacer and damper tube.
- On the body part of the exhaust manifold, unscrew two nuts and remove the heat-insulating shield.
- Unscrew the six fastening nuts around the perimeter of the manifold, dismantle the inlet pipe of the cylinder head.
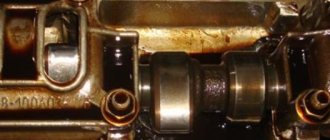
- Directly removes the sealing gasket itself from the block head.
- Use fine sandpaper to clean the perimeter of the cylinder head from remnants of the previous gasket.
- Conducts visual diagnostics of removed equipment and components.
About the modification of the collector
Tuning the VAZ intake receiver is a very popular topic. This operation has two directions. This is the refinement of the inner surface and overcoming the negative influence of the element’s shape. If the latter is asymmetrical, then most of the air will enter the first cylinder, and less and less oxygen will penetrate into all subsequent ones. But symmetrical also has disadvantages. Here the air will enter in the greatest quantity into the middle cylinders. Modifications to the VAZ-2114 intake receiver in this case consist of replacing the standard manifold with a multi-throttle intake system. Here the air flows no longer depend on each other. Accordingly, the same amount of oxygen enters each cylinder.
You can modify the intake receiver of the VAZ-2112 in another way. So, some grind the inner surface. By eliminating some of the highs and irregularities, you can ensure a more uniform air supply to the engine. But as practice shows, this modification does not bring a significant increase in power. A more effective solution is to install chokes. However, this should only be done when installing a turbine, otherwise tuning will not be justified.
Replacing the Kalina catalyst gasket: installation and assembly
After a new paronite gasket with a metal ring in each hole has been prepared, the catalyst is replaced and the technician begins reassembly.
It is recommended to install asbestos-paronite gaskets with a metal frame inside to increase the service life of the product. Compared to a similar gasket, the service life with a metal ring is twice as long.
Further assembly is carried out as usual. There is no need to apply a heat-resistant sealant to the gasket, since there is a high probability of chemical residues getting into the combustion chamber and clogging the channels. The consequences can be very diverse and unpredictable.
There is a modification of the Lada Kalina with a 16-valve system. The gasket replacement algorithm is completely identical to the 8-valve one, there are no differences.
Test No. 2
Acceleration was measured using a special Drag-On device. As a result of the races, a table of measurements was compiled on different configurations (the last measurement on the receiver was made on light forged wheels, all the rest on conventional stamping):
On the standard receiver, acceleration to 100 km/h was 9.2 seconds, on the 21179 receiver - 9.1 seconds (different disks could affect the result). A noticeable difference is felt at a distance of 400 m. Receiver 21126 - 16.5 seconds, and on 21179 - 16.0 seconds.
Signs of damage
Problems in operation are immediately noticeable. The first sign is the engine starting and stopping, or no start at all. In a service station, diagnostics are performed by a specialist. The oxygen sensor is unscrewed from its seat and the technician tries to start the engine; if it works the first time, then the reason is the catalytic filler and the tightness of the system. Otherwise, the reason lies elsewhere.
Secondary signs: reduced dynamics of vehicle acceleration, average speeds are reduced, fuel consumption increases, the “CHECK ENGINE” error indicator lights up on the central instrument panel.
The above symptoms may not always objectively indicate the exact cause of the breakdown. Auto mechanics recommend using several at the same time. For example, increased fuel consumption may not always indicate a problem with the exhaust system. There are many related breakdowns that can give such a symptom.
In 99% of cases, a clear whistle in the area of the engine compartment is guaranteed to identify the breakdown. Of course, if a turbine is not installed. But it is not provided in Lada Kalina.
Features of operation of the intake receiver
Unlike the engine itself, this part does not require maintenance. However, it is necessary to periodically monitor the quality of the gaskets. The slightest air leak causes the engine to trip and a yellow “Check” light on the instrument panel.
Note that plastic collectors, which are now widespread, are more susceptible to deformation than others. This point must be taken into account when tightening the receiver nuts. Be sure to use a torque wrench and observe the tightening torque. The bolts should be tightened from the center, and then move to the periphery.
Untimely gasket replacement: dangers and risks
The main danger lies in the excessive formation of carbon deposits and its deposition on the exhaust system channels. The second point: ceramic honeycombs are destroyed over time, their fragments are spread under pressure throughout the entire system. This is very dangerous, since the particles block circulation and contribute to damage to internal mechanisms: timing belt, spark plugs. The most dangerous option is when fragments of ceramic honeycomb penetrate the oil pan and mix with the engine oil. Subsequently, this mixture damages the surface of the cylinder walls. The car loses compression, breaks down, and needs partial or major repairs.
Reasons for removing and replacing the exhaust manifold Lada Kalina
The exhaust manifold is made of cast iron, which is very resistant to temperatures. However, a critical temperature - 800-900 degrees - can render the distributor unusable. In addition, there are many other factors that negatively affect it. This list can include:
- Mechanical damage;
- Loss of tightness at the junction with the cylinder head (cylinder block);
- Inoperative condition of the gasket between the BC head and the manifold;
- Due to constant overheating, cracks or warping may occur.
Sometimes replacing the exhaust manifold on Kalina 8 valves is necessary in order to install a more advanced and high-quality part.
Important! The exhaust manifold gasket is created from pressed reinforced asbestos and is necessary to create a tight connection between the BC head and the distributor. The fact is that the BC head is made of aluminum, and the manifold is made of cast iron. Therefore, under the influence of temperature, these two elements expand and contract differently. And asbestos allows you to coordinate the difference in thermal expansion. The main threat to the gasket is constant exposure to high temperatures.
There are a number of symptoms that will tell you that you need to replace the exhaust manifold of your Lada Kalina:
- In any operating mode, the engine makes an unpleasant characteristic sound;
- Exhaust gases enter under the hood or even into the interior of your car;
- The engine loses power due to a mismatch between the BC head and the manifold.
Features of the shape and length of the receiver pipes
Recently, engineers have been paying special attention to these reservoir parameters. Sharp corners and sharp curvatures should be avoided in the channel design. In these places, fuel mixed with air will definitely settle on the walls. Therefore, most car manufacturers practice installing such receivers where all channels are of equal length, regardless of the distance from the center. This trend comes from sports cars.
This design eliminates the Helmholtz resonance. When the corresponding valve is opened, the flow of the mixture of air and gasoline moves clearly along the receiver channel towards the cylinder. When the valve closes, the air that did not have time to pass into the chamber continues to press on the plate. Under the influence of high pressure, the air tends to return to the upper part of the receiver. As a result, a countercurrent is formed in the channel. It stops the next time the valve opens. the change in direction of flow occurs at a very fast speed. Studies have shown that this speed is close to supersonic. Indeed, in addition to the closing and opening of valves, the air will tend to change direction due to the phenomenon of resonance. When air moves from side to side, it certainly leads to a loss of power.
Required tools and materials
The list of what is needed is, in principle, standard: a standard set of tools, an extension cord with various heads, WD-40 or other similar lubricant. If you know that the problem is broken studs, then a stud extractor, taps, drill and drill bits will be added to the above list. In addition, a bucket or basin, possibly an old canister, should be at hand.
Advice! A few days before replacing the exhaust manifold, you can begin to lubricate all fasteners in the system. Can be lubricated several times a day. This will greatly simplify the task and make replacement quick.
Dismantling
There is only one difficulty in this process - the inaccessibility of some fasteners. It is best to carry out this “operation” in a viewing hole or on a lift. Of course, this is not necessary, but it is much more convenient.
Work order:
- First you need to remove the negative terminal from the battery or turn off the mains switch.
- Next, it is recommended to drain all the antifreeze into a container prepared in advance.
- Next, you need to disconnect the fuel pipes. If the coolant is not drained, at this stage it will go into the cylinders.
- Now you have to find the throttle position and idle speed sensors, and then remove the wires from them.
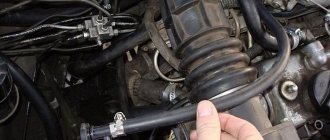
- We first remove the crankcase ventilation from the hoses, then the brake booster.
- Remove the intake manifold (receiver) together with the throttle assembly.
- Then remove the fuel rail (without disassembling) and the wires from the injector.
- There's not much left. Now you need to remove the heat reflecting screen. The exhaust pipe of the muffler is unscrewed from the manifold.
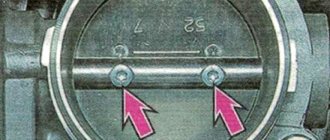
- We remove the exhaust manifold Kalina 8 valves from the BC head studs, to do this we unscrew the fastenings shown below in the figure
How it works?
Let's look at how the intake manifold receiver works. The fuel injectors or carburetor spray fuel into the receiver's downpipe. Due to electrostatic force, gasoline droplets will collect into larger ones in the air or settle on the walls. These actions are undesirable because they lead to incorrect mixture formation. The better the gasoline is atomized, the more completely and intensely it will burn in the chamber. Therefore, in order to eliminate negative factors and ensure the highest quality spraying, the internal parts of the receiver are made unpolished. At the same time, the surface is not excessively rough, since this can cause greater turbulence and lead to a drop in engine power.
The inlet receiver must have a certain shape, capacity and length. The best option is an equal-length collector. All of the above parameters are calculated when developing a specific power unit. The manifold ends with air channels that direct the flow of oxygen to the internal combustion engine valves. On diesel units with direct injection, the air flow swirls and enters the cylinder. In the latter, mixing with fuel already occurs.
Replacing the exhaust manifold and gasket
When dismantling the manifold, the gasket is destroyed in almost any case. Therefore, it is worth removing its remains from the parts. Replacing the Kalina exhaust manifold gasket is a simple process. The use of sealants and other third-party substances is not recommended. They may later get into the crankcase.
Replacing the manifold itself is simple - just take a new part and install it according to the principle in which it was attached. Assembling the system is simply the reverse order of the steps outlined in the last section.
Advice! Don't forget about cleanliness. This is an important factor in long and trouble-free operation of the car.