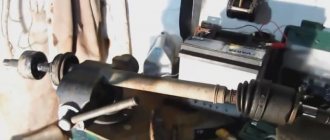
Front-wheel drive and CV joint
What is a CV joint? This is a kind of hinge, which is responsible for equal angular velocities. The VAZ CV joint, or as this part of the grenade is called, serves to transmit torque directly to the wheels of the car. The design of this part, although responsible for important running parameters, is a fairly simple design. Thus, a car grenade consists only of a ball-type bearing, rotating not along its axis, as is customary, but across it.
Note. In other words, a hinge or grenade connects axle shafts that are at an angle to each other. At the same time, we should not forget that this angle is constantly changing, and the grenade or CV joint is the part that normalizes all this.
The principle of operation of the grenade is as follows: the hinge allows the drive front wheel to make turns in different directions without difficulty. And it is noteworthy that the design of all grenade joints in different cars, including the VAZ 2110, is the same.
Design Features
It is worth noting that although all grenades are the same in design, their sizes may be different. In particular, you should know that in the same car, two grenades of different sizes are intended for each wheel. These hinges are as follows:
- an internal joint that transmits rotation from the gearbox gear to the shaft;
- an external joint designed to transmit rotation from the shaft to the hub.
Since the CV joint is a hinge, it is not surprising that its design must have independent elements, simply called balls. It is they who transmit the rotational motion from the leading to the driven part.
Note. There are as many as six balls in a grenade. They don’t sit in the CV joint just like that, but are placed in a special holder. The clip itself is located between the body and the inner cage. It seems to sit on a driven shaft, which is a bowl.
Replacing the external grenade of a VAZ 2110
The body itself and the holder are equipped with special grooves, which allows the balls to move along them. As for the joints of the structure, it is reliably protected by a boot, which is a rubber elastic cap.
Determination of CV joint failure and causes of failure
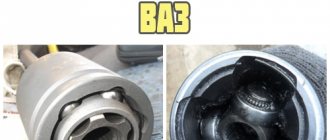
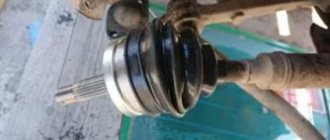
Faulty grenade VAZ 2110
Before starting the process of replacing a grenade, it is recommended to determine which grenade needs replacement. Simply feeling the shaft play on the overpass is an accessible method for determining the malfunction of a particular grenade. As a rule, a working grenade should not create any play at all.
Note. It is worth noting that a faulty grenade does not necessarily occur on older cars. This situation is often observed when the CV joint fails on a car that has recently left the assembly line.
What are the main reasons why a grenade fails? Here they are, listed below:
- the quality of the grenade, which can be low or high (often a fake is sold instead of the original part or a defect is established);
- lubricant that is either completely absent or available in insufficient quantities;
- failure of the boot (see How to replace the boot on a vase), which leads to damage to the grenade (the boot is protection and if it is missing, various abrasive debris and water get into the grenade mechanism);
- incorrect driving style (aggressive driving style);
- poor condition of roads (especially important here in Russia).
So, you can determine the malfunction of the CV joint yourself, as mentioned above, by detecting play in the shaft. In addition, the malfunction of a grenade, like any other part or mechanism of a car, is caused by a change in properties, dimensions, formation of a hole, etc. As mentioned above, the grenade is a hinge, the structure of which contains elements that rub and are under constant load. If the CV joint is a kind of bearing, then its races must have transverse grooves. This is what allows you to change the angle between the drive and driven axle shafts. Since the grenade, forcing the car to move, transfers significant force to the wheels, over time it loses its performance and wear is formed on the part. It also increases the gap. And where there is no close contact between mechanisms and parts, knocking, noise, etc. occur.
Torn boot on a VAZ 2110 grenade
The appearance of a characteristic crunch when turning the wheels is the main sign of failure of the grenade, which most experienced drivers know about. Such a sound can only be produced by metal balls rolling along the gutters.
Note. Such a crunch can appear at any time, but, as a rule, when turning the wheels or sharply accelerating from a standstill. In addition, a characteristic sound may appear when overcoming obstacles.
Slight jerks when the car starts moving will also help to identify signs of a CV joint malfunction. Also, experts recommend changing driving dynamics to quickly identify faulty grenades. As was said, there are two types of grenade: external and internal. How to determine the malfunction of an external grenade, or as it is also called an external grenade, was indicated above.
Note. The external CV joint differs from the internal one, first of all, in that it is smaller in size and fails much more often than the internal CV joint.
- To determine the malfunction of the external grenade in another way, you need to turn the steering wheel and move away. If the grenade is faulty, it will begin to “crunch”.
- To determine the malfunction of the internal grenade, you will need to drive not in a curved manner, as when checking the outer CV joint, but in a straight line. The internal grenade will especially clearly signal with a sound signal that it is time to replace it when overcoming holes, snowdrifts or shallow ditches.
- You can finally check the malfunction of the grenade on the lift. The front wheels will be suspended and if the CV joint is faulty, a characteristic crunch will appear.
How to properly remove and disassemble the CV joint in your garage
AUTOSIZE
Hello, dear car enthusiasts! Front drive wheels provide car owners with many bonuses in the form of: more responsive steering, increased maneuverability, stability on slippery roads and other delights.
In return, the machine, namely its chassis coupled with the drive, will require additional attention. The front wheels are able to pull the car only thanks to the presence of a shaft connecting the hub to the variable gearbox.
However, that's not all. It would be impossible to transmit rotation from the transmission to the wheels without special devices installed at the ends of the shaft - CV joints.
A constant velocity joint is, today, the only way to transmit rotational motion between axle shafts located at an angle to each other.
In this regard, any self-respecting car enthusiast should know how to remove and disassemble the CV joint, diagnose, maintain and repair it.
How to remove a CV joint yourself without the help of a car service
Despite the apparent complexity of the front-wheel drive design of a car, regardless of its make and model, the design of this unit is quite simple and similar in all cars.
In order to remove and replace the CV joint, it is enough to have a garage with an inspection hole or an overpass to facilitate access to the lower part of the car, as well as a set of standard tools.
As a rule, experienced car enthusiasts manage their work without any special devices, but if there is a desire to speed up repair work, you can purchase a CV joint puller.
Considering that each drive wheel has two hinges, repair work can be carried out depending on the following types of failure:
- removal of the internal CV joint and its repair;
- removing the outer CV joint;
- Removal and repair includes a shaft and two joints.
How to remove the inner CV joint in the garage
Repairing an internal CV joint is an event that is quite rare, but you must have the skills to handle this mechanism, because for its long life it is necessary to carry out preventive measures, replacing the boot and lubricant.
Before describing the technology that includes removing the internal CV joint, it should be noted that in this case, an inspection hole will be simply necessary, because the joint cage is bolted (6-8 pieces) directly to the differential gears, and this is the lowest point of the transmission.
After all the fastening bolts have been unscrewed, the steering wheel should be turned to free the spline joints from moving freely. Using a pry bar, the CV joint is very easily removed from the mounting socket. Removing it from the shaft is also easy; to do this, you just need to unfasten the retaining ring and the boot clamps.
A strong recommendation to all car enthusiasts: you should not remove the CV joint from the shaft under the car and, especially, do not disassemble it. It is much more convenient and rational to remove the shaft with two CV joints at the same time, and then perform all the manipulations on the workbench with a vice.
How to remove the outer CV joint yourself
The outer CV joint, which is installed directly at the hub, although more accessible, will require more time and effort to remove. Here you will have to almost completely disassemble the front suspension.
The wheel is removed, the hub nut is unscrewed and the lock washer is removed. After unscrewing the lower ball joint, the moving strut allows you to remove the CV joint axle shaft.
Repairing CV joints can be associated with certain difficulties. The first is the inability to remove the axle shafts or shaft from the splined joint. There are several options for getting out of the situation. First you need to take a wooden or brass spacer and try to knock out the axle shaft.
If nothing could be done at this stage, you will need a CV joint puller. One of the most common and simple pullers is made in the form of a horseshoe, which is attached to the axle shaft, and the thrust bolts remove the CV joint when rotating.
It is not difficult to disassemble the CV joint itself; for this you need:
- apply marks on the holder and body for reassembly in the same position;
- tilt the shaft with the holder at the end as much as possible to one side;
- Remove the ball from the holder on the opposite side and perform the procedure with all the balls in turn.
There is an opinion among some experts that it is enough to simply wash the CV joint with diesel fuel and “fill it in” with lubricant again without disassembling it.
In this case, there is a high probability that fragments of old retaining rings or other debris will remain inside. If the CV joint has already been removed, then it is better to disassemble it, wash it, reassemble it and lubricate it.
Installation of the CV joint after replacement or maintenance is carried out in the reverse order of removal.
Replacing a grenade
Before you begin the process of replacing a grenade, you need to arm yourself with the following tools:
- lift;
- a sledgehammer or large hammer;
- an ordinary hammer;
- heads for 17 and 30;
- balloon type wrench;
- a chisel, not necessarily sharp;
- a flat screwdriver, preferably a slotted one;
- wrenches 13 and 17;
- crowbar or pry bar;
- pipe;
- a special puller designed to replace CV joints;
Special puller for CV joints
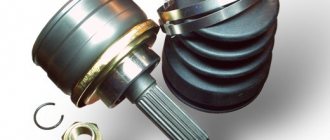
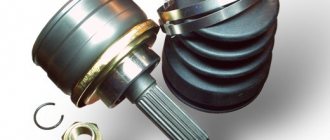
And, of course, you should purchase a new CV joint kit.
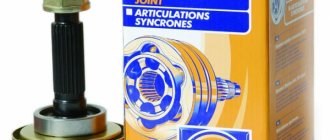
New CV joint kit
Dismantling an old grenade
Let's start the replacement process:
- first you will need to unscrew the nut that sits on the shaft using a 30mm socket, a wrench and a pipe;
Replacing the external grenade of a VAZ 2110
Note. Don't worry if the nut is a little jammed, because if you apply a little force, the pipe and collar will easily unscrew it.
- After the nut is unscrewed, the lift should be installed.
Basic faults
The most common failures of a grenade include: failure due to contamination and due to wear of the part (end of service life or defect).
A faulty grenade can itself reveal its unsatisfactory condition in the form of crunching sounds, crackling sounds when turning wheels, and body vibrations. But in this case, you will have to buy a new part, but you can notice the malfunction much earlier (at the stage of damage to the cover) and prevent serious repairs.
There are several ways to identify a breakdown:
- shake the drive shaft with your hand. If play is detected, the element should be replaced;
- Turn the steering wheel all the way to the left, and then to the right, and at each stage assess the condition of the anthers. If damage (cracks, breaks) is detected, replace them.
The CV joint is protected by anthers from getting dirt into it, which disables the part. But their service life does not last forever; regular inspection of these parts is necessary (as described above) to prevent more serious damage to the grenade.
When operating a car with a faulty joint, also known as CV joint, there is a high probability of it breaking in half. In this case, the vehicle will not be usable. This means repairs will be required and most likely (if this happens on the road) expensive tow truck services.
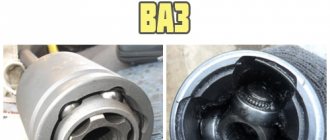
torn boot of the outer CV joint of a VAZ 2110
It is recommended to replace the grenade in a timely manner to avoid unpleasant situations.
An internal CV joint will cost an average of 1,500 rubles, an external CV joint will cost 1,300 rubles. For the anthers they will ask about 150 rubles each. Replacing anthers will cost much less.
Replacing CV joints at a car dealership will cost 1,200 rubles (600 rubles each).
It is recommended to buy a new part using an old one, so the likelihood of an incorrect purchase is minimized. In addition, the purchase of CV joints should be carried out in trusted stores. You should not buy these parts at a disassembly site; it is possible that a breakdown will occur within a few meters.
It is recommended to drive the car onto an inspection hole or overpass, put the handbrake on, engage the gears and support the rear wheels with wheel chocks to ensure safety during repairs.
We arm ourselves with the following tools: wrenches 17.19, socket 30 and 13-17, mount, wheel wrench, wrench, lift (jack), lubricant and pliers.
Both hinges, internal and external, are located on the shaft drive, which means replacing them is identical and the point is to get to this very drive.
- At the rear on the crankcase protection we unscrew two nuts with a 19mm wrench, and at the front there are also two, but with a 17mm wrench.
- Drain a little oil (less than half) from the box.
- From the required side we tear off the wheel bolts with a balloon.
- Unscrew the nut of the outer grenade using a 30mm socket.
- We lift the vehicle using a jack.
- We remove the wheel by unscrewing it first.
- Find the bolts on the hub that secure the CV joint and unscrew them using a 13mm wrench (only two bolts).
- Use a pry bar to move the hub away from the reaction rods.
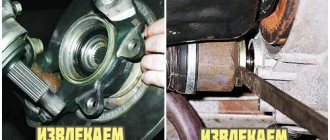
- We take the grenade pin out of the hub, to do this we pull the stand towards ourselves.
- We move the shaft drive aside.
- Now you need to remove the inner hinge from the box. To do this, open the hood and, using a pry bar inserted between the parts, jerk it towards the box. The CV joint must move, otherwise we repeat the action. As soon as it works, we go down to the wheel arch and remove the shaft drive with two CV joints.
- Remove the clamps (large and small) of the protective cover from the hinges. If damage to the anthers is detected, we replace them; if the condition is satisfactory, we move them to the side.
- Using a hammer, we hit the inner clip of the inner grenade with force, making sure that it flies off. We repeat similar actions on the other side.
- We remove the old rings from the shaft drive, put on new ones and a boot.
- We install the new hinge using a hammer and lubricate it and the boot with grease.
- Using clamps, we fix the protective cover on the grenade and the shaft. We do the same with the second part.
- We drive the shaft drive into the box, having first screwed the nut onto the CV joint.
- We collect spare parts in reverse order.
Replacing the outer and inner CV joints of the drive on VAZ 2110, 2112, Kalina, Granta, Priora, 2109, 2114
Nissan X-Trail › Logbook › Inner left front grenade - damn it)))
I don’t even know where to start)) How much time I wasted: - searching for useful information on the Internet; — visited all the investigations in the city; — called investigations in cities that are closer; — how many people have I troubled with my problem))). etc. Finally I made up my mind and ordered a low-quality substitute for Febest (0211-T30LH). By the way, it’s cheaper at www.repart.ru/.
Internal CV joint, gearbox side (0211-T30LH)
When purchasing the car, I immediately noticed the torn boot of the inner left grenade. Well, okay, I thought))).Then I’ll put on the dust cover and that’s it)))…that’s not the case. I called some stores in the city (I was looking for a boot), everywhere from 1500 rubles. and higher. I decided to wait and order through existential for 750 rubles. Febest (0215-071T)
Internal CV joint boot (0215-071T)
While I was waiting for the boot, I wrapped a bag))) with lubricant)). I noticed a slight vibration especially during acceleration. Well, it’s a small thing)))… I waited for the boot. I changed it, it took about 2 hours to replace it… Then I went for a ride)) only then I read on the Internet about the vibration during acceleration. Everyone who wrote about vibration mentioned the torn left boot! In existential terms, the cheap Febest substitute at that time cost 4,700 rubles, a couple of months later it began to cost 3,200 rubles.)) Having already driven 6-7t.km. The vibration has increased and it’s not bad))) (by the way, the boot is still intact) I was thinking about a used drive unit, but if X-trails have this problem, then it makes sense to take a used one. I read on the Internet that the left front drive fits from Nissan Cefiro (A33), from Nissan Primera (P12) and, with minor modifications. I was more inclined towards the drive from the Nissan Cefiro (A33), because... The internal grenade will be stronger)).
But nowhere in Kurgan was there a used drive (((in other cities a used one from 5-7 t.r. immediately disappears. To order through the website www.japancar.ru/ it also costs about 5 t.r. and so on will come...unknown((In the end, I made up my mind and ordered Febest (0211-T30LH) 2860 rubles, I couldn’t continue to worry myself and those around me)) Only reviews about those who installed Febest were not found as a substitute((about the fact that Febest is complete shit..., this okay)) let’s see how long it lasts and if the vibration goes away))
As soon as it arrives, I’ll change it right away))
Diagnose part problems
The grenades are protected by a rubber boot. It is mounted on an external and internal hinge. The boot prevents dirt from getting into the CV joint. Another of its functions is to retain lubricant; without it, the hinge will not work.
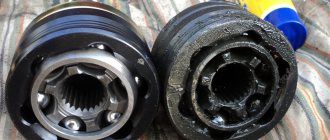
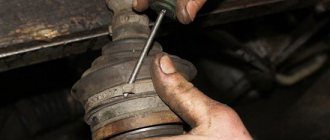
If the boot wears out over time or is torn, sand, small stones and dirt will begin to get into the joint. After some time, the CV joint will become unusable and the grenade will have to be replaced. Such repairs will cost much more. Therefore, it is important to monitor the integrity of the anther. If a defect is detected, replace the CV joint boot.
You can visually check the condition of the anthers yourself, without resorting to the services of service station workers. It is best to drive your car into the inspection hole. First of all, you should pay attention to the boot of the outer CV joint. The VAZ 2110 has two boots on each outer side of the wheels. These anthers most often fail. The inner boot needs to be replaced much less frequently than the outer boot.
You can check the integrity of the outer CV joint boot without a hole. We stop the VAZ 2110 on the road, preferably in a place where the car will not interfere with the movement of either cars or pedestrians. We turn the steering wheel to the right to the extreme position, this will be enough to diagnose the outer boot on the left side.
We similarly inspect the boot from the opposite side. If traces of grease are visible on the boot or there are cracks and cuts, then the boot should be replaced. The design of the VAZ 2110 allows you to cope with the replacement yourself.
Following the recommendations of experienced craftsmen, you should replace the boots of both the outer and inner CV joints at the same time. Even if the inner CV boot still looks intact and without cracks.
Replacing a grenade on a VAZ-2112
The entire drive was removed to replace the inner and outer CV joints.
If we talk about replacing this unit on a VAZ-2112 car, it should be noted that this work is not as simple as it might seem initially. You can make it yourself if you have certain skills. To do this, you need to follow the instructions given below, and also have tools and consumables.
Equipment and materials:
- Hammer.
- Screwdriver.
- Head at “17”, “19” and “32”.
- Driver with extension.
- Lubrication.
External grenade
What is needed besides a new grenade
Don't forget to check the presence of the boot, two clamps and lubricant.
The car must be secured first. It will need to be set to speed, and shoes should be installed under the wheels (you can use a brick or a wooden beam). Next, you will need to remove the decorative cap and unscrew the nut that holds the hub. You need to use a head with an extension (you can take a piece of pipe). Once the hub is unscrewed, you can begin to unscrew the bolts that hold the wheel.
Next, the CV joint itself is removed:
- You should lift the car wheel on the side where the CV joint is being replaced.
- Completely unscrew and remove the hub mounting nut.
May require a long lever, a VERY long lever!
- On the steering knuckle, you need to unscrew the two bolts that secure the ball joint.
- Turn the steering wheel to its farthest point.
- Move the steering knuckle and strut to the side.
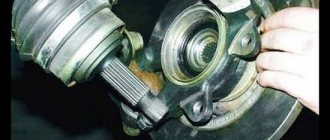
- Remove the splined end of the CV joint from the hub.
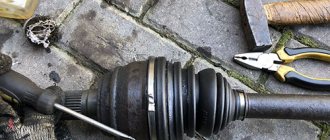
Pull out the outer CV joint
Functionality check
The condition of the inner and outer CV joints should be examined separately, since the procedures and symptoms are somewhat different.
External grenade
The most obvious and main sign of wear of this element is the appearance of a sound similar to a crunch. It appears because the grooves have worn out and the balls do not move along them as well as before. The crunching becomes noticeable when entering turns, sharply pressing the gas pedal or passing difficult road sections.
Grenade
If you want to verify that the outer CV joint is faulty, do the following:
- When starting from a standstill, deliberately create jerks, but not strong ones;
- Try to accelerate sharply and slow down;
- Move the shaft transversely between the CV joints. If you feel any play, then the grenade is definitely worn out.
Internal grenade
It is noteworthy that the internal hinge is more durable and less subject to wear. Most often, the inner CV joint declares its malfunction when simply driving in a straight line or when passing through difficult sections. A check for play, similar to an external grenade, will allow you to verify problems.
But to understand whether an element really needs to be replaced, do this:
- Raise the drive wheels, which will allow you to bring the inner CV joint to its maximum angle;
- Start the engine;
- Turn on first speed;
- If the hinge is at the limit of wear, you will hear a characteristic crunch. This is a signal that you need to change the grenade.
What is this?
By grenade, service station technicians and motorists understand a device through which torque is transmitted to the steering wheels of a car without loss of power characteristics of the power unit.
If you operate the vehicle carefully and carry out maintenance on time, the grenade will last as long as possible. But poor quality of the road surface, savings on maintenance, aggressive driving - all this leads to the rapid failure of the constant velocity joint.
The driver of a VAZ 2112 understands that the CV joint has failed by the following signs:
Sometimes a grenade can be repaired. But more often than not, its malfunction is detected already at the stage when the part is severely worn out. Auto repairmen are advised to replace such auto parts with new devices.
Replacing the inner CV joint with your own hands
” alt=””> The procedure for replacing a “grenade” is the same for the entire front-wheel drive VAZ line, starting with 2108 and ending with VAZ-2115, “Kalina”, “Priora”, “Grant”. Before removing the inner CV joint, the oil is drained from the gearbox. Then proceed according to the following algorithm:
- Unlock and unscrew the hub nut. To make the work easier, a piece of pipe about 1 meter long should be put on the key.
- The desired side of the car is hung on a jack or lift.
- Remove the wheel.
- Remove the washer located under the hub nut installation site.
- Disconnect the steering tip.
- The CV joint is removed from the hub.
- Using a pry bar, remove the drive and internal joint from the gearbox.
Note: when removing both drives at the same time, a suitable mandrel should be installed in their place.
How to change the “grenade” with the drive removed? To do this, clamp the shaft in a vice, loosen the clamps and remove the boot. After this, the hinge is knocked off the splines with hammer blows.
The new CV joint should be hammered by applying light blows to its end with a hammer. For this it is better to use a wooden mallet. The “grenade” is first filled with a special lubricant.
Before installing a new constant velocity joint, it is necessary to clean its seat from old grease and install a new boot. Assembly is carried out in reverse order.
The repair is considered complete after successful sea trials. In this case, there should be no extraneous sounds from the drive side in all modes of vehicle movement.
Pricing factors
Today, most car owners are trying to make financially profitable purchases. But a cheap part does not always turn out to be of high quality. This must be remembered when choosing a CV joint for a VAZ 2112.
To make the purchase profitable, you need to visit different places where this part is sold and compare the performance parameters and cost. The price at different sales points will vary greatly. It is important to understand that the cost is influenced by the following factors:
- Quality.
- State.
- View.
- Originality.
- Company manufacturer.
- Place of purchase.
- The need for product delivery.
- Seller popularity.
Diagnostics of CV joint performance before installation
- The CV joint should be inspected visually, as well as by rotating it relative to the position of the bearings.
- If no crunching or crackling noises are detected when turning, and the presence of dirt and sand on the lubricant is minimal, then the joint can be cleaned in gasoline by soaking and cleaning.
We fill the grease into the CV joint - Then we dry it and squeeze new lubricant into its body. This also applies to the CV joint boot, which also needs to be coated with the body.
Varieties
CV joints are divided into different types depending on the type of structure and installation location. Depending on their location, grenades are:
- External (connect the axle shaft to the wheel hub).
- Internal (connect the gearbox to the axle shaft).
According to their design features, products are distinguished:
- Ball-type (torque is transmitted using balls moving along grooves).
- Cam (consist of shaped disks and forks, can withstand heavy loads).
- Tripod (differed by the presence of spherical rollers).
- Twin cardan joints (represent two connected cardan joints).
As of now, there are grenades on the VAZ 2112:
- New.
- Used in good condition.
- Old, requiring minor repairs.
Also, similar products are classified according to manufacturer into two types:
At the place of purchase, auto parts are:
- From the online store.
- From the car market.
- From a store selling spare parts for VAZ cars.
- From the auto disassembly point.
- Purchased from an ad.
According to the manufacturer, the CV joints on the VAZ 2112 can be sold in the following brands:
Design
Drive diagram If you disassemble the CV joint, it will consist of three main elements:
- Inner ring;
- A ring with holes that hold six balls - a separator;
- The hinge body together with the drive shaft.
In a VAZ 2110 car, the CV joint may need to be replaced. But which one exactly? After all, in the “ten” there are two of them - internal and external. They are necessary in order to effectively overcome all obstacles. Here one CV joint will clearly not be enough.
Internal and external
- The first grenade is internal, and it transmits torque to the shaft from the transmission.
- The second grenade is external and engages with the car's wheel hub.
approximate cost
In Russia, you can buy a new grenade at a price from 700 to 1300 rubles .
Approximate prices depending on the type of CV joint:
- Outdoor – from 700 rubles .
- Domestic - about 1200 rubles .
Approximate prices depending on the manufacturer:
- AvtoVAZ - about 1100 rubles .
- PRAMO - from 700 rubles .
- LGR – from 980 rubles .
- Lucas - about 1300 rubles .
- Hofer - about 1200 rubles .
- Pilenga – from 850 rubles .
An old spare part in Russia is sold for about 400-500 rubles .
Required spare parts
Each car is equipped with two grenades: internal and external. The first joint transmits rotation to the shaft from the gearbox, the second – to the hub from the shaft. Depending on the scope of the repair, you may need:
- internal hinge (article 302315, 2108-2215056);
- external CV joint (article 3107K, 2110-2215012);
- front wheel drive shaft (article 2110-2215070, 21100221507000);
- cover (article 2110-2215068, 21100221506800, 2108-2215068);
- buffer (article 2108-2215073-01);
- hinge clamp (article 2108-2215086);
- internal hinge retaining ring (article 2108-2215104, 21080221510400, 2121-2215084);
- thrust ring (article 2121-2215082);
- clamp (article 2108-2215034Ч, T-00040, 2108-2215036, 2108-2215034-31, 2108-2215034);
- protective ring (article 2108-3103060, 21080310306000).
Where to buy?
If a grenade is needed for a VAZ 2112, then the owner of the car should decide on the place of purchase and the type of part. Car mechanics are advised to take new original spare parts due to their ideal compatibility with the car and long service life. Such a CV joint can be purchased at an auto parts store for VAZ cars or an online store.
If you don’t have enough money to purchase a new auto part, then you should consider the old versions of grenades. They are sold at car dismantling points, at the car market, by advertisement.
Replacing the outer CV joint on a VAZ 2112
On cars with front-wheel drive, instead of a driveshaft with crosspieces, constant velocity joints (CV joints) with axle shafts are used. Both crosspieces and CV joints tend to fail. This article discusses in detail: replacing the external grenade of a VAZ 2112, visual photos for a better understanding of the process and practical advice from an auto repair specialist.
- Why does the CV joint fail? Principle and working conditions
- How to determine if a hinge is faulty? Diagnostics
- What will you need?
- Replacement
- Removing the axle shaft
- Grenade replacement
- Installing the axle shaft on the car
Causes of constant velocity joint failure
What can cause the failure of this element of the car:
- Poor quality boot is the first reason and the most important. If the boot on a grenade is made of low-quality material, it will quickly wear out, and all sorts of debris will begin to get inside the grenade.
- Loosening the boot clamp also allows sand and dust to get inside the CV joint.
- Other defects of the boot (see), such as a cut of the clamp, rupture of the boot or its stretching also lead to bad consequences.
- An insufficient amount of lubricant, or, even worse, its absence in the constant velocity joint housing, leads to rapid wear of the bearing and, as a result, wear of the entire part.
Advice! When repairing your car, especially if you have to crawl under the car, do not be lazy and pay attention to the condition of the axle shaft boots. If you notice at least one of the defects listed above, replacing the CV joint on a VAZ 2112 is simply necessary!
Determining the need to replace the internal grenade
Before any repair, it is important to make sure that there is a fault. And now we’ll do this with the CV joint:
- Often, a malfunction can be determined by the sound emanating from the suspected component of the car.
- A joint malfunction is detected while driving or starting the car.
- Of course, sounds can come from a faulty shock absorber strut, or from the engine. Let's learn how to determine what kind of sound should come from the CV joint and when it appears.
- The sound of a faulty grenade is the grinding of metal on metal, similar to a crunch, breaking of metal, or a stone hitting a bearing or other drive mechanism.
- When can this sound be heard? If such a sound appears when turning, it means that you need to change the outer grenade, not the inner one.
Advice! Although external grenades fail much more often than internal ones, when repairing external ones, be sure to check the others for functionality. Lubricants should also be added if necessary.
- On a VAZ 2112, the internal CV joints make a sound when driving straight, and especially when the car starts to move.
To more accurately determine the malfunction of the unit, diagnostics should be carried out in the inspection pit. The following explains how to do it yourself:
- The car is driven into a viewing hole. Wheel chocks must be placed under the rear wheels, and the car must be set to the parking brake.
- Next, you should raise the car with a jack so much that one of the front wheels is lifted off the ground.
- Then you should turn the wheel by hand. When the wheel rotates, a sound appears - there is a malfunction in the internal grenade. If you turn the wheel at the same time, then rotate it, and only then does the sound appear - there is a malfunction in.
- After carrying out such an operation, it should be done on the second side (with the opposite wheel).
Now that the breakdown has been identified, you can begin repairs. Replacement of the internal grenade on the VAZ 2112 begins!
Why does the CV joint fail? Principle and working conditions
A torn boot is the cause of all troubles with grenades
- A car's wheel is its dirtiest part. The wheel is constantly in contact with the road, and the road is not always asphalt, but often dirt or sand.
- The outer grenade usually wears out much faster than the inner one, since it is closer to the wheel and is more subject to overload when driving on uneven surfaces.
- Anther breakage. One of the reasons for grenade failure is a violation of the integrity of the boot. This usually happens due to a torn boot clamp, a cut of its fastening, or a cut in the boot itself.
- It also happens that the boot loses its rubber properties over time and stretches. Then it does not fit tightly to the axle shaft.
- For all these reasons, dust gets inside the outer CV joint, and even worse, sand and dirt.
- If harmful substances get inside the grenade, the bearing fails - it collapses or jams.
If you notice a torn grenade boot, this means that on a VAZ 2112, replacing the CV joint is simply necessary for its further safe operation.
As a result, the CV joint boot wears out in the VAZ-2110
The outer CV joint boot can be replaced without removing the main element if the work is carried out on an external car grenade.
However, it should be clarified that it is the outer element that most often fails, since it is adversely affected by particles from the outside. Due to the additional sealing, internal axle shafts are subject to less wear, so these components are replaced much less frequently. The main reason for the malfunction of the VAZ-2110 CV joint boot is its wear, which leads to rupture of the element. If the protective sealed layer is broken, small particles from outside can easily penetrate the car grenade, for example:
In addition to the above particles, automotive lubricant will get onto the unprotected element, which will adversely affect the friction process of the hinge surface. As a result, other car parts, for example, knuckles, clips and balls, will become unusable much faster. A worn joint cannot be repaired, so replacing the CV joint boot in a VAZ-2110 remains the most correct solution. Replacement of a worn boot can be confirmed visually by the car owner himself. This event is required if:
Which is cheaper? Change the CV joint boot
or change
the CV joint itself?
How to determine if a hinge is faulty? Diagnostics
At any service station, before repairs, they carry out diagnostics of the unit that is going to be repaired. Let's do it ourselves:
- Are there any strange sounds while driving your favorite car? One possibility could be a faulty CV joint.
- Most often, a CV joint in need of repair manifests itself during turns (not necessarily sharp ones). When turning the car, a sound comes from the hood, similar to metal jamming, the sound of metal breaking, metal grinding on metal.
- If such sounds appear even when driving straight, then the CV joint definitely needs to be changed!
Advice! Do not ignore sounds that occur when operating the vehicle. In some cases, this can cost the lives of the driver and passengers.
- After sounds similar to a malfunctioning grenade appear, it is necessary to diagnose the front chassis of the car in a pit or overpass, or, as a last resort, just in the garage.
- To do this, you need to lift the car using a jack. Raise the side from which the sound was heard. Don't forget to put wheel chocks under the rear wheels of the car.
- When the wheel can rotate freely, you should rotate it around its axis and listen for sound. If the sound does not appear, then you should turn the wheel in the direction of the turn at which it occurred.
- When a sound appears, it will become clear that the VAZ 2112 CV joint is faulty and requires replacement as soon as possible.
- If the sound still does not appear, then check the other side (the other wheel) in the same way. By the way, if the sound appears, check it anyway - you may have to change both grenades.
Preparation
So, damage to the boot on the VAZ 2199 has been identified. You can replace it and wash the CV joint itself in the garage, the main thing is that there is an inspection hole.
Tools you will need:
- Set of wrenches (socket wrenches, open-end wrenches);
- Set of heads and collars;
- Metal brush;
- WD-40;
- Mount;
- Hammer;
- Jack;
- Wheel chocks;
- Wooden coasters.
You will also need a new boot, CV joint grease-4, a container for collecting oil, a container with gasoline for washing the CV joint, and rags.
Replacement
After all the preparations, you can begin the process of replacing grenades with a VAZ 2112.
Removing the axle shaft
- Perhaps this is the most interesting thing in the process of replacing a grenade.
- Place the car on a level platform, inspection hole. Install wheel chocks.
- First, remove the hubcap from the wheel, if you have one installed.
- Now you need the help of a partner. He should take a driving position and press the brake pedal hard.
- In this case, you should take a 30 socket (in some cases 27 or 32) and a large wrench. The head is put on the hub nut, which secures the grenade to the hub (located in the middle of the wheel) and unscrew it with a large wrench.
Unscrew the nut with a large lever!
Advice! It will take quite a lot of effort to complete the last step described. Therefore, the longer the driver you take, the easier it will be to unscrew the nut.
- Then you can unscrew the wheel bolts and remove the wheel.
- Spray the splined surface of the hinge with rust remover. Most often, an additional remedy is needed - you can’t just knock it out.
- When the wheel is removed, it is necessary to free the hub from the ball joint. To do this, take a suitable head and unscrew the two bolts securing the ball joint to the wheel hub.
- When the hub is freed from the ball joint, you can try to remove the splined surface of the grenade from the hub. Remove the entire hub nut and metal washer.
- Now you need to take a copper (bronze) adapter and a hammer, and with their help we knock the splines out of engagement. If necessary, add more WD.
- When the splines are disengaged, move the strut to the side and remove the axle shaft from the hub.
Instructions for replacing the outer CV joint of a VAZ 2112
Advice! During operation, make sure that the internal grenade does not jump out of the gearbox housing - this is an unnecessary loss of oil.
Next, we will consider the most profitable option for replacing a grenade on a VAZ 2112 - replacement without removing the axle shaft from the car.
Grenade replacement
Two methods will be considered:
- Remove the boot from the grenade. To do this, use pliers to cut through the fastening clamp and, using a screwdriver, remove the boot from one side. Turn it out so that it does not interfere with further work.
Complete removal of the CV joint boot of the VAZ 2112
- Now again you will need the help of a partner. He needs to hold the axle shaft tightly so that it does not jump out of the gearbox. It is recommended to rest the axle shaft against something (usually a lever or anti-roll bar).
- The outer grenade must be turned with the slots up. This gives access to the grenade's internal bearing.
- It is necessary to place a copper adapter on the inner bearing and knock down the grenade with a hammer. When knocking down, the axle shaft must be rotated so that the bearing moves evenly and does not jam.
- After the outer CV joint has been removed, you can begin installing a new one.
Note! Above is the IDEAL option for removing the CV joint. And then we will talk about how it happens MOST OFTEN.
- After removing the grenade from the hub, the axle shaft is removed and pulled out of the gearbox housing. Place a container under the flow of oil from the box so that you do not have to drain the oil. Ideally, a special plastic plug is inserted into the gearbox hole.
- The axle shaft is clamped in a vice for ease of further work.
- The boot is removed from the grenade, but remains attached to the axle shaft. It turns inside out so it doesn't get in the way. If you plan to replace the boot, then it is either cut off immediately or removed after removing the grenade.
- We remove the grenade in the same way as above. We hit the bearing with a pointer and a hammer, and it comes off the axle shaft.
The grenade is removed as shown in the photo
- If we change a grenade, then we change it. If, for example, we are only replacing a torn boot, then we do the following.
- The boot is removed and a new one is put on the axle shaft.
- The grenade is thoroughly washed with a brush in gasoline and then wiped. Then you need to fill it with special lubricant for CV joints.
- If you install a new grenade, then do not forget to fill it with enough grease and distribute it evenly there by turning the bearing.
Advice! Before installing the grenade on the axle shaft, pay attention to the condition of the retaining rings. Replace them if necessary.
- A new or repaired grenade is installed on the axle shaft much easier than it is removed. One sharp blow with a hammer through the attachment and the grenade is in place. Experienced mechanics can even put a grenade on by hand.
- Next, you need to put the boot on the seat in the grenade and secure it with clamps. There are special clamps for grenades (do not use plastic ones). Metal clamps are installed using pliers and a screwdriver.
Advice! Clean the spline joint, both on the grenade and in the hub, with a metal brush and lubricate.
Now the VAZ 2112 axle shaft with a changed external constant velocity joint is ready for installation on the car!
Installing the axle shaft on the car
- The axle shaft is inserted into the gearbox housing. Its other end is inserted into the hub until it stops.
Bend the strut and put the hub on the grenade splines
- Next you need to reattach the ball joint.
- Don't forget to put the metal washer back on and tighten the nut that secures the grenade to the hub.
- Reinstall the car wheel and lower the car from the jack onto the wheels.
- Again, the partner must press the brakes as hard as possible. You take the wrench and socket and tighten the nut with good force!
- Next you need to tighten the nut. This is done with a hammer and a blunt chisel type attachment. This is done to prevent the nut from unscrewing.
That's basically the whole replacement. If something is not clear in the text, remember that you can always watch a visual video that will show it all live.
List of tools that may be needed when replacing CV joints
To carry out repair and replacement of CV joints, you will need the following tools and materials:
- hammer,
- punch,
- mount,
- screwdrivers,
- powerful car lock,
- vice,
- wooden spacer,
- gasoline for washing removed components, CV joint-4 lubricant.
Replacing a CV joint on a VAZ 2109 - operating procedure
First, you should remove the handbrake handle and secure the front wheels with a stop. Then you need to unscrew the hub nut while the car is on the ground. Next, you should raise the car and support its front part. The next step is to remove the wheel and wheel hub thrust nut. Next, the tie rod end must be disassembled. Using a special puller, press the finger out of this assembly. Subsequently, you need to unscrew the ball joint mounting bolts. After the steering knuckle with the stand is moved to the side, it is necessary to remove the splined end of the outer CV joint from the wheel hub. Then, in order to squeeze out the CV joint, you need to use a pry bar.
It should be noted that if the repair work affects all CV joints on both sides of the car, then the old part should be installed instead of the removed part, otherwise during assembly you will encounter the fact that the CV joints will not be installed in their designated place.
It should also be noted that if during the operation of your vehicle you could observe oil leaks near the gearbox, then most likely you will have to replace the CV joint seal. The old part should be pulled out with a screwdriver, and the new one should be pressed into this place until it stops.
It should be understood that the entire repair process in this case is not very labor-intensive, just like repairing a steering rack, however, in this case it is necessary to take into account the recommendations of experienced motorists, which state that replacing the inner CV joint, as well as replacing the outer CV joint, should only be done with similar spare parts assembled. In this case, replacing individual elements is not recommended, unless it is possible to replace the inner CV joint boot or other similar components.
After the shaft with CV joints is removed, the following manipulations must be done: the shaft is installed in a vice, after which the cover clamps are removed. Using a drift, the inner CV joint is knocked out. A similar sequence of actions applies to the outer CV joint. But installation on the shaft is done in reverse order.
Here it should be taken into account that the right shaft is longer than the left one
Before final installation, it is necessary to check the presence of the proper amount of lubricant in the CV joints. During assembly, new clamps must be installed, and during the installation process, care should be taken to ensure that no contamination gets inside the CV joint.
Installation of the CV joint in its designated place is carried out using a hammer and a wooden spacer, and the movements should not be sharp or strong. After the CV joint is placed, the CV joint boot should be installed
During the installation process, it is very important to bend the edge of the boot with a screwdriver, thereby equalizing the pressure inside and outside this element
It should also be noted that if the described process seems too labor-intensive to you, you can always contact a car service. Since such a replacement is quite common, it will take very little time for a professional. Another operation that you can do yourself is pressing in the silent block.
