Many owners of a Lada Kalina car are familiar with the situation when antifreeze gets into the cabin through the heater, and it can be very hot, which leads to injury to the driver or passenger of the car. However, usually everything does not manifest itself so tragically - in the form of a puddle of unknown liquid on the central panel or on the floor. The car enthusiast immediately comes up with a decision to replace the faulty heater radiator, but the fun begins when he opens the factory instructions and tries to figure out how to do it.
Where is the heater radiator in the Lada Kalina?
The location of the heater radiator in Kalina is so inconvenient that, according to the instructions, to replace it you need to go through almost half of the car: remove the entire front panel, seats, pedals, not to mention the radiator itself and at least two of its pipes . Over the years, from their own experience, drivers have developed alternative ways to change the heater; we will talk about them a little later. Where to look for a stove radiator? Almost directly behind the instrument panel, and this is the root of all the inconvenience associated with replacing it.
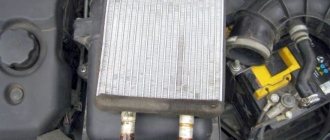
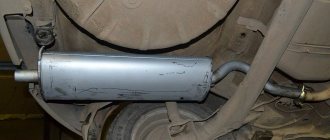
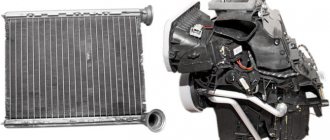
This is what the heater radiator looks like
Risk of breakage
A leaking heater core can cause serious problems.
The fact is that this element is installed just above the control unit (ECU). Therefore, untimely replacement risks replacing the ECU, which will be flooded with coolant and fail.
How to recognize in time
- The first sign is oily smudges under the driver's mat. All you have to do is remove the mat and look at the back of it.
Dry mat.
Dry under the carpets in the cabin. Driver's seat.
- An indirect sign may be glass fogging in clear weather . In this case, the smell of antifreeze . Depending on the manufacturer and type of antifreeze, the smell may be different. From nasty chemical to sickly sweet.
Reasons for frequent replacement
Heater radiators in Kalina are famous for their fragility . And all this is because the aluminum body of this part does not withstand prolonged contact with aggressive antifreezes.
Therefore, when replacing, we recommend copper radiators , they can be soldered and are generally more durable.
Removal algorithm
As for removing the element, with all three replacement methods without removing the panel, dismantling is performed in the same way. The algorithm for removing the heater radiator is as follows:
- Drain the antifreeze from the cooling system.
- We dismantle the engine air filter along with the air duct.
- Disconnect the battery terminals and remove the battery from the car.
- Remove the battery mounting plate.
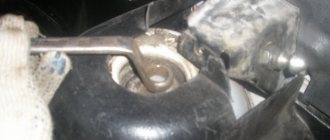
- Under the steering rack we find two pipes through which coolant is supplied to the heater radiator, loosen their clamps and pull the tubes off the fittings.
- Near the fittings we find a nut that secures a mounting plate with a rubber seal through which the heat exchanger fittings pass to the engine shield. unscrew this nut.
- Let's go to the salon. On the driver's side, remove the decorative side trim of the center console.
- Unscrew the gas pedal and move it to the side.
- We remove the brake light sensor located near the brake pedal.
- Since it will not be possible to remove the brake pedal without dismantling the steering column and mechanism, we do this. We remove the bracket for fixing the pin that connects the brake pedal to the vacuum booster, remove the pin and bend the stop plate of the brake light sensor. After this, we lift the pedal up and it does not interfere with removing the radiator.
- Unscrew the three screws securing the radiator to the body.
- Since the radiator outlet is blocked by fittings, they need to be sawed off or broken off.
- After sawing off the fittings, the radiator will “come out” of the seat.
But dismantling the heat exchanger is only half the battle; you still need to install a new element, but the fittings prevent this from being done.
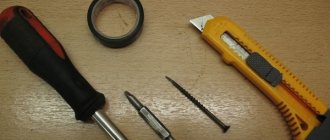
Tools and materials for repairing the Kalina stove
Necessarily:
- Two screwdrivers: Phillips and flat (for unscrewing clamps)
- Ratchet wrench
- Heads 7 and 8 (for unscrewing clamps)
- Heads for 10, 13
- Long head 10 (5 cm long)
- Keys for 10, 13
- Long pliers or pliers (to break out the old radiator fittings)
- Metal file (carefully saw off the fittings of the new radiator)
- Sharp knife (for cutting foam rubber)
- Standard heater radiator Kalina 11183
- 3 meters of reinforced hose, internal diameter 20 mm
- Two corners made of tubes (D=18-20 mm, size 50x50 mm)
- Foam rubber 5 and 15 mm thick
Desirable:
- Lighting: carrying lamp or lantern
- A piece of coolant drain hose + adapter tube
- Needle-nose pliers (for unscrewing hard-to-reach clamps)
I draw your attention, dear readers, that for repairs, two tubular angles with a diameter of 18-20 mm (according to the diameter of the hose) measuring 50x50 mm are absolutely necessary. which will turn the fluid flow from the fittings upward (they are on the right in the photo):
You can try to do without these corners. but in this case the hoses will become very bent and it is possible. antifreeze will not be able to circulate freely through them. In addition, the load inevitably increases in places of fractures, therefore the risk of leaks increases, which are extremely undesirable in the car interior.
I bought the corners for 50 rubles. in the GAZ spare parts store. At the same time I grabbed a handful of clamps of the appropriate size
Heating system composition
The operating principle of the heater in the Lada Kalina is very simple. It is built on a supply and exhaust circuit. The heater circuit contains:
- cabin air filter;
- air ducts;
- heater radiator;
- electric fan;
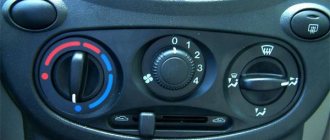
- air flow and fan operating mode control module.
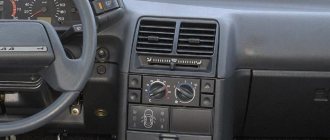
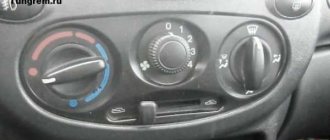
The design of the interior stove looks exactly like this, and is located behind the dashboard and only the system controls are present on its front surface in the Lada Kalina cabin. A running engine generates heat, which is removed from it by the cooling system. This circuit includes a heating radiator. The circulating liquid heats the honeycombs, from which the warm flow is directed into the cabin by means of a fan. Adjustment of the required temperature, strength and direction of the air stream is carried out using the handles and dampers present in the cabin. Sometimes the dampers need to be adjusted.
The air taken from the external environment initially passes through the intake element located on the hood at the bottom line of the windshield of the Lada Kalina. Next, the air rushes to the filter component and is supplied inside the cabin space by means of a fan.
The fan can operate in 4 different speed modes. The adjustment is carried out using the corresponding knob on the device, and the switching itself is possible due to the presence of a resistor block in the control module.
Two common replacement methods
There are two ways to replace a stove radiator. The first method does not require removing the panel. The second method is described in the Lada Kalina operating manual. It involves complete dismantling of the torpedo (the author of the video is Gaz0014).
First method (without removing the panel)
When using the method without dismantling the panel, you must perform the following steps:
- First of all, the car is de-energized by removing the negative terminal from the battery.
- After unscrewing the 4 bolts, remove the cover from the steering wheel.
- Remove the pedal covers.
- After pressing the accelerator pedal all the way, you need to unscrew the brake pedal mounts.
- Now you need to remove the radiator pipes.
- Next, use a hacksaw to saw off the bottom of the panel.
- Now you can dismantle the radiator.
- Before installation, the pipes should be shortened by 1.5 - 2 cm to make it easier to install the new device.
- Next, the hoses are put on.
- Assembly is carried out in reverse order. The sawn-off part of the panel is returned to its place.
Second way
The method of completely dismantling the torpedo is more complex and time-consuming.
To perform the work, you should prepare the following tools and materials:
- set of wrenches;
- screwdrivers;
- knife;
- new radiator.
New product for Lada Kalina
Replacing the heater radiator on Kalina using the second method consists of the following steps:
- Before removing the dashboard, it is necessary to dismantle the decorative trim.
- Next, unscrew the screws on both sides of the torpedo.
- Then the trim from the instrument panel under the windshield is removed.
- At the next stage, the air duct grilles are dismantled.
- Next, you need to dismantle the trim, which contains the organs that control the air conditioner and stove.
- When the trim is removed, you can unscrew the two screws that secure the instrument panel and remove it.
- To avoid damage, the electronic control unit must be moved to the side.
- The torpedo is removed after unscrewing the 9 nuts securing it to the body of the Lada Kalina.
- After dismantling the torpedo, the heating radiator is accessible.
- At the next step, the screws securing the stove casing are unscrewed and the pipes are disconnected.
- Now you can remove the old one and install a new heating device.
- After installing a new radiator, assembly is performed in the reverse order.
conclusions
Thus, it becomes clear that replacing the heater radiator on Kalina is not an easy task. But like all Lada cars, it requires disassembling the torpedo. Over the years, designers have not provided for simplification of the design, as for example on the Volga. On average, the heater radiator on Kalina lasts about 3-4 years. So, if this is the service life, you should prepare for the difficult task of replacing this unit.
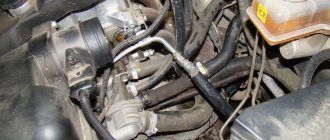
When is it necessary to replace the cooling system pipes? Everything is very simple - when they crack, burst, tear and begin to leak coolant. Something similar happened to me - hernias appeared on some of the pipes in the area of the clamps. There were no fluid leaks, but their appearance indicated that this could happen at any moment. Therefore, it was decided to replace all the pipes, as well as the thermostat and, at the same time, fill in new antifreeze.
To gain access to the pipes on Kalina, you need to remove the air filter and the corrugation going from it to the throttle assembly.
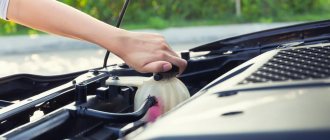
Also, drain the coolant first. It is better to do this on a cold engine to avoid getting burned. You need to drain the cylinder block and radiator. The drain hole on the block is located directly behind the ignition module (so it also needs to be removed), and on the radiator - at the bottom left.
How did I drain the antifreeze? I cut off half of a plastic bottle (it turned out to be something like a watering can) and put a hose on the neck itself. I placed the bottle under the drain hole, and led the other end of the hose under the engine into a bucket. It turned out very convenient. The pressure of the drained liquid can be controlled by the cap on the expansion tank (by opening and closing it slightly).
After the coolant has been completely drained, you can begin to remove the pipes and thermostat. There is nothing complicated here - unscrew the clamps and remove the pipes and hoses. The only thing that caused me difficulty was removing the outlet and inlet pipes of the stove. The clamps are very inconvenient, I had to tinker a little.
Having removed the pipes, I realized that I had not bought a new thermostat in vain. There was a rather large hole in the fitting going to the stove. As I understand it, it appeared as a result of the interaction of antifreeze and its additives with metal. The remaining thermostat outputs were in slightly better condition, but there were traces of interaction with the coolant.
Selection of spare parts
The choice of a stove radiator should be approached carefully, since changing it is quite inconvenient. The majority of motorists choose an original part that is available for sale. But few people know that there are several analogues.
Let's consider the heater radiator options for Kalina, their catalog numbers:
- 1118-8101060 – this is the article number of the original catalog number of the heater radiator for Kalina. It fits perfectly and does not require any modifications. The average cost in the Russian Federation is 1500-1700 rubles.
Original heater radiator and hoses
- There are several analogues that are in no way inferior to the original in terms of quality. Thus, spare parts from the following manufacturers are suitable for Kalina: Pekar (1118-8101060), Fenox (RO0001O7), Luzar (LRH 0118) . The average cost of an analogue is 1200-1500 rubles.
Kraft stove radiator
Reasons for failure
There are not many reasons for the failure of a stove radiator, but you need to know them. Let's consider the main ones:
- Radiator clogged, which led to pressure, resulting in a breakdown of the inner tube.
Antifreeze flows into the cabin due to a breakdown in the heater radiator
- An air lock can also cause a radiator leak.
- Wear . Frequent use of the stove leads to wear on the inner walls of the tubes.
Perhaps these are the main reasons, but others may arise due to the operation of the car.
Main causes of malfunction
If, with the onset of cold weather, no heat is supplied to the interior when the heater is on, then you need to figure out what is causing this. The main causes of failure may be:
- Thermostat malfunction;
- Heater radiator leaking;
- Air in the cooling system.
The main cause of the malfunction is a leak in the heater radiator.
The most dangerous failure is a leak, which can occur simultaneously in several places. It is detected by visual inspection of the system, as well as the connection points. A copper radiator can be repaired by soldering the leaking areas, but an aluminum radiator will have to be replaced.