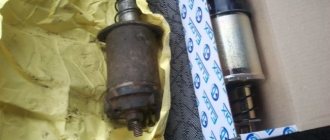
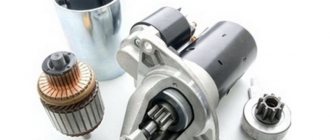
A car is a complex of various mechanisms and systems. The most important of these are the starter and alternator. It is important to take care of these components in a timely manner and prevent wear and tear. For example, for the generator to break down quickly, it is enough to disconnect the negative terminal from the battery and wait until the diode bridge burns out.
As for the starter, the situation is similar. When the engine refuses to start, it is enough to turn it until it completely breaks down. The starter cannot be turned for more than 10 seconds at a time - even this sometimes becomes too much. After long periods of cranking, wait at least 30 seconds between attempts to start the car.
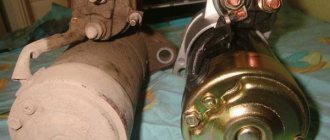
It is very inconvenient to use a car with a faulty starter, because you can start the engine only after numerous pushes of the car. Based on all this, one conclusion suggests itself - you need to be extremely careful with the operation of the starter and generator. But breakdowns still happen. In the article we will consider in detail the need and process of replacing the starter on VAZ-2110 cars.
To replace the part you will need a set of wrenches and gloves. It is better to carry out all work in the inspection pit.
Otherwise, you will need to lift the front of the car, hang the wheel and remove it. The element we need is located at the very bottom, and we can only access it this way.
Starter device
Content
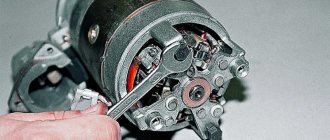
A starter was previously installed on the VAZ 2110, which was presented in the form of an electric motor to generate direct current. It consists of a traction relay and a planetary gearbox, there is also an armature and a stator. The anchor is used here to rotate the metal inserts, and this rotation must be transmitted to the gearbox and drive of the device.
VAZ 2110 starter device: 1 - rear cover fastening nuts; 2 — back cover; 3 — screws for fastening the brush assembly; 4 — brush springs; 5 — brush assembly; 6 — stator (with magnets); 7 - anchor; 8 — thrust washer; 9 — armature shaft support; 10 — central gear of the gearbox; 11 — planetary (satellite) gears of the reducer; 12 — drive shaft; 13 — external gear of the gearbox with internal teeth; 14 - sealing ring; 15 — drive shaft support; 16 — thrust washer; 17 — drive shaft retaining ring; 18 — retaining ring of the drive lever clutch; 19 — washer; 20 — drive lever coupling; 21 — drive lever support; 22 — drive lever; 23 - drive; 24 — drive stroke limitation ring; 25 — locking ring of the limiter; 26 — starter traction relay; 27 — screws for fastening the traction relay; 28 — return spring; 29 — traction relay core; 30 — front cover; 31 - tie rods.
The starter for the VAZ 2110 has four stripes and four brushes on an electric motor with direct current, and the device also contains magnets that contribute to the formation of this current. But still, the main part in the starter is the retractor relay, because during operation, the drive with the gear engages with the flywheel and it, in turn, drives the electric motor of the device.
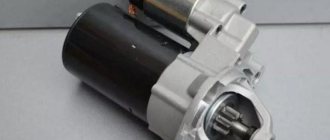
Where is the starter located on the VAZ 2110
If you have a question, where is the starter on a VAZ 2110, see the photo below.
What is a starter for?
Let's introduce a little theory about the ignition system and the starter itself.
The ignition system is necessary to start the engine; the starter itself is designed to create a powerful current (by passing, so to speak, through the starter winding). This is done so that this energy turns the flywheel half a turn. Main starter components:
You can see more details in the picture.
- Front cover with plain bearing.
- Bendix (engagement drive).
- Planetary reductor.
- Rotor with collector.
- Housing with stator.
- Solenoid relay.
- Brush unit.
- The back cover has a plain bearing. You can see more details in the picture.
Starter malfunctions
Of course, the mechanism may stop working, and therefore experts identify several malfunctions here:
| The car battery is discharged. That is, before sinning on the starter, you should check the battery charge and that it is in good condition. |
| It is also worth checking the wires and its terminals for oxidation. If it is detected, then the current will not flow to other mechanisms. Of course, this can also include poor wiring. In order to fix all this, it is necessary to clean the contacts and terminals; during cleaning, you may find that the elements are loose and it is best to securely fasten them. |
| Do not forget that the traction relay may also fail, and the device will close; all these faults will lead to the device being inoperable. |
| If the starter winding is faulty, there will also be short circuits in the system. |
| The ignition contact part may also fail, but it cannot be fixed or repaired, so it will have to be replaced. |
| Also, the armature in the device may fail; this will become apparent if malfunctions occur during the operation of the device. To identify this malfunction, it is necessary to diagnose the starter. |
Starter relay (retractor)
The starter retractor relay is located on the starter itself and serves to move the bendix to the flywheel, and then engage with it. This relay often fails due to poor workmanship. It is quite easy to understand that the solenoid relay has failed; with such a breakdown, the starter will spin at idle, but the engine will not rotate, since the moving part of the drive (bendix) will not engage with the flywheel.
How to check the performance of the starter on a VAZ 2110
Of course, you will always have time to disassemble the device, but you should check why the device does not work.
And this check can be done:
- It is necessary to turn the gear in the same direction as the armature of the device turns, and try in the opposite direction, and this should not happen. And if it scrolls in the opposite direction, then this is already a malfunction.
- It is also worth checking the movement of the coupling along the shaft; use a screwdriver for this. If the device is functioning normally, the coupling should turn easily and without snagging.
- To check the serviceability of the starter, you need to connect the wires from the battery. If the device is working properly, then the clutch will have a characteristic click when it extends, and if it does not turn on at all, then you will need to disassemble the starter and find out the reason.
- If the starter stops turning at all, you need to check the armature, that is, remove the cable and connect it to the bolt with contacts. If the armature is working properly, then it will rotate very quickly, but there are cases when the movement is too small, in which case the armature is not working properly.
And now it’s worth talking about how to properly repair a starter on a VAZ 2110 with your own hands. And it’s immediately worth noting that without removing the starter from the car, it is impossible to check its performance and not even carry out repair work.
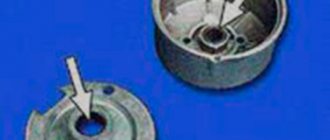
Replacing bushings
If you need to replace the bushings, there are two of them, in the gearbox housing and in the lower part of the starter. In the starter housing it can be changed without problems, but in the gearbox housing it is problematic to change it without a special tool (riber); this procedure is recommended to be done at a service station by a specialist.
After repair, it is recommended to check it on site before installation, with the power terminals from the battery.
Installation is carried out in reverse order. The nuts for 13 fastening the terminals must be tightened without much force, since the terminals are copper and if tightened too tightly, the threads can be damaged.
Source
Instructions for repairing and replacing the starter on a VAZ 2110
All repairs to the device are carried out according to specific instructions:
- First of all, you need to disconnect the battery, disconnect the wire from the starter and remove it altogether.
- The starter is disconnected from the engine, and after that the nuts are unscrewed and secured.
- If an old device is replaced with a new one, then it is simply replaced.
- After the nut on the traction element is unscrewed, immediately remove the relay and unscrew all the fixing bolts.
- After this, it is necessary to dismantle the anchor, and to do this, you need to lift it up a little.
- Then the pins are removed and the starter cover can now be removed. First, it is removed along with the drive, and then the brushes are removed.
- Now you need to remove the gear from the anchor, and then remove the anchor itself, but this happens after removing the gearbox. And now you can see all the malfunctions of the device.
- After this, you can remove the gear mechanism and you can inspect all the necessary faults.
- To dismantle the restrictive ring, which is located above the locking ring, it is necessary to use a mandrel. All elements in the device can be replaced with new ones if necessary.
- When the brushes are removed from the device, they need to be checked. If there is wear on the unit, they should be replaced with new ones. Reassemble the device in the reverse order.
Instructions for removing and installing the starter:
1. First of all, disconnect the wire from the battery at the “–” terminal.
2. Dismantle the crankcase on the engine.
3. Next, from the top of the engine compartment you need to unscrew one nut that holds the starter mount.
4. The wire must be disconnected from the traction relay terminal at the bottom of the machine.
5. Unscrew one nut from the contact bolt of the traction relay and disconnect the wire.
6. The starter is secured from below with one nut, which should also be unscrewed.
7. Now calmly remove it and do the repairs. A new or repaired starter should be installed in the same way as it was removed, only in the reverse order.
Device repair for VAZ 2110
To carry out repair work on the device, you first need to prepare the necessary tools. And of course, you can’t do without a set of keys; you should have pliers and screwdrivers on hand. This set of tools will depend on what will change in the device.
Now it’s worth figuring out how to repair the starter on a VAZ 2110. Any driver will immediately understand what the problem is, since the car will stop starting or start poorly. All this will indicate problems with the starter, but problems with the ignition switch may also arise, that is, problems may not always indicate a failure of the starter. And here are some tips on how to recognize the problem if, when you turn the ignition key, something starts to click, but the starter turns at least a little. Then the battery may be dead; after charging it, you should repeat the procedure. It happens that when you turn the ignition key, you may hear extraneous sounds, for example, grinding on metal, then in this case it is better not to use the car, otherwise you will need to replace the flywheel on the car.
Signs and causes of trigger malfunction
Fortunately, the element in question is not a non-separable structure and, having identified the cause of the breakdown, you can get by at much lower costs than replacing the entire assembled mechanism. Let's look at the signs and their corresponding malfunctions:
- The solenoid relay clicks, but the motor rotates. In this case, it is necessary to check all power wire connections. From the battery to the solenoid relay and from the solenoid relay to the starter housing. If current is present, then the problem is most likely in the electric motor itself (usually a burnt out rotor or brushes).
- When you turn the key, the dashboard lights immediately go out. The engine does not rotate. Most likely there is a short circuit in the electric motor or relay. Stop trying to start the engine until the problem is resolved.
- The starter "snacks". This may be due to both the mechanical elements of the unit (bearings, gears) and engine problems.
How to repair a starter on a VAZ 2110
Before starting to repair the starter, it must be removed from the car and its performance checked.
- First, unscrew the nut and carefully remove the wire, and after that you can remove the solenoid relay, and nothing will interfere here. After this, the nuts are unscrewed again to remove the tie rods that secure the stator, and then it can be removed from the front cover.
- Then you can remove the planetary gears that are on the gearbox and remove it from the starter. But there can be a different number of gears, three or four. If there are 4 of them, then you need to remove the central one at the very beginning, and after that all the others can be easily removed. Do not forget that they also need to be carefully inspected so that there are no gaps, rust, otherwise they
- will need to be replaced.
- If we talk about the solenoid relay, then there are several bolts on it, and if it is necessary to remove them, you need to unscrew them, and then remove it from the starter with special care. Of course, they carry out a test, it can be done by connecting an ohmmeter to the traction relay, but before that you need to completely sink the armature. During this check, if the device shows zero, then the relay is working properly, and the cause of the breakdown is not in it.
- After this, using a hammer and a wrench, the restrictive ring is carefully knocked off, but you need to put something under it to prevent deformation. Then use a screwdriver to remove the retaining ring and another restrictive ring, which is responsible for the movement of the shaft. Thus, the entire drive is disassembled and all parts must be checked for wear; if something is wrong, they need to be replaced.
- Then, using a screwdriver, pry the front cover off the stator, and if there is a gear there, then remove it too.
- And at the final stage, you need to unscrew the two bolts from the stator cover and remove it. And here a view of the starter brush assembly opens up, but to get them you need to remove the front support and thrust washer, but there are special magnets here. Having unclenched them, it will be possible to pull the armature out of the stator, after which the commutator and windings are inspected; there should be no deformations or burnt parts. If all these damages exist, then it is best to replace the anchor with a new one, and if everything is fine, then you can simply clean it. This can be done using sanding paper or water and detergent. After this, the anchor is dried using compressed air to remove any remaining dirt and water.
- It’s worth telling a little about the brushes of the device; a special brush holder is provided for them. It should be without visible damage, if there is none, then you can put it back together, and if there is, it is better to replace it.
Now you can begin assembling the device, but before that you should lubricate all parts of the device with lubricant, and it is best to completely immerse the drive in engine oil. But after this it is necessary to drain the oil and check all the parts for rotation. If the brushes were removed and changed, they are inserted back using a special mandrel. But if it is not there, then you can do it differently. There are two screws in the device, and this is where you need to secure the brushes, and then lubricate the armature with oil and put all four brushes in place. But here there is no need to install special springs under the brushes, and then they put the armatures on the commutator, and only after that the brush springs are installed. And now you can install the remaining starter parts in the reverse order.
Bendix replacement
If the reason is wear of the solenoid relay or bendix of the VAZ 2110, you can carry out this work yourself. In order to remove the solenoid relay, unscrew the fastening of the power wire from the starter housing with a 13 key. Using a 8 key, unscrew the two bolts securing the solenoid relay to the starter housing, be careful, when unscrewing the bolts, there is a spring in the solenoid relay, which can cushion when removing hold with your hand. Next, remove the retractor relay piston from the rocker arm hook on the Bendix and install a new retractor relay in reverse order.
To replace the bendix, remove the solenoid relay, unscrew the two long bolts with a 10mm wrench on the back of the starter and disconnect the starter housing and its front part with the fork, bendix and rotor. Using a screwdriver, remove the plastic fork from the armature and remove the armature with the bendix from the front of the body. Remove the retaining ring from the armature tip and dismantle the bendix. Assembly is carried out in reverse order. When installing a new bendix, it is recommended to lubricate the splines with LITOL lubricant.
Replacing the starter on a VAZ 2110
If there is a malfunction of the VAZ 2110 starter or its retractor, then in any case the part is removed from the car and diagnostic work is carried out. In any case, repairing the device has already been considered, so now it is worth considering such a step as replacing the starter on a VAZ 2110.
To carry out such work, you should prepare the necessary tools in advance:
- open-end wrench number 13;
- head;
- The socket head is also 13.
Before you begin removing the starter, you first need to remove the air filter, and after that, remove the negative terminal and the starter feed wire from the battery. But to remove the wires, you need to use a 13mm wrench and remove the rubber cap in advance. After this, you can unscrew the nuts securing the device, and usually it is attached to the VAZ 2110 with two bolts and several studs. Now the starter is moved to the side with special care and, lifting it up, is removed from the car. If the starter has already been purchased, then a new one can be installed in place of the old device. All work on installing a new starter is carried out in the reverse order as it was removed, and after that you can check the car for starting. Of course, the old device can be disassembled and repaired, and left as an additional one.
In conclusion, we can say that there are many reasons that indicate a malfunction in the ignition system, but not in all cases the starter is to blame. Therefore, before you start disassembling the device, you should check its functionality. All these procedures are very simple; you need to check the solenoid relay and the voltage at the terminals of the part.
Replacement
To remove the VAZ 2110 starter, you need a pit (preferably), a key for 10, a key for 13, a key for 15, and a key for 8. It is advisable that the engine is cooled. We remove the negative terminal of the battery, remove the protection, if there is one, and use keys 8 and 10 to remove the tin cover for the gearbox protection. We remove the power wire plug from the starter; just pull it towards you. Using a 13 key, unscrew the power wire to the solenoid relay; it is advisable to move the wires to the side, no matter what gets in the way during dismantling. Using a 15 wrench, unscrew the two nuts securing the starter to the gearbox housing. We're filming.
After removal, it is necessary to check the condition of the bushings in the gearbox housing for wear; the armature shaft should fit in without play or jamming. In case of these defects, it is necessary to replace the bushings.
Checking the functionality of the starter
If there are doubts about the efficiency of the starter, it is necessary to check it on a stand.
The stand must have a socket for installing a starter with a bushing for the front end of the drive shaft.
The electrical connection diagram for testing the starter on the stand is shown in Fig. 1
The connecting wires to the current source, ammeter and contact bolt of the starter traction relay must have a cross-section of at least 16 mm2.
The starter temperature during checks should be (25±5) °C, and the brushes should be well ground to the commutator.
By closing switch 5, with a current source voltage of 12 V, turn on the starter three times with different braking conditions.
For example, at braking torques of 3, 6 and 12 Nm (0.3, 0.6 and 1.2 kgf m).
The duration of each starter activation should be no more than 5 s, and the intervals between activations should be no less than 5 s.
If the starter does not rotate the gear ring of the stand or its operation is accompanied by abnormal noise, then disassemble the starter and check its parts.
DIY starter repair
Maintenance or repair of the starter must be carried out in accordance with certain algorithms, compliance with which requires certain experience and knowledge, as well as the use of the necessary tools. Troubleshooting always begins with disassembling the starter, after which diagnostics are carried out, and if problems are detected, repairs are carried out.
Tools and Supplies
To troubleshoot, you need to prepare the following tools:
- Socket heads for 13 and 15.
- Extension.
- Handle equipped with a ratchet.
- Ohmmeter.
- A special analyzer equipped with a light bulb.
- Phillips and flathead screwdrivers.
Spare parts will be used as consumables to replace failed components. You can determine which parts require replacement at the diagnostic stage described above. To repair the starter, it is recommended to use only high-quality parts.
How to remove and disassemble
To prepare for repairs, it is necessary to completely disassemble the starter. This procedure should be carried out in the following sequence:
- Remove the negative battery terminal.
- Remove the air filter housing to ensure convenience for further operations.
- Disconnect the wire leading to the traction relay.
- Place the disconnected wiring to the side so that it does not interfere with further repairs.
- Unscrew the nuts that secure the starter to the gearbox.
- Remove the unit and carry out further repairs in more convenient conditions.
- Disconnect the wire that is in contact with the mounting bolt.
- Remove the traction relay. To do this, you need to unscrew the two bolts that secure it.
- Remove the relay armature. To do this, you need to lift it up a little, and then remove the loop from the lever.
- Unscrew the nuts securing the tie rods.
- Remove the cover with the drive, as well as the gearbox assembly.
- Completely “remove” the tie rods. This will make it easier to further remove the drive and gearbox.
- Remove the planetary gears. They need to be replaced if there is damage to the teeth or the integrity of the needle bearings is compromised.
- Replace the brush holder assembly (if necessary).
- Remove the cover from the manifold side.
- Unscrew the two screws and then remove the brush holder from the cover.
- Bend the clips and remove the spring.
- Check the anchor for defects. To do this, you need to remove it from the case.
- Remove the gear from the anchor shaft.
- Remove the armature from the stator mechanism.
- Remove the sealing support from the lever.
- Knock the stopper off the retaining ring using a special mandrel.
- Dismantle the restrictor and retaining rings.
- Remove the drive assembly.
General view of a completely disassembled starter
Assembly must be done in reverse order.
Troubleshooting
When conducting a full check of the functionality of the VAZ 2110 starter, you must act in accordance with the following algorithm:
- Check how well the unit rotates. If the crankshaft moves poorly, you should pay attention to the presence of lubricant and, if necessary, lubricate the mechanisms. There are situations when the oil does not correspond to the current season. Replacing it with a more suitable one will solve the problem.
- Check the battery for charge and oxidation of tips and inputs. If necessary, it is necessary to charge and replace failed elements. In such a situation, it is necessary to carry out maintenance of the contact group and the battery itself, after which the functioning of the starter will be restored.
- Inspect the brushes and check the tightness of the wire ends. To do all the necessary actions, you will need to dismantle and disassemble the device, clean the commutator, replace the brushes and adjust the degree of spring tension.
- Determine the presence or absence of clutch slipping. If necessary, it is necessary to completely replace the starter drive. Another way to solve the problem is to wash the threaded shaft and then lubricate it.
- Inspect the flywheel ring teeth for nicks. Their presence may be indicated by a characteristic grinding sound. To eliminate it, you will need to eliminate the nicks or install a new buffer spring if the old one is noticeably weakened.
- Carry out diagnostics of the starter pole fastening. Its weakening may be indicated by the characteristic noise present during operation of the mechanism. The problem can be solved by securely fastening the starter or reinforcing the said fastening.
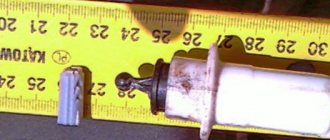
To ensure that the bolt is in contact with the plate, it is necessary to measure the resistance on the contact bolts
If you check using the described algorithm, you will be able to accurately determine the “source” of the malfunction and effectively eliminate it. However, there are breakdowns that cannot be eliminated during an inspection.
How to fix
After the preparatory work is completed, you can begin the repair procedure. To achieve a positive result, you must act in accordance with the following algorithm:
- Check whether the bolt is locked to the contact plate. You need to “push” the armature inward, and then measure the resistance on the contact bolts using a tool called an ohmmeter. If it is missing, then the relay must be replaced or repaired.
- Repair the relay (if necessary). To do this, you need to unscrew two screws, dismantle the winding terminals, remove the cover and clean the contact plate and bolt heads using special sandpaper. If they are “burnt” quite badly, then you need to turn them 180 degrees.
- Repair the gearbox. The gears, which are located inside the housing, wear out over time, and the properties of the lubricant deteriorate noticeably; moreover, metal shavings appear, making work difficult. Repairs are carried out by replacing worn elements, as well as cleaning the housing from chips and old grease, after which the internal components must be re-lubricated. The wear of the elements of this mechanism in the future can be reduced by periodically “renewing” the lubricant.
- Check the winding using a light bulb rated for 220 V. It should not burn if voltage is applied to the core and collector plate.
- Replace bendix (if necessary). To do this, you need to pull it out of the gearbox cover along with the drive.
- Replace the ring if it has lost elasticity or is severely bent.
Broken gear teeth cannot be repaired, so they must be replaced
It is possible to carry out the procedures in the described algorithm, even in a private garage, without having special tools or equipment for computer diagnostics at hand.
Starter repair, which includes checking, determining the “source” of the malfunction, completely disassembling the mechanism and installing serviceable components to replace the failed ones, can take varying amounts of time depending on the person performing the maintenance and the individual characteristics of a particular vehicle. In a specialized car service, such a procedure takes no more than a few hours, if you do not need to wait a long time for the delivery of spare parts.
Where is the starter relay located and how can I check its operation?
If you are trying to find this relay on the starter itself, then you are making a big mistake. The fact is that this relay is installed in the relay and fuse box, which is located in the corner of the car interior panel. It is hinged and installed in a special white connector.
To check the functionality of the element, try cranking the engine without spark for 20 seconds. If this relay is in good condition, the starter should turn off after a specified period of time.
Malfunctions
After removal, you need to carefully check the solenoid relay. Here is a list of possible breakdowns:
- The nuts that secure the wire ends have become loose/loosened. Easily solved by tightening the nuts;
- Wires, windings, connections have oxidized. This may require replacement or just cleaning;
- There are breaks in the power supply circuit. Treatment - chain replacement;
- The anchor operates untimely or runs idle. Replacement ordered;
- You also need to check if there is a short circuit between the turns of the windings (there are two of them).
An ohmmeter is used for checking.
Node malfunctions
The most common starter breakdowns are divided into several types. These include:
- Damage to the electrical circuit. A sign of such problems is slow rotation or complete absence of it at the crankshaft when starting the internal combustion engine. The reasons for this phenomenon may be a discharge of the battery, rupture of the contacts of the ignition device, unreliable fixation, wear of the wires, or violation of the integrity of the wiring suitable for the relay contact group. If, when starting the internal combustion engine, the armature does not respond and the relay does not operate, then the cause of the failure is most likely due to a break in the solenoid relay wire. In the absence of the described “symptoms”, it is necessary to dismantle, check the plates for short circuits, and the presence of traces of “burning” in the collector system.
- Worn starter brushes. The presence of such problems may be indicated by difficulty starting the car, but not always. The reason for this phenomenon may be “hidden” in a battery failure. Complete wear of the brushes leads to the spring “resting” against the brush holder (contact is ensured only due to its mass). This can be easily checked by changing the position of the starter. The reason for premature wear is the misalignment of the brushes during the operation of the starter.
- Broken traction relay. This is indicated by a failure of the internal combustion engine, since it will not be possible to start the engine without a working relay. The “symptoms” of a malfunction of this starter element include its rapid rotation, even after starting the internal combustion engine, idling movement (without contact with the flywheel of the engine, which does not start), and a click after turning the key in the ignition device. It may not exist if there is a break in the coil, the armature is jammed, or there is no power for some reason.
- Lack of starter rotation with a characteristic “buzzing” sound. This phenomenon indicates the occurrence of a short circuit in the electrical circuit, in which power is supplied to the brushes of the electric motor. However, it is in working condition. In such a situation, the holding coil often does not work and the bendix does not move. Its gear cannot engage the flywheel gear, and the electric motor runs in idle mode. The reason may be that the force of the retracting element “enters” the bendix through a lever made of plastic (has the shape of a grip). If the movement resistance of the bendix is high, then the plastic elements break down. As a result, it is not moved to the working position and the starter rotates, but does not transmit torque to the flywheel. Another reason for the failure of the rotor can be severe wear of the teeth, which are located on the rotor shaft of the electric motor. Do not forget that complete destruction of the mentioned teeth can also cause failure. This type of malfunction is related to the breakdown of the motor and is not related to the functioning of the drive. The presence of such a breakdown is indicated by the activation of all starter mechanisms, that is, the rotation of the electric motor and the transition of the bendix to the working position. It can be locked by turning the key in the ignition.
The main malfunctions of the unit include: the appearance of oxide on the wires and terminals, failure of the traction relay and traction winding, wear of the brushes, breakage of the armature
The listed faults can cause more serious problems if they are not corrected in time. Ignoring problems will most likely lead to vehicle failure at the most inopportune moment. The best solution is to contact a specialized service station when the first signs of the listed problems appear.
The principle of operation of the starter and its main elements
With the help of the starter, the primary rotation of the engine crankshaft begins until the power unit starts up due to the ignition of the oxygen-gasoline mixture. This electric machine is a constant current EDC with 4 brushes of a four-pole type, which initiates the excitation moment using permanently installed magnetic elements, so replacing the VAZ 2110 starter is necessary in case of its failure.
It includes a freely rotating roller-type clutch, a traction relay with 2 windings, and a planetary gearbox. The traction relay with 2 windings is the most significant element of the starter. With its help, the drive gear is brought into engagement with the rim of the motor flywheel. In addition, it determines how the starter motor receives power.
When triggered within the parameters - voltage no more than 8 V and T within 20±5 °C - the relay is considered functional. If T is higher than normal, then you should look for defects in the starter drive or in the product itself. This is determined by external inspection of the disassembled electric machine.
If the relay malfunctions, the following problems may occur when operating the car:
- “wedge” of the starter armature and lack of relay activation;
- after starting the electric machine, either a barely noticeable rotation of the armature is observed, or it stops;
- unauthorized activation of the relay with subsequent shutdown after starting the starter.
- breaks in the power supply circuit or relay closures in the interturn segments;
- oxidation of the relay contact fasteners or its absence;
- uneven rotation of the starter armature.
How it works
The design of the “ten” starter is such that inside it there is a retractor relay, which is responsible for the rotation of the drive gears. When the gears engage the teeth of the crankshaft flywheel, starting occurs. Therefore, if the retractor does not work, then you will not be able to start the engine.
Plus, when the contacts on the traction winding are closed, the starter motor is supplied with power from the battery. The contacts are washed out, the blocking is activated, due to which the retractor winding is “cut out”.
The retractor is controlled directly from the ignition switch. Plus it plays the role of starter protection. The fact that the relay will require an impressive amount of current leads to gradual wear of the contacts in the contact group.
This can be noticed by the unclear start of the power unit; periodically the starter may not operate or may rotate the engine slowly. You can solve this problem on your own.