In case of any problems with car electrical systems, many owners give up and entrust the repairs to specialists. In some cases, indeed, this may be the only way out. But not when the fog lights on the VAZ-2110 do not work. We will try to solve this problem right now.
Replacement is easy
Having figured out where the block that controls the operation of the PTF power circuit is located, replacing it is a trifle. It is much more difficult to correctly diagnose a breakdown. Therefore, if for some reason there is no power to the rear fog lights, you should start by checking the fuse and cleaning the contacts.
For the latter, you can use regular fine-grit sandpaper. This must be done extremely carefully, because the relay block contains electromagnets, with the help of which the contacts are switched (when the light button is pressed).
If there is no power supply to the VAZ rear lights, and the fog lights do not work together with it, then this does not indicate a breakdown of the relay, but a damage to the electrical circuit or a short circuit in the system (most often, the absence of a negative contact from ground).
To accurately determine the cause, it is advisable to use a multimeter. If only the rear lights do not light up, this indicates:
- damaged fuse;
- absence of 1, 2, 6 contacts (voltage on them);
- switch closure (momentary button);
- problem with electrical wiring (break).
https://youtube.com/watch?v=t0ysCPFw_WA
As practice shows, the relay on the PTF VAZ 2114 fails extremely rarely. Most often, only a break in the contacting area or mass contact occurs due to body vibrations. A faulty relay should be the last thing to blame.
As I think, you have already seen that on the VAZ 2114 and other Samaras the headlights leave much to be desired, and in cloudy and rainy weather you feel like a hedgehog in the fog. Therefore, fog lights significantly improve the situation and illuminate the roadside.
But it happens that at a certain moment the PTFs stop working, and you need to urgently look for the cause of the malfunction. In this article we will look at the main possible causes of malfunction of fog lights (FTL) and methods for eliminating them.
VAZ 2114 heater fan does not work reasons
The most basic and common cause of malfunction is oxidation and corrosion, which appear during long-term operation and in the Russian climate. But still, we will touch on specific problems, and start from the simplest to the most complex.
Fuse
Each PTF has a separate fuse F8 and F9 in the fuse block with a rating of 7.5 A. Check its integrity - replace it. If you did not find a fuse in the mounting block, then most likely, in your case, the PTFs were installed by the previous owner, and the fuses on them are located either next to the fog lights themselves or next to the relay. If both PTFs do not work for you, then most likely the problem with the fuses disappears - because It is not possible for both fuses to blow at the same time, although everything happens in our lives.
Burnt out lamps in PTF
In this case, all that remains is to check and replace. When you remove the lamp and look, the filament of the lamp may visually remain intact, so it is better to check with a known working lamp. Again, if both fog lights have failed, then most likely this is not your case.
The relay is either located in the mounting block or installed in another location if the PTF was not installed at the factory. The easiest option is to replace and check with a relay that is known to work, or you can also try knocking on it. When you turn on the PTF button, the relay should click. If the relay does not click, either replace the relay, or there is simply no power going to it.
No power supply
- We check whether power is going to the PTF button (if the PTF turn-on light is on, then everything is fine here).
- We check the relay power supply to pins 30 and 87 (see diagram). The wires from this relay go to the sh7 sh8 blocks of the mounting block (they are marked).
If there is no power, you need to look for it, look for a broken wire. Most likely the problem in this case is trivial - the wire has fallen off or rusted.
Useful articles: Which PTF should I choose? – choosing fog lights on the market.
How to install PTF? – we set the PTF with our own hands to the norm.
- Restoring the turn signals
What should you know about car optics?
A modern car has a large number of lighting fixtures.
All of them are combined into a single lighting system that performs the following functions:
- illuminates the road and side of the road;
- signals the driver's intentions;
- informs about the dimensions of the car;
- illuminates the interior, engine compartment, luggage compartment, etc.
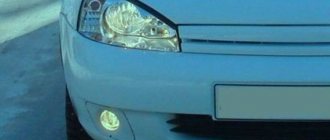
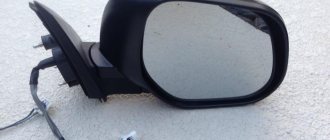
All devices are divided into external and internal lighting. The external ones include front headlights, turn signals, side lights, rear lights, license plate lights, fog lights on the VAZ 2112. The headlights on the VAZ 2112 are a block that contains several lighting devices: low and high beam lamps, side lights, DRL.
Turning and side lights are signaling lights. The former warn about the driver’s intentions to perform a particular maneuver, the latter inform about the vehicle’s dimensions. They are built into the front headlight and rear lights. A special feature of signaling devices is that they shine yellow and synchronously.
Requirements for installing daytime running lights on cars have appeared recently. They have an intense light, their function is to improve the visibility of the car when driving in the daytime. In their absence, this function is performed by low beam or PTF. Fog lights on the VAZ 2112 are designed for driving during bad weather when visibility is poor. They are installed in pairs at the front. The back may be missing.
The rear lights of the VAZ 2112, like the headlights, are block headlights. These include the exterior light, turn lights and side lights.
Tail lights VAZ 2111
The rear optics include a brake light, a luggage compartment light and a license plate light.
Interior lighting consists of: interior lights, engine compartment lights, door lights, trunk lights, glove compartment lights, and dashboard lights.
Features of choice
Automotive optics is constantly evolving and at this stage the following types can be named:
Halogen lamps resemble conventional incandescent lamps in their design: a glass bulb contains electrodes with a tungsten filament. Due to the high heating temperature, halogen lamps quickly fail as the tungsten filament burns out. The main advantage of these lamps is their low cost.
Xenon lamps shine much brighter than halogen lamps. At the same time, they do not have a filament, so they are not afraid of shocks and vibrations. Xenon is durable and economical. The disadvantage is that both bulbs have to be changed, since during operation the brightness decreases, so the light of the lamps will be different. In addition, xenon optics require the installation of an ignition unit.
LED optics have bright light, economical energy consumption, long service life, and do not heat up. Another advantage is the ability to install LEDs of different colors. The disadvantage is low efficiency. For high-quality lighting you need a large number of LEDs (video author - Pro Sport).
Laser optics uses laser LEDs, which are characterized by high power and small size; their light is very bright. The disadvantage of laser lighting elements is the complexity of control.
When choosing optics, you should be guided by the following factors:
When choosing lamps, you need to take into account the parameters (base type, markings, etc.) that are indicated in the instruction manual. You cannot install xenon on a VAZ 2112 in halogen optics
When installing xenon, it is necessary to change the optics to the appropriate lens. You should pay attention to the manufacturer and buy lighting fixtures from well-known companies. The seller should ask for a certificate stating that the product can be used in European countries.
Lighting must meet the requirements.
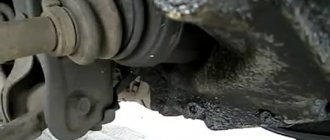
Unexpected reasons for non-working PTFs on the VAZ-2110
First of all, we check the bulbs themselves; you can get to the left one through the hood.
On some versions of the VAZ-2110, a PTF from the Avtosvet plant (Kirzhach) was installed with a socket for the H1 lamp. Stock lamps are not the best quality and they do not like sudden changes in temperature. It is quite difficult to get to the right fog lamp through the hood; it is easier to remove the headlight itself by unscrewing the screws.
During sudden cooling, when leaving the garage in winter, for example, or after turning off the headlights, the contact leg of the lamp bulb simply fell off the conductor. At the same time, visually the halogen lamp looked absolutely intact. It was enough to apply a plus directly to the leg itself, and the lamp would light up. The fault was due to poor-quality resistance welding, and it is almost impossible to detect the cause without a detailed examination of the lamp itself and its dismantling.
Of course, it is impossible to provide for all failure options, but we will consider the most common ones.
Identifying problems with fog lights
The car owner can begin the check in the order that is most convenient for him. But as practice shows, it is better to check the fuse first - a rather vulnerable part of any electrical circuit.
Fuse
Each of the installed “foglights” is served by its own fuse, rated 7.5A, marked F8 and F9, and which is located in the central unit. Initially, its integrity is visually assessed, then it can be checked with a multimeter. It often happens that the car was purchased second-hand, and there are simply no fuses in the block. In this case, you should look for them in the engine compartment, and most often they are located next to the headlights themselves. When both fog lights do not light up at once, you should not waste time on fuses, since there are few cases when both fuses light up at once.
Lamps in headlights
If low-quality lamps are used or the voltage in the on-board electrical network fluctuates, and the car owner knows about this, then it is not surprising that both lamps burn out at once. To check them you will have to tinker a little, disassembling the headlight
Be careful when doing this as it is quite fragile. After that, all that remains is to replace them with working ones
Fuse box and wiring for Lifan Smiley
Watch the video to see how the replacement is carried out:
Relay
If the fog lights were installed at the factory, the relay is located in the mounting block; if it is installed independently, it can be anywhere. The easiest way to check it is to replace it with a known working one. One of the motorists “repairs” it by tapping it. When you turn on even non-working headlights with the button, the relay should make a click. If this is not the case, then it is either not working or there is no power.
Both fog lights stopped working
Sometimes it's better to live.
The fog lights stopped lighting along with the tidy. Moreover, the mileage display works. The tidy backlight (brighter - dimmer) also does not work((((Sadness((
I have already burned out 10-15 fuses (((The one under the steering wheel is on. I put it on the more powerful one, it burns out under the hood due to the dimensions.
I turned off the fog lights and the dash lights are still on.
Did you get into the wiring? Additional gavnetol sensors?
No, they didn’t do anything like that. Yesterday during the rain I think it went out, or after it.
Nothing has been installed on the car for “a hundred years.” The fuse for the fog lights is on. Accordingly, the following happens: I start it, turn on the dimensions - everything is ok, well, almost)) the tidy does not work (tidy lights), I turn on the fogs and the fuse blows. Near and far are working!
The fogs seem to be original.
The fuse blows when I turn on the headlights. but the dimensions are on fire. Those. It's not even a matter of fogs. and in the tidy.
Correctly, the fog lights are made through the dimensions precisely through the snout, the fog lamps have their own fuse, and the dimensions have their own relays, and at the moment the dimensions are turned on, when the fuse burns out, are the fog lamps turned on or off? those. — turned on the lights, everything is fine, the fuse for the fog lights works, then you turn on the fog lights, does the fuse burn out? or so - you just turn on the headlights, the fog lights are turned off, and the fog light fuse still burns out?
what about the fuse? which I voiced - which is used to illuminate the tidy and often some other lighting in the cabin.
Many opinions and topics have been voiced on many forums regarding short circuits in the instrument panel (a lot of lyrics.
Video on how to replace fog lights yourself
The decision to install high-quality fog lights for your VAZ 2110 is strategically important, since it provides several advantages at once. Firstly, it transforms the appearance of the vehicle towards improvement. And secondly, it improves visibility, safety and gives confidence when driving in the dark.
The very name of the headlights – “fog” – succinctly reveals their true purpose. Their light is able to penetrate thick layers of fog and rain, which significantly improves visibility while moving.
There are three key features that exclusively PTFs have:
- The possibility of timely maneuver, which under normal conditions simply does not seem feasible. Often, drivers who do not have a PTF find themselves off the road. The secret lies in the width of the light beam, which opens up a full view of the markings and the roadside.
- Increased illumination range (and, as a result, visibility). This property is ensured by a flatter luminous flux, which spreads to a greater extent in width. Given the higher temperature of the road surface compared to that of fog, it does not fall directly to the ground. Therefore, PTF owners have visibility that is on average ten meters further compared to standard optics.
- When professionally installed, fog lights do not dazzle passing vehicles, allowing them to better observe you. This greatly improves safety by reducing the risk of accidents.
Why are fog lights needed?
The very name “fog” lights already speaks about their essence. Their light penetrates fog, a wall of rain, and contributes to more efficient illumination of the road.
The presence of PTF provides three important advantages.
- PTF or fog lights are characterized by a flatter luminous flux, which literally spreads above the ground, spreading more in width than in height. This was done on purpose, since the temperature of the road surface is higher than the temperature of the air and fog, so it does not fall to the ground itself. Consequently, fog lights provide a certain range of illumination compared to conventional headlights. You will see approximately 10 meters further than with low beam.
- The width of the PTF light beam allows you to see the markings and the side of the road, which will allow you to make a maneuver in time and not end up outside the road surface. Unfortunately, this is a common occurrence in foggy conditions. Moreover, those who do not have fog lights suffer much more often. It is a fact.
- PTF does not blind oncoming cars, but allows them to see you. Only if the headlights are adjusted correctly, of course. Therefore, fog lights on your car have a big impact on safety by signaling oncoming cars that you are approaching.
Instructions for dismantling and replacing the fog lamp
Replacing a fog light may be necessary if the entire unit does not work or the quality of the light beam has significantly deteriorated. When replacing, it is most often necessary to remove the bumper. It is on this that the fog lamp plug is located.
After the mounts of the optics to the bracket are opened, you need to unscrew the fasteners from the bracket with the appropriate tool. Next you need to disconnect the plug and you can remove the fog light. If the entire assembly needs to be replaced, a new part is installed.
Photo gallery “Replacing foglights”
If the fog lamp frame, reflector or glass is changed, then it is necessary to disassemble the fog lamp. To do this, you need to warm it up well, for example, with a hairdryer, so that the sealant melts, and then you can disassemble the PTF.
Installation of replaced or repaired optics is performed in the reverse order: attach the plug, install the fog light in its original place, tighten the bolts securing it to the bracket. At the last stage, either the fender liners or the bumper are returned to their place.
Common foglight malfunctions and how to fix them
The reasons why the fog lights do not light up may be the following:
- fuse is blown;
- light bulbs burned out;
- there is no contact in the relay;
- the shutdown button is faulty;
- poor contact to the ground of the body or the PTF itself;
- incorrect connection;
- oxidation of contacts.
To diagnose and troubleshoot problems, you will need a tester and a set of tools. The most common electrical fault is blown fuses. If they are burnt out, they need to be replaced.
If the fuses are OK, then you need to check the light bulbs in the headlights. They can burn out as a result of a short circuit, or due to natural wear and tear. You can check the serviceability of the lamp using a known working light source
It is important that the base of a working lamp is the same as the base of the non-working element. You can replace the light bulb without removing the PTF (video author – MegaMeyhem)
If, after eliminating the above reasons, the fog lights do not work, then the power button may be faulty, which can be easily replaced. The contacts may oxidize, then they should be cleaned. If the fog lights do not light up after connecting them yourself, the wires may be connected incorrectly.
Fog light connection diagram
If fog lamp repair is necessary, it may include replacing the fog lamp glass or its lamp. It is possible that the fog lamp lining is damaged, then it will be necessary to remove the fog lamp and replace the fog lamp frame, which is secured with a bracket. In any case, before disassembling the fog lamp to repair or replace the glass shade, it is necessary to dismantle the fog lamp by unscrewing the screws securing it to the bracket.
Why the fog lights on the VAZ-2114 do not light up: a review of the main reasons
As you know, fog lights are not installed on the VAZ-2114 from the manufacturer's factory. This is an additional option that is available when selling a car at an authorized dealer. But sometimes even this node can fail. In this article we will look at the causes of breakdowns, as well as methods for solving them.
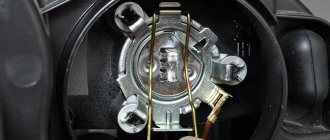
Let's look at the picture above. Since the reflector is already worn out, its “shards” penetrate into the headlight and “harm” the lamp itself. In this case, the lamp will burn out very often, and if the second headlight is in the same condition, then both will burn out at once! And the owner will be looking for the shorty!
Ready-made PTF kits
Today you can find 2 types of foglights on sale, in which the light spot is formed:
- Due to scratches on the glass (classic headlight with reflector);
- Due to the lens (so-called lensed).
A complete set of lensed headlights - wiring, relays and PTF with an adjustment system and plugs.
Which of them to choose depends not only on your desire, but also on the configuration of the set.
In particular, to install PTF you will need:
- Full compliance of the kit with your car model (in this case, VAZ 2110);
- The adjustment system is easy to use (meaning, without removing the bumper or partially disassembling the headlight itself);
- Visual instructions on how to connect fog lights on a VAZ 2110.
Each “correct” kit contains a wiring diagram for VAZ 2110 fog lights
The famous “Kirzhachi” are produced at the Avtosvet Plant.
So, we found out that cars of the 2110 family may differ in the way they install PTF due to the technical features of the instrument panel and front bumper.
Everything else (installation of headlights and their integration into the electrical circuit) will not create problems, because:
- The automaker has prepared the vehicle as much as possible for the installation of PTF;
- Independent work will take only 1.5-2 hours of pure time.
How to check the fuse?
New model mounting block VAZ-2113, 2114, 2115. Location of fuses and relays.
Relay Description:
K1–relay for turning on headlight cleaners; K2–relay-interrupter for direction indicators and hazard warning lights; K3 – windshield wiper relay; K4 – lamp health monitoring relay; K5 – power window relay; K6 – relay for turning on sound signals; K7 – rear window heating relay; K8 – headlight high beam relay; K9 – relay for turning on low beam headlights; F1–F20—fuses; X11 – terminals of the wiring harness block Table of circuits protected by fuses on the VAZ 2114
| Fuse number | Current strength, A | Circuits protected by a fuse |
| F1 | 20 | Rear fog lamp switching relay. Rear fog lamp lamps. Rear fog lamp switching indicator |
| F2 | 10 | Direction indicators, relay-interrupter of direction indicators and hazard warning lights (in hazard warning mode) Hazard warning lamp |
| F3 | 7.5 | Front interior lamp. Central interior lamp. Luggage compartment lighting. Illumination lamp for the ignition switch. Lamp for monitoring the engine management system. Brake light bulbs. Trip computer (if installed) |
| F4 | 20 | Socket for connecting a portable lamp. Relay for turning on the heated rear window (contacts). Rear window heating element |
| F5 | 20 | Sound signal. Horn relay. Cooling fan electric motor. Fan fuse. |
| F6 | 30 | Electric windows. Power window relay (contacts) |
| F7 | 30 | Heater electric motor. Heater fuse for VAZ 2114, VAZ 2115. Electric motor for windshield washer. Headlight wiper motors (in operating mode) Cigarette lighter fuse. Glove box lighting lamp. Rear window heating relay (winding) |
| F8 | 7.5 | Fuse for fog lamps VAZ 2114, 2115 - Right fog lamp |
| F9 | 7.5 | Fuse for fog lamps VAZ 2114, 2115 - Left fog lamp |
| F10 | 7.5 | Side light lamps on the left side. Indicator lamp for turning on the side light. License plate lamps. Engine compartment lamp Instrument lighting switch. Fuse for backlight lamps of switches, instruments, cigarette lighter, ashtray, heater control levers |
| F11 | 7,5 | Side light lamps on starboard side |
| F12 | 7,5 | Right headlight (low beam) |
| F13 | 7,5 | Left headlight (low beam) |
| F14 | 7,5 | Left headlight (high beam). High beam indicator lamp |
| F15 | 7,5 | Right headlight (high beam) |
| F16 | 15 | Direction indicators, relay-interrupter for direction indicators and hazard warning lights (in turn indication mode). Reversing lamps. Relay for monitoring the health of lamps. On-board control system display unit. Instrument cluster. Insufficient oil pressure indicator lamp. Parking brake indicator lamp (brake light fuse). Brake fluid level indicator lamp. Low battery indicator lamp. Trip computer (if installed). Generator excitation winding (in engine starting mode). Front windshield wiper. Seat heating control. |
Diagram of the VAZ-2113, 2114, 2115 mounting block Option No. 1.
Relay Description:
K1-relay for turning on headlight cleaners; K2-relay-breaker for direction indicators and hazard warning lights; K3 windshield wiper relay; K4 relay for monitoring lamp health; K5-power window relay; K6-relay for turning on sound signals; K7-relay for turning on the electric heating of the rear window; K8-relay for turning on the high beam headlights; K9 relay for low beam headlights;
Diagram of the VAZ-2113, 2114, 2115 mounting block Option No. 2.
Date added: 07/14/2014
It's no secret that the VAZ 2114 fuse box is the main component of the vehicle's wiring system. This device has a specific circuit and allows you to protect all kinds of car system devices, such as the cigarette lighter, stove, fuel pump and others from malfunctions and overvoltage. In this article we will provide you with basic information regarding the location and replacement of components.
Location
Since AvtoVAZ engineers tried to do everything so that car owners would not have problems replacing relays and fuses, it would be stupid to come up with a clever arrangement. Therefore, finding them is not difficult.
- The main unit is located to the left of the steering wheel;
- You will find the first additional block in the dashboard inside the niche, directly behind the main mounting block;
- The second additional block is located in the same place, only on the opposite side.
We will get acquainted with each block separately so that you do not have any confusion when searching for one or another fuse.
On injection engines with 16 and 8 valves, the location of the MB is identical, so the instructions are equally relevant for owners of both versions of the dozen.
Main MB
Relays and fuses are located here. Let's look at their descriptions in more detail and separately.
Let's start with the relay.
| Designation | What is he responsible for? |
| Car lamp operation | |
| Electric windshield wipers | |
| Special relay that interrupts the turning lights when the hazard warning lights are activated | |
| Turning on the low beam | |
| Turning on the high beam | |
| Area for installation of additional device | |
| Rear window heating operation |
Each fuse is indicated with a current rating and designation. This allows you to use a new fuse with parameters that meet the requirements of the equipment connected to it.
| Designation | Rated current | What is he responsible for? |
| Lamps for license plate illumination, instrument panel illumination, indicator lights on the instrument panel, left side position lights, luggage compartment illumination | ||
| Low beam left headlight | ||
| Left high beam | ||
| Right front fog lamp | ||
| Electric door windows | ||
| Carrying lamp, cigarette lighter | ||
| Radiator fan, horn (horn) | ||
| Heated rear window | ||
| Windshield wipers and washer | ||
| Backup fuse | ||
| Right dimensions | ||
| Low beams in the right headlight | ||
| High beams in the right headlight | ||
| Left fog lamp | ||
| Heated seats in the cabin | ||
| Hazard signal, turn signals | ||
| Stop signal, ignition switch illumination, interior lighting | ||
| Interior heater, glove compartment light, cigarette lighter | ||
| Reversing light, brake light monitoring | ||
| Rear fog lights |
First additional block
Inside the central panel there is the first of two additional blocks provided for the VAZ 2110. You can find it at the bottom left on the front passenger side.
This block provides three fuses. Each of them has the same power rating - 15A.
- The first fuse is responsible for your vehicle's ignition and controller module.
- The second protects the mass air flow sensor, heating sensor, speed sensor and purge valve.
- The third is necessary to ensure protection of the injectors, as well as the fuel pump. So if problems arise with the fuel pump, the first thing we recommend is to check the condition of the fuse responsible for it.
Plus, the same block includes three relays:
- Relay number 4 is responsible for the electric fan;
- Relay number five is the electric fuel pump;
- The third relay is part of the ignition protection group on your VAZ 2110.
Second additional block
The second additional block should be looked for already in the driver’s feet, on the right. Behind the protective cover on the console you will find the required board.
There are three more components on it. They are responsible for:
- Immobilizer operation;
- Additional optics (mostly fog lights);
- For the operation of the car's central locking control.
What to do if the fog lights on a VAZ 2114 do not work
Most often, the cause of a non-working fog light on a VAZ 2114 is a burnt-out lamp. In this case, it is necessary to remove the lamp from the PTF housing and carry out a visual inspection. If at the same time you find a burnt-out lamp spiral, therefore, it is necessary to replace the lamp with a new one. There are also cases that upon visual inspection the lamp may not be burnt out. In any case, you need to insert and check another working lamp. Since in a situation with a fuse, two lamps cannot burn out at the same time, so if both VAZ 2114 fog lights do not work, the reason is different.
No matter what anyone says, the headlights on domestic VAZs leave much to be desired. The VAZ 2114 is no exception; the headlights shine disgustingly in the twilight and at night, so you have to additionally use the light of fog lights or, as they are also called, PTF. However, it often happens that the PTFs do not work, and in order to quickly find the reason for the failure of fog lights on a VAZ 2114, we suggest that you familiarize yourself with the main reasons for the failure of fog lights.
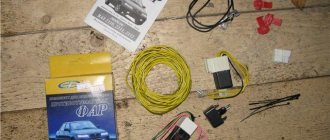
Materials and tools
You can easily buy a ready-made PTF kit with all the wires, and then you won’t have to figure out where the fog light relay is located on a VAZ 2110. However, if you purchase spare parts separately, this will diversify the installation options, plus it will allow you to save money.
Connection kit
Therefore, you need to purchase the following:
- Two sets of headlights;
- Plastic pads;
- Headlight frames;
- A key with a yellow indicator for it;
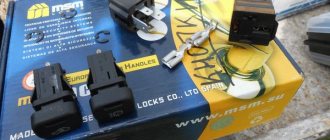
- Relay;
- Wiring. Choose an option with two copper conductors and double insulation, for example ShVVP2. A cross section of 0.5 mm is suitable, but if the lamps are powerful, 0.75 mm is better;
- Ground terminals;
- Female/male terminals - wide and narrow terminals.
Installation process
Ready-made kits usually contain an installation diagram for the VAZ 2110. However, you should understand that adjustments may need to be made during the process. Before starting installation work, you need to make sure there is space for them.
If it is not provided for in your model, then you should think about it and decide on it yourself. It is recommended to do this through the front bumper.
The installation procedure is as follows:
- At the very beginning we lay out the wiring for the fog lights. It is laid in the same way as the main wiring - along the wing, through the left side (under the hood).
- After this, you need to supply power to the button, which will need to be placed on the dashboard. According to the standard, power is supplied from the fuse on the right dimensions. However, you can go the other way by connecting power to the light switch. You can take power from the output to the dimensions, but this method should be used last, since the battery may discharge prematurely if you forget to turn off the PTF.
- We connect the plug together with the headlights. If the lights do not light up, then there was some error in the circuit. Each component of the network should be carefully checked. Often the problem is in the relay. To identify it, you need to make sure there is a click; if there is none, the relay should be completely changed.
It is quite simple to check that the headlights are set correctly and are working correctly: drive out onto the road and turn on the headlights. If the light is directed slightly downward, but illuminates both the road surface and the side of the road equally well, everything is installed correctly.
- vmiredorog.ru
- carfrance.ru
- automotocity.com
We recommend that you familiarize yourself with the new taxi application in Russia - DiDi
Additional block
Additional relays are mounted on a bar and located under the dashboard, near the front passenger's feet. To get to them, you need to remove the right tunnel lining. Next to the additional relays is the electronic engine control unit (ECU).
If its connector interferes with access to the relay, disconnect it by first removing the negative terminal from the battery.
Features of PTF operation
These lighting fixtures differ in the light they emit. They can glow with yellow or white light, their main feature is that they do not illuminate the fog ahead, resting the beam on it, but create a flat, wide beam that spreads along the road.
Road lighting
To ensure good visibility in bad weather conditions, the following two rules must be observed:
- Adjust precisely the boundary of the light beam emitted by the optics. The beam should not shine above the specified horizontal plane.
- The lamp must be at a minimum distance from the road surface. Under such conditions, it is easier to precisely adjust the boundary of the light beam.
Adjusting foglights on a car
It becomes clear that these lighting sources are necessary to ensure good visibility on the road in difficult weather conditions.
What glass color to choose for the fog light
Experienced drivers remember the time when PTF glass was painted yellow. Since then, there has been a very strange, but erroneous stereotype that yellow headlights are the most effective and optimal color. However, this opinion is completely erroneous, since today the largest car and component manufacturers equip fog lights with transparent glass. And this is not an accident, because transparent glasses are more preferable.
For the VAZ 2110 model, modern models of fog lights are available in only two variations: transparent and corrugated.
It’s paradoxical, but the lion’s share of buyers choose transparent ones, although for a number of objective reasons the corrugated ones are better suited for installation
They not only make the appearance of the car more modern, but also ensure clarity and directionality of the beam itself, and ultimately better visibility in adverse weather conditions, and ultimately safety, as well as checking the VAZ 2110 speed sensor, timely replacement of tires and others precautionary measures
Useful rules - you need to know
When choosing the fog lights themselves and the location for their placement, you need to carefully read the accepted standards, which are strictly prescribed in the rules of the road.
Thus, on the territory of Russia, only factory-certified PTFs are allowed to be installed. This is evidenced by the E22 mark in the circle, which is applied to the PTF body.
- The fog lights themselves should be two - no more, no less.
- They must be installed at a distance of no more than 40 cm from the edge of the diffuser with a side lens and at least 25 cm from the level of the road surface. Most modern cars have standard seats on the bumper for installing PTF.
- If this configuration does not include fog lights, plugs are installed in their place, which are easily removed and PTFs are installed in their place.
Most fog lights on the market use a standard H1 single filament bulb. The PTF should only be turned on together with the side lights.
Improper installation of fog lights can cause an accident or cause discomfort to oncoming drivers. Follow all the rules and you will never have problems.
Video on how to replace fog lights yourself
Fuses and relays VAZ 2110 - 2112, electrical diagrams
If some devices on your VAZ 2110 or VAZ 2112 car have stopped working, fuses or relays may be to blame. At the very least, the first thing you need to do is check them, and then draw some conclusions regarding the malfunctions.
Correct diagnosis of many electrical problems will allow you to accurately determine the cause of the inoperability of a particular unit. To find out what the fuses and relays of the VAZ 2110 - 2112 are responsible for and how to find the right one, read this article.
As in many other cars, in the VAZ-2112 and VAZ-2110, when the engine is turned off, the devices are powered directly from the battery. When the engine is running, voltage is supplied to the devices from the generator, which simultaneously charges the battery. If the current exceeds the permissible value or a short circuit occurs, the circuit fuse will blow. Powerful electrical appliances are connected via relays.
This is interesting: What is the polarity of the battery on the VAZ-2110 - let’s look into it in detail
Logical conclusion
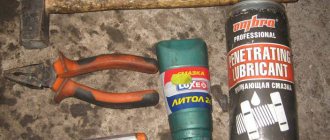
If you are not looking for simple ways, you can try to disassemble the relay itself and check what is wrong with it. Perhaps the movable plate has become sour or the contact has come loose. Since the part is small, you need to be very careful not to bend anything. Using a small soldering iron and some fine-grit sandpaper, you can bring the relay back to life and gain valuable repair experience in the process.
Replacing the VAZ-2110 turn relay is quite simple and quick. There is absolutely nothing complicated, so it makes sense to do such work yourself. It does not require you to have any knowledge of electrical engineering. The relay itself may “fail” if its time is approaching. When the first signs of a malfunction appear, such as intermittent relay failure, altered click frequency, etc., it is better to stock up on a spare part in advance. This way, if necessary, you can immediately replace the VAZ-2110 turn signal relay.
In order to maintain the temperature regime of the engines, a fan is used for cooling; it is usually equipped with an electric drive. The options to turn on and turn off such a fan are controlled automatically. On cars with carburetor engines, the TM 108 sensor is used for this; on cars that have an injection engine, control is carried out using a controller.
Fan control from temperature switching sensors largely depends on the temperature settings of the sensors, which are indicated on the case. As the temperature rises until the sensors are triggered, the fans do not turn on, which requires checking that the sensor is working properly. To check, you should simply close the contacts on the sensors; if this happens, then the sensor should be replaced with a new one. If the fan does not work after shorting the terminals, then it is worth checking the integrity of the supply wires according to the diagrams.
The cooling fans of the VAZ 2110 with injection engines can be turned on by an electronic controller. The response temperature is built into the controller program and can range from 100 to 105 degrees. A malfunction of the temperature sensor is automatically recorded in the fan error code when the engine is running.
There are also malfunctions that make it impossible for the controller to recognize malfunctions; in this case, the fan cannot turn on. To check circuits and sensors, it is worth removing the connectors from the temperature sensors at a time when the engine is at full speed. In the event that the malfunction of the circuits can be checked by the integrity of the fuses, it is also worth checking the serviceability of the wires and relays according to the exact circuits.
Many tens are set to reduce the effort during maneuvers and turns.
For an accurate and quick test, it is worth bridging the output to approximately 87 relays. If after this the fan works, then connect the relay without removing it from the block using a test lamp, the relay will work and the fan will turn on immediately. In this case, the faulty controller or drive will need to be repaired.
If you don’t hear a click after turning it on, then you just need to change the relay. When installing jumpers between pins 87 and 30, the fan does not turn on. If there is power at this pin, this indicates that there may be some kind of malfunction of the engine fans.
Hello everyone, guys. In general, the rear PTFs do not light up. What could be the problem?
Comments 22
Mine didn't burn either. It turned out that the old owner took out the light bulb. Apparently they were needed a lot. It happens
Very funny) Based on the fact that I turned to the people for help, you can understand that I checked everything on my own! There are light bulbs and they work!
Dadada, there's a block under the panel on the ZPTF
I've looked all over, no(
They turn on when the low/high beam is on, this is me, by the way, since several of my friends put up with non-working PTFs until I told about the low beam, thereby making a colossal discovery for them)))
The main causes of PTF malfunction
The most common reasons why the VAZ 2114 fog lights do not work are as follows:
- fuse is blown;
- burnt out light bulb(s);
- oxidation of contacts occurred;
- lost contact with the “mass”;
- the button is faulty;
- the relay has failed.
In addition, some other, rarer reasons are possible, which we will also consider below.
And so, the very first and most common reason is a blown fuse.
Each of the fog lights has its own fuse, namely F9 and F8 in the block, each of which is designed for a maximum current of 7.5 Amperes. In some cases, it happens that there are no fuses responsible for protecting the fog lights in the common block.
This happens when a car is purchased second-hand, and the PTFs were installed independently by its previous owner. In this case, you should inspect the entrance and the board on which the headlights themselves are located. Very often, during self-installation, the fuse is attached in this place.
VAZ 2114 fuses
When replacing, you should use a fuse exclusively for a current of 7.5 A. A fuse designed for a higher current simply will not be able to protect the headlights from a voltage surge, and one designed for a lower one will often burn out.
If both fog lights do not light up at once, then the problem is most likely not in the fuse, since the failure of two protective elements at once is quite rare.
The next reason why the fog lights on the VAZ 2114 do not light up may be the usual burnout of the light bulbs. In order to check this, just unscrew the old lamps and screw in new ones in their place.
Another, no less common reason (especially in the middle climate) is the oxidation of the contact connectors of the headlights themselves. Very often this causes blinking or intermittent operation of the light bulbs. In order to eliminate this nuisance, it is enough to remove oxides by cleaning the headlight contacts with fine-grain sandpaper or wiping well with WD-40, White Spirit or kerosene.
PTF VAZ 2114 with cartridge
Also, the contact running from the battery negative to the housing (to ground) often oxidizes. If this happens, the joint should be thoroughly cleaned, as described above.
Oxidation of PTF contact
Another reason why the fog lights may not turn on is the failure of the button located on the front panel of the car, which is used to turn on the PTF. You can check its functionality in two ways: connect a new button (if you have one) and try to turn on the headlights, or ring the button with a multimeter. If the button turns out to be damaged, it should be replaced with a new one, since it is practically not repairable.
PTF power button
Failure of the relay may also be the reason why the rear fog lights of the VAZ 2114 do not work. It is checked in the same way as a button - by testing the contact legs or replacing the relay with a new one. If it turns out that it has become unusable, it should also be replaced.
PTF relay VAZ 2114
Often the cause of headlight failure can be the headlights themselves. During long-term use, the reflective layer can be destroyed, chipped and fall on electrical elements, thereby interfering with their proper operation. That is why it is worth periodically checking the internal condition of all headlights (not just PTF).
If all of the above reasons have been checked, and none of them have been identified, then the problem is in the wiring itself. In this case, you should ring all the wires used in the fog lamp connection circuit, and also check the correctness of the connection itself.
This can be done using the diagram given at the beginning
In this case, special attention should be paid to the correct connection (to the correct connectors) of the button and relay
Didn't find the information you are looking for? on our forum.
We recommend reading:
How to make a Shumka on a VAZ 2114
VAZ 2107 trunk lock, device, automatic opening
Oxygen sensor VAZ 2114 8 valves
Dismantling and assembling the gearbox of a VAZ 2101 car. Video
Why does the stove on the VAZ 2109 not heat up and cold air blows?
VAZ 2106 how to check a woman's
How to remove the window regulator on a VAZ 2114, step-by-step description with photos
How to connect an alarm system to a VAZ 2107
How to install and connect PTF
Lada 2110 Logbook Replacing the thermoelement of the VAZ 2110 thermostat
Installation and connection of fog lights is done in 3 stages:
- installation of PTF in the bumper;
- connecting wiring to the mounting block via a relay;
- installing a button in the panel.
Wiring diagram for fog lights
Well, I think everything is clear here! The diagram is not complete: the mass of the PTFs themselves on the body is not indicated, which must be done without fail. You need to secure the mass in a safe place, naturally on metal! Before fastening, be sure to clean the metal from dirt and tighten the mass well so that there is no loss of tension. Otherwise, the PTF will burn dimly and unevenly.
Installing fog lights in the bumper
As stated above, you have two options - either install a new bumper with ready-made cutouts for the PTF, or cut it yourself with a jigsaw. To do this, remove the bumper, mark the mounting holes, and cut with a jigsaw.
Next, we install the “glasses” - they cover the cutout on the outside of the bumper, they consist of two parts: a decorative one - outer and inner - attaches the glasses to the bumper using side latches and holds the PTF. (How to remove the bumper?)
Connecting wiring to the mounting block via a relay
Relay with wire set
- First of all, open the hood, find the mounting block and unscrew its two fastenings to the body on the sides, remove the cover from the mounting block.
- From the bottom of the mounting block, unfasten the two outer wire blocks marked “7” and “8”.
- Take the installation kit: put the wires from the kit on the relay.
- We add the other ends of the wires to the block of wires “7” and “8” according to the diagram.
- We plug the wire blocks back into the mounting block and fasten it back to its original place
- Next, we attach the relay to the car body in any place you like: for example, next to the same mounting block.
- We run a length of wire from the mounting block blocks (which we have already installed) to the fog lights and connect them. We also attach a lot of foglights to the car body.
Installing a button in a panel
To install the button (which comes with the mounting kit), you need to partially disassemble the front panel.
Fortunately, the factory came to the rescue and installed wiring for the PTF in all Samar configurations, so all we have to do is remove the center console and find a block in the wiring for connecting the button.
To disassemble the panel, use the article: How to remove the instrument panel and remove only the center console:
Removing the center console
Next, find the wiring block - install the button, assemble the panel.
Next, we check the headlights for functionality.
Do not forget that the fog lights turn on only after the side lights are turned on!
After installing the PTFs, they need to be configured and adjusted!
Performance diagnostics
After you have found out where the VAZ 2114 reverse sensor is located, you can begin diagnostics. To do this, you may need light bulbs with wires or a tester. However, there are ways to do without their participation.
The verification procedure itself should proceed as follows:
- The hood must be opened and the cover removed from the fuse console.
- Then check 15A, who is directly responsible for its operation. If the white light does not come on after replacing the fuse, the diagnosis continues.
- The ignition must be turned on to record electrical voltage on the console. If it is not there (and its indicator should be 12 V), then it is likely that the contacts have oxidized. If there is, the check is carried out further.
- And then you need to crawl under the car. The protection is removed from the electric motor, the ignition and the corresponding gear are turned on. Now you can see whether voltage has appeared at the sensor connector or not.
- As mentioned above, if there is no tester with an arrow, you can use a test light. Its glow should make it clear about the existing voltage.
- Then comes the key point: it is necessary to short-circuit the conductors of the sensor in question. When the light appears, all that remains is to state the fact that the VAZ 2114 reverse sensor needs to be replaced.
After completing the diagnostics, you can begin the replacement procedure.