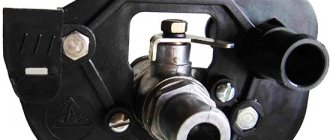
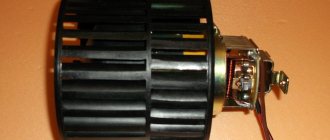
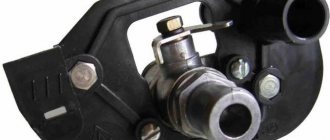
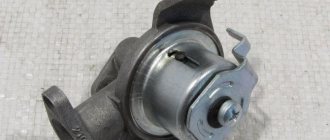
Every modern person knows the proverb given to us by our ancestors that it is useful to prepare a sleigh in the summer. However, it is not always possible to carry out some types of repair work on time if you own a car. Often the vehicle itself “manages” this process. As soon as something knocks or creaks, you immediately begin to look for the problem. In the same way, the first news of help from the heater fan on your VAZ-2108 begins to arrive. It is not difficult to guess why it is precisely at the moment of the first frost that car owners most often have to face such a problem. It’s just that the days before were hot and warm, so no one even tried to turn on the stove.
So, if the heater motor on your VAZ-2108 howled pitifully and sadly, don’t hesitate, but start carrying out repair work. Of course, many G8 owners don’t even know what actions are important to take to restore the device to excellent performance. In order not to torment you with unnecessary doubts, and not to force you to spend time searching for the necessary information, we are ready to present you with a step-by-step algorithm of actions. If you follow it, you will be no worse than a real master in carrying out repairs, after which the heater fan on your VAZ 2108 will work flawlessly and successfully compete with new devices.
Fan replacement process
Of course, you should prepare for any task; only in these cases can you count on an optimal result. It is imprudent to purchase any spare parts or the new motor itself in advance, since no one knows what the problem is, why the heater motor on your VAZ-2108 howled so much. However, to carry out diagnostics it must first be removed. For these specific actions, you will need to have a Phillips screwdriver, a 10mm socket and a ratchet handle on hand. We will work both from the engine compartment and from the interior.
Algorithm of actions
First, open the hood and unscrew the five bolts that securely secure the plastic trim. We remove it and put it aside so that it does not interfere with us during all subsequent actions. Now remove the rubber seal on the hood as it prevents the fan guard from being removed. As soon as you remove this casing, you will immediately be able to find the motor itself. It is easy to see that it is fastened with two bolts. Arm yourself with a pre-prepared screwdriver and unscrew these bolts.
After this, we suggest that you move into the car interior and prepare to continue working in an uncomfortable position. It is very important to disconnect the power leads. Under the instrument panel you will find a positive wire plug, unplug it. The next step should be to disconnect the negative wire. However, it is additionally secured with a nut located in an inaccessible place. For this reason, try to initially feel it, and then, after getting used to it, unscrew it using a socket and ratchet. Once you disconnect the wires, push them towards the motor itself. Leave the interior and go to the engine compartment again. Grasp the engine with both hands and carefully turn it from side to side to find the optimal location to remove it.
After you manage to remove the heater motor, inspect it to make sure it is intact and free of mechanical damage. If your diagnostics show that the stove motor can no longer be restored, go to the store and buy a new one. You really don’t want to part with some money, but you still have no other choice. It is impossible to travel without a heater in winter, not only because there is no comfort, but also because such trips are unsafe.
Some craftsmen are making efforts to remake a failed motor. If the bushings on the VAZ or UAZ heater motor “fly”, many decide to insert bearings instead. Indeed, it is possible to revive the fan’s operation, but especially not to get rid of the noise. Only you can decide for yourself whether to purchase a new one or restore the old one; we are not your guide in this matter. In any case, you will also have to perform steps aimed at installing a new or restored motor back into the engine compartment. Don't worry about this because you will have to do the same thing, just in reverse order.
So, as you can see, removing and then installing a new motor on the stove of your “eight” is not an difficult task. It is quite enough to carefully familiarize yourself with the algorithm we have proposed and carry out all the steps flawlessly.
Direct installation
Before starting installation, you need to let the motor cool down. It's better to let it cool naturally. Then you need to drain the coolant into a previously prepared and clean container. It will still be useful, so it is better to make sure that it remains as clean as possible.
Next, take the new additional pump to the Gazelle stove and tighten the screws from the impeller side. The rubber gasket, which you will definitely find there, needs to be coated with a silicone-based sealant to prevent leakage. Then assemble this structure back, but throw away the screws, and instead install thin long bolts under ordinary nuts. This way you can make the connection as tight as possible.
What is a stove fan
A car heater, which is popularly called a stove, is designed to perform a simple and at the same time important function - heating the interior. In addition, the device helps eliminate fogging of windows in cold and damp weather. During normal operation of the heating system, the temperature in the interior of the “nine” should be maintained at +20 ˚С with the same indicators outside, but only with a minus sign. In the legs, with maximum heating mode, the value should be maintained at +25 ˚С. One of the important components of the stove, in addition to the radiator, is the fan. The purpose of this device, its malfunctions and repairs should be considered in more detail.
Purpose of the device
The purpose of the motor is to increase the efficiency of the heating system and air circulation in the car. Its operation is based on air intake from outside and its subsequent supply into the cabin through the radiator. As a result of the air flow passing through the heat exchanger, the air enters the cabin already warmed up.
Heater operation diagram: a - VAZ 2108; b - VAZ -2108–01: 1- fan impeller; 2 — air duct for heating the windshield; 3 — windshield heating flap; 4 — damper for heating the driver’s feet; 5 — central nozzle flap; 6 - central nozzle; 7- radiator; 8 — heater control damper; 9 — driver’s foot heating window; 10 - internal ventilation duct
Where is the motor located on the VAZ 2108/09
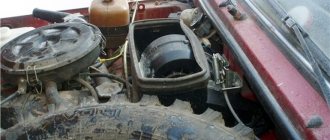
The heater motor on the VAZ 2108/09 is installed in a niche in the engine compartment in front of the windshield, which is radically different from the design of the heater of classic Zhiguli cars, which have a fan installed in the cabin. The unit is an electric motor with an impeller mounted on it, through which air is pumped into the cabin.
The heater motor on the VAZ 2108/09 is installed in a niche in the engine compartment in front of the windshield
Connection diagram
To make it easier to find possible faults with the fan, an installation diagram may sometimes be required, the main components of which are:
- fuse mounting block;
- egnition lock;
- additional resistor;
- fan motor;
- operating mode switch.
The heater motor connection diagram consists of a fuse mounting block, an ignition switch, an additional resistor, a fan motor, and an operating mode switch
Why did the stove stop working on the VAZ 2109, 21099, 2114?
In harsh Russian winters, the stove saves the driver. But often in the most severe frosts it fails. What happened? Why doesn’t the stove work on the VAZ 2109, 21099, 2114? What to do? The age-old question.
Most likely, the stove failed due to a breakdown in the thermostat, which is why the antifreeze is not circulated along the usual route, large and small circles, but only in a large circle. To get the stove working properly, you will have to replace the thermostat, because repairing this part is very problematic and expensive.
The second, most common cause of failure is an air lock. This happens because, after active driving, while the engine is cooling, air accumulates in the radiator, which, under the influence of heat and steam, turns into a thermostat. And, if you start the engine a few hours after such transformations, this accumulated air is pumped into the radiator and, as a consequence of all this, an air lock occurs. You can solve the problem in the following way: you need to remove the pipe and slowly add antifreeze to the stove to the maximum level.
Another cause of stove failure may be the faucet. It is easy to determine the malfunction: if the faucet cannot be unscrewed to the limit, then the whole essence of the problem lies precisely in it. The problem is solved this way: we lift the crane cable, tightening it with pliers. If even pliers and your efforts are not able to move the faucet from its place, it means that oxidation has occurred in it. Then there is no point in repairing the part and you will have to replace it with a new one.
If the radiator is clogged, this can also lead to a breakdown. To diagnose, you just need to pull out the radiator and clean it thoroughly, using a vacuum cleaner. If after such a general cleaning the stove still does not work, then we are looking for the reason further.
Car heating system design
The 2108 heating system consists of the following components:
- draft, which affects the heater valve of the VAZ 2108;
- damper control lever;
- additional resistor;
- a motor that affects the rotation of the fan;
- system operating mode switch.
Heater valve VAZ 2108
Operating principle of the stove
- The liquid is heated to a certain temperature and enters the radiator of the VAZ 2108 stove.
- To ensure constant circulation, rubber tubes are installed between it and the liquid cooling system, fixed for better fastening with clamps.
- Warm air enters the car interior through several openings. The heater motor with its own fan is designed to distribute air evenly.
- The air flows directly to the feet of the driver and passengers, and also exits to the panel. The heat flow is then delayed by the dampers, and therefore the air is cooled. Thus, cool air is supplied to the windshield.
If the operation of the furnace is not satisfactory, it can be modernized. This is done by installing fiberglass.
The action goes like this:
- It is necessary to disassemble the stove, wash all parts and begin assembly. This action can also be used to visually inspect parts for damage. For example, the casing ear often breaks.
- After this, you need to glue all the flaps and fill the seams with sealant. Glue the casing and wait a while until the sealant is stable.
- Assemble the “insides” of the heating system and cover it with fiberglass. Thanks to this, the temperature will increase to 10 degrees.
Typical faults
As with any mechanism, problems can occur in the heating system (video author - Andrey Kuzemsky).
If the VAZ 2108 heater motor is broken, you can understand this by comparing some symptoms:
- If the motor does not work when switching operating modes, the cause of the breakdown may be hidden in the resistor. When repairing, you need to replace the resistor with a new one, because it cannot be repaired.
- If the fuse is blown, you need to check the insulation of the armature located on ground. There may be a short circuit.
- If, when switching modes, the VAZ 2108 heater fan rotates at the same speed, this may be a consequence of contamination or oxidation of the collector. In case of repair, it is worth cleaning the collector and, if nothing has changed and the fan continues to act up, you can replace the bearings.
If the VAZ 2108 stove motor does not even show signs of life, then the reason is not in its design, but in a broken circuit. To find out if this is true, you can use a voltmeter.
DIY repair
To carry out repairs yourself, you need to use the following tools:
- a Phillips head screwdriver;
- 10mm wrench.
When dismantling, you need to remove the plastic trim, which is located on the outside of the windshield. To remove it, you need to open the hood and remove the 5 bolts that secure the trim to the body. Remove the rubber seal from the engine compartment and pry the casing with a screwdriver to get to the motor and oven fan. Now you can remove the motor. It is attached to the body of the VAZ 2108 with two bolts.
When the clamps are disconnected, you can turn off the power and disconnect the positive wire of the furnace under the dashboard. The negative one is attached over a special thread and pressed down with a special nut. You need to unscrew the nut by touch and fold back the negative wire. By disconnecting the wires, you can remove the motor and install a new fan. The entire structure is assembled in reverse order.
It is important to note that breakdowns associated with the stove also depend on which panel is installed on the VAZ - low or high. Both have their downsides. For example, on a high one the central flap does not open completely. It is she who is responsible for supplying cold and hot air to the car interior. To solve this, you need to adjust the damper. And to get to it you need to disassemble the dashboard.
If we talk about the low panel, this is where the thermostat often breaks. Of course, if it wears out, the oven will not work. It is recommended to change it every two or three years. And if replacement does not solve the problems, it is worth replacing the hoses that connect the stove and radiator.
Heaters of old and new standards
As a result, we note that on the VAZ-21099 of various years of production, heaters with certain design features were used, which related to the angle of the radiator and the location of the main damper.
In stoves of the so-called old standard (on cars before 1998), the radiator was installed almost vertically, and the main damper was located under the heat exchanger. There was a partition between the rear wall of the case and the radiator, which formed a channel that provided air supply down the case.
When the damper was open, the air flow moved through the radiator, where it was heated and supplied to the air ducts. In ventilation mode, the main damper closed the heat exchanger, forming, together with the front wall of the housing, another channel through which the flow flowed directly to the air ducts.
In the latest standard heaters (for cars manufactured since 1998), the radiator position angle was significantly smaller than on older heaters, which is believed to provide a huge contact area of the air flow for thermal exchange.
The position of the main damper and its shape also changed (it became arched). It began to be placed above the radiator. In the closed position (ventilation mode), the damper ensures air movement along the shortest path to the air ducts. In heating mode, it blocked the cool air supply channel to the air ducts and directed the flow down the housing, from where it went to the heat exchanger.
Source: avtocity365.ru

