Almost every car owner wants his car to be different from others. If we are talking about expensive cars, then it is better to entrust this task to specialists; you can make changes to budget models yourself. Tuning headlights on Kalina is a fairly common option for decorating a car, so this article will cover this particular topic. In addition, the more recognizable a car looks, the less interest it is to car thieves.
Key points of improvement
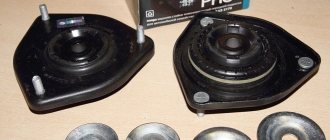
The ProSport headlights for the Lada need improvement, as they do not shine well. Please note that there are several models of this optics. The standard equipment of the Lada Kalina includes lighting fixtures of the Agressor and HL-2 types. These units are a monoblock, including 2 low and high beam headlights.
In order for such lights to shine well, you will need to modify the curtain. To improve the low beam, it is wrapped in foil or trimmed.
You can solve the problem with headlights by installing xenon optics on the car and tuning the engine. To do this, you will need to remove the standard lighting fixtures. In some cases, car enthusiasts install alternative lenses with their own hands. When choosing these elements, their size is taken into account. It should coincide with the same indicator for standard models. Then car owners think about how to fix the new headlights in the appropriate block. Usually, to do this you will need to make a special fastening yourself using additional bolts.
If “angel eyes” are installed on the Lada Kalina, it means that their rings are dull. ProSport optics are equipped with conventional bulbs that need to be replaced with LEDs. However, it is necessary to take into account that such modification leads to uneven illumination of the ring.
The presence of additional holes for LEDs in the optics does not contribute to the formation of uniform illumination. Some areas will be highlighted more than others. In this case, auto mechanics advise installing the LED strip yourself. It is fixed with special glue. If the problem is solved by installing neon rings, their diameter should be 90 mm.
Standard diodes on Lada Kalina usually burn out after 6-12 months. The problem can be solved by installing a voltage stabilizer on the car. The factory wiring is replaced with more durable wire. When choosing it, the power of the Lada engine is taken into account.
Dismantling and repair of optics
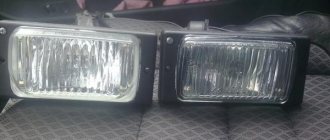
One of the most common malfunctions in the operation of optics, if you do not take into account the failure of lighting sources, is damage to the headlight glass. If the lamp itself is damaged, it will have to be removed and disassembled to change the glass.
How to disassemble the headlight and how to replace the brake light bulb:
- First you need to open the trunk and move the brake light source to the left.
- The Kalina brake light lamp must be pressed and turned to the left, so that the device can be removed from the installation location. The installation procedure is performed in reverse order.
- If you need to replace the glass, you will have to remove the bumper to do this. To do this, you need to unscrew the corresponding fasteners.
- After dismantling the bumper, it is necessary to disconnect all the wiring connectors that are connected to the optics.
- After completing these steps, you can unscrew the lower fasteners of the flashlight; to do this, use a wrench. After this, similar actions are performed with the upper bolts securing the optics. When all the screws are removed, the optics themselves can be removed.
- The next stage will be the glass repair itself. You need to pull the headlight towards you and carefully remove the rubberized seal. It is usually attached to the lantern quite tightly, so most likely you will have to use a utility knife to cut the elastic.
- After the headlight housing and glass are separated from each other, all remaining adhesive and sealant should be removed from the perimeter of the housing. To do this, you will also need to use a utility knife, and if the residues are small, then use sandpaper. Make sure that the surface on the housing is clean and free of sealants and dirt.
- Before installing new glass, the housing around the perimeter of the installation will need to be treated with a solvent. This will allow the surface to be degreased, so that the fit of the new glass will be maximum.
- Next, apply glue to the new seal and connect the glass itself to the body. The tightness of the structure must be optimal, otherwise the problem of fogging of the optical glasses from the inside may arise. Press the headlight on both sides so that the lens is connected to the housing as firmly as possible.
- At this stage, the repair can be considered complete; assembly is carried out in the reverse order. When installing the lights, they will need to be readjusted.
Photo gallery “Replacing glass with your own hands”
Regulation rules
Another headlight design option
Another equally important disadvantage of the optics in question is the difficulty in adjusting it. The mounting bolts used do not turn well (a special wrench is used for this). But raising the light to the required level will not work in any case.
When finalizing the adjustment of such a headlight, a long self-tapping screw is inserted into its body. It should rest against the plate responsible for adjusting the lens. Now you can raise it.
There is another method for adjusting this element. It consists of installing a washer or nut 3-4 mm high in the upper part of the lantern. The final stage is adjusting the height of the Lada Kalina headlight lenses. Refinement of ProSport light optics should be carried out comprehensively. In this case, state standards should be taken into account. If necessary, perform engine tuning.
Tuning ideas
There are several options for tuning optics on Kalina:
- Tinted lights. This procedure can be carried out using a special varnish or tint film. More information about this type of tinting is provided in this article.
- Eyelashes for headlights. This tuning option is considered the simplest.
- Special tuned optics. The modern market offers potassium growers a huge assortment of different tuned headlights. These can be so-called angel eyes, diode optics, etc. In this case, it all depends on preference.
- Installation of other lighting sources - diodes or xenon.
Bi-xenon installation
With their own hands, car enthusiasts can install bilens into the lighting device. The first step will be acquiring the necessary elements. Attention should be paid only to those products that can easily fit into the cavity of the Kalina headlight. For example, if you buy a G-5 kit, you will have to cut the lenses.
Work begins with dismantling and disassembling the headlight. Then, using a file, they cut the seat in the shape of a cone, due to which the lens will fit into the body by about a centimeter. It is necessary to remove the cap so that it does not block the flow of light, and then mount the lens in the prepared place. The element is secured using factory fasteners.
After installing the lenses, the car owner needs to stop by the stand to adjust the luminous flux and position of the lamps in accordance with the current GOST.
Pinout of sockets and LED lamps
Look at the number of contacts in the socket intended for installing rear license plate lamps. It is equal to four, but every two nearest contacts are connected to each other. If you install an LED assembly with a Conventional connector in such a socket, it will burn out. The LED lamp base is compatible with a socket in which the potential difference is applied only to two opposite contacts located diagonally.
LED lamp pinout, common option
One way to use the LED assembly with its
Conventional base is to bite off the lower left and upper right contacts in the socket.
Similar tuning options are already known; there is a corresponding video on the website. Watch it carefully, where the owner talks about installing LEDs equipped with knife contacts. If we talk about tuning the DRLs, the best option would be the following - you need to find an assembly equipped with an “SRCK” base. Then, in principle, there will be no need to redo anything. Look for LED bulbs designated as P27/7W (7443), W21/5W (3157).
Video “Installing a low beam light bulb on Kalina”
Detailed instructions for installing low beam lamps in Kalin are given in the video below (the author of the video is the Kalinin channel).
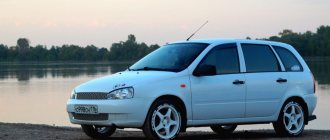
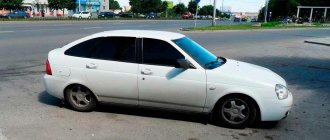
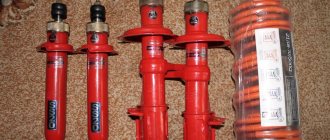
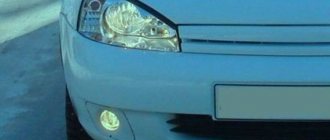
Many people have probably noticed two types of cars with darkened headlights. There are two types of headlight dimming: painting and tinting. Let's try to use one of these options when tuning the Lada "Kalina" hatchback. Despite the fact that the hatchback body suits Kalina very well, it still looks rather boring in the factory configuration without a little tuning. To refresh its appearance, it was decided to install alloy wheels, change the audio system, and tint the windows. So to speak, a gentleman's tuning kit.
The Kalina on which all this was done was not a standard modification, but a luxury one, that is, it already had some. In addition to all of the above, the idea came to paint the headlights as well. There is an opinion that this should not be done, because it will negatively affect the light of the headlights, but real experience has shown that this is not so.
When installing powerful diode bulbs, much more light is released than with conventional ones, and if the headlight glasses are tinted or painted, they do not blind the driver of the car in front. All that remained was to decide what type of tinting should be chosen: film or spray paint.
This paint beautifully paints the headlight glass without reducing the amount of light even with standard light bulbs. Thus, the decision was made to use spray paint.
To do this, the body was covered with film in the area of the headlights, so as not to splash it in the bumper area. For a professional this would not be very difficult to do, but in our case insurance would not hurt. The painting went well. You can’t call it excellent, because the amount of paint was calculated incorrectly, and I had to run to the store again for another can.
After painting is finished, you need to leave the car in the garage for a couple of days so that the paint dries well. After it dried, everything looked very beautiful. The painting was without smudges or streaks. After this, diode bulbs were installed, which made it possible to provide excellent lighting at night.
Such tuning costs approximately 500 rubles, if you correctly calculate the amount of paint, and no other costs are required. And finally, a little advice: if this is your first time using a spray can, or in general, in the field of painting, it is better to entrust this work to a master.
Angel eyes
Aesthetic appearance, attractive design and functionality – these are the distinctive features of this type of tuning. It was first introduced on BMW cars. Such an improvement can be carried out on Kalina. To create the effect you will need:
- transparent plastic rod;
- pliers, wire cutters or metal saw;
- construction hair dryer;
- soldering iron;
- insulating tape;
- 220 Ohm resistors;
- 3.5-volt LEDs (4 pcs.);
- wires and connectors.
First you need to choose the length of the rod. This can be done by measuring the circumference of the illuminator with a thread or using the formula 3.14xD, where D is the diameter of the headlight. The rod needs to be heated with a hair dryer or boiled so that it becomes soft. Next, you should select a tin can or other round container, the diameter of which coincides with the diameter of the headlight. Wrap the rod around this container so that it takes the shape of a circle.
Now you need to solder the resistors to the LED legs. Only 4 LEDs are required (2 for each headlight). When soldering, polarity must be observed, otherwise the homemade product will not work. After this, connect the element to the power source. If the diodes light up, it means everything was done correctly.
The third stage is cutting. The circumference of the rod must be evenly cut, the depth of which does not exceed 1/3 of the diameter of the thickness of the rod. This is necessary for the formation of radiant light.
Next comes the installation of homemade angel eyes in the headlight. The rod must be positioned so that the diodes are not conspicuous. The rings do not require fasteners - they are pressed against the glass.
The Lada Kalina headlights have a fairly simple structure, and if necessary, any car owner can carry out their own repairs. Maintenance and timely troubleshooting are the key to long-term operation of the machine’s lighting equipment.
Possible problems and methods for solving them
The fact that the Lada Kalina headlights stop working is due to many factors that the driver cannot influence. These are exposure to moisture, metal fatigue, and a combination of minor deformations that have appeared over years of operation. The most common problem that owners of this car face is the breakdown of the high or low beam.
A similar nuisance can occur while driving. Driving such a car in the dark is unsafe and can endanger the health of the driver, passengers and pedestrians. It is advisable to repair the breakdown immediately, in the field. Fortunately, in most cases the problem is resolved within 10 minutes.