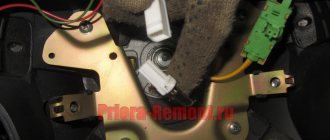
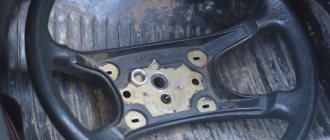
A common case is when a driver who does not have many years of experience (and not only) is faced with operational problems, each of which turns into a real nightmare. Minor errors in the incorrect use of some features of modern cars are worth special mention. Such seemingly trivial problems very often promise a serious headache for owners. For example, not knowing the intricacies can lead to a situation where the ignition switch is blocked and the motorist is faced with the question of how to remove the steering wheel lock?
This material contains the necessary useful information on how to limit yourself from such cases, and also answers the main question: “What to do and what to do if I get into such an incident?” Difficulties can await you at the most inappropriate moments in life, because if the ignition switch is blocked, then how to start the car will be a big question, so this material will be useful reading even for car enthusiasts who have proven themselves over the years.
Steering wheel secret for dummies
Many modern cars have a special function that limits the impact on the car, which many people know about, but not novice drivers.
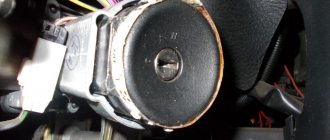
This is an automatic steering wheel lock when performing certain actions (turning the steering wheel with the key removed from the ignition, changing gears, etc.). There are many reasons why such functionality is placed in a car and we will not dwell on them. Typically, the ignition switch and steering wheel lock are accompanied by a certain sound (most often a click) after turning the steering wheel itself. And so we encountered a problem when the ignition switch was blocked. Inserting the key into the ignition switch did not help the matter, because the rotation of the starter axis is also blocked, and it is not possible to make at least one revolution. What to do?
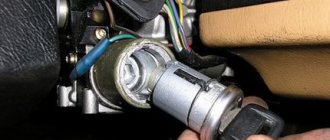
Disassembling the ignition switch to remove the steering wheel lock First, you should make sure that the car is in neutral gear. Being in a busy traffic jam, or in a room that restricts traffic, abruptly removing the lock and then igniting the vehicle is fraught with jerking of the car, which can lead to adverse consequences.
Next, you need to perform the following actions: with the key inserted into the ignition switch and trying to turn it, simultaneously turn the steering wheel to the right and left. There is no need to use all the force, as some cars are very sensitive to such manipulations. After a few attempts, this should remove the steering lock and the ignition will be restored and the steering wheel can be controlled.
Repair or install a new one
Many people believe that a change is the best option, but this is not entirely true. Buying a disassembled lock is not an option for everyone, since a used device is in a similar technical condition and is unlikely to work for a long time.
Repair or new installation?
In addition, the new keys will not fit the trunk/glove compartment. It will need to be registered in the car (does not apply to our cars). Undoubtedly, you can carefully disassemble the element from the old lock and remove the chip from it, and then put it on the purchased copy.
But the best option is to restore the larvae. This way you can keep the old copy of the keys in use. If it is necessary to cut a new body onto an element, it will be made according to the original characteristics.
The ignition switch is blocked when wedge the key
Another common case of the ignition switch being blocked is when the key itself gets stuck in the lock itself, making it impossible to turn it or remove it. This problem has more serious reasons for repair, and sometimes requires replacing the entire lock. There are also many reasons for such situations, where the most basic and commonplace is a malfunction caused by long-term operation.
If you encounter this problem on the road, and do not have the opportunity to get to a service station and use the services of auto mechanics, analyzing the system will help. Having first freed the block from the plastic casing, you need to remove the cover from the lock and knock out the key. (the structure may vary from car to car). In addition, many drivers use special lubricants based on silicone and kerosene, which allow them to keep the lock and the mechanisms in it “on the move.”
Disassembling the ignition switch with a key wedge
Well contamination.
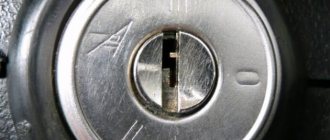
The answer may lie in the ignition key hole itself. With prolonged use or unfavorable conditions, it becomes dirty, causing the key to stop turning in the right direction, creating the impression of being locked.
If this happens, spray or lightly pour alcohol or WD-40 into the hole. After waiting a few minutes, try again.
By the way, in winter it is recommended to use silicone grease or a special hair dryer to heat the ignition system.
Automatic engine start system
In modern cars, you can often find the function of remote engine start, or in other words, “autostart”.
The thing is certainly convenient and extremely useful in some situations, but at the same time it causes problems associated with the ignition and blocking of the control system. Cars require you to insert the key into the lock to start driving. This is where many drivers have an unpleasant moment: the car is started, the key is in place, but the steering wheel is still locked. The solution in such a situation is simple. Despite the presence of a key in the groove, to activate the system the latter must be set to the “ignition” position, in other words, turned all the way.
Causes of EUR failure
Why does the electric power steering on the Lada Kalina not work, turns off and refuses to work, what are the signs of a steering wheel with power steering knocking, jamming, biting or squeaking? To repair the system yourself, you need to know how diagnostics are carried out and what causes precede the breakdown. Most often, the failure of the amplifier is caused by a breakdown of the unit itself and the amplifier fails. Problems of this type are resolved by thoroughly checking the system to identify the exact problem.
As practice shows, often the inoperability of the electric amplifier (failure) is associated with a breakdown of the speed controller.
- the steering wheel is jammed,
- jams
- becomes tight
- and others
Because the speed controller sensor ensures activation and deactivation of the electric power steering under different driving modes. The amplifier on Kalina works if the car is moving at low speed. When the speed begins to increase, the booster automatically turns off, allowing for safer machine control when driving at high speeds.
So, briefly about the reasons for the inoperability of the EUR:
- The speed controller has failed or the control unit does not receive or disappears a signal from it. In this case, the reason may lie in either a breakdown of the sensor, damaged wiring, or poor contact of the controller with the on-board network.
- The voltage in the vehicle's electrical network has decreased. The reasons can be different, ranging from a dead battery and an inoperative generator to the use of inappropriate electrical equipment in the car.
- The permissible crankshaft speed has been exceeded.
- Incorrect operation or failure of the control module. Depending on the cause, the control unit may need to be repaired; more detailed diagnostics need to be done.
Other factors and tips on how to remove the steering wheel lock
The ignition switch is blocked; jamming or blocking of the ignition key can happen to any car for reasons beyond the driver’s control. For example, a lock can very often jam during a cold period of time, as a result of the car being in sub-zero temperatures for a long time. As usual, in such situations, drivers do not expect such an outcome, and do not have additional time for the mechanism to freeze. To speed up the process will help to tow the car to a warm room, or blow through the lock slot with warm air currents.
Aclii › blog › we set the Eur on the grant standard. part i
It was necessary to transfer my wife from Kalina to Grant, and therefore difficulties arose with the steering, since Kalina has an ESD, but Grant does not and the tires cost 195.
As a result, a kit was ordered for installing the EUR on the Grant:
1. Gearless electric power steering manufactured by JSC Avtoelektronika, 11186-3450008-02 (122.3405010-02); 2. Intermediate bracket for installing the EUR, 11186-3403172-00; 3. Intermediate non-separable steering shaft “TAYA”, 72780. 4. Wiring harness for connecting the EUR, 2110-3724155;
According to fragments of the diagram from the document “ELECTRICAL CONNECTION DIAGRAMS OF LADA GRANTA CARS”, the following contacts of connectors X1 and X2 of the EUR are used:
X1-1 - power 12V. Connect to the positive terminal of the battery through a 50A fuse; X1-2 - power mass of the electric power steering. Connects to the ground point of the body EUR;
X2-1 - signal 12V. Used to power control circuits. Connects to pin 56 of the fuse block; X2-2 - ECU tachometer signal output (X2-F4); X2-3 - ECU speed sensor output (X2-E3); X2-4 - instrument panel ESD malfunction lamp (pin No. 20 of the instrument panel connector);
X2-5 — K-line output for connection to the OBDII diagnostic block (pin No. 7); X2-6 - L-line output. It is not used in the circuit, but it may be present in the harness - just pull out the terminal with the wire from the connector so as not to get tangled. By closing the 6th contact to ground or the 7th contact, the EUR diagnostics is started.
The error code is generated by the number and duration of flashes of the dashboard ESD malfunction lamp; X2-7 - signal mass of the electric power steering unit. According to the diagram, it is connected to the S22 twist, which is connected to the car body, but I could not find the connection point, so it was connected separately to the center console.
I don’t know for sure whether special harnesses for Grants are sold, but in the one that came to me, only the connectors for connecting the EUR itself and the wires were useful from the terminals and contacts, the rest of the contacts: instruments, diagnostic connectors, ECU are some kind of ancient and do not fit anywhere. In this regard, before installation, it is advisable to
purchase the necessary terminals/contacts (of course, I didn’t do this myself, so I tried my best): READ How to install porcelain tiles on the facade 1. Two contacts for the 32-pin connector X2 of the ECU for connecting tachometer and speed sensor signals.
As far as we could find out from the Internet, the ECU uses two types of connectors: AMP (AMP 1719675) - with square contacts and MOLEX (MOLEX 0643193211) with round ones. Accordingly, the contacts that are needed are: AMP 928999 or MOLEX 0643221019. I was unlucky - I got a MOLEX connector with round contacts, so the contacts from the dashboard connector for which there was great hope did not fit;
2. One contact of the Delphi diagnostic connector 12129484 for outputting the EUR K-line signal to the OBDII diagnostic block;
3. One contact for the AMP 928999 instrument cluster connector (the same type of contact is used for the X2 ECU connector made by AMP) to connect the instrument panel ESD malfunction indicator. This indicator is also used for simplified diagnostics of the ESD;
4. One contact AMP 962928-1 for connecting the power fuse in the power fuse block of the engine compartment. There is a seat for installing a 50A EUR fuse there, but there is not one response contact. It looks like this:
Intermediate steering shaft
Before installation, it is advisable to clean the steering shaft splines from excess paint, and then make sure that the shaft fits easily onto the EUR shaft from either side. This will help save nerves and time.
We align the wheels and steering wheel straight, after which we apply marks on the steering shaft o-ring of the rack (it rotates with the shaft and sits quite tightly), I used aluminum tape for this, you can use paint or whatever your imagination allows:
Since the steering wheel is equipped with an airbag, before removing it it is necessary
Disconnect the negative terminal of the battery and wait 10 minutes to discharge the starting capacitor.
We begin to remove the steering wheel; to do this, we pierce holes covered with decorative material on the sides of the steering wheel with a thin Phillips screwdriver:
Then, using thin flat screwdrivers, we feel for the spring clips that hold the upper part of the airbag. Press down on the right bracket and release the right edge of the pillow. We hold it so that it does not snap back and similarly release the left edge of the pillow. To make it easier to navigate where to press, here is a photo of the insides:
New Lada: How to set up bluetooth in a Lada Vesta car
After the upper fastenings of the airbag are disconnected, it will be held by the lower fastenings (circled in yellow in the photo above), they are rubberized and just fit tightly, so here we simply pull the airbag towards ourselves by the lower part, but very carefully - you need to be prepared that the airbag will pop out, so we pull with sharp movements with a small amplitude. If you overdo it, the airbag connector will break off, since there are no wires there at all.
We freed the pillow from its fastenings, lay it down comfortably and disconnect its orange connector; it feels very flimsy to the touch, so we do everything carefully.
Source
How to solve the power steering problem?
In general, power steering mechanisms are characterized by reliable and stable operation. And even if they fail, the car can be driven quite well, although more effort will have to be made. Problems arise due to a broken belt or a broken seal of the entire system. They can also lead to jamming when turning the steering wheel. To eliminate such phenomena, you need to ensure that the required fluid level is maintained, using high-quality lubricants, and keep the condition of the belt under control.
Removing and installing electric booster - tools
Even manually diagnosing something with an EUR will be difficult - one way or another, you will have to remove it. To do this, you should prepare and get:
- Hammer;
- Chisel;
- Extension;
- Driver (ratchet);
- Heads for 8 and 13.
Let's sort it out
- Disassemble and remove the steering column. Remove the negative terminal from the battery;
- Using the eighth head, remove the contact group;
- Disconnect all wiring from the gray metal block. Each wire is under a lock, so handle them carefully, try not to damage the contacts;
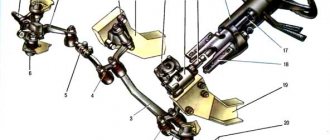
- Disconnect the steering rack and cardan mounts by removing the bolt. Using a chisel and hammer, loosen the universal joint;
- Unscrew the four nuts that secure the amplifier to the body;
- Pull out the EUR.
To install the EUR, all steps are performed in reverse order. It is highly recommended that during dismantling you remember (better - take a photo!) the connections of all wires so that the installation goes smoothly the first time.
Hello everyone, there is a problem with the power steering, the car was standing in the cold, warming up, sat down, everything was fine, I arrived at the garage and didn’t turn it off, well, it worked for an hour, then when I turned the steering wheel all the way, there was a click, the power switch turned off, turned it off, started everything back to normal, and so on for a couple of days, then it stopped working altogether! What could it be?
Comments 65
It works flawlessly for me in the summer, but as soon as the cold weather starts, the engine switches off, I give up and drive like this, I don’t have the money to pay 15-16 thousand rubles for it.
Please tell me what happened? I removed the torpedo for the ShVI, put it back, the EUR stopped working, the front is intact, no oxidation chips, also without oxidation, these are the errors
Mine was also buggy, and then completely died. Everything was as in the description, it turned off after a click and turned on when the engine was restarted. And at one point it stopped working completely. I advise you to urgently go to a diagnostician. They say in such cases the steering wheel can become stuck at any moment, God forbid, at speed.
How to start a car without a key if the key is lost:
In the life of a motorist, many different troubles happen, one of which is the loss of a single set of keys. Of course, this doesn't happen every day. However, additional knowledge on starting the engine without the original key will not be superfluous. How to start a car without a key? The answer to this question is further in our article.
How to start a car without a key (including VAZ)? Way
This is one of the simplest methods of starting an engine, which involves the correct connection of certain wires according to a specific circuit. So, how to start a car without a key? VAZ 2106-2172 starts as follows.
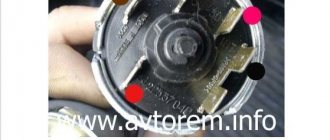
To begin with, the steering column cover is removed in the cabin. As a rule, it is attached with just a few screws. By removing this part, you will have access to the ignition switch and all the wires coming from the starter and battery, as well as the ground cord.
The main task is to determine the right one and connect it with the other.
Most often, the ground wire is painted green or black. Of course, we will not determine the type of this or that cord “at random”, since there is a risk of short-circuiting the entire on-board system of the car.
You can find out whether a given wire is grounding using a tester. If the cord is connected to the metal body of the car, the arrow of the device remains at the value “0”.
If this is the case, carefully insulate this wire and move on to other elements.
Please note that if the insulation is poor, the grounding cord can short circuit all electronics in your vehicle. And the more “bells and whistles” installed in your car, the more expensive repairs will cost later.
The remaining two wires should be connected to each other. These cords are connected to the starter and battery. After you do this, the first element will receive an electric starting current. Then your car will start and you can safely drive to your home or workshop without any surprises.
But before you hit the road, one of these wires should also be insulated. In this case, the starter will not suddenly start spinning while driving.
Features of the ignition system of modern cars
It is worth noting that on newer cars the ignition system has not three, but much more wires that are responsible for different key positions. On such cars there are entire groups of contacts, each of which is painted in its own color.
For example, grounding may be green or black. The wires responsible for power supply (current supply from the battery) have a yellow or red tint. As a rule, these cords are the thickest, so they are very easy to identify.
The starter wires are painted orange.
So, how to start a car without a key? The VAZ-2110 and many other cars are started using the same method described earlier:
- First, the ground wire is identified.
- Then it is isolated.
- The two remaining wires are closed.
- After a successful start, the cord from the starter should be disconnected from the power supply and also carefully insulated.
The danger of using “keyless” starting
When using this method of starting a car, do not forget that if you connect the wires incorrectly, you risk burning out the on-board network, all sensors and even the electronic engine control unit.
The cost of the latter is sometimes higher than 50 thousand rubles. You should be especially careful if the car has an on-board computer.
In this case, experts recommend not to interfere with the ignition system, but simply call a tow truck.
