Electric power steering is a component used to provide more comfortable driving. Not so long ago, domestically produced cars began to be equipped with EUR, in particular, in this article we will talk about Lada Kalinas. What malfunctions can occur with the Kalina EUR and what troubleshooting methods are there? Find answers to these and other questions below.
EUR switches off on viburnum while driving
For the first time, the Russian auto industry installed electric power steering on Kalina.
At the first stages, it worked extremely unstably, up to a complete shutdown. Later, they tried to eliminate the shortcomings, but the EUR remained a weak link and periodically fails, as evidenced by the exclamation mark on the panel. This is evidenced by the feeling of a heavy steering wheel, and turning with one hand becomes difficult. The principle of operation of the electric booster is to reduce the force that needs to be applied when turning the steering wheel. The Kalina electric power steering control unit uses sensors to calculate the operation of the electric motor at the current speed and torque. Thereby giving a signal of the effort with which the driver needs to be helped when turning. After all, it does not work constantly and needs adjustment, which is carried out by the unit.
Reasons for shutdown
The main reason lies in the electric power steering. When ignited, the system performs a self-diagnosis and if the mechanism does not pass it, a signal is turned on indicating a malfunction. The color of the signal indicates the degree of danger. The light turns red, the problem needs to be fixed urgently. If the color is yellow, the vehicle can be operated, but safety precautions should be taken. There may be several reasons why the electric power steering on Kalina does not work:
- speed sensor malfunction;
- torque sensor malfunction;
- speed exceeds 60 km/h;
- engine speed is less than 400 per minute;
- failure in the control unit;
- poorly soldered contacts;
- insufficient tension.
Software shutdown
- The electric power steering on Kalina turns off after 60 km/h. Therefore, keep this point in mind; it is set in the system unit and is not a breakdown. The Priora's electric power steering is switched off at a speed of 110 km/h.
- Also, the EUR does not work at low engine speeds. If the value is less than 400 rpm, it is not active.
This is software planned inactivity. It is needed to give information to the steering wheel at high speed and reduce wear of the mechanism.
Electrical booster malfunctions
A direct indicator of a malfunction of the speed sensor in Kalina's electric power steering is a non-working speedometer, as well as a lit-up exclamation mark on the dashboard. It may not work for several reasons. Check the appearance of the sensor; if it is covered with dirt, simply clean it. See if any metal shavings have become magnetized and remove those as well.
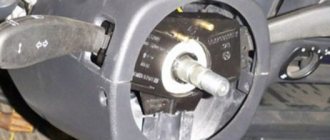
If this does not help, then the sensor is probably faulty. Such sensors are now inexpensive and can be found in many auto parts stores. We do the same for the torque sensor. But where is the speed sensor? It is usually located in the gearbox housing, see photo on the left.
Another cause of malfunction of Kalina’s electric power steering is the generator. The control unit requires a voltage of 13.6 V to operate; if you have less, change the voltage regulator (chocolate) on it.
Also, the contacts could simply become disconnected due to poor-quality soldering. You can either disassemble and solder the contacts or send it to service.
If the problem is in the control unit, it is difficult to solve this problem yourself; the service will either solder it or you will have to buy a new one.
Fuse box
Check if the fuse is working, if it fails, replace it. It is very easy to check, check the integrity of the thread inside the fuse. Changing a 50 amp relay to a 30 amp one will also help.
Newer versions of Kalina are equipped with electric amplifiers from Hyundai, which has a positive effect on its reliability. However, there are still thousands of cars with the domestic version, which malfunctions and breaks down from time to time. Now it will be easier for you to repair the electric power steering on Kalina yourself. The main thing to remember is that not every amplifier shutdown is a breakdown. And you can find the problem yourself and fix it, but somewhere you will have to go to a service center.
Electric power steering is a device designed to provide more comfortable driving. Not so long ago, domestically produced cars began to be equipped with amplifiers. ESD in a Lada Kalina car - what are its malfunctions, what are they, and what are the most effective solutions? Read about it below.
Installation instructions
This manual is intended for those who have minimal skills in working with tools and vehicle systems. It is made as accessible as possible to everyone. But if you doubt your skills and knowledge, it is better to contact a car service.
Required tools and materials
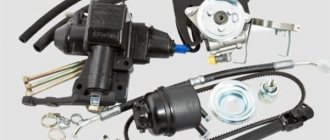
First of all, you will need the EUR itself. Please note its serial number. The last two digits indicate the type and place of production.
So, 00 is a geared amplifier, produced in Makhachkala and has received complaints from drivers. With the numbers 04 - Korean, installed on Grants and Kalinas, a good amplifier, can be found in stores, but there are few of them on sale. Well, 02 - Kaluga, gearless type, also has good reviews.
To connect, you will need common tools such as screwdrivers, wrenches, and an angle grinder.
Causes of EUR failure
One of the main reasons why the electric power steering on Kalina may turn off is a breakdown of the device itself. When the ignition is turned on, the system automatically performs diagnostics, which subsequently fails. As a result, the electric power steering does not work due to its own shutdown, which undoubtedly negatively affects the comfort when driving the car.
Repairing the electric power steering can be quite expensive, so if the Kalina is still under warranty, it makes sense to have your power steering repaired at the dealer. In the event that the system has completely failed, you must first turn off the power. In this case, the engine torque will be received by the steering element (rack), bypassing the amplifier.
Another reason why the electric booster does not work is the failure of the speed sensor, which is responsible for the operation of the system in various driving modes. The power steering operates at full power only when driving at minimum speed. When the vehicle accelerates, the force that the system creates on the rack decreases, and this is what the speed controller is responsible for. Do-it-yourself EUR repair involves replacing the sensor yourself; the cost of such an element today is not high.
If a speed sensor directly connected to the speedometer breaks down, then the unit that controls the power steering receives incorrect data. The system automatically turns off, at this moment a diode indicator appears on the control panel, which informs the driver about a malfunction of the device. To avoid the need to repair the amplifier, it is enough to carry out diagnostics in time with a paper clip. Thanks to diagnostics, the motorist will be able to find out about all the problems that are present in various mechanisms and transport components.
Let's summarize this point - for what reasons does the electric amplifier refuse to work:
- There is no signal from the speed sensor. The problem may be either a regulator failure or a wiring fault.
- Very low voltage level in the car wiring. It is necessary to measure the voltage and solve the problem.
- The permissible engine speed has been exceeded.
- The control unit has failed. Repair will solve the problem, but usually if the unit breaks down, it has to be replaced.
Removing the electric amplifier
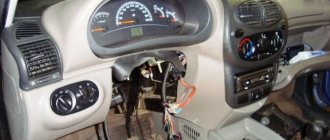
- If you decide to repair the electric power steering, then first of all you need to dismantle the steering column switches. Next, you need to disconnect all the blocks with wires from the control panel - if you need to remove the ignition switch, then to do this you need to unscrew three self-tapping screws. A Phillips screwdriver is used for this.
- After completing these steps, you can dismantle the lower cross member of the control panel. To do this, press the clips that secure the wire block, and then disconnect them from the system control unit. Only after these steps can you disconnect the block from the switches themselves.
- The bracket itself is fixed with several nuts, they are unscrewed.
- The entire steering column must be carefully lowered. You need to find the screw that secures the cardan to the assembly shaft. This screw is unscrewed, while you need to hold the nut to prevent it from turning. After dismantling the screw, the terminal clamp must be released, then the intermediate shaft is carefully removed. To prevent installation problems, the location of the shaft, as well as gears, must be marked with a marker. If the marks on the shafts are not aligned, this will lead to problems with the system. When removing the electric amplifier, do not damage the wiring under any circumstances.
- As for installation, the procedure is carried out in reverse order (the author of the video is Murzik Bely).
How can I lubricate and adjust the EUR?
How and with what to lubricate the amplifier?
Litol can be used as a lubricant; the procedure is performed as follows:
- First you need to remove the plastic casing; to do this, unscrew the bolts that secure it. To unscrew, use a Phillips head screwdriver. It is also advisable to remove the lower cross member of the instrument panel, located under the steering wheel.
- Next, unscrew the two bolts that secure the amplifier itself; for this you will need a 13mm wrench. After this, the column can be released down.
- Unscrew another bolt, after which you can do the actual lubrication.
- First, the steering wheel is turned to the left until it stops. The lubricant is poured into a 10 cc syringe, which needs to be sprayed into the hole formed. You need to throw out all 10 cubes.
- Then the steering wheel is turned to the right until it stops - the syringe is again directed into the hole, all the lubricant is sprayed out.
- After this, the steering wheel should be turned to the middle position and again sprinkled with lubricant into the hole.
- Next, the steering wheel must be turned in different directions until it stops several times. The lubrication operation is repeated again.
- Then all the components are assembled in reverse order.
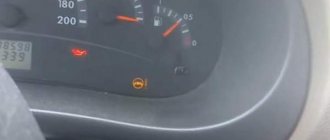
ESD error on the dashboard
If an electric power steering error appears on the instrument panel, this may indicate a breakdown of the system or its incorrect operation. In this case, the electric amplifier can be fully operational. The error that appears on the dashboard is yellow. This indicates that it is possible to use the machine even when the power steering is not working, but certain safety measures will need to be observed.
If the device turns off completely, you will have to put more effort into operating the machine. To turn off the EUR, it is enough to remove the fuse responsible for its operation. If you notice that the system is not working correctly, it is better to remove the fuse and solve the problem.
If you notice that the indicator light on the control panel lights up only when the ignition is turned on, and goes out after starting the engine, then there is no need to worry. When the ignition is activated, the system diagnoses all components and mechanisms, so the appearance of an indicator is normal. But if the lamp continues to light even after starting the engine, then this indicates a problem.
Electric power steering is a component used to provide more comfortable driving. Not so long ago, domestically produced cars began to be equipped with EUR, in particular, in this article we will talk about Lada Kalinas. What malfunctions can occur with the Kalina EUR and what troubleshooting methods are there? Find answers to these and other questions below.
Engine control unit
This unit is located in the center console.
The fuses responsible for engine operation are located on top under the protective cover.
Photo - diagram
Designation
p, blockquote 17,0,0,0,0 —>
- Diagnostic connector
- 15A - Main relay circuits (winding of the cooling system electric fan relay, canister purge valve, air flow sensor, speed sensor, oxygen concentration sensor, ignition coil)
- 15A - Fuel pump, viburnum fuel pump fuse.
- 15A - Constant power supply circuits of the controller (ECU)
The relays are located in the lower right part of the console, where the fuses for the electric cooling fan are also attached.
The diagrams do not fit or you own a different generation of the model, study this description for the Lada Kalina 2.
We have also prepared video material on this material on our channel. Come in and subscribe.
p, blockquote 24,0,0,0,0 —> p, blockquote 25,0,0,0,1 —>
And if you have any questions, write them in the comments.
Source
Causes of EUR failure
Why does the electric power steering on the Lada Kalina not work, turns off and refuses to work, what are the signs of a steering wheel with power steering knocking, jamming, biting or squeaking? To repair the system yourself, you need to know how diagnostics are carried out and what causes precede the breakdown. Most often, the failure of the amplifier is caused by a breakdown of the unit itself and the amplifier fails. Problems of this type are resolved by thoroughly checking the system to identify the exact problem.
As practice shows, often the inoperability of the electric amplifier (failure) is associated with a breakdown of the speed controller.
- the steering wheel is jammed,
- jams
- becomes tight
- and others
Because the speed controller sensor ensures activation and deactivation of the electric power steering under different driving modes. The amplifier on Kalina works if the car is moving at low speed. When the speed begins to increase, the booster automatically turns off, allowing for safer machine control when driving at high speeds.
So, briefly about the reasons for the inoperability of the EUR:
- The speed controller has failed or the control unit does not receive or disappears a signal from it. In this case, the reason may lie in either a breakdown of the sensor, damaged wiring, or poor contact of the controller with the on-board network.
- The voltage in the vehicle's electrical network has decreased. The reasons can be different, ranging from a dead battery and an inoperative generator to the use of inappropriate electrical equipment in the car.
- The permissible crankshaft speed has been exceeded.
- Incorrect operation or failure of the control module. Depending on the cause, the control unit may need to be repaired; more detailed diagnostics need to be done.
Diagnostics
To check the amplifier in a car, you need to remove the plastic trim on the steering column; to do this, unscrew the bolts securing it from the bottom.
Then you will need to get to the 8-pin plug, its pinout is as follows:
- The blue contact is connected to the ignition switch, this is 12 volt power;
- the red-brown contact is the connection cable to the tachometer;
- the gray contact goes to the car speed controller;
- white and pink wire - amplifier control indicator;
- black-yellow contact is a diagnostic line;
- the next contact is empty, the wire is not connected to it;
- brown contact is ground;
- empty.
More accurate results will be obtained by checking the amplifier using a scanner. But since such equipment can usually only be found at service stations, you can try to check the operation of the system with a paper clip.
To check you need to do the following:
- First the ignition is turned off.
- Then, using a paper clip, you need to close contacts numbered 6 and 7 of this plug, while the plug itself does not need to be removed.
- Next, the ignition must be turned on.
- After completing these steps, the EUR failure indicator located in the dashboard will begin to blink; by the number of blinks, you can determine whether the system is broken (the author of the video is Gosha Vakhromeev).
How to understand where to look for the cause by the blinking indicator icons:
- one long signal and one short signal - the electric amplifier is working;
- one long and two short - no engine speed signal;
- one long and three short - the torque controller is out of order or there is no power supply;
- one long and four short blinks—problems in the operation of the electric power steering motor;
- one long and five short - the steering shaft position controller has failed;
- one long and six short - the motor rotor position controller has failed;
- one long and seven short - problems with the electrical network - the voltage is either too high or very low;
- one long and eight short - the control module of the electric amplifier has failed;
- one long and nine short - the speed controller is broken.
Error codes
c1044 - incorrect sequence of the rotor position sensor (RPS)
c1621 - incorrect voltage 5V
c1622 - speed signal circuit failure
c1011 - car engine speed signal circuit, no signal - the signal from the idle sensor (or the standard tachometer through a voltage limiter) is divided by 4 and applied to the tachometer input,
c1022 - error, voltage of the main output of the torque sensor - it is possible that the shaft cover has rubbed the insulation and the middle, green wire shorts to ground
Electric power steering relay viburnum where is it located – Telegraph
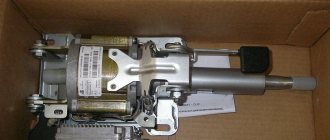
Replacing the electric power steering control unit
=== Download file ===
Mounting fuse block for Lada Kalina: location, diagram, where it is located
Fuses and relays Lada Kalina
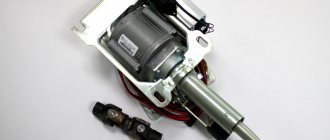
Electric power steering for modern cars has already become an integral part of them. On the Russian market it was first installed on the Lada Kalina VAZ car. The electric booster added both a lot of positive emotions and a lot of negative ones. Failure of this unit occurs quite often on the first samples. Our guest today was no exception - a car of the Lada 'Kalina' family. Fig. This situation is very annoying, because not only the owner uses the car, but also his wife. It is much more problematic for a woman to turn the steering wheel without electric power assistance. We start the car, and the electric power steering fault light actually lights up and it becomes quite difficult to turn the steering wheel. It is imperative to deal with this problem. On the monitor screen we see the following error: C - incorrect sequence of the rotor position sensor. What is a rotor position sensor and where is it located? Let's take a break from our malfunction for a moment and touch on a little theory. Let's understand the EMUR device and what main parts it consists of. Let's consider all its parts separately. Remove the steering wheel, steering column switches and ignition switch. To get to the torque sensor, you must first remove the electric motor. We unscrew the bracket with 4 bolts, the cardan shaft, the lock nut and the 3 bolts securing the electric motor. This is what we got Fig. We take out the torque sensor winding Fig. The inductive sensor consists of two concentric cylinders with holes and perforation slots, which are fixed to the shaft and rotate with it. And two concentric coils with primary and secondary windings, fixedly inserted into the EMUR housing. We won’t go into various terminology, but let’s put it simply: Thus, the electronic control unit of the ECU determines with what force you rotate the steering wheel in one direction or another. So we’ve dealt with the torque sensor, let’s move on to the next one, namely the rotor position sensor Fig. In order for it to start rotating in one direction or another, the electronics must understand what position the rotor is currently in and, after determining the position, apply voltage to certain stator windings at the right moments. To determine the position, the DPR rotor position sensor is used. A disk is installed on the motor rotor, and when it rotates, photodiode a, b or c is activated. In this way, the electronics determines the current position of the rotor. Next, let's look at the electronic control unit EMUR Fig. What needs to be done to make everything work as it should? A fairly common malfunction with this modification of the EMUR is poor soldering of the optocouplers on the rotor position sensor board. It is enough to simply solder all the contacts of the optocouplers Fig. The EMUR fault light went out and the steering wheel began to rotate very easily. How to count errors without a special scanner? In order to read the self-diagnosis codes of the Kalina EUR you need: There is no 6th contact in connector X2, so we installed a piece of white wire there and connected it to the 7th contact with ground. Let's look at a clear example in the video of how to read EMUR self-diagnosis codes. Unfortunately, at the time of recording the video, we overcame fault 16 C, and in the video we simulated fault 13 torque sensor. Video 'How to read EMUR self-diagnosis codes without having a diagnostic scanner at hand'. Error codes for the VAZ electric booster when read by a diagnostic scanner. Steering shaft position sensor, main signal circuit malfunction, or out of range. Steering shaft position sensor, control signal circuit malfunction, or out of range. Engine rotor position sensor, phase A circuit malfunction or out of range. Engine rotor position sensor, phase B circuit malfunction or out of range. Engine rotor position sensor, phase C circuit malfunction or out of range. Today, Lada 'Kalina' cars are equipped with electric amplifiers from the Korean company MANDO (fig. The nameplate inscription on the electronic control unit EMUR is 'Autoelectronics'. Home Services and prices Contacts Photo album Reviews of the service Articles Shop. On a Lada 'Kalina' car, the electric power steering amplifier periodically turns off and error C lights up: incorrect rotor position sensor sequence. Read on to find out how to deal with this malfunction Design of EMUR Kalina Fig. EMUR mando Korea for 'Kalina' cars.
Dismantling and disassembling the electric amplifier
Before removing the amplifier, you need to remove all the steering column switches. Remove the steering rack cover and dismantle the devices, remembering to disconnect the connectors from the power supply.
How to remove the EUR with your own hands:
- After removing the switches, you will need to dismantle the lower cross member of the dashboard. To do this, you need to press the fasteners that secure the connector with wires, and then disconnect the wiring from the control module. Once these steps are completed, you can disconnect the connector from the switches.
- The system bracket is secured with nuts; you will need to unscrew them with a wrench.
- After this, the steering rack will need to be carefully lowered down. To do this, you will need to find the bolt that secures the driveshaft to the booster shaft. This bolt must be unscrewed, but when unscrewing, you will need to fix the nut, this will prevent it from turning. When the bolt is removed, the fastening will need to be loosened, after which the intermediate shaft will be carefully removed. At this stage, we recommend marking the position of the shaft and gears; you can use a marker for this. This step is very important because doing it will prevent possible installation problems in the future. If the marks on the shafts do not match, this may cause problems with the amplifier. When dismantling, be careful not to damage the wiring, as this will also lead to the inoperability of the ESD.
- When the unit is dismantled, it will need to be disassembled and the failed elements replaced. Further editing is done in reverse order (the author of the video is Murzik Bely).
How to tighten the electric power steering rack?
The appearance of a knocking sound in the operation of the electric power steering is associated with the need to tighten the steering rack.
How to do it right:
- First you need to disconnect the battery; to do this, disconnect the terminals from it. Unscrew the battery mount; to do this, you need to unscrew two more nuts located at the edges. After this, the battery is removed and put aside.
- Then you need to lift the plastic stand, there are four more screws under it, they can also be unscrewed.
- Having done this, it is necessary to move this stand forward until the platform is disconnected from the air filter housing retainer pad. After this, the trim can be moved back, this will provide freer access to the rail itself.
- At the next stage, you will need to crawl your hand under the rail. Directly below it, as shown in the photo, there is a rubberized cap; it will need to be removed, this will allow the key to access the adjusting nut.
- To perform adjustment work, you will need a special wrench to tighten the rack; without it, the adjustment procedure will not be possible. Using this wrench, you need to crawl under the car rail to install the tool in the required hole.
- When adjusting, be careful not to overtighten the rack. If its tightening is very strong, then when cornering the rack will bite, and this, in turn, may affect the safety of movement. The angle of adjustment is always different, it depends on how much the nut is loose, but usually when performing such work the nut is tightened by approximately 30 degrees. This should be enough to get everything right. After the adjustment is completed, it will be necessary to check that this task was performed correctly. That is, you will need to make sure that the steering wheel turns normally to any position all the way and there is no knocking. If the knock remains, then the adjustment continues.
Photo gallery “Adjusting the steering rack”
1. Slide the stand and detach it.
2. In this place under the rail there is an adjusting washer.
3. Adjustment is made with a special key.
4. Location of the adjusting nut.