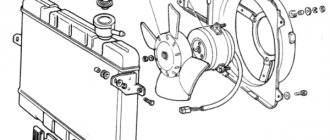
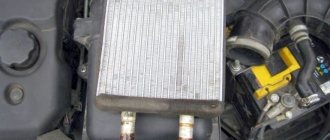
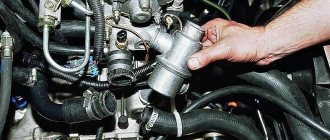
It is no secret that a car radiator is one of the most important automotive parts in the vehicle engine cooling system. Its main purpose is the timely removal of heat from the internal combustion engine into the atmosphere. This occurs due to the circulation of liquid through channels, of which there are quite a lot in the car’s heat exchanger. Thus, the article describes relevant decisions for car owners on how to solder a car radiator, and what equipment should be prepared for these purposes.
- Car radiator repair methods
- How to seal a car radiator?
- Assessing the extent of radiator damage
- Internal radiator repair using chemicals
- How to solder plastic car radiator
- Surface preparation
- Preparing the adhesive mixture
- Cold welding
- Final stage
- DIY aluminum car radiator repair
- Security measures
- conclusions
Every driver should understand that the key factor for the correct functioning of the cooling system is its tightness. This means that even the smallest and most unnoticeable crack will completely disable it. Before working on soldering the part, it is important to study the process of repairing an engine cooling radiator with your own hands, and also determine which glue should be used in each specific case.
Car radiator repair methods
If you notice that your car’s radiator has become faulty, you need to take care of its speedy restoration. Otherwise, you will have to invest in more expensive engine repairs. In order to properly solder the radiator, you will need to decide on the most suitable method for this matter. The most popular methods for restoring the integrity of this spare part are:
- Soldering. Plastic housings of spare parts are always made of material resistant to high temperatures. This means that the product can be soldered with the most ordinary soldering iron. This way you can achieve a fairly long-term effect.
- Cold welding. This name refers to a special mass of plastic resins, iron and chemical additives. The cold welding method allows you to quickly cope with the restoration of a part from damage. In addition, this method makes it possible to quickly connect two surfaces and form a high-quality, durable seam between them.
- Gluing. This method is most optimal for eliminating minor damage. It is important that not every adhesive is suitable for these purposes: its characteristics must be ideal for working with heat exchanger materials.
What is the difficulty of soldering aluminum?
Aluminum is a very specific metal. Its peculiarity lies in its high chemical activity, manifested in the formation of a so-called oxide film on the surface. It appears instantly when pure metal comes into contact with air, reacting with oxygen. And it is precisely because of this that it is impossible to solder an aluminum cooling radiator in the usual way. This will require additional substances that contribute to:
- removing oxide film from the surface;
- reducing surface tension;
- protection from adverse factors affecting the soldering process;
- improved solder flow.
How to seal a car radiator?
Now let's talk about how to seal the radiator and what glue is best suited for this. Thus, one of the best options is considered to be the two-component adhesive 3M DP 8805. The basis of its composition is acrylic, which makes it possible to use the composition for working with difficult-to-glue materials:
- the main advantages of such glue are the ability to create a sufficiently strong and reliable seam that will not lose its original shape when exposed to high temperatures;
- The disadvantage is the rather high cost.
Special welding adhesives are also a good option. They are designed for quick and, most importantly, effective elimination of defects on plastic surfaces. Adhesive joints after such compositions withstand not only high but also low temperatures. In addition, they are not afraid of high atmospheric pressure.
It is important that it is not recommended to use compounds like superglue to glue parts of the radiator. Be sure to take into account that the glue for repairing a part must ideally cope with high and low temperature conditions.
To avoid making a mistake in your choice, we recommend purchasing the required adhesive from a certified automotive store.
The main reasons for the loss of radiator tightness, signs, repair features
Loss of tightness of the radiator of the cooling system may be due to the following reasons:
- Natural wear and tear. The approximate lifespan of a radiator is about 10-12 years. As the device wears out, its internal working surface becomes covered with a layer of scale and deposits formed as a result of chemical and thermodynamic processes. The walls of the radiator plates and tubes become thinner. Since the liquid in the device is under pressure, microcracks are possible, as a result of which the liquid begins to leave the system.
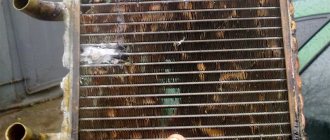
Considering that the sizes of microcracks are small, a strong leak is not observed in this case. Wet traces of leakage may disappear after cooling the engine and antifreeze. It is advisable to immediately detect the consequences and place of fluid leakage. The sooner repairs are made in this situation, the less damage will have to be repaired. Can be successfully repaired by cold welding .
- Filling the cooling system with water. Freezing in the cold season. If there is a slight leak of antifreeze, many drivers add limited amounts of water to the system. During the warm season of vehicle operation, the number of such top-ups can be large. As a result, the concentration and characteristics of antifreeze change. In winter, even at slightly below zero temperatures, it can freeze. In this case, volume expansion occurs. The radiator may “break”.
Assessing the extent of radiator damage
It is customary to install the radiator itself in the engine compartment, or rather in its front part. This is how it is possible to create the effect of blowing with a counter flow of air while the vehicle is moving. The disadvantage of a car heat exchanger is its fragility. This device is often called the most vulnerable part of any car.
Even if the slightest impact occurs, the likelihood of mechanical damage to the spare part in question is quite high. Heat exchangers whose water tanks are made of plastic break down especially often. Therefore, when deciding how to repair a radiator, you need to focus primarily on your capabilities. Carefully study all the methods presented above and try to figure out which method will be the most convenient and simplest from a practical point of view.
It is also important to first assess the extent of the damage. If it is strong enough, it is recommended to focus on direct adhesion. This way you can deal with really large cracks that cannot be fixed with ordinary glue. If the crack is not the largest, cold welding type putty is quite suitable. Glue will be the optimal solution for restoring small cracks.
If you are not sure that you know how to seal a car’s cooling system, it is better to focus on repairing the system at a car service center. In addition, you won’t have to spend too much money on restoration work carried out by a mechanic, because the process itself is not considered difficult.
Classification of cooling systems
There are several types of engine cooling systems:
- air;
- liquid;
- combined.
The air system uses the flow of outside air to operate. Used in motorized vehicles with low power engines.
In a liquid system, a heated engine is cooled with a special coolant. Most modern car engines are equipped with such a cooling system.
The combined system combines the operation of liquid and air systems. Used to operate high-power power plants. Widely used at energy sector enterprises.
Internal radiator repair using chemicals
Radiator repair can also be done using traditional methods. So, when all sorts of chemicals simply had not yet been invented, ordinary mustard was considered the most effective way to deal with a broken car heat exchanger. It was simply poured into the car radiator. Since hot water circulates there, the mustard swells quickly enough and covers all the small cracks in the pipes.
So, at any time you can purchase chemicals that act on approximately the same principle. They are often sold under the names "powdered remanufacturer", "repair agents" or "radiator sealants".
The main disadvantage of using such chemicals is that it is unlikely to know their exact composition or the exact place of production. Just like with regular mustard, the use of some types of such chemicals can lead to clogging of the heat exchanger. Moreover, sometimes these substances can damage the entire cooling system of the engine.
Causes of destruction of a car radiator
During operation, elements of the cooling system may receive various damage. There are the following causes of damage:
- mechanical;
- chemical;
- thermal.
Mechanical reasons are caused by the impact on the grille during an accident, road stones, and collisions with various obstacles.
Chemical malfunctions are caused by the effects of corrosive processes on the internal and external surfaces of the radiator.
Thermal malfunctions occur as a result of scale formation on the internal walls of the device.
As a result of leaks, partial or complete loss of coolant occurs. Reducing the amount of coolant leads to overheating of the units and a high probability of engine failure.
To prevent malfunctions in the operation of the cooling system, soldering of radiators is used.
How to solder plastic car radiator
Soldering an engine cooling radiator is considered a fairly simple task. However, not everyone can cope with it due to insufficient knowledge of how to solder a car radiator on their own. Most car owners prefer to take their car to a service station.
If you are confident in your abilities, then first you should determine how to seal the plastic radiator. Next, let's look at step-by-step instructions that will help you make a truly high-quality and durable repair of the plastic parts of the part.
Surface preparation
Before gluing the plastic on the car radiator, you will need to thoroughly prepare the surface for this process. For this purpose, we will need to clean it from grease, dust and dirt. Lightly dampen a rag and very carefully wipe the areas of plastic around the resulting crack.
In order to achieve a better effect, it is recommended to use an alcohol solution. It is important that in no case should you overdo it. The fact is that too active mechanical impact on the damaged area or excessive pressure on it when cleaning can damage the heat exchanger even more.
Preparing the adhesive mixture
Now you need to worry about how to seal the crack on the car radiator. So, let's prepare the adhesive mixture. If you decide to use exclusively glue specially designed for such purposes, then its use will be as simple as possible.
A small amount of adhesive should be applied directly to the damaged area. When a part is missing a certain piece of the body or there is no gap between the two halves that are formed due to a crack, it is recommended to sprinkle the liquid base with the powder component of the glue.
So, if the crack itself is too deep or a sufficiently large part of the body is missing, gluing must be performed in several stages. You should apply glue to the damaged area two or three times, waiting until each layer is almost completely dry. When the resulting gap can be completely filled with dry gradulant, it is recommended to saturate it with a liquid composition. This way you can be completely confident that it will adhere perfectly to the surface of the spare part.
Cold welding
In addition, you can seal a car radiator using cold welding. Since it comes in the form of a fairly thick putty, it will be enough to apply it to the seam and wait until it cools completely. It is important that this putty must be applied in a neat and even layer so that the seam is of the highest quality.
Cold welding must be used as:
- the main method of restoring performance;
- an additional means of securing the result obtained by soldering or gluing.
A layer of cold welding applied on top of the glue layer will allow you to preserve the quality of the auto part repair for a long time and extend the service life of the part.
Final stage
When the glue has completely hardened and all the main working steps have been completed, you need to carry out final surface treatment. It is necessary to ensure that the resulting seam becomes neat and smooth. For such purposes, the soldering area will need to be treated with fine-grained sandpaper, and ideally with a grinding machine.
In this way, you will be able to get rid of all minor defects that will not have the best effect on the further operation of the product. After this treatment has been completed, install the heat exchanger back in its place.
Repairing a copper radiator
To solder an engine cooling radiator made of copper, you will need the following tools and tools:
- powerful soldering iron or gas torch;
- solder;
- soldering flux;
- pliers;
- sandpaper.
First, you need to dry the radiator, especially if you checked it by immersing it in water. Next, the damaged area should be thoroughly cleaned with sandpaper. If there are slats on it, they need to be removed locally. After this, the soldering area is treated with flux and dried again.
You can solder the cooling radiator using either a gas torch or a soldering iron. In the first case, solder is applied in place and heated with a torch until it melts and fills the crack. When using a soldering iron as a heating tool, make sure that it has sufficient power.
If the solder does not adhere to the surface or lags behind, it is necessary to repeat the stripping and fluxing process. You can check the repaired radiator using the method described above.
DIY aluminum car radiator repair
Let's look at how to solder an aluminum car radiator at home. Typically, aluminum devices are repaired according to a special principle. So, you will definitely have to solder the damaged area.
First of all, you will need to remove the radiator and drain all remaining fluid from it. The tanks are washed under running water and dried until not a drop of water remains inside. In addition, you need to assess the condition of the tank as carefully as possible. Find even the smallest cracks and flaws in it. So, to do this, take a large basin of water or a bathtub, prepare a pump or compressor. Close the cover fitting in exactly the same way as the cooling system pipes, and connect one of them to the pump tube. Place the device in the bathroom and supply air. Watch for the bubbles that appear from the cracks.
It is not possible to repair an aluminum car radiator with an ordinary soldering iron. You need a fairly powerful device, which is unlikely to be found in everyday life. So, you will need a device whose power is approximately 250 watts. The aluminum itself will need to be preheated, for which you need to use a special gas burner.
It is important that this process requires strict adherence to basic security measures. Use of this equipment other than in accordance with the instructions may result in serious injury.
Use of iron rosin flux
There is a simple way to solder a radiator with a soldering iron using rosin-based flux. To do this, the damaged metal is prepared according to the following scheme:
- remove paint residues and all kinds of dirt;
- thoroughly clean the metal with an abrasive;
- degreased with a special solvent.
The preparation must be very conscientious; the entire repair depends on this. Flux is prepared in a metal crucible. Melt the rosin and gradually add iron filings there in a ratio of 1:2. Stir until smooth. Sawdust in this case will be an abrasive.
Next, the surface to be repaired is covered with a thin film of molten flux. The quality of future soldering depends on the thoroughness of the procedure. In this way, aluminum is protected from oxidation.
The materials used in the work emit toxins. Therefore, you need to do everything under a hood, or carry out repairs in a thoroughly ventilated area. If conditions permit, outdoors.
Next, the soldering process begins. Use a soldering iron to grab a little solder and apply it on top of the flux using smooth circular movements. This should be done slowly, carefully ensuring that the solder is evenly distributed over the damaged area.
How does flux behave in this case? Iron filings clean off oxides, and rosin blocks air access to aluminum. The conditions for contact between metals are met.
This method works when you need to solve the problem of how to solder an aluminum radiator if the damage is not great. Large areas cannot be repaired this way. The flux becomes cold very quickly, so soldering a large surface will be problematic.
Security measures
When repairing a car radiator, you should be extremely careful and follow certain safety measures. The heat exchanger itself must be disconnected. Drain all liquid completely.
If you have not previously had experience working with a soldering iron, it is better to entrust this task to professionals. In this case, you should at least practice on less important surfaces and parts of the car.
When working with cold welding or glue, it is important to use gloves to avoid damaging your hands. In addition, be sure to follow the instructions for using the glue. This way you can not only achieve the ideal effect of the repair, but also protect your hands from the harmful effects of adhesives.
conclusions
So, following the recommendations and advice in the article, determining what to seal a car radiator with will not be difficult. The main thing is to follow some safety measures and choose the best repair option. If you are not sure that you can cope with such a task on your own, it is better not to take risks and seek help from qualified auto mechanics.
Still have any questions? In this case, we recommend watching a video on how to repair a car radiator at home. We wish you good luck in your endeavor!
Looking for a leak
If a stain of antifreeze remains under the car after parking, it means there is a leak in the cooling system.
Before removing the cooling radiator or air conditioner, you should make sure that all pipes and the expansion tank housing are in order. The heat exchanger of the interior heating system is also checked.
Before dismantling, the liquid must be drained from the system. The removed radiator is carefully inspected in good lighting. If the damage cannot be seen, all holes are plugged with tight plugs and the heat exchanger is immersed in water. The emerging chain of bubbles will indicate the location of the leak. If you increase the pressure by connecting one of the pipes to the compressor hose, you can detect a leak faster.
Tools and materials
In order for classic hot soldering to be quick and easy, and most importantly, to give the expected result, it makes sense to prepare all the necessary tools and materials in advance. The following things must be present as such.
Step-by-step launch instructions
At the start, it is not necessary to have legal permission to conduct business. If we are not talking about opening a full-fledged service, but about independent repairs, then you can do without an individual entrepreneur or LLC. Because the beginning of the journey never gives a large flow of clients, this will be an additional small income, but after a while, you can think about expanding. Then official documents will be required.
- Search for premises. As already mentioned, the repair site must have high ceilings so that a KAMAZ can be driven in. Very often, it is this transport that requires such services, because the modern technology for manufacturing this engine part does not provide for future repairs. If you have the means to rent a box for several cars, then you can spend the money. The radiator will be removed and repaired indoors; it must be taken into account that there must be enough space for the vehicle itself. Therefore, an area of 50 square meters can be considered initial.
- Equipment.
- Search for clients. Online advertising and a website will be of little use, so you need to post advertisements. If you wish, you can hire a couple of workers who will perform the assigned tasks. But these are unnecessary expenses.
