Attention! We hang and remove the rear wheel. Remove the rear brake pads (see Replacing the rear brake pads).
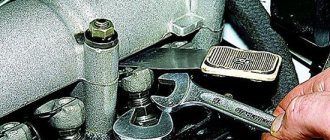
Using a 17mm spanner, unscrew the four nuts on the bolts securing the axle shaft to the beam flange.
Use a slotted screwdriver to bend the locking plates of the axle shaft mounting bolts...
...and remove the bolts.
We fix the wheel with the reverse side on the axle shaft by tightening three nuts several turns.
Holding the wheel, we move it with a jerk...
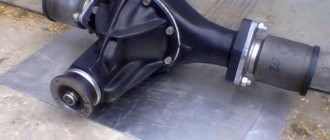
...and remove the axle shaft assembly with the bearing mounting plate, bearing and locking ring.
We take out the rubber sealing ring of the beam flange.
We insert two bolts into the holes of the brake shield and the rear axle beam so that the shield does not hang on the brake pipe.
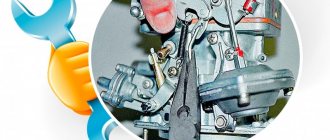
We pry off the oil seal using sliding pliers...
Using a tool head of a suitable size with an extension (or a piece of pipe), we press in a new oil seal.
If the axle shaft is deformed, its splines are worn out, or the bearing is worn out, we replace the axle shaft with a new one complete with bearing and locking ring (it is not recommended to replace the bearing or locking ring yourself).
Install the axle shaft in reverse order.
Check the oil level in the rear axle and add if necessary.
Transfer case location and functions
Location of the transfer case in the Niva 21213
The transfer case occupies an intermediate position in the vehicle transmission between the gearbox and the driveshaft. It has its own body in which its components are located.
The transfer case helps to implement such SUV capabilities as:
- Center differential lock.
- Disabling the drive axle.
- Increased torque of the drive wheels.
- Distribution of torque along the wheel axles.
Transfer case Niva 21213
Model VAZ-21213 is an all-terrain passenger car with permanent all-wheel drive and differential lock. Brand 21213 is a restyled version of the first VAZ SUV, VAZ-2121. RK Niva 21213 has three gears:
- the first - with a gear ratio of 1.2;
- the second, lowered – with the number 2.135;
- neutral
21213 is equipped with 4-speed and 5-speed gearboxes, and when the first speed of the transfer case is turned on, the car operates in standard mode, the gear ratios in the transmission are from 5-speed. The checkpoints are as follows:
- 1 – 4,4;
- 2 – 2,52;
- 3 – 1,63;
- 4 – 1,2;
- 5 – 0,98.
When you turn on the second position of the transfer case lever (reverse position), the gear ratios change (lower):
- 1 – 7,83;
- 2 –4,48;
- 3 – 2,90;
- 4 – 2,14;
- 5 – 1,75.
On ordinary roads, the transfer case is always in first gear, the transfer case control lever (reduction gear) is pushed forward. The neutral gear of the RK disconnects the transmission, and in this position the car does not drive; there is also a neutral in the gearbox.
Motorists often ask the question: why is neutral gear needed in a transfer case? The neutral is used when connecting additional units to the transmission, for example, a mechanical winch; in this case, a power take-off must also be installed.
Intermediate shaft
1. Screw in all screw plugs, push-button switches, and filler pipes with new O-rings or seals. Torque
see chapter "Adjustment data and tightening torques".
2. If necessary, insert the jet tube (1). Tuck the ends into the housing holes and bead them using tool 1X20 155 653, insert
O-ring (3). Rolling torque = 5 to 6 Nm.
3. Insert new filter (4).
4. If necessary, attach a label (5) for clarity.
5. If necessary, insert the roll pins (6) into the housing.
6. If necessary, install new tapered roller bearing outer races for the output and intermediate shaft in the mid-case.
HINT: Heat the bearing bore with heated air to approximately 60 degrees Celsius.
7. Insert the bearing sleeve (7), spring the thrust ring (8) and insert new cuffs (9) using a plastic mandrel, achieve the correct axial position.
8. Insert the pressure spring (11) with the locking pin (10) until the correct position is achieved. Screw on tool 1X56 137 287.
5.2 CLUTCH CASE
1. If necessary, insert the tapered roller bearing outer races for the input and intermediate shafts into the clutch housing bearing holes.
The outer race of the input shaft bearing is located on top. The outer race of the intermediate shaft bearing is located at the rear.
2. Screw in the screw plugs with new O-rings. Torque: M18xl.5 = 35Nm M22xl.5=50Nm M24xl.5 = 60Nm
3. Screw in the plug with a magnet (1) for filling the oil, after cleaning it. Tightening torque = 140 Nm.
6.
SYNCHRONIZERS/WEAR LIMIT 6.1 Determination of the WEAR LIMIT FOR SYNCHRONIZERS (except for 1st, 2nd gear).
It is necessary to check the condition of the gear coupling and synchronizer ring before assembling them.
HINT: Do not mix up synchronizer parts.
1. Place the synchronizer ring (1) onto the corresponding part of the gear coupling (2). Rotate the synchronizer parts, align
conical surfaces for parallelism. The gap in the synchronizer rings in 3rd and 4th gears and in the divider group is not
less than 0.8 mm, and for a range multiplier 1.2 mm.
2. Measure the distance (X) between the gear coupling and the synchronous ring using a plate template in two opposite directions.
located places. If no more than 0.8 or 1.2 mm, then the synchronous ring or gear coupling must be replaced. (Don't know
why, but the text says exactly that! Translator's note)
3. In addition, you need to check the structure of the synchronizer parts (visual inspection). If the surface is wavy, the parts should be replaced. Don't mix up the details
checked together (label them).
6.2 DETERMINING THE WEAR LIMIT FOR SYNCHRONIZERS
1st and 2nd GEAR
1. Place the inner ring (3) of the 1st and 2nd gear synchronizer, the intermediate ring (2) and the outer ring (1) onto the disc gear coupling (4). . By rotating the outer ring, uniformly impart a load-bearing state to the cones. Apply a load F = 50 N evenly to the outer ring.
2. At the same time, use a plate gauge to measure the distance (s) between the disc gear coupling and the outer ring in two
oppositely lying points. The gap must be at least 1.5 mm.
7.1 ADJUSTING THE SECONDARY SHAFT
1 Using lifting lever 1X56 137 200, position the output shaft in the middle part of the crankcase.
The device of the VAZ Niva transfer case
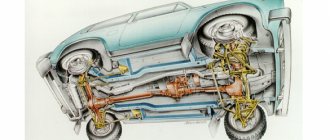
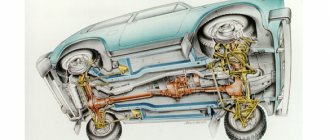
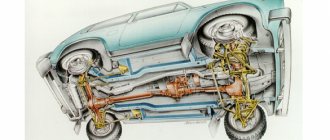
The transfer case is not present in all VAZ passenger cars, but only on cars with two drive axles. In the transmission, the transfer case (TC) is installed at the rear of the gearbox; a rear driveshaft is attached to its shank, which connects the transfer case to the rear axle. The front axle is also driven by the steering wheel; it is connected to the transfer case by a front driveshaft.
The reduction gear in the Republic of Kazakhstan is designed to obtain high torque, it is used to overcome difficult sections of the road, and helps to cope with off-road conditions. The VAZ Niva transfer case contains the following main parts:
- the body itself;
- front axle drive shaft;
- intermediate shaft;
- drive shaft;
- gears;
- bearings;
- differential housing;
- satellites;
- differential lock clutch;
- gear shift clutch;
- flanges (for connection to cardan shafts);
- oil seals;
- control levers.
Centering method
To carry out this work you will need a lift, although with some skill you can get by with simple supports. First you need to prepare the car. If there is a lift, it is raised up. If supports are used, the corners of the machine are jacked up one by one and it is placed on them. Please note that all supports must be stable, otherwise the work will be unsafe. You should also prepare the tool in advance. If there are no plans to simultaneously replace other parts, then it is quite possible to get by with a ratchet and a “13” head. During operation, an assistant must be in the cabin.
Adjustments are made in the following order:
- To begin with, you should evaluate the condition of the splines on the cardans. If they are very worn, then most likely you will not be able to perform the alignment correctly. In case of significant wear, parts should be replaced;
- The transfer case mount is inspected. Often the displacement can be seen with the naked eye;
- Next, loosen the transfer case mount. Just don’t unscrew it completely;
- After this, start the engine and “accelerate” the car to a speed of 80-90 km/h. In this case, the transfer case will fall into place on its own;
- The crucial point is to consolidate the result obtained. This can be achieved in 2 ways. Mechanics argue which one is better, but both are used in everyday life. Most often, the engine is turned off, and with its help the transfer case and cardan shafts are stopped.
- All that remains is to quickly tighten the nuts. Disadvantage here 2. Stopping the box in this way can have a negative impact on its condition.
- Also, you need to tighten the fastener as quickly as possible, otherwise it will be of no use. A more reliable, but technically complex method is to tighten with the engine running;
- The car is lowered to the ground and testing is performed.
If the vibration persists, the procedure should be repeated.
How to replace a grenade
Once you have the inner grenade in your hands, collect the bearing balls if they have fallen out and place them in a container of kerosene. Remove the retaining ring from the shaft that holds the race and separator. Take a drift and, hitting it with a hammer, knock down the hinge, hitting the end of the cage. Remove the retaining ring and thrust ring. Clean all removed parts with a metal brush and rinse in kerosene.
Disassembling the hinge
Eliminating prerequisites
The misalignment of the transfer case occurs due to an undeveloped design. Therefore, many craftsmen strive to modify the fastening so as not to bother with alignment once a year. A special frame is used for this. In recent years, it can be purchased in stores, but you can also make it yourself. The advantages of this modification are the following:
- The transfer case is mounted on the rigid base of the subframe. The attachment to the body is made through a subframe, this allows to reduce the level of vibration transmitted to the body;
- It plays the role of a kind of protection for the crankcase;
- Also worth mentioning is adding additional rigidity to the side members.
- Among the disadvantages, we can mention a slight decrease in clearance. Although, in light of the advantages, this does not play a special role.
To assemble the subframe you will need a square pipe. Some people use a corner, but in this case the structure will be less durable. The support plates are made of sheet steel. Before assembly, you should cut off the old transfer case mounting bolts. Now it will be installed on the subframe. The pipe is cut to size and the frame is welded. After that, holes are drilled in the crossbars for fastening the transfer case. It is important not to make a mistake with the sizes. The next step will be assembling the mount to the body. Sheet steel support plates are welded to the subframe. Holes are drilled in it. After fitting, you need to drill holes in the floor of the car.
M12 bolts should be used for fastening
, as well as thick washers.
After installing the subframe, do not forget to treat it with an anti-corrosion compound. This will increase the service life of the part. This is how, through simple manipulations, you can get rid of one of Niva’s sores. Conclusion
. Even great cars have flaws. The domestic SUV Niva is no exception. During active use, vibrations emanating from the transmission may occur. That’s when the question arises of how to center the transfer case on the Niva. In fact, this work is not difficult, but there are some nuances that are better to know before starting work. Some people, knowing this feature of this car, install a subframe, this can significantly reduce the noise of the transmission.
TOP 3 best winter tires for Chevrolet Niva
Winter tires for Niva can boast excellent performance characteristics, so the owner will not have any difficulties with driving even in severe frost, on snowy or icy roads.
Nokian Tires Nordman 7 SUV 205/70 R15 100T
The winter model from the famous Northern European brand is specially designed for comfortable and safe driving on slippery and snowy roads..
The technologies used for production increase the tire's wear resistance and guarantee stable traction on almost any road surface.
The size of the tire is ideal for almost all SUVs, including the domestic Niva.
The design solutions used to produce the tire allow it to demonstrate excellent grip properties even in the most difficult climatic conditions.
Special teardrop-shaped recesses on the blocks are equipped with anchor spikes . This further increases the directional stability of the vehicle and allows you to perform complex maneuvers even on snowy and icy roads.
Specifications:
- profile width/height 205/70 mm;
- maximum speed 190 km/h;
- load up to 800 kg.
pros
- the spikes do not fly out even during regular off-road trips;
- the size is suitable for almost all SUV models;
- soft rubber compound makes it easier to pass road obstacles;
- The tread design reduces braking distance, regardless of the road surface;
- good abrasion resistance.
Minuses
- controllability in slushy snow is lost;
- not very good balancing.
Nexen Winguard WinSpike WH62 205/70 R15 96T
This winter tire, despite its affordable price, is superior in many characteristics to similar models of its competitors.
For its production, advanced technologies and modern materials were used, which guarantee a long tire life and provide excellent grip on the road, even on icy roads.
In order for the car on which these tires are installed to boast stable and predictable handling, the manufacturer has provided a whole range of measures.
These include a special breaker design, synthetic cord and a special rubber mixture, which increases the rigidity and resistance of the product to deformation.
Specifications:
- profile width/height 205/70 mm;
- maximum speed 190 km/h;
- load up to 710 kg.
pros
- excellent quality of South Korean assembly;
- costs less than analogues without loss of performance characteristics;
- behave stably and predictably on ice and snow;
- make minimal noise;
- The tire allows you to take turns quickly and accurately.
Minuses
- not the shortest braking distance on ice;
- in deep snow they start to slip.
Toyo Observe Ice-Freezer 215/70 R16 100T
Studded winter tire designed for medium and high power SUVs.
It differs from the previous version with a reinforced frame and sidewalls. But this is not all the advantages of the tire. The running part of the tread has a directional design with large elements.
The central part is represented by a monolithic rib with elongated lamellas . The transverse edges are located nearby.
In combination with similar shoulder elements, this increases traction and braking efficiency on ice and loose snow.
In addition, numerous small sipes run across the entire tread area..
Their side walls are located at a special angle, which provides additional grip on the road surface and guarantees a significant reduction in braking distance.
Specifications:
- profile width/height 215/70 mm;
- maximum speed 190 km/h;
- maximum load up to 800 kg.
pros
- excellent grip on icy roads;
- predictable control on loose snow and slush;
- relatively low cost;
- makes much less noise than other studded tires;
- high-quality screwed-in studs.
Minuses
- in very severe frost, handling suffers a little;
- not very good directional stability at high speed.
Niva transfer case. Ways to eliminate vibration
The Niva family of cars differs from VAZ passenger cars in permanent all-wheel drive - they have two drive axles. In total, the VAZ SUV has three differentials in its transmission - one for each axle and another center differential.
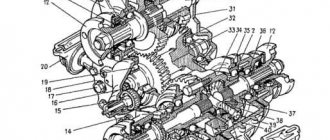
1. Oil seal; 2. Thrust ring of the front bearing of the drive shaft; 3. Front bearing cover; 4. Front drive shaft bearing; 5. Transfer case front cover; 6. High gear; 7. Gear clutch hub; 8. Gear clutch; 9. Low gear; 10. Transfer case housing; 11. Rear drive shaft bearing; 12. Drive shaft; 13. Transfer case rear cover; 14. Intermediate shaft; 15. Rear intermediate shaft bearing; 16. Rear differential housing bearing; 17. Installation ring of the rear axle drive shaft bearing; 18. Rear axle drive shaft bearing; 19. Oil seal deflector; 20. Rear axle drive shaft flange; 21. Rear axle drive shaft; 22. Bearing thrust ring; 23. Differential housing; 24. Rear axle drive gear; 25. Satellite; 26. Axle of satellites; 27. Retaining ring of the satellite axis; 28. Spring washer; 29. Driven gear; 30. Differential housing bearing retaining ring; 31. Differential locking clutch; 32. Front axle drive shaft; 33. Front axle drive housing; 34. Retaining ring of the front axle drive shaft bearing; 35. Differential bearing spring washer; 36. Front differential housing bearing; 37. Driven gear of the speedometer drive; 38. Speedometer drive housing; 39. Front intermediate shaft bearing; 40. Gearbox; 41. Elastic coupling; 42. Constant velocity joint; 43. Transfer case; 44. Shims; 45. Transfer case suspension bracket; 46. Rear engine mount bracket.
Lada 4×4 5D Snow Queen › Logbook › Second Repair: Replacement of the Promval
After one year + five months, that is almost ONE AND A HALF
After a year of quite active but
careful
operation and
51,000
kilometers (and also eight months after the previous repair), the Niva suffered a second breakdown. Compared to the first breakdown, which, in principle, cannot even be called a breakdown (although if it had not been changed at the time, perhaps the consequences would have been the same), the second one is already more serious - the Intermediate Shaft was “covered”. At first, light vibrations began at a speed of about 30-40 kilometers per hour. No more. And five days later, when I try to start at the Crossroads on a flat road - “crunch ...” and that’s it - not a single speed is engaged. I've already reached the Garage in tow!
So, look at the Video of what happened:
I almost guessed the breakdown. The fact that it was Promval - I realized right away when, even before the breakdown, I was turning the transfer case in Neutral at 5th speed - these were the very same vibrations that were on the move. But I thought that it was the Elastic Coupling that had fallen apart, but it turned out to be a CV joint.
After reading many interesting articles, and listening to a huge number of opinions, which were in almost equal numbers both for the “Sondovsky” Promval “CV-CV joint” and for the Zavodskoy Val, and also for the old-style Promval, which is on the Krestovina, it was decided The decision was made to take the new ShSUR-CV joint shaft. This choice was also made because I have a “Niva-Comfort” subframe installed, which, by the way, made my work easier by “holding” and moving the “Razdatka” on itself and thanks to which it is likely that the new CV joint will also may break minimally.
At the beginning, an overview Video of the new Industrial Shaft “CV joint-CV joint”:
Eliminate vibration with additional fasteners
Installing the third support of the transfer case on VAZ 21213/21214 vehicles allows you to reduce the level of vibration of the transfer case; with this support it is easier to center the transfer case. The part can be purchased at auto stores or made yourself. The finished product comes with three long studs (for model 2121); to install the third support on this machine, you will need to unscrew the short studs from the transfer case housing and install new studs from the kit. We carry out repairs as follows:
- dismantle the front passenger seat in the cabin;
- remove the floor tunnel lining;
- in the cabin we move aside the carpet covering the body amplifier (in front of the handbrake lever);
- remove the transfer case (alternatively, you can simply hang it up, but removing the third support makes it easier to install);
- We attach the bracket of the new support to the body of the RC;
- we install the transfer case in place, center it in the optimal position, and fasten the side supports;
- we combine the third support with the body, drill two holes in the bottom;
- Using washers, bolts and nuts (from the kit) we attach the support to the bottom of the body.
Vibration is eliminated more effectively by installing a subframe under the transfer case. You can also make such a device yourself or buy a finished product at a car store.
In order to install the subframe, the transfer case must be removed. It is more convenient to carry out such work in a pit; we carry out repairs as follows:
- leave the car in neutral gear;
- disconnect the propeller shaft from the transfer case, it is advisable to mark the driveshaft flange and the drive shaft so that during installation, align the driveshaft according to the marks - this way, the occurrence of unnecessary vibrations is eliminated;
- dismantle the muffler mounting bracket;
- remove the gearbox traverse;
- jack up the transfer case, remove the side fastenings of the transfer case;
- We treat the places where the subframe fits to the body with Movil;
- place the subframe on the gearbox studs;
- we mark the attachment points of the subframe on the side members, drill holes, attach bolts to the body;
- we tighten all fastenings, except for the transfer case supports themselves;
- we perform alignment of the steering wheel;
- Finally tighten the transfer case supports.
It should be noted that installing an additional support or subframe on the steering wheel does not always lead to the desired effect; in some cases, vibration only increases.
How to remove the drive
Untimely replacement of the hinge will lead to dire consequences: in the worst case, the drive may jam, which at high speed can lead to an emergency situation. Therefore, it is more advisable to replace the unit in time. How to change the CV joint on a Niva? It is best to remove everything assembled; for this you will need:
- socket head wrench for 13 and 27 with a wrench (preferably a ratchet type);
- extension to the wrench in the form of a hollow pipe;
- hammer;
- flat screwdriver (you may also need a chisel);
- a jack and a wheel wrench for removing the wheel.
Inner CV joint
Place the car on a viewing hole, and if possible, on a lift. In the first case, you will need a jack. But first you need to remove the hub nut cap with a screwdriver and loosen it, then remove the wheel and unscrew it completely.
Further steps to replace the grenade on the Niva:
- Using a 13mm socket, unscrew the nuts securing the ball joint to the steering knuckle.
- Using a jack, smoothly lower the lower arm onto a suitable wooden block.
- Remove the shaft from the hub by moving the steering knuckle up and back (secure it with wire), and removing the retaining ring to remove the outer joint.
- Remove the 3 pressure plate nuts securing the inner CV joint. Pry it up with a flathead screwdriver and pull the internal assembly out of the gearbox.
- If it is inconvenient to remove the hinge when assembled, disconnect it.
Below see how to remove the CV joint on Niva 21213 - video.
We study problems and repair methods.
Any car owner definitely doesn’t need to be told why howling and humming are bad. Vibration of the transfer case on a Niva at low speed is quite common. The driver, of course, gradually gets used to many extraneous sounds in the car, but the noise level is high enough to make it impossible to carry on a conversation with passengers while traveling. Due to excessive noise pollution, you will inevitably have to deal with the problem.
Sources
- https://motorltd.ru/snyatie-i-tsentrirovanie-razdatochnoy-korobki-vaz/
- https://www.vazzz.ru/vaz-21213-razdatka-ustrojstvo-shema-tsentrovka-snyatie/
- https://avto-idea.ru/remont/remont-razdatki-na-nive-21213-kak-ottsentrovat/
- https://AutoFlit.ru/2260-kak-otcentrovat-razdatku-na-nive-sposob-dlya-korotysha-i-shevrole.html
- https://NewNiva.ru/kak-ustranit-vibratsiyu-na-nive-21214.html
[collapse]
Rating of TOP 9 best tires for Niva 2021-2022
| Place | Name | Price |
| TOP 3 best summer tires for Chevrolet Niva for 2021-2022 in terms of price/quality | ||
| 1 | Yokohama Geolandar A/T G015 215/70 R16 100H | Find out the price |
| 2 | Cordiant Comfort 2 SUV 215/70 R16 104T | Find out the price |
| 3 | Continental ContiPremiumContact 5 215/70 R16 100H | Find out the price |
| TOP 3 best winter tires for Chevrolet Niva | ||
| 1 | Nokian Tires Nordman 7 SUV 205/70 R15 100T | Find out the price |
| 2 | Nexen Winguard WinSpike WH62 205/70 R15 96T | Find out the price |
| 3 | Toyo Observe Ice-Freezer 215/70 R16 100T | Find out the price |
| TOP 3 best all-season tires for Chevrolet Niva | ||
| 1 | Nitto Dura Grappler 215/70 R16 100H | Find out the price |
| 2 | MAXXIS Bravo AT-771 205/75 R15 97T | Find out the price |
| 3 | Triangle Group TR292 215/75 R15 100/97S | Find out the price |
