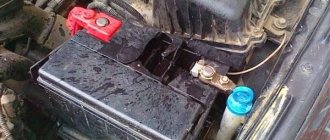
If you discover that the generator on your VAZ 2110 does not charge, you should immediately look for the cause of the malfunction, because the supply of all electrical equipment with current, as well as charging the battery, is at risk.
Generator
As you know, with a working generator, the battery does not require charging for many months and years, while maintaining at least 60% charge. That is, a battery with a capacity of 55 Ah, which is usually equipped with dozens, is replenished with current due to the operation of a working generator.
Basic problems
If the generator begins to act up, then the main causes of the malfunction should be sought either in the on-board network, or these are problems with the generator itself. If the generator gives a charge, but not enough, then perhaps it has been “loaded” too much by installing many other gadgets in addition to the standard electrical equipment, and it is already working at the limit of its capabilities.
Our motorists really love tuning the VAZ 2110, adding, for example, speaker power, enhancing the light, etc. In such cases, some people change the battery, for example, installing it with a capacity of 70 Ah, instead of the usual VAZ one with 55 Ah.
But although this may help at first, over time such a battery will run out even faster, since a standard generator will not be able to provide it with a full charge; it does not have enough power for this.
The reasons for battery discharge are described in detail in the following material:
The main reasons why the generator does not charge the battery
To identify problems, it is necessary to diagnose both the entire on-board network, which may draw too much energy, and the generator itself. If you have tuned your car, equipping it with additional electrical equipment, you will need to check its energy consumption level and serviceability.
Very often, to compensate for the current consumption of third-party devices, car enthusiasts install high-capacity batteries. However, the generator power remains at the same level, so this measure has no effect.
troubleshooting
To accurately determine the source of the problem with the generator, you need to perform a basic check. If you do not have “additional” energy consumers, you can immediately look for generator faults; if there are any, turn them all off for a while. Moreover, do not turn it off, but simply disconnect it from the car.
Test plan:
- Measure the current output on a cold car, when it is not running and all its life support systems are turned off. It will be ideal if there is no return at all. But this happens extremely rarely. On almost every VAZ 2110, somewhere due to insufficient contact, local short circuit, etc. There is still a small return. But - just a small one, and not one in which the battery can run out during a night of parking;
- If everything is normal, there are no current leaks, or they are negligible, the battery is not discharged, reconnect all those devices that you (no matter, independently or with the help of hired specialists) installed on your car on your own initiative. Repeat the same check. If it turns out that current is actively leaking, it means that the reason is not in the battery and is not related to the generator; it is the device not provided for by the designers of the VAZ 2110 that is to blame;
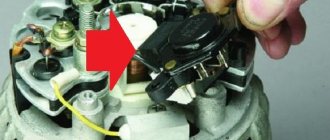
- But if even then no kickback is detected, we proceed to a thorough examination of the generator. And here there are many possible malfunctions: • there is not enough contact between the brushes and the rotor rings; • there is a break in the excitation winding; • an interturn short circuit is possible directly in the field winding coil. At the same time, the generator heats up and hums; • the field winding may short-circuit to the rotor housing; • breaks can also occur in the stator phase winding; • the stator can short-circuit to the housing; • possible short circuit of the “plus” to the housing; • diodes in the rectifier unit can be pierced; • mechanical failures also occupy a significant place on this list.
It is possible to repair or replace the generator yourself if you have the proper desire and knowledge of the nuances of the procedure. Details:
Now let's look at all of the above generator malfunctions in more detail.
What is on the VAZ 2110
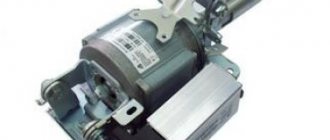
For VAZ 2110 cars, the installation of two types of generators is provided, depending on the installed engine.
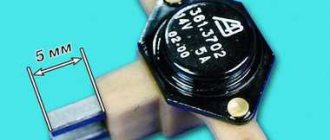
- For carburetor models, a generator with number 9402.3701 is installed.
- If the engine is injection, then the catalog number of the generator used will be 3202-3771. It has a serpentine belt.
Regardless of the type of installed engine and generator, respectively, problems with the devices are the same, therefore the inspection and repair procedure is identical in both cases.
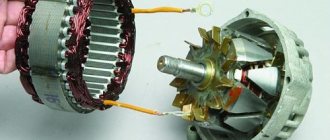
Winding break
If the excitation winding is broken, then there is no charging of the battery. To determine this, it is often enough to place your hand on the generator. When it breaks, it heats up. For an accurate check, you need to disconnect the end of the excitation winding from the brush, connect the battery wires to it, and connect the battery wires to terminal Ш of the generator (via a voltmeter or a light bulb).
If there is a break, the voltmeter needle will not deflect and the light bulb will not light up. To find which of the coils prevents the generator from working, connect the wires from the battery to each individually. Finally, check the soldering and coil terminals. If the break is internal, the coil needs to be replaced; for external ones, soldering helps.
Dips when pressing the gas pedal during acceleration
Determined using computer diagnostics or the steps described below:
- The first thing you need to do is inspect the spark plugs. To do this you need to remove them. The presence of carbon deposits on the spark plugs, poor contact with the wires, or an excessively lean or rich mixture lead to spark plug malfunctions.
- High voltage wires can also cause engine malfunction, as can ignition coils.
- The throttle needs to be checked. If it is clogged, this causes the engine to respond untimely when pressing the gas pedal.
- It is necessary to check the condition of the air, fuel and oil filters. They tend to get clogged, which worsens dynamics, increases fuel consumption and causes pedal failure. They need to be changed constantly, you can do it yourself, they are inexpensive and easy to install.
- The presence of errors in the ECU leads to failures.
- Clogged injectors. If necessary, replace or repair injectors.
The wires, as well as the rubber bands on them, should not be damaged and should not spark when the engine is running. If damage is found, this indicates that the engine is shaking and jerking begins. This may occur due to the age of the car, worn-out or low-quality spare parts, poor contact with the spark plugs, or due to the temperature of the engine.
The resistance of the coils and the temperature change together, as a result of which a gasoline car begins to jerk during acceleration. In diesel cars, jerking cannot be associated with the coils, since they are not present.
Why the battery light does not light up when the ignition is turned on and how to fix it
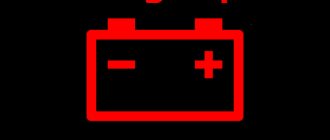
The dashboard of a modern car is filled with all kinds of indicators and lights. Some of them are emergency, others are warning, others are simply service, and their operation should not cause any concern.
Among the lamps that are activated when the ignition is turned on is the battery indicator. If it doesn't light up, it's not a very good sign. There is a reason to conduct a diagnosis and determine why this is happening.
This is a typical situation that many motorists who own cars of different brands, models and ages have encountered.
Diagnostic Tools
The right tools will make it faster and easier to diagnose the problem when you turn on the ignition. Therefore, let’s not be lazy, prepare everything you need:
- portable powerful lamp for good lighting;
- controller with probe and clamp;
- battery load plug;
- cable tracker or locator for locating a wire/cable and tracing the entire circuit in the cable line to the relay - consists of a receiver and transmitter;
- multimeter for checking the lamp;
- improvised adjustable voltage unit, professional or homemade, simple type.
Fuse and relay block on Priora Lux and Lux Plus: designations and assignments
The fuse and relay block on the Priora in the Lux and Lux Plus configurations looks like this, as shown in the photo below.
The photo below shows how to correctly count fuses.
The fuses are indicated above, how to correctly read them on the block. They have the following designations:
- F1 - Reserve socket.
- F2 - 25A - Heated rear window, electrical package module, relay and connector “10” of block XP2 for connecting the rear window heater.
- F3 -10A - Right headlight, high beam lamp, instrument cluster, signal lamp for turning on the high beam headlights.
- F4 - 10A - Left headlight high beam lamp.
- F5 - 10A - Mounting block (protection), horn relay and horn.
- F6 - 7.5A - Left headlight low beam lamp.
- F7 - 7.5A - Low beam lamp of the right headlight.
- F8 - 10A - Mounting block, anti-theft alarm relay and anti-theft alarm sound signal.
- F9 - Reserve socket.
- F10 - 10A - Instrument cluster, contact “20”. STOP signal switch and STOP signal lamp. Interior lighting unit and interior lighting. The door sill light on the right front door. Auxiliary STOP signal.
- F11 - 20A - Mounting block, high-speed windshield wiper relay. Switch for cleaners and washers, contact “53a”. Wiper and washer switch, contact “53ah”. Heated rear window switch. Mounting block, rear window heating relay (winding). Windshield wiper motor. Rear window wiper motor (for 2171, 2172). Windshield washer motor. Rear window washer motor (for 2171, 2172). Airbag control unit, pin "25".
- F12 - 10A - Instrument cluster, contact “21”. Electrical package controller, contact “9” of block X2. EMUR control unit (EUR), contact “1” of block X2. Reversing lamp switch. Parking system control unit, contacts “11” and “14”.
- F13 - 15A - Cigarette lighter.
- F14 - 5A - Dimensions lamps (left side). Instrument cluster, light on indicator. License plate lights and trunk light. Electrical package controller, contact “12” of block X2.
- F15 - 5A - Dimensions lamps (right side). Lamp for lighting the glove compartment.
- F16 - 10A - Hydraulic unit of the ABS system, contact “18”.
- F17 - 10A - Left side fog lamp.
- F18 - 10A - Fog lamp right side.
- F19 - 15A - Seat heating switch, contact "1". Front seat heater.
- F20 - 10A - Recirculation switch (on indicator). Mounting block, relay for low beam headlights and parking lights (automatic lighting control system). Heater electric fan relay. Automatic lighting control switch. Windshield wiper and external lighting control unit, contacts “3” and “11”. Climate system control controller, contact "1". Automatic window cleaning system sensor (rain sensor), contact “1”.
- F21 - 5A - Light signaling switch, contact "30". Diagnostic block, contact “16”. Clock and climate control controller, pin “14”.
- F22 - 20A - Windshield wiper motor (automatic mode). Mounting block, windshield wiper relay and high speed windshield wiper relay.
- F23 - 7.5A - Control unit for windshield wipers and external lighting, contact “20”.
- F24-F30 - Reserve socket.
- F31 - 30A - Electrical package controller, terminal “2” of block X1. Electrical package controller, terminal “3” of block X1. Double-glazed window control module on the driver's door, pin “6”. Lamp light for the threshold of the left front door.
- F32(F28) - 40A - Reserve on Priora without ABS. On a Priora with ABS: ABS system unit.
And a similar table in the form of a photo, which can be printed on a printer if necessary.
Below is a pinout diagram for the central unit of the body electronics.
Now about the actual purpose of the relay on the mounting block. Below is a photo with the relay designation.
All these relays have the following purposes:
Below is a wiring diagram of the mounting block for Priora Lux Plus.
This is interesting! When replacing fuses, buy products not only of the appropriate rating, but also from reliable manufacturers. It is not recommended to buy Chinese-made products that are not tested. For Priora, it is recommended to choose fuses of the LittelFuse brand.
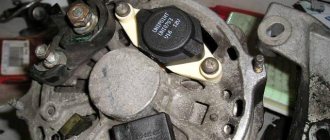
How to check the operation of the generator
The battery in a car is an important element of the system, which is responsible for providing the car’s on-board network with electricity. The generator is used to charge the battery while it is active. Unstable operation of a device generating electricity causes a voltage drop in the network and failure to restore the capacity of the power source.
Normal generator performance means timely and complete replenishment of the battery charge level, which decreases under load. Checking the battery charge level from the generator is simple and can be done by the car owner himself.
Diagnostics of an automotive energy-generating device includes a visual inspection of the unit, its elements and related parts, as well as voltage and current measurements. At least twice a year, you should check the tension of the drive belt, excessive weakening of which leads to a decrease in the performance of the generator, and sometimes can lead to breakdown of the device. Once a year, you can check equipment elements - fasteners, diode bridge, voltage regulator and others. Timely maintenance of the battery will also guarantee the absence of problems - cleaning the terminals, adding distilled water.
Diagnostics of indicators such as voltage, current, resistance are also necessary twice a year. To carry it out, you will need special devices - a voltmeter, multimeter or load fork.
Verification method
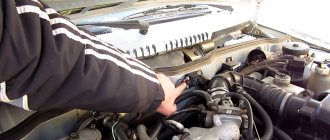
So, if it seems that the root of all problems with the car is connected with the generator. There is a very simple way to find out if this is actually true. The check must be carried out, as you guessed, under the hood of the VAZ 2109, 21099 and 2110, the generator is located there.
In order to understand whether the generator is working or not, you will need a very ordinary voltmeter. This is done as follows:
- First of all, we start the engine of VAZ 2109, 21099 and 2110.
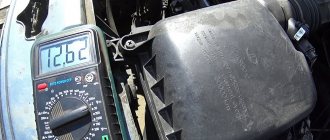
- Now start the measuring device, switch it to voltage mode and connect the contacts to the battery.
- If at idle the device shows from 13.6 to 14 volts, and at the moment when you turn on all electrical appliances in the car, including the radio, headset, etc., the arrow does not fall below 13.2 volts, then everything is fine. ok. If the value is lower, the generator is probably faulty.
It is almost impossible to check the performance of this device more accurately and quickly. The above method is the most reliable, and experienced auto mechanics advise using it.
Three-level regulation system
The quality of regulation of such structures is much higher than that of those previously discussed. Previously, mechanical designs were used, but today non-contact devices are more common. All elements used in this system are the same as those discussed above. But the operating principle is slightly different. First, voltage is applied through a divider to a special circuit in which information is processed. It is possible to install such a generator voltage regulator relay (Ford Sierra can also be equipped with similar equipment) on any car if you know the device and connection diagram.
Here the actual value is compared with the minimum and maximum. If the voltage deviates from the value that is set, then a certain signal appears. It is called a mismatch signal. It is used to regulate the current flowing to the excitation winding. The difference from a two-level system is that there are several additional resistances.
Video “Which battery to choose”
This video provides recommendations for choosing a battery (the author of the video is GrigoryFF)
After purchasing the car, we connected a laptop and the charge was approximately 14.2v... Recently the battery died, I gave it under warranty for free charging. They charged, the battery became like new on their load plug, after connecting to the car they checked the leakage, it was normal. But the charging is weak, only 12.9v with the headlights, heater and radio on at idle, with
3000rpm charge 13.2. Measurements were taken at the battery terminals. Looking at the weather forecast, frosts are coming
not weak, I went to disassemble the general 12/31/2015
.
The diode bridge has no visible defects, it rang, all the diodes show about 700 ohms. The brushes have been brought in, I bought new ones.
I put everything back together with new brushes.
Started it up, the check engine
, self-diagnosis shows10
, Bosch's brains are standing, reset the error, the error is gone. I drove around the city a little, measured the charge at the battery terminals, also 13.4v at a lower load. The battery terminals are not oxidized, the mass is good.
What to do next, change the diode bridge, and what is error 10?
Issue price: 230 ₽
Why does the battery indicator not light up?
In fact, there are several main reasons. Often the battery light itself, built into the indicator, stops working. It is possible that the fuse has blown, there is a problem in the relay, or there is a short circuit in the electrical circuit to the generator.
Car owners often make the mistake of immediately disassembling the panel and inadvertently shorting out some part of the ignition. For example, you can easily burn out LEDs and other blocks, as well as relays.
The warning light is located on the vehicle's dashboard. Although it copies the battery icon, it actually shows the state of the generator - which converts mechanical energy into electrical energy. This AC device performs several functions: it charges the battery and powers all other electrical systems of the car after the engine starts.