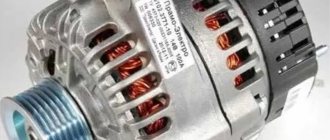
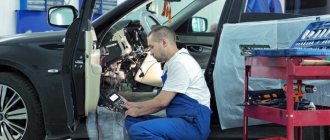
The presence of a central locking system in the VAZ-2114 and other models of this generation is an excellent help in operating a car, because the central lock not only adds comfort, but also guarantees that all doors are accurately locked.
Another thing is that this system on domestic cars often malfunctions, or even breaks down completely - for example, after closing the driver’s door, the rest remain unlocked.
For some time, a slight movement of the key in the well may help, but not immediately, but the central locking works, but you can’t drive for a long time with such a breakdown, so as not to risk it.
When trying to independently find the reason why the door on a VAZ-2114 does not close, it is worth taking a closer look at the main lock drive: this unit often causes trouble due to problems with contact closure.
The lock itself works according to the following scheme:
- an electric drive is installed in the driver's door;
- the drive controls both the driver's door lock and the signal to the central locking unit;
- The lock block issues directed signals to the drive of other doors.
In order for the driver's drive to perform this task, it is equipped with five plugs: the central unit, based on the voltage in the contacts of a particular door, gives commands to open or lock, focusing on the driver's door.
The problem may be that the adjusted "lock button - electric drive" circuit is broken: the button moves down enough to mechanically close the driver's door, but does not close the contacts of the drive. Accordingly, a lack of a couple of millimeters leads to the fact that the central lock does not receive a signal to block the remaining doors.
To eliminate the breakdown, you just need to reduce the friction density of the button inside the casing, freeing up its movement, or adjust the mechanical traction from the button to the electric drive.
Where is the central locking of the VAZ 2114
The central locking system is located in the driver's door, just like the electric drive. If we talk about the system as a whole, it is distributed over 4 doors (in some cases it also extends to the trunk), and the central panel (control unit).
Testing and diagnostics
If your car is equipped with one of the alarm systems, then it is better to start diagnostic activities with it. You should check the operation of the central locking when using the key fob, and when opening and locking with a key. If, during a manual check, the central locking system works correctly, then the reason is the alarm. Additionally, it would be a good idea to check the battery charge level, since if it is insufficient, interruptions in the operation of many electrical consumers occur. In general, it is best to check, as they say, along the path of least resistance. That is, diagnose something that does not require significant effort. And if the fault cannot be identified, resort to disassembling the driver's door and examining the mechanisms along with the electronics.
How does a car door latch mechanism work?
Door latch designs have been developed over decades.
Modern latch mechanisms keep the door secure in the adjacent jamb during travel and during an accident, but still allow the door to open in the event of a collision. This is achieved by using a cam-type latch or a rotating toothed latch. When a car door is closed, either of these types of latches tightly grips the capped impact pin or U-bar on the door jamb. Whether your vehicle has a latch or rotating tooth type latch, for our discussion here we will simply use the term latch.
When you open a car door by pulling the door lever or handle, the latch mechanism releases the latch and the door opens. The clamp is then held in the unlocked position by a snap mechanism. When the door closes, the jaw hits the striker and returns to the locking position.
Warning #1
If your car door does not close or latch properly, repeated attempts to close it may damage the latch mechanism. This can make a relatively inexpensive corrective action much more expensive.
Warning #2
You may be tempted to close the door with one hand and take your car home or to a repair shop. Never take risks. You may be wearing your seat belt and feel safe, but you may lose that door. And if it flies apart, it can hit a passing car and cause a serious accident.
Adjusting the handles
When repairing a VAZ 2114 and adjusting the door handle, you will need a 20mm screwdriver from your inventory. Disassembling the device will correct the incorrect service of this element. Step-by-step instruction:
- Remove the plug.
- Unscrewing the bolts.
- Handle recess.
- Disconnecting the retainer wires.
- Checking the mechanism.
If improper operation is caused by blockage, then the internal elements are cleaned and lubricating work is carried out. When assembling the device, do not tighten the screws too much, no more than four turns with a screwdriver.
Installation instructions for central locking
Before installing the central locking system, you should study the connection diagram
Photo gallery “Central locking diagrams”
The central locking control module is located on the left side under the panel. There are 6 wires coming from it. To install the central locking system, you need to disconnect the brown and blue wires.
Before connecting, you need to check that activators with 5 outputs are installed in the doors. If they are missing, they should be installed.
In a VAZ 2114 car, the wire responsible for opening the doors is usually white and connected to terminal 7. If there is no connection to terminals 7 - 5, then the 8th terminal is connected to the brown wire. This wire is responsible for opening the doors. Terminals 5 and 6 are for closing doors.
To install the central locking system, you must purchase additional items:
- 2-3 diodes 1N4001 at 1A;
- one diode 1N5401 3 A;
- 2 diodes of 4 or 5 A, if there are no separate outputs for turn signals.
After connecting the central locking system to the alarm, you need to check its functionality.
The door does not open from the outside in any VAZ-2114
Infrequently, but still, VAZ-2114 owners have a problem - the door does not open from the outside. It is possible to eliminate this problem without the help of service station employees, if you take into account the advice of professionals when working and carry out the entire process step by step.
It is worth noting that both the driver's front and rear doors can become jammed in the car. Before you begin to fix the problem, you should find out the cause of the breakdown. The door may not open well due to the following reasons:
- The car door key has failed.
- The leash has become unusable.
- The rod has become disconnected from the car lock.
Having found out the cause of the breakdown, you can begin to eliminate the problem step by step.
Reasons why a car door won't close completely
This way, your car door closes but is not locked and can be opened. Or the door, when it is closed, just swings open.
#1 - Clamp latch stuck in closed position
Inspect the door latch that won't close. Now examine the other door, which opens and closes correctly. On this door you will see what a fully open latch looks like. If the offending door latch is not in the fully open position, the door will not latch shut.
How to fix
- While watching the latch, use one hand to pull the door lever or handle as if you were opening a door. This should release the latch and it should return to the fully open position. Release the door handle. The latch must remain open.
- Using a screwdriver, try to move the jaw to the closed position. It should slide easily into the closed position and “click” into place. Now pull the door lever or handle again. The latch should click open again.
- Check the door operation. If it latches and opens again properly within three or four attempts, the problem is solved.
- If these steps do not solve the problem, your vehicle's door latch mechanism may be faulty. Corrective action by a qualified professional is required.
#2 - Latch cannot stay in position
Inspect the offending door latch. If the latch is in any position other than fully open, there may be a problem with the latch mechanism.
How to fix
- Using a screwdriver, move the jaw to the fully open position. Then move it to the closed position. It should "click" into place in the closed position. Try to move it with a screwdriver. It should be held firmly in this position.
- While watching the latch, pull the door lever or handle as if you were opening a door. This should release the latch and it should click into the open position. Otherwise, the latch mechanism could fail. It is also possible that the latch mechanism on the jaw has dried out and is sticking due to lack of lubrication. Follow steps (3) and (4) to release and lubricate the sponge.
- At this stage you may need help. Have a helper hold the outward release lever or handle as if about to open the door. Using a penetrating lubricant such as WD-40, lightly spray the latch hinge area(s). Don't spray too much. Rotate the sponge back and forth with a screwdriver until it moves freely. Release the door release lever. Move the latch to the closed position. Remove excess grease.
- With the sponge in the closed position, pull the door release lever. The latch should click into the open position. If it does not move or only moves partially to the open position, the latch mechanism may be faulty. Corrective action by a qualified professional is required.
#3 - Latch jaws and shackle not aligned
Door sagging may be the result of a previous minor collision, which in turn causes the latch bracket to not align with the latch catch. Alternatively, the hinge fastener may have become loose, causing the door to move out of alignment.
How to fix
Corrective action will require relocating the door. This can be a daunting process for the DIYer. In most cases, the vehicle will need to be taken to a specialized auto repair shop to have the problem repaired.
#4 - Frozen latch mechanism
In a modern car, a frozen door latch is a rare occurrence.
But this happens. Such an event may occur in the following ways: Your car was parked outdoors while it was raining. The rain, accompanied by a sharp drop in temperature, froze your windshield and windows. You open the door to grab the scraper, but the door won't close. The latch mechanism is frozen in such a way that the lip either does not open completely or latches when the door is closed.
How to fix
Here are three possible solutions:
- First, don't slam the door. This may damage the latch. Instead, with the door slightly open, pull the lever or door handle and let the door swing back several times. Often this action leads to the breakdown of the frozen locking mechanism. If this doesn't work...
- Get in and start the car. Close the door as tightly as possible. Warm up the engine and turn on the front windshield heater to maximum. Set the heater temperature to maximum. This will warm up the interior of the car, including the door assembly. It may take fifteen to twenty minutes for the door latch mechanism to defrost. If this doesn't solve the problem, there is another option...
- You will need warm water (for example, at home). Start the engine and heater as described in step (2) above. While the machine is warming up, fill the kettle with hot tap water ( not boiling
). When the car interior and window glass are completely warm, keep the door tightly closed. Now slowly pour warm water into the back corner of the door above the outside latch handle. - Following each of the procedures above, close the door to see if you have resolved the problem. If the door still does not latch shut, you will have to contact a service technician to take action.
#5 - Corroded latch area
In older vehicles (especially those stored outdoors for long periods of time), sufficient corrosion in the jaw area can prevent the car door from closing and latching.
How to fix
A latch that is stuck due to severe corrosion can probably be fixed by following steps (3) and (4) in the section above, which deal with lubricating the jaws.
#6 - Latch mechanism failure
Failure of the operating latch mechanism is very possible if none of the above steps correct the problem.
Rules for running a car
When asking which is better, VAZ 2114 or Kalina, you need to pay attention to the time it will take to break in a car like the VAZ Kalina. Please note that in the first 3,000 km, the parts begin to interact intensively with each other. It is at this time that Kalina should be used most carefully, since the durability of the parts and the fact how economically the car will use gasoline will directly depend on this.
Keep in mind that break-in should be carried out not only for a newly purchased car, but also for a car in which the engine has been completely replaced or overhauled. First of all, even when descending from elevations, the speed of the vehicle should not exceed 100 km/h. It is best to use a gentle driving style without any sudden movements.
Such undesirable processes include acceleration, maneuvering and sudden braking. In addition, if you do not quickly apply the brakes, the brake pads will get better break-in, which plays a very significant role. If unexpected obstacles arise on your way caused by weather conditions, use first gear to move the Kalina 2108. This will help protect the engine, which has not yet been run in, from severe overloads.
Try not to tow other cars or trailers in order not to overload the VAZ 2118. You should refuse to replace the engine oil poured into the car by the manufacturer, and whenever possible, try not to drive the car over obstacles such as large snowdrifts, sandy mounds and dirt.
Common causes of fuse failures
- Natural factor - due to long-term operation of the technical device;
- Mechanical damage, accident, impact, collision;
- Short circuit in the circuit;
- Damage to insulation, oxidation of terminals, loosening of contacts;
- Water entering the mounting block, condensation formation, deformation due to high operating temperature.
Description of car 2110
This model is a second-generation car that managed to carve out a legitimate niche for itself in the automotive world in the nineties. The VAZ 2110 became the successor of the 2108 hatchback and was supposed to be released into mass production in 1992. However, due to the economic crisis, this task was postponed for several years, as a result of which production of the VAZ 2110 was launched only in 1996. The time that manufacturers lost significantly affected the car, because most automakers have already managed to improve their products.
Despite this, among domestic cars it was a real breakthrough in creating a competitive vehicle. In terms of price-quality ratio, the VAZ 2110 fully met the requirements of buyers. The car now has a control panel and seats that can now be adjusted.
The disadvantages of the VAZ 2110 include at least the fact that, despite the ability to move the steering column for greater driver convenience, tall people will still feel uncomfortable in the VAZ 2110. In addition, despite the fairly smooth movement of the car on the roads, if necessary, parking it would not be superfluous power steering.
For its price, the VAZ 2110 is a very good car. If we add to this the presence of a galvanized body, inexpensive spare parts and the ability to undergo maintenance at any car service center, then the VAZ 2110 is considered a worthy representative of its class.
Electrical wiring failure
The fuse is good - check the heater. If it still doesn't work, do some electrical diagnostics. Often the wires on the mount are broken or broken. What to do? The algorithm is like this:
- put the button in the “on” position;
- we check the voltage at the terminals (the place where the wires are connected);
- if there is no U, we look for a break in the wiring;
- We clean the terminals and connections from traces of corrosion.
Contact an auto electrician if you are unable to trace the path of the electrical wiring.
Possible malfunctions of the locking system
If there is no reaction when you turn the key in the lock or press a key on the remote control, this means that the central locking is not working.
All causes of central locking malfunction can be divided into two types:
- technical;
- related to climatic phenomena.
In the first case, breakdowns are possible due to incorrect installation or configuration of the locking system. Subject to natural wear and tear after long-term use. The service life directly depends on the quality of the device.
In the second case, the central locking system may fail under the influence of low temperatures and it may freeze. The lock may not work if water gets into the mechanism during rain or melting snow.
The central locking system may not work due to an incorrectly installed or faulty alarm system. In this case, you should diagnose the locking system. The control activator is installed in the driver's door. As soon as the drive is activated, signals are sent through the appropriate channels to the remaining activators, according to which the required action is performed. Therefore, you should check the operation of the lock using the key and the button on the key fob.
If the doors sometimes close, sometimes they don’t, then the reason may be in the control circuit or a violation of the integrity of the electrical circuit of the car alarm. The reason why the central locking system fails to operate may be insufficient battery charge or a blown fuse. Depending on the circuit being used, there may be multiple fuses. They all need to be checked and faulty ones replaced.
The fuse can burn out as soon as it is installed, due to a short circuit or overload, for example, when controlling the central locking with a key fob, and not manually. In warm weather, the reason is a short circuit, which is possible due to poor contacts or an open circuit. The cause of the breakdown may be a malfunction of the central locking control unit.
You can check the operation of the unit using a multimeter by checking the power supply to the activators. Current is supplied to the contacts of the unit by unlocking and locking the driver's door. If the control unit is broken, it needs to be replaced.
Repair of electric central locking
The central locking system on a VAZ-2114 of this type begins to work intermittently after a while. They will be associated with temperature fluctuations. Most often, unstable operation of an electric central locking system will be observed at low temperatures or high air humidity, that is, in the autumn-winter period. At first, the mechanisms will jam slightly, then opening or closing will not occur at all. Most often, this problem occurs on domestic cars with pre-installed central locking from the manufacturer. It is better to replace locks with solenoids installed at the factory with central locking systems with motors, which will be more reliable.
Location of the main fuse block
The main fuse and relay block of the Lada Kalina is located under the left panel of the steering wheel, where the main light switch is located.
In order to gain access to the main fuse panel of the Lada Kalina, you need to do a number of manipulations:
- On the closing panel, on the left and right, there are grooves that need to be pulled alternately. Also below. This operation should be done carefully so as not to break the plastic fasteners.
Gently pull and remove from the grooves
Gained access to the fuse box
Thus, the fuses and relays of the main unit of the Lada Kalina, as well as the control board, are changed.
Location of additional fuse box
The additional fuse box is marked with an arrow in the photo.
The additional relay and fuse box for the Lada Kalina is located to the right of the front passenger's feet. It can be accessed by unscrewing the cover bolts and removing it. In order to dismantle this block, unscrew the 3 mounting bolts. The replacement process is carried out in the same way as with the main unit.
Why doesn't the rear window heating work?
The heated rear window provides good visibility (fights icing and sweat during the cold season or during temperature changes). It is difficult to overestimate this function, because the driver’s ability to adequately and fully assess the road situation is worth a lot.
Stern heaters are practically no different from each other. Threads that conduct electricity are applied to the glass from the inside. They heat the surface, which melts the ice and removes moisture.
System components:
- threads (there are different quantities - depending on the model);
- wires (supply current);
- safety relay;
- fuse;
- “On” button with indicator.
Let's look at the most likely causes of heating failure.
Engine
The twelfth was equipped mainly with 16-valve engines. Which seriously damaged the reputation of the car. The engine was supposed to become more economical, powerful, and fast. However, at the “bottoms” it was weaker than the 8-valve, a little more economical, but not significantly. Faster - however, in the city, thanks to the “bottoms”, the eight-valve engine won. But on the highway, the difference was unnoticeable.
The advantage of Kalina, compared to the twelfth, was an old, proven, reliable, unpretentious horse - an 8-valve engine, known from the 08 - 09 family of the Volga Automobile Plant. The only downside of this engine was its tractor-like rumbling. Otherwise, this is an ideal domestic engine:
- Powerful.
- Economical.
- Reliable.
- With high maintainability.
Kalina was supposed to become Oka’s successor; it was initially planned that the tenth family and Kalina would occupy different niches. If we compare the base of cars, then the twelfth:
- It is 32 centimeters longer than the Kalina hatchback.
- Wider by 10 centimeters.
- Ground clearance by 10 mm. above, which is more practical.
- The trunk volume is 120 liters larger.
Repairing broken wires
As a rule, most often the wires break off or break in the corrugation of the door. This is due to the fact that the door is constantly opening or closing, and the wire insulation is quite thin. To eliminate the problem of broken wires from the rubber corrugation of the door, you need to slowly pull out one wire at a time that approaches or departs from the central locking unit for power or control. A broken wire can easily be pulled out of the total mass. You can connect the break using a simple connection using male-female terminals. If the break occurs in another place, it is necessary to test all wiring with a multimeter. When checking, it is worth remembering that voltage will be present on one wire only at the moment of opening, and on the other - when closing the central lock.
How to check if the switch is working properly
For diagnostics, take a regular marker light bulb rated at 12 V, where 2 wires are soldered. Then remove the instrument panel. You can do this by following the step-by-step instructions:
- Using a Phillips-head screwdriver, unscrew the 3 screws that securely secure the left center console screen.
- Remove the trim, and then remove the protrusion located at the bottom from the body bracket.
- Continue working with a Phillips screwdriver - remove the 5 screws secured in the right console trim and remove the screen.
- Disconnect the terminal that goes to the negative wire of the VAZ-2115 battery. If there is a radio receiver here, remove it and disconnect the harness block using a wire, or remove the plug container from the panel.
- Next, your task is to disconnect the plug from the cigarette lighter. The socket of the lamp illuminating the ashtray is removed.
- Pull the handle off the levers using a narrow screwdriver.
- Pull the handle that activates the electric fan switch of the VAZ-2115 stove in your direction, and then pry it lightly with a screwdriver.
- A Phillips screwdriver will be needed again to unscrew the 2 screws located above the devices, as well as the 2 screws below them.
- Pry up the plug and unscrew the screw under the plug.
- Get rid of the pair of screws that secure the trim.
- Remove the instrument panel trim and unscrew the remaining fasteners.
Once you reach the switch, check its serviceability in this way:
- Turn on the ignition of the VAZ-2115.
- Compare the negative wire of the light bulb with the body ground.
- Connect another light bulb to outputs 1, 2, 3, which pass through an additional resistor.
- If the light comes on, then the switch is working.
- If the light remains off, switch the light source to the positive wire to the heater position switch. If the lamp still does not light up, it means there is an open circuit, perhaps the fuse has simply been blown out.
The rear window heating does not work, but the button is “on”
I noticed that the glass on the back does not defrost. The relay does not click, the button lights up.
I immediately ruled out the option of a non-working button, since firstly it lights up, and secondly, I updated all the buttons immediately when I bought the car about two years ago and was more than confident in the functionality of this one.
I started checking with the relay.
Taking it off
And further disassembled.
You can see how everything melted.
I was surprised by this design, how many relays there were on 2110 and they all worked on a spring, like this:
And here is a plate with the same operating principle.
So, we connect the plus and minus from the ROM to the red circles.
ROM
at, say, 10A, so that there is enough power to operate relay A to the yellow ones for the multimeter to ring:
I apologize right away, there was a picture of a sample here earlier, I threw it in by mistake, now I replaced it.
The polarity doesn't matter what's on the ROM at all.
And we see that nothing works, doesn’t beep, the plate only slightly gives a one-time push, trying to close the contact, “but it doesn’t work.” We help her with our finger and hear a squeak from the multimeter. I have several of these relays left from the 2110, some of them I removed from the car:
I took some new ones “as a spare”, took one of them and checked it the same way, the tester lit up.
Just installed a working one.
I checked the heating on a car with a new relay, everything works properly: the relay clicks, the glass thaws.
As for the relay, I read that sometimes it turns off after 20 minutes, nothing will melt if you forget to turn it off, you need to buy one.
Lock: repair, unlocking, assembly
If the back or other door of a VAZ 2114 does not open, then you will have to work from the interior. It is important to take care of lighting. To open the door, replace or unlock the lock, the following instructions are provided:
- The plugs on the handle of the door element are removed.
- Three screws are unscrewed: two on top, one under the armrest.
- The cover is removed.
- The handle locks are disabled.
- The decorative panel comes unfastened.
- Electrical wiring is disconnected.
- The handle and plastic cap of the lock are removed.
Next, the condition of the core is checked. If the teeth are broken or deformed, replacing them will unlock the mechanism. Otherwise, you will need to remove the cylinder and install a new part. Repair algorithm:
- In the open lock, the rods are unfastened.
- The staple is removed.
- The plastic fastener comes off.
- The lock washer, liftback and electric drive wires are removed.
- The core is removed.
If the lock body is not deformed, then the cylinder is repaired or replaced. Collection is carried out in reverse order.
Principle of operation
How is the central locking system controlled on the VAZ-2114? The algorithm of the central locking operation is that a control pulse arrives at a certain point, as a result of which one relay with power contacts is activated. In one case the car is locked, in the other – vice versa. Central locking activators are connected to relay contact 30, and through closed contact 87, ground acts on both outputs of the activator. If one or another relay is triggered, then contact 30 will be connected to the positive, and as a result, temporary voltage will be supplied to the activator, which will set the rod in motion, which will either open or close the door.
Experts' opinions
Many experts who have encountered the problem that the central locking on a VAZ-2114 does not work argue that all problems with the device should be divided into certain categories. Below we will look at each of them.
- Complete device failure.
- Partial lock failure.
- Operation malfunctions due to mechanical, electrical or other defects.
If a problem occurs with the central locking, the car owner must independently determine which of the above categories the breakdown falls into. Therefore, repairing a fault should not begin with disassembling a particular unit - it is enough to conduct a thorough diagnosis of the equipment. Thanks to the diagnostics carried out, the car owner will not only reduce the time spent searching and solving the problem, but will also reduce the monetary costs of repairs.
