During the operation of the car, an effect occurs when the headlights lower slightly. This happens due to the fact that on uneven roads vibration occurs in the body, which is transmitted to all fasteners. This is a simple law of physics. So, on the Lada Kalina, adjusting the headlights is quite easy.
Video about adjusting headlights on Kalina:
The video will tell you how to adjust the headlights on a Lada Kalina. Basic recommendations for the adjustment process are given.
Notes:
Adjusting the position of the headlights must be done every 20 thousand km or as needed. On the Lada Kalina, this adjustment operation is not carried out often, since deviations from the norm rarely occur (in most cases, due to road accidents).
Checking and adjusting the headlights of the Lada Kalina VAZ 1118 is carried out with a fully filled fuel tank, a set of tools and a spare wheel.
1. First check the air pressure on all tires of the car with a pressure gauge. If necessary, bring it to normal.
2. Place the Lada Kalina car perpendicular to a smooth wall (for example, a garage) at a distance of 5 m. Place an additional weight weighing 75 kg on the driver’s seat.
3. Mark the screen on the wall as shown in the headlight adjustment diagram.
4. Draw a vertical center line O on the screen, lying in the plane of symmetry of the car (the distance from it to the center of the left and right headlights should be equal). To the left and right of it, draw two more symmetrical lines A and B , which should coincide with the centers of the left and right headlights.
5. At a height h corresponding to the distance of the centers of the headlights from the ground, draw a horizontal line 1, and 75 mm below it - line 2 .
6. Turn on the low beam headlights on the Lada Kalina car by turning the headlight range control of the Lada Kalina 1118 to position “0” (this position corresponds to the load of the Lada Kalina car with one driver).
7. Closing each headlight in turn, check that the light limit corresponds to the adjustment diagram previously marked on the screen. The boundary must follow line 2. The inclined segments must begin at the intersection points.
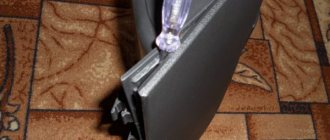
8. Insert the "6" hexagon into the regulator socket through the hole in the upper cross member of the radiator frame.
9. By turning the hexagonal adjuster 1 , located closer to the wing, adjust the position of the headlight beam in the horizontal plane.
10. By turning regulator 2 , located closer to the radiator, adjust the position of the light beam in the vertical plane. Make sure that the upper boundary of the light beam coincides with the lower horizontal line, and the break point of the beam (the point of intersection of the horizontal and inclined sections of the light flux) with the vertical line corresponding to the center of the headlight.
11. Similarly, adjust the direction of the light beam of the other headlight.
Note:
Adjust the direction of the light spot for each headlight separately. During adjustment, cover the second headlight with opaque material or disconnect the connector with wires from it.
Scheme for adjusting headlights on a Lada Kalina VAZ 1118 car:
- 1 — a horizontal line corresponding to the centers of the headlights;
- 2 - a line passing through the centers of light spots;
- A, B - vertical lines corresponding to the centers of the headlights;
- O - center line;
- h is the distance from the centers of the headlights to the floor;
- d is the distance between the centers of the headlight lamps.
Self-installation of fog lights on a Lada Kalina car
On the Lada Kalina, there are protective plugs in the places where the foglights are installed, so you don’t have to make holes in the bumper; just remove them.
- First you need to remove the bumper, for which you should unscrew the bolts and screws from the bottom of the bumper and under the grilles, you should also unscrew the screws in the wheel arches, with which the edges of the bumper are secured. Then you should remove the sides of the bumper from under the wheel arches and completely remove it.
- Then you should remove the plugs (you can use a flat screwdriver to bend the latches) and screw the PTF onto the self-tapping screws (three for each headlight).
- Inside the car, above the clutch pedal, you need to find the place where the bundle of wires goes, push out the seal, and then, using steel wire, pull the wires from the foglights next to the main wires.
- Afterwards, you need to connect the fog light wires to the main wires and tighten the entire bundle with ties (plastic clamps).
- Opposite the fog lights, you should leave wires of sufficient length with connectors, screw the negative terminals to the screws on the car body, and secure the wires with zip ties.
- Since the total power consumed by the PTF is 110 W, they must be connected via a relay, which is controlled by a button. The button is installed inside the car, on the dashboard. Power for the headlights can be obtained by connecting to the pink wire in the fuse box (it goes to relay K7, which turns on the high beams). You can also power the PTF from the blue-black wire that comes from the ignition switch.
- The PTF must be connected through a 15 A fuse. To do this, you need to connect the power contacts of relays 87 and 30 to the wires to the fog lights and the fuse, respectively.
- After all the connections have been made, you need to check again that the connection is correct and then connect the battery terminal, and then make sure that the fog lights turn on when you press the button.
- Then reassemble the bumper in reverse order. Of course, after assembly there should be no extra screws left.
Reasons for adjusting headlights
Headlight position during final adjustment
Many car enthusiasts do not understand why and how to adjust headlights. According to regulation No. 699 of the “International Automobile Convention” of December 12, 1999, there are basic rules for the use of light at night. It states that car light must fall at a certain angle, offset to the right for left-hand drive cars, and to the left for right-hand drive cars.
It is for this purpose that headlight correctors are installed on the car. If they are not enough for full adjustment, then you need to adjust the light manually by adjusting the headlights using the mounts.
Another reason is the load on the car, the curb weight, as well as the number of passengers who regularly drive the car.
The process of adjusting headlights on Kalina
The headlights should only be adjusted with low beam, the PTF should be turned off. If you do not have fog lights, then read the material on how to install them.
Before proceeding directly to the adjustment process, you need to refuel the car to a full tank, put on a spare tire, and also call an assistant. Place a helper behind the wheel.
Garage door adjustment process
Thus, it turns out that the car is fully equipped. Ideally, have a standard adjustment marking for headlights on the wall of the garage, but if this is not available, you can use a regular wall.
Markings on the wall when adjusting headlights
Let's look at how to adjust the headlights on a Lada Kalina:
- We check and adjust tire pressure to normal.
- The distance between the wall and the car should be 5 meters.
- We apply markings as in the figure above.
- Open the hood and unscrew the top headlight mount.
- For each headlamp, we adjust the light beam separately.
Adjustment of headlights through special holes in the front panel. 1 - in the horizontal plane), and 2 - in the vertical plane.
How to independently adjust the headlights on a Lada Kalina
The car enthusiast will need to make a minimum of effort; for convenience, below is a complete list of the necessary components.
- An additional pair of hands in the person of an assistant.
- Five meter tape measure.
- The nearest flat vertical surface, be it the wall of a house or a fence.
- Cardboard sheet. It is necessary to cover the adjustable headlight.
Scheme for adjusting the head light Armed with everything you need and waiting until it gets dark, you can begin the adjustment process. It is worth remembering that the car must have the correct tire pressure, without excess load, and the corrector must be set to the zero position.
On the selected surface it is necessary to draw a screen according to the diagram shown.
Having measured five meters from a vertical obstacle, you need to install the car perpendicular to it and alternately cover the headlights with a cardboard sheet and adjust them with a six-millimeter hex key.
In this case, it is necessary to compare the light from each headlight with the circuit used. For both headlights, set the upper limit of the low beam to line 2, and bring the bends of the beam boundaries to points A (for the left) and B (for the right).
From time to time, drivers encounter an unpleasant and dangerous moment - a light curtain. A wide, high beam from the vehicle's lighting illuminates the space in front of the car. This situation causes 30% of road accidents.
This is easy to avoid: it is important to systematically check and adjust the position of the lighting equipment on the car. This is not the most difficult task, and can be done independently without the involvement of specialists. The algorithm is universal for all machines. As an example, let's look at how the Kalina Lada headlights are adjusted.
Question and answer: what should not be allowed under any circumstances
Q: What happens if you buy lamps with a base other than “H7”?
A: It will not be possible to install lamps in a standard headlight.
Q: If I use more than 55 watts of power, will this cause overheating?
A: Excessive power leads to the fact that the fuse in the low beam lamp circuit burns out. A separate fuse is used for each of the lamps, so it will not be possible to “deceive” the automation.
Q: Are halogens afraid of power surges?
A: For incandescent lamps, excess voltage is a harmful factor. In the case of using halogen lamps, there will be two harmful factors: overheating, underheating. Actually, this is why MTBF can be considered a relative rather than an absolute value. This value depends, and depends strongly, on the stability of the voltage.
Headlight range control: device and malfunctions
A device that monitors and regulates the position of a car's lighting devices is called a headlight range control. It is possible to adjust the headlights on Kalina using:
- Kalina manual headlight leveler;
- electric headlight corrector.
The principle of operation in both cases is similar, the difference is one. The first option involves making the correction using a regulator installed inside the car. The driver himself changes the tilt of the car lighting. The electric corrector works automatically: depending on the location of the machine, the device changes the angle of inclination of the optics.
In 45% of cases, failure of optical devices is due to the fact that the corrector on the Lada Kalina does not work.
- Sensor inaccuracy. Failure of the bracket leads to a failure of the tracking element synchronizer performance.
- Souring of contacts. Due to the reduced conductivity of the electrical wire, the device begins to malfunction.
- Factory defect. The regulating element falls out of the electric corrector.
Step-by-step replacement instructions
Each H7 standard bulb has an iron base, which is pressed to the headlamp with a wire clamp. To bend this bracket, just get close to the plane of the headlight from behind. Let's open the hood and see what exactly will bother us.
Engine compartment of Kalina-2 (VAZ-2192, 2194)
Behind the headlight on the right is a washer reservoir. It is dismantled like this: disconnect the electric motor terminals, tighten the plug harder, find one nut and one fastening bolt. The fastening elements are unscrewed with a 10mm wrench, then the tank is placed on the engine. Next we could look at how to remove the headlight on Kalina-2, but in this case this is not required.
Before performing any manipulations with electrical equipment, always disconnect the negative terminal of the battery. It is better to connect this terminal last (before closing the hood). Be careful.
Replacement sequence:
- Remove the rubber cover covering the low beam lamp compartment;
- Disconnect both terminals from the lamp contacts;
- The fastening bracket is removed from the grooves by first pressing on it, then the bracket is moved to the side;
- They take out the lamp, install a new one in its place, and return the bracket to its place.
Next, perform steps “2” and “1” in reverse order. The connection diagram is not important - there are only two contacts, and both go to the filament. Now, if we connected LEDs, then everything would look more complicated.
The bracket presses the cartridge to the plane of the headlight
When installing a halogen light source, you must remember: the surface of the lamp glass must be perfectly clean. Do not allow grease marks to remain on the flask. Installation is carried out using only cotton gloves. The glass of the flask is cleaned with industrial alcohol or Secunda.
How to set up the headlights on a Russian state-owned Lada Kalina with your own hands
Lada KalinaThe head light of a car is a fundamental element when driving at night.
Currently, there are no vehicles left that are devoid of lighting technology. This fully applies to the Russian automaker AvtoVAZ. The bestseller of this brand is the budget model Kalina, which is in strong demand in the post-Soviet space. It is equipped with a minimal amount of additional equipment, but, fortunately, it does not lack the most important thing - front optics, without which driving a car at night is unthinkable.
