How to choose tuning for VAZ-2111
To simplify the task of the owner of a VAZ-2111, we suggest studying some rules that will allow you to update your car quickly and beautifully:
Pay attention to the details of the car, especially the body, which immediately catch your eye. The front and rear bumpers definitely need to be replaced. How to do it? First, visit a store that sells auto parts. You can replace the air intake mounted by default - instead of the boring part, install a stylish branded version; a sporty model is more suitable for a guy. Use your imagination and buy the best suspensions for your iron horse, don’t go cheap - inexpensive models cannot boast of good dynamism and streamlined shapes. Add tinted deflectors
They will allow you to further stylize the VAZ-2111 and provide the necessary comfort to the driver and passengers. Many beginners do not know that a properly selected deflector can redirect air in the right direction, as well as improve ventilation in the car interior; road dust and small stones will not get inside the vehicle. Appreciate the color of the body as if from the outside. What would you like to add? It is not necessary to radically change the color of the vehicle, you can at least change the hue, add saturation or, conversely, blur, it all depends on the wishes of the car owner. Contrast will provide depth. It wouldn't hurt to install a camera in the cabin that shows the picture from behind. This camera adds an unusual charm to the VAZ-2111, and in case of an accident the camera will become an indispensable assistant.
How cool tuning the interior and exterior of a VAZ-2111 can look is shown in the video below, you might like a few ideas: https://www.youtube.com/watch?v=PQBW_7RiOmY.
Improved suspension and chassis
For a powerful engine, the car's suspension must also match. The factory suspension will not provide the required stability, unlike a rigid one, and besides, the factory rear suspension contributes to strong skidding at speed, especially in the cold season. Suspension rigidity is achieved by placing rubber cushions under the springs, installing springs from a VAZ 2121 Niva car and replacing standard oil shock absorbers with gas ones. Stability will also be facilitated by replacing the reaction rods with an A-arm, which provides clear vertical suspension travel without lateral displacement.
Car skidding at speed and in turns can be eliminated by improving the rear suspension, namely:
- replacing the lateral stability rod (Panhard rod) with a Watt mechanism;
- installation of a stabilizer on the rear axle with fastening of its ends to the car body;
- complete replacement of the suspension with another: semi-independent or independent.
As a result of replacing the suspension, you will have to change the drive, since the standard rear axle will not provide torque transmission during suspension operation. In this case, either the rear axle is installed under an independent suspension of the rear wheels, for example, a very common case when the rear axle of an Opel Omega A is installed.
Another option involves changing the drive from rear to front. In this case, you need to either change the engine and install the engine of any other front-wheel drive car, for example with a VAZ 2109, or install a gearbox with CV joints Moskvich 2141, since the first cars of this model were produced with the main engine from the VAZ 2106 with a volume of 1.6 liters, only with gearbox assembly and differential for front-wheel drive. This option will be the cheapest, unlike a complete engine replacement.
To ensure the safe operation of a vehicle, a powerful engine also requires good brakes to quickly reduce speed or stop. Absolutely every owner of a classic Lada model knows that the brakes on this car are a sore subject. The rear drum brakes are not that frustrating, but the front disc brakes leave much to be desired. A disease of a two-piston caliper is the frequent souring of one of the working pistons, as a result of which, in addition to uneven wear of the brake pads and disc, the braking of the car itself is not effective and it can be carried to the side.
Without solving the problem, the piston boot breaks, and replacing it will take a lot of precious time and money from the owner. If you take good care of the braking mechanisms of the front wheels, then the correct operation of the two-piston calipers provides very good braking, but most owners replace them with the calipers of VAZ cars of the Samara family. They are easy to maintain and also provide good braking of the car. It is also possible to replace the calipers and discs with sports ones, since sports calipers allow you to quickly reduce speed or stop the car, and ventilated discs will increase the service life of the brake pads and thereby increase braking efficiency.
Wireless charger
Modern business class cars have many useful options, for example, wireless charging of a mobile device. Many people have phones that are charged from a special unit. You can make a similar base yourself in the car in question. Let's consider all the features of such a modification. Wireless power supply occurs via the QI channel. This standard can be used to transmit energy over a distance of up to 4 centimeters. The technology involves transferring energy between two induction coils.
A fairly popular option for installing wireless charging is to embed the unit into a tunnel. In this case, the mobile phone will be charged almost constantly, and the phone can be picked up during a call quite quickly. In order to tune the interior of a VAZ 2110, you will need the following parts:
1. Charging module, which transmits current according to the standard in question.2. A converter that can reduce the voltage from 12 V to 5 V.3. A heat gun that will be used to mount the power supply.
Please note that the charger model is powered from a 5 V network. That is why the connection should be made through a converter
You can create a special niche for the charging module, which will eliminate the possibility of the phone slipping while turning. The mobile phone power base is attached to the base using thermoplastic. In order to monitor charging, you can display the LED in a visible place.
In a similar way, you can create a special unit to power a mobile phone. You can also purchase special holders that are designed for charging a cell phone in a car. However, their use is quite inconvenient.
Installation of electronic seats
Another way to carry out interior modernization work is to install electrically adjustable seats. You can install the electric mechanism yourself quite quickly, the procedure will not lead to large financial costs. The work can be carried out for all VAZ cars with front-wheel drive. The modernization work looks like this:
- First you need to select the necessary parts. To change the seats, you will need a power window, a 10A fuse, buttons for adjusting the position of the backrest and a sufficient number of wires to transfer voltage from the source to the installed motor.
- You can tune the interior of a VAZ 2110 yourself: first, we disassemble the window regulator: gearbox, iron disk - these elements are necessary in order to rotate the entire mechanism being created.
- The design should be slightly changed, for which a hole measuring 14 by 10 millimeters is created.
- Next, we install the entire structure on the seat. In this case, the metal part of the mechanism should be directed towards the seat. The metal part is modified by creating a 13 mm hole in it. The metal bolt that is initially present must be removed.
- In order to eliminate the possibility of damage to the mechanism, it is worth protecting it with a special casing. It can be made from plastic.
- The buttons can be placed in any most convenient place. As a rule, the button block is moved to the central dashboard near the seats. The choice of location for the block of buttons should be taken seriously, since if they are poorly positioned, a lot of inconvenience will be created.
The above work requires the skills to connect the energy consumer to its sources. Be sure to include a fuse in the circuit, which will eliminate the possibility of the motor burning out.
Suspension tuning on VAZ cars
Very often, owners of VAZ cars try to make various kinds of improvements to their design in order to improve their performance characteristics. These are various changes in the design of the engine, brake system, gearbox, bumper, wheels, etc.
Among all these modifications, tuning the VAZ suspension occupies a special place - it is one of the determining factors in handling, driving performance and road safety.
To improve the suspension, you can seek help from car service specialists or do all the work yourself. This will help you reduce financial expenses and do everything as you see fit. Let's look at some improvement opportunities in various VAZ car models.
Tuning the suspension of a VAZ 2109 car
Eliminating "crickets"
Almost all owners of VAZ cars know what “crickets” are. When driving at a high enough speed, a hum, noise, creaking and many other sounds appear that are very annoying. This is why moving long distances will be quite painful. Let's look at the most common problems associated with car sound insulation, as well as ways to solve them.
A fairly common problem is squeaks. This is due to poor sound insulation of the interior, which does not improve even with each generation. Plastic rattling can, as a rule, be provoked by a regular blow; periodic rocking of some structural elements of the interior trim also causes quite a lot of problems.
The creaking of plastic is quite unpleasant and can make even the calmest driver nervous, and this promises big problems. There is an opinion that such sounds prevent the driver from falling asleep while driving, but this is not the case. If the driver wants to sleep a lot, then even the loudest sound will become soothing music.
Read more: VAZ 2114 stove faucet, replacing the stove faucet 2114, changing the stove faucet 2114 with your own hands. How to replace the faucet of the VAZ 2114 stove. Self-replacement of the faucet of the VAZ 2114 stove. Causes of malfunctions.
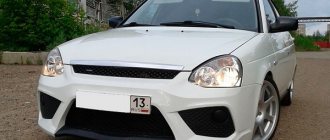
Tuning a VAZ 2111 with your own hands: photo and video examples
VAZ 2111, created on the basis of the popular VAZ 2110 sedan, is a front-wheel drive station wagon that has become widespread mainly due to its practicality. Buyers of such a car are primarily concerned with its performance characteristics, and not its appearance, so a Lada 111 in tuning is a rather rare sight. All the better for the owners of the 11th model, because their efforts to modernize the car will not go unnoticed.
The technical side of tuning the VAZ 2111 has been worked out quite well, because in this matter you can fully use the modernization techniques of the same “tens”. You can easily select suspension parts to reduce or increase ground clearance, buy everything you need to increase engine power, improve the exhaust system, etc.
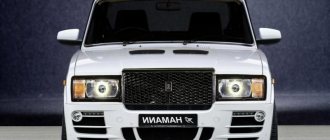
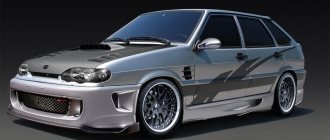
Not everything is so simple with changing the appearance of the car, however, the range of industrially produced aerodynamic kits for this station wagon includes about ten options.
In addition, you can add the desired touches to the appearance of the car by purchasing individual parts.
You can try on individual tuning elements or ready-made kits for your car using programs that specialize in virtual 3D tuning.
To facilitate your creative process and direct your thoughts in a creative direction, we have created a selection of photographs with examples of VAZ 2111 tuning posted on the Internet (see below the article).
Obviously, you can decorate a station wagon with your own hands using a lot of factory-made and home-made attachments, replace standard optics with modernized ones, organize an additional lighting system and implement many other original solutions.
LED optics of the “eleventh” in the video:
Another example of diode rear lights for a VAZ 2111 in the video:
The first and mandatory step to improving the appearance of a car with your own hands is to tint the windows and install cast or forged wheels.
Replacing the usual “stamping” not only makes the car look modern and aesthetic, but is also useful for the chassis, especially if the latter is also modified or even larger wheels are simply installed than the original ones.
Example of tuning Lada 111 on video:
The large trunk of the eleventh model is a real find for lovers of high-quality sound. Even a very large subwoofer can easily fit here, causing the envy of owners of smaller interiors. There will also be room for payload.
Installing additional keys
Please note that additional control units may be required when installing additional accessories. It is possible to install keys on the central panel
This can be done quickly and easily. The procedure for performing the work is as follows:
1. The front panel is disassembled.2. Excess plastic is cut off.3. The edges of the frame are processed to a minimum size.4. To place the keys, you should create a special base made of plastic.5. In order for the structure to be sufficiently rigid, stiffening ribs should be created.6. The buttons can be taken from any car. It is worth noting that, if necessary, you can make the buttons backlit as an indication.7. If necessary, you can repaint the color of the key to match the interior design features.
The result of the above changes is a significant increase in the functionality of the car interior. The keys can be responsible for various additional functions. If necessary, you can create a niche for a multimedia system, which will be responsible for many functions in the car: playing music, watching videos, navigation, and so on. You can purchase various multimedia systems, the cost of which varies from several tens to hundreds of dollars. If necessary, you can modify the front panel almost beyond recognition.
In conclusion, we note that before carrying out work you should always create a work plan. It will eliminate the possibility of problems and errors during tuning.
What can be changed?
First, let's look at what can be changed. The following types of upgrades are most often performed:
- Without significant modernization, it is almost impossible to make it comfortable. Such modernization means improving the degree of sound insulation. Despite the fact that the domestic manufacturer had previously announced that the car’s insulation had been carefully studied, this was not done. Therefore, it is recommended to begin modernizing the interior by increasing the quality of insulation.
- Another important upgrade is the installation of new seats. The standard ones are inconvenient, and over several years of use their condition deteriorates significantly. Modern seats have lateral support, lumbar support, and so on. The difference is significant. At the same time, we note that lateral support allows you to sit comfortably while driving.
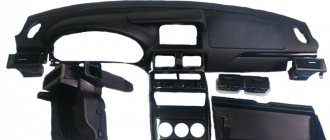
- The central torpedo can also be significantly modified. Tuning the interior of a VAZ 2110 may involve installing a new torpedo or upgrading a standard one. Note that such a change will significantly transform the interior of the car.
- You can also replace the car's upholstery. If the point is that the old one is seriously worn out, then you can find the car disassembled to look for more preserved panels. It is also possible to purchase other panels from companies that produce tuning parts.
- Other changes can be made: installing a new instrument panel, gear shift knob, installing lighting fixtures or new acoustics. There are many ways to change the interior of a vehicle.
Sidebar: Important: In order to determine the scope of the upcoming work, it is recommended to create an action plan. A lot will depend on this plan: the amount of costs, the time required to complete the work, and so on.
Tuning of VAZ 2110 interior elements: painting, ceiling covering
Over time, the ceiling in the VAZ 2110, and frankly speaking, in any other car, gets dirty, damaged, and generally becomes unsightly and spoils the appearance of the interior. Reupholstery or restoration costs a lot of money, and it must be admitted that it is quite labor-intensive.
The photo shows the process of painting the ceiling
Therefore, now many drivers decide on such tuning as painting the ceiling, especially since you can choose a color and tone to suit every taste. What are the options for ceiling paints?
- Universal paint in aerosol cans (you will need about five pieces). You can choose matte paint or shimmer. The only thing you need to remember is that the top may “crumble” a little, plus the interior must be ventilated for several days.
- Universal and water-based paint. They are mixed to soften and better adhere the paint to the soft ceiling material.
- Paints for velor, suede, textiles in the form of aerosols. These types are best used for the ceiling, since painting with them will not make it hard, and the paint will apply more evenly and without stains.
Painting result
Panel modernization
The appearance of the dashboard on the very first Twelves was very far from ideal. In 2006, AvtoVAZ engineers tried to correct this situation and began installing “European”-style panels on these cars. And today, owners of old cars are modernizing their cars by installing Europanels on them.
Europanels began to be installed on the VAZ 2112 only in 2006
Sequence of work
To remove the panel you only need a couple of tools: a knife and a Phillips screwdriver.
- The instrument unit is removed along with the decorative visor as described above.
- The car glove compartment opens. There are 3 self-tapping screws inside; they are unscrewed with a Phillips screwdriver.
- There are 4 plugs located near the central control unit. They are pryed with a knife and removed. The screws located under them are unscrewed.
- The safety block opens. Inside there are 2 self-tapping screws. They also get out.
- The old dashboard trim has been removed from its fasteners. All that remains is to remove it by pulling it towards you and up.
- The removed trim is replaced with a new europanel, the fastening screws are returned to their places (all the mounting holes for the old and new trims match, so there will be no problems).
Improved dashboard lighting
The VAZ 2112 dashboards have always had one problem: dim lighting. This was especially noticeable at night. So the first thing tuning enthusiasts do is change the light bulbs in the instrument panel. Initially, there are simple and extremely weak incandescent lamps. They are being replaced by white LEDs, which have two advantages: some are durable and economical. Here's what you'll need to get started:
- 8 white LEDs;
- medium sized flathead screwdriver.
Sequence of operations
To remove incandescent lamps from the VAZ 2112 instrument unit, you will have to unscrew it and pull it out.
- The steering wheel moves down all the way.
- Above the dashboard there is a visor into which a pair of screws are screwed. They are removed using a screwdriver.
Video: removing the instrument panel on a VAZ 2112
How to do tuning of the VAZ-2112 interior with your own hands
It is a fairly common saying that a car is the world of its owner. Therefore, as soon as they buy a car, everyone tries to change it. Some strive to improve, others to make individual. But these changes will immediately show who is the boss. Moreover, by the appearance of the car you can tell a lot about the owner. More precisely about his interests, preferences, etc.
There are many ways to accomplish your plans. Today, VAZ-2112 tuning is actively used. It is mainly carried out by specialists. To do this, they have everything they need: tools, equipment, and, of course, skills and experience. But, as practice shows, you can do tuning yourself. This procedure is not the most difficult. Before you start work, you need to prepare. As a result, the result of the work will be in no way inferior to professionals, and will be more valuable, since you will put a piece of your soul into your car.
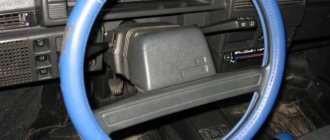
Replacing the braid on the steering wheel
The standard braid on the VAZ 2112 is made of leatherette, the surface of which seems too smooth to many. The steering wheel simply slips out of your hands, which is very dangerous when driving. Therefore, almost all owners of “dvenashki” change the standard braids for something more suitable. There is now a huge selection of braids in spare parts stores. The steering wheel of the VAZ 2112 requires a braid of size “M”. It is put on the steering wheel and sewn along the edges with ordinary nylon thread.
Tuning of VAZ 2110 interior elements: painting, ceiling covering
Over time, the ceiling in the VAZ 2110, and frankly speaking, in any other car, gets dirty, damaged, and generally becomes unsightly and spoils the appearance of the interior. Reupholstery or restoration costs a lot of money, and it must be admitted that it is quite labor-intensive.
The photo shows the process of painting the ceiling
Therefore, now many drivers decide on such tuning as painting the ceiling, especially since you can choose a color and tone to suit every taste. What are the options for ceiling paints?
- Universal paint in aerosol cans (you will need about five pieces). You can choose matte paint or shimmer. The only thing you need to remember is that the top may “crumble” a little, plus the interior must be ventilated for several days.
- Universal and water-based paint. They are mixed to soften and better adhere the paint to the soft ceiling material.
- Paints for velor, suede, textiles in the form of aerosols. These types are best used for the ceiling, since painting with them will not make it hard, and the paint will apply more evenly and without stains.
Painting result
Ceiling covering
The material from which the ceiling covering in the VAZ 2112 is made gets dirty very quickly. Over time, a dark spot appears on the ceiling, directly above the driver's seat. Similar spots appear above the heads of passengers (but, as a rule, later). Re-upholstering the ceiling covering on your own is not an easy task. But finding a reupholstery specialist is not easy, plus his services are not cheap. So VAZ 2112 owners do it simpler and simply paint the ceilings of their cars using universal paint in spray cans (to paint the ceiling of a “two-wheeler” you need 6 of them).
Sequence of work
Painting the ceiling directly in the salon is not an option. First, the coating must be dismantled.
- The ceiling covering in the VAZ 2112 is held on by 10 screws and 13 plastic latches located around the perimeter. To remove the screws, use a Phillips screwdriver. The latches are opened manually.
Illuminated seat belts and locks
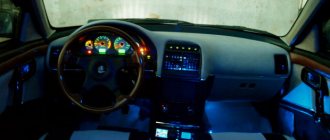
You should pay attention to the possibility of changing the car interior by installing backlighting for the seat belt, handles and locks. Such changes are not only attractive, but quite useful - you can simply find a belt, handle or lock in the dark
In our case, we use a red backlight.
It is quite attractive at the right time and gives the interior a sporty look. In order to carry out the modernization in question, you should purchase some elements:
- Resistors and drivers.
- Wires, the length of which is 1 meter.
- LEDs in the amount of 4 pieces.
- Thermal gun and insulating material.
These consumables can be purchased at a fairly low price.
The job of creating the backlight consists of doing the following:
1. Tuning the VAZ 2110 interior begins with dismantling work. The seat belt buckle can be disassembled by unscrewing the bolt. Please note that there is no need to dismantle the seats. The structure is disassembled by slightly expanding the body using a knife or thin steel plate or screwdriver.2. After completing the dismantling work, the LEDs should be attached. Fixation is carried out using special glue. In this case, the cable is also fastened using the method in question.3. We check that these elements do not interfere with the functioning of the belt. Otherwise, rework will need to be done.4. If nothing interferes, then you can reassemble the structure in the reverse order. 5. In order to significantly increase the service life of diodes, you need to use resistors when connecting.6. Quite a lot of problems are caused by wiring connections. It extends under the seat, then into the tunnel.7. The diodes are connected depending on the needs.
The above points should be taken into account when considering how to change the interior by installing lighting. Tuning the interior of a VAZ 2110, carried out by installing LEDs, does not take much time.
| Engine | 1.6 l, 8kl (Euro-2) | 1.6 l, 16cl (Euro-2) | 1.6 l, 16cl (Euro-3) |
| Load capacity, kg | 475 | 475 | 475 |
| Luggage compartment volume, dm3 | 450 | 450 | 450 |
| Permissible total weight of a towed trailer with brakes, kg | 1000 | 1000 | 1000 |
| Permissible total weight of a towed trailer without brakes, kg | 500 | 500 | 500 |
Interior renovation costs
And everyone is healthy again!