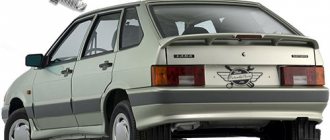
VAZ 2110 cars, also known as Lada 110, have gained popularity among many car enthusiasts both in our country and abroad. These cars were produced in Tolyatti from the mid-1990s until 2007. They were produced abroad, under license, until 2015.
The VAZ 2110 was designed in the second half of the 1980s, back in the Soviet Union. Its release was planned for 1990, but due to financial disasters in the post-Soviet space, it took place five years later. For its time, this car was an excellent representative of its class and price category. And despite a number of complaints about build quality in the 1990s, the VAZ 2110 has earned a reputation as a reliable and inexpensive car with a modern design.
The best lamps for VAZ 2114
Let's consider which low beam bulb can be used for installation in the headlights of a VAZ 2114 car:
- Bosh A 12-60+55 VAZ H4 plus 60;
- Osram H4 Night Breaker Unlimited +110%;
- General Electric H4 12V 60/55W P43t GE;
- Philips H4 3700K X-treme Vision +130%;
- Koito WhiteBeam III Premium 4500K.
This list is far from complete, however, a simple listing does not make sense. It is important to consider that all lamp models have their own purpose and specificity. When purchasing, you need to select samples for existing conditions and loads.
Which modification is better?
H4 halogen lamps installed on the VAZ-2114 are divided into:
- Standard.
- Enhanced light beam.
- Improved visual overview.
- All-weather.
- Increased power.
They are two incandescent filaments for low and high beam lighting. Lamps with a power of 60/55W are considered optimal among them.
Standard H4 lamp
Such lamps are mounted on every car of this VAZ model.
High beam lamp
High light flux lamp +30%
They are designated as +30%, 50% and so on. In addition to consuming “their” 55W and percent, they produce brighter light. But the duration of their operation is not long, although the price is more expensive.
Improved visual overview
Illuminated with white light familiar to the eye. Consuming the usual 55 W, they illuminate brighter, despite the bluish tint of the bulb.
They provide an excellent background light on snowy and dry roads. On a wet road it is better to use yellow fog lights. Doesn't blind oncoming cars. The service life of these does not differ from standard ones, despite the inflated price. Manufacturers prefer lamps with a yellow or bluish tint.
All weather
All-weather yellow lamp
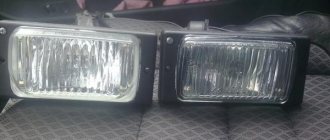
The lamps are specially coated with a yellowish tint, which allows the light to achieve the contrast of the area in bad weather, especially cloudy (foggy). Yellow light has less reflection.
Increased power
They are in demand among owners who do not particularly know the “subject of the dispute.”
High-power lamps lead to consequences such as blinding an oncoming car and causing an accident.
Replacing the low beam lamp
I hope that you have already chosen and bought what you are going to change. Therefore, let's understand the features of replacing the low beam bulb of a VAZ 2114.
We will need:
- cotton gloves or a piece of clean cloth;
- lamp H4;
- screwdriver and pliers (just in case).
Replacing a lamp on a VAZ 2114 is quite simple. We need:
- turn off the ignition;
- open the hood and disconnect the battery terminals.
Next, the process of replacing the low/high beam lamp on Kirzhach and Bosch headlights is slightly different. If you have Bosch headlights, then:
- We examine the headlight from the back and see that it is covered with a round casing. We turn the casing counterclockwise, its fastening resembles a bayonet mount.
- Remove the terminal block from the H4 bulb.
- We compress the antennae of the locking spring and disengage the lock.
- We remove and change the lamp.
Replacing a lamp in a BOSCH VAZ 2114 headlight
Be careful not to touch the bulb of a new halogen lamp with your hands. The oil from your hands will cause it to fail, so wear gloves when working. Try not to touch the lamp and parts of the engine compartment.
The main and only difference between the Kirzhach headlight is the mounting and shape of the rear shield. It is not round, but rectangular; therefore, to remove it, you do not need to turn it counterclockwise, but unscrew the fastening screws (indicated by number 3 in the figure). This can be done by hand, and if it doesn’t work, then pliers or a screwdriver will help us.
Farah Kirzhach: rear view
After assembling the headlight and connecting the battery to the vehicle's on-board network, you can begin operating your car with new high/low beam bulbs. Changing the low beam bulb on a VAZ 2114 turned out to be as easy as shelling pears! Have a nice trip, share in the comments what lamps you use!
Types of lighting fixtures
There is an opinion among police officers that every fifth road accident occurs due to the fault of incorrectly selected or faulty lighting devices, so a reasonable question arises: “What are they?”
Standard bulbs VAZ 2114
There are two types of lamps, one of which has subtypes:
- xenon – the popularity of “xenon” and “bi-xenon” and other buzzwords, which, in essence, call one type of lamp, appeared for a reason, because this lighting device has a whole bunch of positive aspects against just one drawback. On the negative side, they note that the VAZ 2114 network is designed for halogen lights, and difficulties often arise with the installation of xenon. If you solve this problem, you will get: a double reduction in energy consumption, triple light, gentle load on the generator and engine, and almost ten times the service life in comparison with halogen analogues;
Xenon bulbs VAZ 2114
- halogen - are a classic solution, have several advantages over their xenon counterpart, but do not solve the main tasks assigned to lighting devices. Among the advantages, they usually note the ability to configure a passive view of the roadside, which is not essential for new European cars with intelligently customizable headlights, but is still important for the VAZ 2114, and the ability to choose the color of the headlights. They have many more disadvantages than “xenon lights”: high energy consumption, regular maintenance work, excessive heat transfer during operation.
Halogen bulb VAZ 2114
Replacing all lamps in the headlight on a VAZ 2114
Headlight bulb - basically, wherever the lamps are, but still they do not last long because they burn out from time to time, but many do not know why this happens, basically lamps should not last too short a life, they fail only for three reasons, namely, the lamp can fail due to the fact that you got it defective and thus has poor contact, and it also fails little by little because it does not turn on smoothly but abruptly, thereby causing a filament incandescent current flows very quickly and in connection with this the light bulb can burn out, and it also fails due to the fact that the light bulb is not designed for the voltage that your wiring produces, for example, you bought a 220 volt light bulb (considered using the example of a chandelier) , and the chandelier wiring produces 230-240 volts and therefore the lamp burns out very quickly.
Note! In order to replace a light bulb on a car, you will need to stock up on: A clean rag in case you suddenly stain the new lamp and alcohol, thanks to which you will clean the dirt from the dirty lamp!
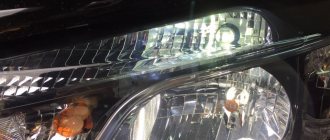
Where are all the bulbs in the headlight?
Inside the headlight itself there are only two lamps, namely a side light bulb (the location where it is installed is indicated by a blue arrow) and a halogen lamp (the location is indicated by a red arrow), another lamp is built into the turn signal of the headlight unit, this indicator is not in the photo below and There is no point in showing the inside of it, the most important thing is that you have an idea of the main headlight, namely what is behind the headlight glass.
Note! Both of these lamps, that is, the side light lamp and the halogen lamp, are needed for completely different purposes, for example, the side light lamp is very small (It is also shown in the photo below) and is needed only to indicate the dimensions of the car in the dark day and it turns on together with the low beam of the headlights, but for the low beam of the headlights and for the high beam one single halogen lamp is already responsible, which many already know about, and so the halogen lamp in the car of the Samara 2 family is used with two filaments and thus it shines for the low beam as well (One thread is heated) and high beam (Both threads are heated)!
When do you need to change all the bulbs in the headlight and which bulbs will be discussed in the article?
It is very difficult to predict when a lamp will fail, because most lamps fail instantly (But they can also gradually), so to prevent this from happening to you, for example, you are driving along a dark road to a distant area and your lamp immediately burns out , it is recommended to always carry spare bulbs in your cars, and besides, changing them will not be difficult.
Now a few words about which lamps will be discussed in the article, and we will talk about replacing all the lamps that are built into the headlight unit, that is, we have written instructions for a separate replacement of a halogen lamp, as well as for a separate replacement of the side light bulb and, accordingly, about the light bulb that is built in to the turn signal.
A few final tips
To avoid injury and replace correctly:
- wait a while after turning off the headlights - halogen headlights get very hot and if you don’t wait, you can get burned;
- do not choose too bright headlights - even burnt-out wiring is not as important as the lives that can be crippled by a driver blinded by you;
- Always carry out work with gloves - temperature, cracked glass, unexpected condensation, all this will not harm you if you protect yourself.
- https://vaz-2114.info/kakie-lampochki-stoyat-v-farah-vaz-2114-i-drugih-svetovyh-priborah/
- https://svetilnik.info/avtomobilnyj-svet/lampy-vaz-2114.html
- https://carfrance.ru/kakie-luchshe-lampy-postavit-v-fary-vaz/
- https://remontvazov.com/kakie-lampy-luchshe-postavit-v-fary-vaz-2114
How to replace all lamps on a VAZ 2113-VAZ 2115?
Note! Before you start, be sure to keep one thing in mind: under no circumstances should you touch the glass bulb with your fingers, otherwise this could cause your light bulb to fail much faster, so we recommend that you replace the light bulbs with clean gloves, but if If you have already touched the glass flask with your fingers, then before installing the lamp, wipe the entire flask from grease and dirt with a clean rag soaked in alcohol!
Replacing the low and high beam lamp
1) As was said earlier, there is only one lamp for the low and high beam, but it is two-filament, so to replace it you will need to first open the hood of the car and then find two bolts on the back of the headlight unit (Bolts are indicated by arrows ) that secure the headlight cover, after these bolts come out, unscrew them completely by hand and then, as shown in the small picture below, remove the plastic cover from the headlight block.
2) Now that the car is de-energized, disconnect the wire block from the terminal of the halogen lamp and then take it aside.
3) Then take a closer look at the terminals of the halogen lamp, there will be a spring clamp that holds the light bulb while driving so that it does not fall out of the headlight, so using your hand, fold this spring clamp down, as shown in the small photo below and then pull it lamp leads (For clarity, the leads are indicated by red arrows), remove it from the hole in which it is located.
Note! The new halogen lamp is installed in the headlight unit in the reverse order of removal, but when installing, always remember that you cannot touch the glass bulb with your fingers, otherwise your lamp will quickly burn out and will not work!
Replacing the side light bulb
This lamp is replaced very simply, in order for you to be able to remove the old lamp, you will first need to open the hood and remove the same plastic cover that was discussed just above, in the section “Replacing the low and high beam lamp”, so first remove this completely roof and simply pulling the wires that fit the side light lamp, pull it out of the hole in which it is located and then, holding the lamp itself with your hand, simply remove it from the hole, thereby you will remove it from the chamber, as shown in the small photo slightly below:
Note! In some cars of the Samara family, the optics are slightly changed, so on some cars there are side light headlights that are held simply by tension, and there are those that are specifically fixed in the chamber, those that are held by tension do not need to be turned anywhere, you just need to pull it by force it will come out (This lamp is shown in the small photo above), but those that are specifically attached to the chamber must be turned counterclockwise and only then removed, so before pulling it, try turning it counterclockwise!
Replacing the turn signal lamp
1) Replacing this lamp will also not be difficult, so as always, first you will need to open the hood of the car and then find the socket that goes with the lamp and is built into the turn signal itself, so after finding the socket, take it with your hand and turn counterclockwise as shown in the figure below, and after turning the socket, pull it and thereby remove it from the turn signal along with the lamp.
2) And finally, when the socket and the lamp are in your hand, press the light bulb itself and turn it in the same way as the socket counterclockwise and then completely remove the lamp from the socket.
Note! This lamp is installed in the reverse order of removal, but only during installation will you pay attention to the two side slides (One of them is indicated by an arrow in the photo below) that are on the lamp, so install it in such a way that these slides fit into the grooves on the chamber and then Turning the lamp, make sure that it is fixed with these two side slides!
Which light bulbs are better to choose?
By default, the VAZ 2114 is equipped with lamps that do not give the required effect in conditions of poor visibility. In this regard, car owners often replace lighting elements with better models.
The choice is made based on the personal readings of the car owner. Before purchasing, you must study the technical specifications of the part. The following models are most common among motorists:
Osram Cool Blue Boost is a high-quality lamp from a German manufacturer. Emits white light, which has a positive effect on visibility in low visibility conditions. The brightness indicators of the model are at a high level. Lighting element power 100/90 W. The service life ranges from 120 to 400 hours of continuous operation. The price of the product differs depending on the region and averages 1100-1200 Russian rubles.
Philips Blue Vision Ultra. The power of the lighting element is 60/50 W. The model is distinguished by high brightness. Cold white light allows you to see the road situation regardless of the level of illumination. The cost of two lamps in this series is 1400 - 1500 Russian rubles.
IPF Titan White are high-quality models from a Japanese manufacturer. A distinctive feature of the product is its high luminous characteristics and long service life. The lamps provide high-quality illumination of the road surface regardless of weather conditions. Power is 55 W. The cost of a product from a Japanese manufacturer averages 2,200 rubles.
The problem with new headlights
It happens that after installing new headlights, purchased for a lot of money from a reliable, excellent manufacturer, the quality of the glow leaves much to be desired.
Inexperienced drivers attribute everything to a defect or the purchase of a fake disguised as a trusted company. But in reality everything is completely different.
Headlights shine efficiently and efficiently not only depending on the manufacturer. Settings that someone doesn’t know about or simply forgets play a big role.
Headlights that have just been removed from the factory packaging and installed in place of the old optics do not have the adjustment required specifically for your car. You can do it yourself, but this will require a perfectly flat area, a similar wall and the skills of a draftsman. In practice, this is quite difficult to implement, so the optimal solution is to entrust the adjustment to specialists from a service station.
Alas, the VAZ 2110 is not a modern, advanced car in which the headlights are automatically adjusted electronically. Here everything has to be done manually.