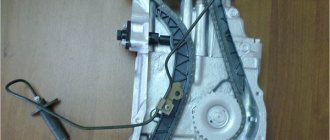
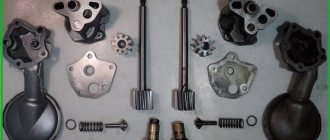
The appearance of a characteristic metallic ringing in the front part of the power plant of a VAZ-2107 vehicle indicates problems with the gas distribution mechanism drive.
The cause of this ringing is the weakening of the drive chain as a result of its strong stretching or weak tension by the tensioner.
And if severe stretching of the chain can only be eliminated by replacing it, then tensioning it is a procedure that is included in the list of maintenance work and must be carried out in a timely manner.
But there are also cases when the tension was recently carried out, the chain has not yet exhausted its service life, and ringing has already begun to appear.
This is often due to the chain tension mechanism.
Replacing the chain tensioner VAZ 2107
The appearance of a characteristic metallic ringing in the front part of the power plant of a VAZ-2107 vehicle indicates problems with the gas distribution mechanism drive.
The cause of this ringing is the weakening of the drive chain as a result of its strong stretching or weak tension by the tensioner.
And if severe stretching of the chain can only be eliminated by replacing it, then tensioning it is a procedure that is included in the list of maintenance work and must be carried out in a timely manner.
But there are also cases when the tension was recently carried out, the chain has not yet exhausted its service life, and ringing has already begun to appear.
This is often due to the chain tension mechanism.
Features of the tension mechanism and its possible malfunctions
Tensioner is a drive element that provides a certain tension to the timing chain.
The “native” device of this car is a plunger type. That is, in the design of this element there is a spring-loaded plunger, which, due to the pressure of the spring, provides the necessary tension.
This element works in this way - the spring pushes the plunger out of the body, it rests on the shoe and pushes it until the plunger stops the resistance of the chain, while the slack is removed from it by a powerful tensioner spring, the chain is tensioned.
But its design is such that after taking out the slack in the chain, the plunger is fixed with a cracker.
However, over time, the chain stretches more and more and its additional tension is required, for which it is necessary to remove the lock nut fixation of the plunger with a cap nut so that the spring makes a selection again.
One of the main disadvantages of such a tensioner is the possibility of debris getting between the plunger and the body, which can cause it to jam.
Sometimes jamming can be eliminated by lightly tapping the body, but not always. Damage to the housing always leads to the need to replace it.
It is not always convenient to periodically sample chain slack, so instead of a standard tensioner, you can install an automatic one, which performs the sampling itself.
At the same time, the design of such a tension mechanism is very simple and the possibility of jamming is practically excluded.
Automatic tensioner, design, operating principle
The automatic mechanism uses a ratchet mechanism, which itself takes out the slack of the chain as it stretches.
This element consists of a housing in which a spring-loaded ratchet pawl is installed.
Inside the housing there is a spring and a tensioner rod with a toothed sector.
The sector teeth are small, have a pitch of 1 mm, and are inclined in a certain direction.
This is how an automatic tensioner works.
As the chain sag, the spring pushes the rod and it, acting on the shoe, makes a selection.
But the pawl of the ratchet mechanism, which places one of its ends between the teeth of the sector, prevents the rod from returning back.
As the chain stretches, the rod moves out, and the pawl, jumping over the teeth, prevents it from returning back. Thus, the tensioner constantly maintains chain tension.
If it is discovered that the standard tensioner has ceased to perform its functions due to damage or jamming, which could not be eliminated by tapping the body, then it must be replaced.
This operation can be divided into partial, when only the damaged element is replaced, and complete, in which the shoe is also replaced.
Timing chain tensioner VAZ 2107
The VAZ 2107 was equipped with engines with a timing belt and chain drive. Although a chain is more reliable than a belt, the design of the drive unit is nevertheless imperfect and requires periodic tensioning, for which a special mechanism is used - a tensioner.
Purpose of the device
The chain tensioner in the power unit performs an important function by monitoring the chain tension in the timing drive. It follows from this that the coincidence of valve timing and stable operation of the engine directly depend on the reliability of this product. When the chain weakens, the damper breaks down. In addition, it can jump over the teeth, causing the valves to hit the pistons, which will lead to engine damage.
Types of tensioners
The timing chain tensioning mechanism comes in several varieties: automatic, hydraulic and mechanical.
Mechanical
In a mechanical type tensioner, the required amount of tension is provided by a plunger spring. Under its influence, the rod comes out of the body and pushes the shoe. The force is transmitted until the chain offers resistance, i.e. it is sufficiently tensioned. In this case, sagging is eliminated. The tensioner is fixed by tightening the cap nut located on the outside. When it is necessary to adjust the tension, the plunger lock nut is unscrewed, as a result of which the spring presses the rod, eliminating sagging of the chain.
Such tensioners have one significant drawback: the device becomes clogged with small particles, which leads to jamming of the plunger. To eliminate this malfunction, tap the tensioner during adjustment. However, you should not make special efforts to avoid damaging the body of the product.
How to understand that you need to pay attention to the timing assembly
Timing chain problems manifest themselves in a variety of ways. In some cases, the power unit begins to triple, and in others, at idle you can hear floating speed. In advanced cases, a carburetor or injection VAZ-2107 can simply stall, and some modifications completely fail when the chain jumps.
Other symptoms may include:
- an increase in temperature in the cylinder-piston group (leads to accelerated wear of its parts);
- a metallic ringing sound coming from the front engine cover;
- knocking noise from under the valve covers;
- Belt tension does not eliminate extraneous noise.
We recommend that you do not delay repairs if you hear the first signs of incorrect engine operation.
Auto mechanics recommend regularly checking the timing belt tension to detect problems at an early stage. You also need to pay attention to the condition of the shoe; if it is worn out, then you should not delay repairs.
Signs of stretching
The symptoms of this problem are specific. And it will be very difficult to confuse them with something else.
In some cases, the damper breaks. In this case, only replacing it will help. How to tension a chain on a VAZ-2107 (injector)? Photos of the process are in our article.
By the way, on a VAZ-2107 with a carburetor power system, unlike injection engines, to turn the crankshaft it is enough to turn the ratchet. But let’s not get ahead of ourselves and consider several ways to tighten the motor chain on a VAZ-2107.
Removing the mechanism
The car is placed on a level surface and immobilized with the handbrake.
To partially replace the tensioning mechanism, you do not need to remove anything from the engine. It is enough to unscrew the two nuts securing this element and remove it.
You need to pull it out carefully so as not to damage the gasket located under it.
But if this one came complete with a new tensioner, then it is not necessary to monitor the safety of the old one.
How to tension a chain on a VAZ-2107 without removing the valve covers?
First we need to place the car on a flat surface and secure it with anti-roll bars. Next, fix the gearshift lever in the neutral position. Then remove the drive cover. Once access to the chain is free, the tensioner should be slightly loosened. It is located next to the water pump. Next, using a 36-degree socket, rotate the crankshaft 360 degrees. After this, tighten the tensioner to the maximum. We start the engine and check the tension level. The clatter must disappear.
Tightening the chain while removing the valve covers
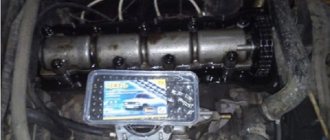
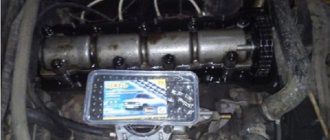
If the chain is still noisy, perform the following operation. Using keys, we remove not only the drive, but also the valve cover from the cylinder head side. In this case, the chain tension can be checked manually as the camshaft sprocket is released.
So, loosen the tensioner a little and turn the crankshaft two turns. After this, fully tighten the timing chain tensioner. Next, we check the element manually. There should be no sagging. The chain must be elastic. If so, replace the valve cover and drive cover.
Removing the camshaft
The engine must be cold when replacing the camshaft. You will need:
- New camshaft;
- Set of levers with bolts;
- Wrenches for 7, 8, 10, 13, 17 and 24;
- Small and large screwdriver;
- 3 spare lever springs;
- Rail;
- Valve cover gasket;
- Torque wrench
- Remove the air filter, separate the tip, cable and throttle linkage.
- If you have a carburetor engine, remove the fuel hose from the bracket; if you have an injection engine, disconnect the vacuum hose, air supply hose and remove the fuel filter from the bracket.
- Remove the cylinder block cover.
- Align the mark on the camshaft sprocket with the top dead center of the 4th cylinder. If you have a carburetor engine, you can turn the crankshaft with a special wrench. And if there is an injector, then you need to jack up the car, engage fourth gear and spin the rear wheel.
- Remove the gasket.
- Bend the camshaft sprocket washer with a chisel.
- Engage fourth gear to lock the crankshaft.
- Remove the tensioner.
- Unscrew the nut and remove the star. Tie the chain to the sprocket so that the links do not jump to other teeth.
- Unscrew the nuts and pull out the camshaft.
- Remove the rocker, bolts and springs.
Adjustment Details
Sometimes the process of adjusting the tension level may be required several times. Therefore, let us consider in detail how this procedure is performed. After the cover has been removed, it is necessary to relieve the pressure in the tensioner. To do this, unscrew the corresponding lock nut.
How to tension a chain on a VAZ-2107? Use a large wrench to turn the crankshaft. It should stop at the point of greatest resistance. Just turn it a couple of turns. Using a wrench, fix the shaft in this position and tighten the cap nut. How to further tighten the chain on the VAZ-2107 with your own hands?
We connect the tensioner and check how secure it is. If the chain is elastic, install all the elements in place and start the engine. When checking the operation of the timing drive, there should be no extraneous noise, which will increase with increasing crankshaft speed.
Why is chain tension controlled, and how is this done?
If the chain tension is done correctly, you can avoid a lot of trouble.
The chain tension on a multi-gear bike depends on the rear derailleur spring. But this does not mean at all that there is no need to check the tension: the process of engaging gears can be complicated, the chain and sprocket teeth can fail, and if it sags, it hits the frame stay, dirtying it and wearing out the transmission.
Tension is checked using two methods:
- the chain is put on large sprockets; on the front bottom, the links are pulled forward towards the wheel so that the rear derailleur remains stationary. The chain from the switch should be located in a straight line. When, after such tension, a couple of links are superfluous, the length is considered normal;
- the chain is installed in a position where the rollers are placed at the surface of the ground at right angles and are located on a common line: on the front derailleur the chain is put on a large sprocket, on the rear derailleur - on the smallest one.
Adjustment on a double suspension is performed as follows: press on the bike until the front sprocket is lowered from the cassette as much as possible. This indicator is used to determine the length.
Why is this so important to do?
During operation, the chain is subjected to significant loads. After all, it interacts with two shafts - the crankshaft and the camshaft. Over time, the part stretches out. The chain pitch changes and the engine begins to operate unstably. As a result, the revolutions fluctuate, and the mechanism itself jumps one or more teeth. If the circuit begins to make noise, this is the first sign for diagnosis.
Experts recommend tightening the chain every 15 thousand kilometers. Its resource itself is about 100 thousand. By this time the part must be replaced. The sedative also changes. Before tensioning the chain on the VAZ-2107, check its condition. All the necessary elements can be found in the VAZ-2107 timing belt repair kit.
REPLACEMENT
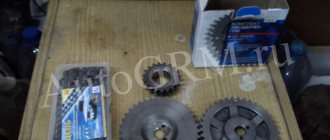
When it is not possible to tighten the timing chain on a VAZ 2107, it is replaced. Along the way, you will need to change the tensioner shoe and damper. Often a set of all gears (sprockets) must be replaced, but they do not wear out as quickly as other timing parts. Before carrying out work, you will need to buy all the necessary spare parts and prepare the tools. The chain is sold at any auto store that sells VAZ spare parts. The cost of a timing chain is approximately 500-800 rubles, depending on the manufacturer. Suspiciously cheap parts are not worth buying. And you need to remember that the number of links may vary depending on the type of engine (for motor 2106 there should be 116 links). If you need to change a set of sprockets, it will cost about 600 rubles. A shoe and a damper cost approximately 100 rubles each. every.
Tools you will need:
- Set of car keys;
- Screwdrivers;
- Hammer;
- Ratchet wrench VAZ.
So, removing and installing the VAZ 2107 timing chain:
- Remove the valve cover;
- We turn the crankshaft with a ratchet wrench and set the camshaft to the mark on the 4th cylinder;
- Unlock the camshaft sprocket mounting bolt and unscrew it;
- Remove the tensioner by unscrewing two 10mm bolts;
- Unscrew the ratchet nut and remove the crankshaft pulley;
- We unscrew the nuts securing the front engine cover (do not forget that there are still three bolts at the bottom), remove the cover;
- Unscrew the bolts securing the damper and remove it;
- Unscrew the shoe bolt and remove the shoe;
- If you are changing the drive shaft sprocket, you must first loosen the fastening bolt and then unscrew it. In this case, the shaft must be secured against turning;
- Unscrew the chain stop (it is to the right of the crankshaft) and remove the chain.
During assembly, it is important that the crankshaft and camshaft do not rotate during the entire operation (there is a risk of bending the valves). Also, the intermediate shaft must be placed in the same position as it was before disassembly. If the blower shaft nevertheless changes position, you will have to reinstall the distributor in order to set the ignition correctly.
We reassemble in the reverse order and pay attention to the marks - they must match. Before installation, the tensioner should be recharged - loosen the cap nut, recess the plunger and tighten the nut. To tension the chain (when everything is already assembled), we loosen the tensioner nut, the plunger shoots and tensions the chain drive.
Replacing the chain tensioner on a VAZ 2107 does not present any difficulties; it can be removed and installed in literally a matter of minutes.
Replacement
How to replace the timing chain tensioner
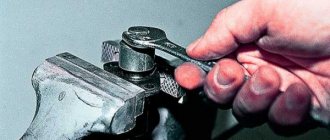
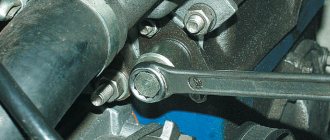
Removal: 1) First, remove the two nuts that secure the chain tensioner to the engine.
Unscrewing the chain tensioner fastening nut
2) Then remove the chain tensioner from the car engine.
Note! There is a sealing gasket between the chain tensioner and the engine, remove it carefully, do not damage it! (For information on what a sealing gasket looks like, see the very bottom of the article, in the “For Beginners!” section)
Installation: 1) First, charge the new chain tensioner. (For information on how to charge the chain tensioner, see the article “How to charge the chain tensioner on a VAZ?”)
2) Then reinstall it in the reverse order of removal.
3) Now turn the crankshaft clockwise in order to tension the timing chain. (For information on how to turn the crankshaft, see the article “Installing the piston of the fourth cylinder to the TDC position”, in paragraphs “1-2”)
Note! In the article to which the link is given in paragraph “3”, by clicking on it you will also need to set marks, but if you are replacing only the chain tensioner, then you do not need to set any marks, just turn the crankshaft “1-1.5” turns and that’s it !
4) After you have completed cranking the crankshaft, loosen the cap nut slightly to allow the tensioner to discharge.
Note! When the chain tensioner is discharged, you will hear a click and only then tighten the chain tensioner nut back!
How to change a shoe
You will need: “10”, “13”, “17” wrenches, a special wrench for the crankshaft pulley nut (or a “36” socket), a flat-blade screwdriver, a mounting blade, a hammer, and a bit.
1. Remove the engine splash guard.
How to tension a chain on a VAZ 2107
Before starting work, let the engine cool down. Many people believe that it is necessary to tension the chain when it is hot in order to compensate for its thermal expansion. In fact, an automatic tensioner is installed on the car, which copes with this. In principle, there is no difference at all; you need to let the engine sit so that the oil flows from the head into the crankcase or down the line.
Now let’s look directly at how to tighten the chain on a VAZ 2107:
This completes the tensioning of the chain on the VAZ 2107.
TYPES OF CHAIN DRIVE
The VAZ “Seven”, like other “classics”, is equipped with a double-row timing chain. However, there is a single-row chain that, if desired, can be installed on a Zhiguli.
SINGLE ROW CHAIN
A chain drive with one row has less noise when the engine is running compared to two rows. This factor is one of the main factors in favor of choosing single-row chains. Therefore, some VAZ 2107 owners decide to replace the timing drive. The lower noise level is due to the fact that fewer links are driven. Plus, it is easier for the entire engine to rotate such a chain, which has a positive effect on the increase in power. However, due to the low noise level when such a chain is stretched, it is not always clear that the part needs tension.
Single row timing chain has lower noise levels
DOUBLE-ROW CHAIN
Despite the advantages of a single-row chain, a chain drive with two rows is the most common, since it is characterized by high reliability and if a link breaks, the entire chain does not break. In addition, the load on the timing drive parts is distributed evenly, as a result of which the chain and gears wear out more slowly. The life of the part in question exceeds 100 thousand km. Although recently, in order to reduce the weight of power units, automakers have been installing chains with one row.
The double-row chain, despite its higher noise level, has a long service life
REPLACING A DOUBLE-ROW CHAIN WITH A SINGLE-ROW CHAIN
If you are thinking about replacing a double-row chain drive with a single-row one, you will need to purchase the following parts:
- crankshaft, camshaft and oil pump gears for single row chain;
- sedative;
- shoe;
- single-row chain;
- automatic tensioner.
To install a single row chain, you will need to replace the gears, chain, guide and timing chain tensioner
All of the listed parts are taken, as a rule, from the VAZ 21214. Replacing the chain should not cause difficulties. The only thing that is required is to replace the sprockets, for which you unscrew the corresponding fasteners. Otherwise, the steps are similar to the procedure for replacing a conventional double-row chain.
VIDEO: INSTALLING A SINGLE-ROW CHAIN ON A VAZ
Despite the fact that replacing the timing chain drive on a VAZ 2107 is not an easy process, every owner of a Zhiguli can do it if you follow the step-by-step instructions. The main thing is to correctly set the marks upon completion of the work, which will ensure synchronous operation of the crankshaft and camshaft.
Consequences of a loose chain on a VAZ 2107
This applies to 2106 and all classics in general. First of all, the chain is manufactured with high precision and durability. This means that at the slightest jump of teeth, the engine will work at random. This is especially true for injection engines, since the crankshaft position sensor will give one reading, but in fact, the shaft will be in a completely different position. Moreover, jumping two or more teeth is fraught with the risk that the valve will punch a hole in the piston, and such a disaster will occur in all cylinders, and if, when the belt breaks, for example, the timing parts move simply by inertia, then in this situation they are still driven into movement from the crankshaft.
Cyclist:
Correct 8. Traffic regulation
8.7.3. Traffic light signals have the following meanings:
A signal in the form of an arrow that allows a left turn also allows a U-turn if it is not prohibited by road signs.
A signal in the form of a green arrow(s) in the additional section(s), switched on together with the green traffic light signal, informs the driver that he has priority in the direction(s) of movement indicated by the arrow(s) over vehicles moving from other directions;
f) a red signal, including a flashing one, or two red flashing signals prohibit movement.
A signal in the form of a green arrow(s) in the additional section(s), together with a yellow or red traffic light signal, informs the driver that movement is permitted in the indicated direction, subject to the unhindered passage of vehicles moving from other directions.
A green arrow on a sign installed at the level of a red traffic light with a vertical arrangement of signals allows movement in the indicated direction when the red traffic light is on from the rightmost lane (or the leftmost lane on one-way roads), subject to the provision of priority in traffic to its other participants moving from other directions to a traffic light signal allowing movement;
16 Driving through intersections
16.9. While driving in the direction of the arrow turned on in the additional section simultaneously with a yellow or red traffic light, the driver must give way to vehicles moving from other directions.
When driving in the direction of the green arrow on the table installed at the level of the red traffic light with vertical signals, the driver must take the extreme right (left) lane and give way to vehicles and pedestrians moving from other directions.
Wrong 8. Traffic control
8.7.3. Traffic light signals have the following meanings:
A signal in the form of an arrow that allows a left turn also allows a U-turn if it is not prohibited by road signs.
A signal in the form of a green arrow(s) in the additional section(s), switched on together with the green traffic light signal, informs the driver that he has priority in the direction(s) of movement indicated by the arrow(s) over vehicles moving from other directions;
f) a red signal, including a flashing one, or two red flashing signals prohibit movement.
A signal in the form of a green arrow(s) in the additional section(s), together with a yellow or red traffic light signal, informs the driver that movement is permitted in the indicated direction, subject to the unhindered passage of vehicles moving from other directions.
A green arrow on a sign installed at the level of a red traffic light with a vertical arrangement of signals allows movement in the indicated direction when the red traffic light is on from the rightmost lane (or the leftmost lane on one-way roads), subject to the provision of priority in traffic to its other participants moving from other directions to a traffic light signal allowing movement;
16 Driving through intersections
16.9. While driving in the direction of the arrow turned on in the additional section simultaneously with a yellow or red traffic light, the driver must give way to vehicles moving from other directions.
When driving in the direction of the green arrow on the table installed at the level of the red traffic light with vertical signals, the driver must take the extreme right (left) lane and give way to vehicles and pedestrians moving from other directions.
15.
When to check chain tension
If you need to tighten the chain, it is not necessary to check the tension. It is enough to use a chain tensioner (this will be discussed below). Checking the tension is necessary if the chain has been replaced or if the chain continues to knock after tensioning. The knock of a loose chain is easy to distinguish from other noises: when the engine speed increases, it disappears.
To check this yourself, you need to open the hood and start the car. Then ask an assistant to press the gas pedal or independently pull the cable that controls the throttle valve with your hand. If the knocking noise at the front of the engine has disappeared, the cause is low chain tension. It needs to be tightened up.
When is stretching necessary?
Chain tensioning is required in the following cases:
- after engine repair;
- after replacing the product;
- when stretched after prolonged use.
Timing belt VAZ 2101
In the first two cases, it is clear that checking the tension is necessary, since the chain was removed or replaced. In addition, you should also check that the alignment marks match. These marks are located on the crankshaft and camshaft. You can determine the need for tension by the sounds of the engine running. If the tension is weak, then during its operation extraneous noises are heard in the place where the chain drive is located. At the same time, timing parts wear out faster. Therefore, when checking the tension, it is necessary to pay attention to the condition of the damper and the shoe.
Timing tensioner shoe
If the tension is weak, the links can jump several teeth, then the valve timing will be disrupted. In this case, the car may stall, not start, and the speed will fluctuate. You can use a flathead screwdriver to check. It needs to be inserted and, using as a lever, pressed on the chain. It should not bend and be stretched like an arrow. Do not put too much pressure on the drive, although the part is metal, it is subject to deformation.
The video below looks at a VAZ 2101 car, in which a clattering sound is heard when the engine is running. It shows in detail how to check the condition of the damper, the shoe, and how to carry out tension.
How to check chain tension
The VAZ 2107 timing chain is located in the front part of the engine. It is closed on top by the cylinder head cover, on the bottom by the engine sump, the middle part runs inside the block and can only be reached by removing the chain.
To check the chain tension, simply remove the cylinder head cover. To do this, you need to unscrew the 8 fastening nuts. After removing the cover, the gasket must be replaced. It is inexpensive, but if this is not done, after installing the cover with the old gasket, it is almost guaranteed that oil will begin to ooze from under it.
When the "valve cover" is removed, the top of the chain is exposed. You can check the tension with your hands, but it is better to use a large screwdriver. It must be inserted between the chain and the cylinder block body and, using it as a lever, try to bend the chain. In this case, the chain should not bend. The tension must be checked on both sides - on the left and right sides of the engine. A chain that is taut like a string and does not bend when pressed with a screwdriver or fingers is a sign of its correct tension. Otherwise, it must be tightened or replaced.
Important: Do not apply too much force by pressing the chain as hard as you can. This can lead to deformation of the chain links. Therefore, it is necessary to press “half-heartedly.”
How to install roller damper and rockring
- First, you need to make sure that the bike frame supports the “calm” setting. To do this, on the right side of the frame, on the carriage assembly, there must be special mounting ears with holes for bolts. If there are any, then the frame supports the installation;
- After making sure that installation is possible, it is necessary to remove the crank (connecting rod) from the bicycle frame along with the sprockets from the fastener side, and also dismantle the carriage or carriage cup, if this is possible. For this stage you will need a connecting rod puller, which requires a wrench and a carriage puller, depending on the type of which you may need a wrench;
- After this procedure, install the structure according to the mounting holes. It is worth remembering that after installing the carriage stabilizer, the chainline changes, so when installing the carriage in the seat, it is necessary to adjust this indicator using spacer rings. For this step you will need hexagons or a Phillips screwdriver, depending on the type of bolts on the bicycle carriage;
- After installing the carriage and adjusting it, you should reinstall the crank with stars. At this stage, the rockring is installed, which is installed instead of or on top of the outermost drive sprocket of the bicycle. In order to put on the rockring, you need to unscrew the bonnets with hexagons (the bolts that secure the front stars together), and then return them to their place;
- Next, put the chain on the bike and adjust the “calm down” rollers so that its operation is correct;
- Depending on the type of “changeguide” design, the installation of the chain occurs in the assembled or unfastened state, where in the latter it will be necessary to pull the chain through the roller. At this stage, you will need screwdrivers to adjust the rollers and other parts of the damper;
- After all installations and final checks have been completed, the chain tension should be checked. To do this, you need to switch from one speed to another, thereby finding out whether it is necessary to lengthen or shorten the length of the chain so that the “calm down” adequately performs its function.
