Lada Kalina cars use an APS-6 or 6.1 immo block. If a malfunction occurs in its operation, you first need to find the cause and try to eliminate it. You will need to disable the immobilizer on Kalina if repairing the device does not produce results.
Main problems and features of immobilizers
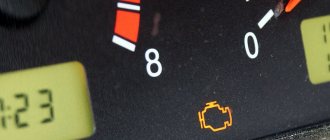
How to find and where should the immobilizer be located? How to bypass the device if it does not work and how is it configured? Typically, car owners of relatively new Kalinas face similar questions. The power unit of the car begins to start every other time, or when trying to start, the starter turns a little, and then does not respond at all to the actions of the motorist. In this case, the corresponding car icon with a key - immobilizer - may appear on the car dashboard and not go out.
New immobilizer for Kalina
No less often, the immobilizer is disabled due to the sensitivity of the device. The system control unit may break if it is affected by interference from a mobile gadget or other device. As a rule, all such malfunctions are caused by incorrect operation of the K-Line diagnostic line. Ultimately, the owner of Kalina has to reboot the system using the alternative startup method.
From a theoretical point of view, disabling the immobilizer on Kalina is not at all difficult. To do this, you only need to enter the six-digit combination corresponding to the instructions and diagram, after which the engine can start.
However, in practice, the driver will have to work hard to start the engine, because there is neither a display nor a corresponding button in the vehicle to enter the secret code. To activate the power unit to bypass the system, the driver will have to literally use Morse code, namely, press the code with the gas pedal. Moreover, this function must also be additionally activated. So in general, this procedure is not particularly simple, which is why domestic car owners are often interested in the question of how to disable the immobilizer on their own.
Is it necessary to disable the immobilizer on a VAZ?
As a rule, the need to disable the system arises when installing an anti-theft system with automatic engine start. In practice, it can be quite problematic to “make friends” with such systems from the factory. Therefore, many “specialists” at service stations simply fix the spare key on zip ties or tape next to the ignition switch. And for the mechanism, this is equivalent to the fact that the driver will be constantly present in the car interior. This should not be done under any circumstances, because if a criminal tries to take possession of the car, he will immediately have the key to the car in his hands.
Immo location
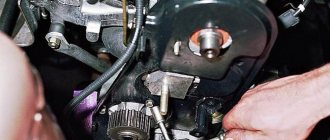
Removing the immobilizer control unit
1. Remove the negative terminal of the battery.
2. Remove the instrument panel trim.
3. Using a Phillips screwdriver, unscrew the two screws securing the unit to the instrument panel, holding the screw nuts with a 10 mm wrench.
4. Remove the block from the instrument panel and disconnect the harness block
Removing the remote control unit
Raise the rear seat cushion. Loosen the screws securing the carpet in the rear left door opening.
3. Having folded back the edge of the carpet and the sound insulation, disconnect the wiring block from the remote control unit.
4. Using a 10 mm socket wrench, unscrew the two nuts securing the block to the body.
5. Remove the remote control unit.
Installation is carried out in reverse order
If the immobilizer keys are lost
If you lose a working key, you need to purchase a blank and cut it to work with the ignition switch. Then you need to perform the immobilizer training procedure using a training key and a new working key.
Disconnection Guide
To know how to disable the immobilizer, you first need to understand where it is located. At the very beginning, you need to dismantle the battery for greater convenience and remove the protection from the instrument panel. In Lada Kalina cars, the immobilizer is located directly behind the heating system control components, next to the audio system. The appearance of the standard alarm is not flashy - it is just a small black box, its dimensions are 5x10 cm.
To dismantle the device, you need to unscrew the screws securing the device to the control panel. Then you should disconnect the power supply from the APS; to do this, remove the plug and hold it with the lock. When the device is removed, you need to reanimate the diagnostic line that we mentioned earlier.
After removal, you need to delete all existing data from the device’s memory, and this is not so easy - you have several options:
- You can try to modify the control unit by resoldering the chip resistor. The unit itself is connected to the computer, then, using a special bootloader, the firmware is read. Then new firmware is installed on the element, after which the chip must be soldered again to the installation site.
- You don’t have to touch the chip, but then use the Combiset utility (the author of the video is Video74revieW).
Firmware in some cars does not allow you to delete all data. If you cannot get rid of unnecessary information, edit the dump file. Having opened it, you will need to replace the bytes; to do this, instead of a combination of numbers (there can be from 2 to 7), write FF. To open the unit itself, you will need to remove the wiring connector. The connector has twenty contacts, of which the wires at 9 and 18 need to be tied and insulated.
After all these steps, all that remains is to connect all the necessary connectors to the computer, after which it can be installed in place. Assembly is carried out in reverse order.
To bypass the standard immobilizer when connecting an alarm system with auto start, you can buy a special unit that is commercially available. Experts consider this the most correct decision.
Flashing
If during diagnostics the instruments show an error in the operation of the immobilizer, you need to check all the fuses, and if they are in good condition, check the engine control unit. The controller in the Lada Kalina car is Bosh M7.9.7. For flashing you will need:
- voltage source 220 V;
- computer;
- computer program PAK “Loader”;
- Soldering Station.
- The engine control unit is removed from the car.
- The block is being finalized.
- Reprogramming the block.
After removal, the control unit is disassembled and modified. The modification consists of resoldering the transistor, which can be done directly on the hood using tweezers and a soldering iron. The unit is reprogrammed using a computer and the M3 Loader program . To do this, the control unit is connected to a special adapter from the “Loader” PAK kit, and then work proceeds to execute the commands of this program. The re-flashed controller can be disconnected from the computer, assembled the control unit and put it in its place.
The process of flashing the immobilizer using a computer
How to activate immo?
If you were able to disable the standard alarm on Kalina, you may have to reactivate it in the future. When an alarm is installed on Kalina, the car owner will need to activate the system (if it fails for some reason) using a special code. Before activation, you need to make sure that you have a training key installed in the lock. When you insert the key, the ignition will need to be turned on and off several times. In this case, the APS light should blink for six seconds.
conclusions
After the Lada Kalina immobilizer is unlocked, it is better to enhance the car’s security with an additional security alarm. There are many options on the market that can replace the standard factory feature.
It’s certainly difficult to understand, especially for a beginner, but it’s explained quite clearly and point by point. It’s a pity that it was already turned off in the service when I changed the signaling system to a more reliable one. So I would try to turn it off myself.
I know someone who did this procedure on my car. It looked complicated at first glance, but after these instructions it became a little clearer.
But I tried it and realized that for me it’s still difficult even with such detailed instructions. For now I trust this procedure to a car service.
“>
Video “Instructions for activating immo”
The video below provides instructions for this process (the author of the video is avtodopka).
Diagnostics of the Lada-Kalina security system. Guarding the frontiers
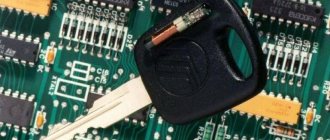
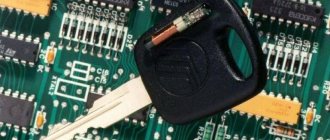
- This is the first domestic car on which even in the simplest “norm” configuration the plant installs a full-fledged security system. Its main links are shown in photo 1. This is controller 1 (Bosch M7.9.7), control unit 2 of the automobile anti-theft system (APS-6), working ignition key 3 with a remote control and transponder (coding device), training key 4 with its own transponder (in a red shell), ignition switch 5 with a built-in communication coil, block 6 of the remote control system. Let us note one of the advantages of the new APS-6 immobilizer over the previous APS-4, familiar to owners of “Samar” and “Ten” cars: now there is no need to apply the key to the receiving device located away from the ignition switch. The key in the Kalina lock immediately ensures connection between the transponder and the coil - without unnecessary manipulations! The APS-6 control unit reads the code hidden in the key transponder and transmits it to the controller, which compares this code with that recorded in non-volatile memory. If someone else's key was inserted into the lock (the probability is quite low!), starting will not work - the codes will not match. Or... someone else’s key is “clean”, untrained - start-up is again impossible. Nothing will work if you try to use someone else’s teaching key.
At the same time, it is worth remembering that if you lose a working key, you can start the engine with a training key and drive until you buy a new working one. It is clear that he will have to be re-programmed (trained).
By the way, VAZ does not recommend selling cars with a non-activated security system - if the buyer refuses it, a corresponding entry must be made in the service book. But life is complicated...
Having purchased a Kalina with an activated APS-6 system, you received two keys - a training one and a working one. But there are already “clean” working keys on sale: where is the guarantee that an unscrupulous seller has not trained another working key (the system allows this) and passed it on to “interested parties”? That is why it is better to retrain APS-6 immediately, on a new machine. Let's do this.
During subsequent manipulations, we will need to quickly replace one key with another, so we will release both from the bunch. And one more thing: let's fill the tank, otherwise the warning light may come on and the buzzer will sound at the same time, confusing - we only need those signals that are related to training!
So, let's get behind the wheel. Are the doors closed? We can begin.
1. Having turned on the ignition with the training key, do not start the engine. In the instrument cluster there is an APS status indicator - 1 in photo 2. It turns on and does not blink - the system is not trained. Didn't turn on - trained. Flashes for 20 seconds - the system is faulty. In our case, the “car with a key” does not light up - it is trained.
2. Turning off the ignition, remove the key - the indicator blinks.
3. Turn on the ignition with the working key. The buzzer of the APS control unit will sound three times, and after 6 seconds twice more.
4. Turning off the ignition, remove the working key and...
5. ...No later than 6 seconds, insert the training one and turn on the ignition! (Otherwise the system will remain silent and you will have to do everything again.) The buzzer sounds three times, and after 6 seconds twice.
6. Turn off the ignition, but do not remove the training key. The buzzer will sound once. The indicator will start flashing quickly. It takes up to 15 seconds to enter this mode - wait!
7. Turn on the ignition. After the buzzer sounds once (but no later than 10 seconds), the direction indicators will flash three times, the buzzer will sound in time with them, and the horn will sound once. During this operation, the system remembers the codes, so you cannot turn off the ignition without waiting for three confirmation beeps from the buzzer. The waiting time is at least 5 seconds.
Where is
The immobilizer on Kalina can be located deep in the dashboard near the central air conditioner pipe. The antenna unit, shaped like a ring, is located in the ignition switch. The chip is built into the head of the key; the information is read when the engine starts. You can access the blocker as follows:
- disconnect the power cables of the on-board network from the battery;
- pull out the ashtray and unscrew the 4 bolts holding the housing (the latter is removed from the socket);
- remove the plugs located near the service alarm button;
- Unscrew 2 screws located under the plugs;
- remove the rotary air distributors;
- remove the central decorative trim by removing it from the clamps;
- disconnect electrical cables leading to electronic devices installed on the dashboard;
- dismantle the standard unit, which is located under the central air duct;
- disconnect the immobilizer power cable (to do this, press the latch).
How to activate
Before activating the immobilizer on the 2 Kalina, you need to fill the fuel tank. This will prevent interruptions in the operation of the blocker caused by an emergency buzzer warning about a lack of gasoline. Activating the immobilizer unit requires the following steps:
- closing car doors;
- inserting the key into the lock and turning on the ignition;
- turning off the ignition and removing the key (performed after 3 buzzer signals);
- ignition activation (carried out using the black key included in the immobilizer kit);
- engine shutdown (performed after 5 buzzer signals);
- installing a red key and activating the ignition;
- engine shutdown, performed after 5 buzzer signals (the key is left in the lock);
- activation of the ignition (carried out within 5 seconds after the appearance of 1 buzzer signal);
- wait 5 seconds (after this time the hazard warning lights start flashing and the horn sounds an audible warning);
- turning off the ignition (leaving the key in the lock, wait until the lock indicator on the dashboard disappears).
Some cars notify the user not with a sound, but with a light indication. The immobilizer lamp that lights up on the dashboard starts flashing.
Main problems and features of immobilizers
Most often, owners of two- and three-year-olds face the problem of engine shutdown. The car starts to start every other time, or when starting the engine, the starter makes several dull attempts, after which it completely stops responding to any movement of the key. Also, the immobilizer warning light on the instrument panel may light up and not go out (image of a car with a key).
Another common problem with capricious Ladovsky immobilizers is the sensitivity of the device. The control unit can easily fail if it picks up interference from a smartphone or other device. Usually, all these problems are associated with incorrect operation of the K-line diagnostic line. As a result, the car owner has to reboot the anti-theft device using an alternative start. In theory, everything is simple here - you just need to enter a six-digit code and the engine will start. But, in order to disable such an immobilizer on Kalina, Priora or Grant, you will have to work hard, because in order to enter a secret combination there are no buttons or LCD panels. The driver must literally type out the code in Morse code using the gas pedal. This means that if your code consists of six sevens, then you will have to press the pedal 6 times in seven quick jerks at a certain interval. In addition, this function still needs to be activated (see below). In general, there is little convenience, so it is not surprising that many car enthusiasts are starting to look for information on how to disable the immobilizer on Kalina themselves.
Causes of malfunction
Let us list the reasons for the occurrence of such a phenomenon as a non-working starter and a flashing immobilizer. First, it’s worth noting that it all depends on the intensity of the blinking, but let’s take the most common concept. So, the reasons for the malfunction:
- The most deplorable and fatal option is the ECU burned out. This usually happens because liquid has gotten into it.
- Safety block. The immobilizer fuse or ECU relay has blown. Replace, but it is also recommended to check all other fuses responsible for the ignition system.
- Starter relay failure.
- The ignition switch itself or the key.
- Failure of the immobilizer itself.
- Damage to the starter or retractor relay.
ECU burned out
The insides of the ECU block are filled with antifreeze, we are trying to fix it
If the ECU burns out, then you can “dry your oars” because the owner ended up with a substantial amount of money. Often, this happens due to the fault of the motorists themselves, who try to install additions to the car themselves, or simply spill coffee on the dashboard.
This malfunction can be treated by replacing the control unit and updating the firmware. The procedure is expensive, so it is recommended to treat the car carefully, especially inside.
To prevent this from happening, we recommend that you move the engine control unit to another location, higher, under the panel.
Ignition key and lock
Out of sync ignition keys. Key training will be required
A malfunction of the key or ignition switch can only be treated in one way - by replacing them. In this case, you will have to flash the same car control unit. This is not a critical malfunction, but it will cause trouble and hassle.
While checking the ignition switch
Immobilizer
First, it’s worth determining why the immobilizer started flashing. This can be done according to the error diagnosis manual. But, in any case, most motorists recommend replacing it. This is not a simple matter and the owner will drink a lot of blood. You can try to deactivate it, more details here.
Starter or relay failure
We check the contacts on the starter and its relay
Let's consider this option also as a coincidence. If the immobilizer flashes and the starter does not turn, then this is a “normal” phenomenon for the starter, since it will not be supplied with power for anti-theft purposes. But it doesn’t hurt to check the contact between the starter and the relay. You can close the starter directly (see video).
Disabling the immobilizer
Before bypassing the immobilizer on Kalina and other AvtoVAZ creations, it is better, of course, to consult with a specialist, but if your knowledge of electronics allows, then you can save money on this procedure. In addition to the necessary knowledge, you will need:
- knob;
- universal joint;
- crosshead screwdriver;
- extension;
- figured bat.
Armed with everything you need, unscrew the battery and remove the protection from the dashboard. The capricious immobilizer will be located behind the heating controls, not far from the radio. Externally, the device looks discreet, like a small black box measuring 5x10 cm. After that, the hardest part begins.
To remove the treasured black box, you need to unscrew the bolts that connect the device to the control panel. Before this, you need to turn off the power supply from the APS; to do this, pull out the plug and hold it with a special lock. Don't forget to reactivate the diagnostic line after the immobilizer has been removed. Disabling the Priora or Kalina immobilizer is completed, now we need to configure the APS.
The most important thing at this stage is to completely delete all information that was left in the ECU (volatile memory) unit. This will be more difficult to do, since the immobilizer will most likely be equipped with an EEPROM system, which is responsible for storing data. There are two ways to solve this problem:
- You can modify the control unit by resoldering the chip resistor. To do this, you need to connect the unit to a PC and use a special pack-loader to read the firmware. After this, it is enough to install new EEPROM firmware and solder the chip in its rightful place.
- You don’t have to remove the chip and use the Combiset program, which works on the same principle as EEPROM.
In some immobilizer models, “tricky” EEPROMs are installed, from which it is impossible to delete all information, and unnecessary “tails” will not lead to anything good. How to disable the Priora immobilizer in this case? Yes, very simple, edit the dump file. To do this, you need to replace its bytes and enter the combination FF instead of 2-7 digits.
In order to open the ECU from the immobilizer, you need to remove the standard wiring connector and count contacts 9 and 18 in it (there are 20 in total). These wires must be bundled and insulated.
The matter remains small. We connect all the connectors to the control unit and put it back. We install the console and start the engine without any problems. Ready!
If, for some reason, you need, on the contrary, to activate the immobilizer, by the way, activating it can often help in case of interruptions in the operation of the device, then you will have to use the key.
What to do: Lada Kalina won’t start
Stylish crossover Kalina
A lot of time has passed since AvtoVAZ announced the launch of a new project called Lada Kalina. Grandiose advertising and hope for a bright future did their job: millions of Russians, out of patriotic feelings, decided to choose the domestic Kalina, discarding numerous projects by Renault, Volkswagen and other factories positioning reliability and quality. But the joy was short-lived.
Already in the first months, Kalina did not show her best side, showing a capricious disposition. And it turned out that Kalina’s owners began to spend more time in the garage doing repair work than on trips. Engineers know their shortcomings and try in every possible way to get rid of them in each next generation of cars, to come up with something to increase the reliability of the car.
But for some reason the results are still little noticeable. As before, the car cannot please you with its endurance and wear resistance. The most unpleasant problem is that Kalina does not start from time to time. To return the machine to working order, it is necessary to find out the causes of the malfunction, and there are many of them. So, let's try to figure out why the Lada won't start.
How to activate the immobilizer
In case of immo failure, the manufacturer offers to use a secret password, which must first be activated on the car. Before activating the immobilizer on a Grant, Kalina or Priora, make sure that you have not lost the special training key that needs to be inserted into the ignition switch. After this, turn the ignition on and off a couple of times and remove the key. The APS indicator should flash for 6 seconds. And here is the most interesting thing. During this time, you need to have time to insert the working key and turn on the ignition. After the buzzer sounds 3 times and 2 more times, turn off the ignition and quickly remove the key. If your speed and reaction were sufficient, you will hear a single signal and the indicator will begin to flash more quickly. If this happens, then you are moving in the right direction, if not, then you will have to practice.
Next, turn on the ignition and make sure that the “Check Engine” symbol lights up. After it goes out, you can enter the password. There are standards here. The password must consist of 6 digits from 1 to 9. We recommend that you choose smaller numbers, then you will understand why.
When the password has been created, press the gas pedal all the way down and wait until the “Check Engine” light comes on again. After this, hold the gas for no more than 3 seconds and release. The lamp should go out.
Now you can enter the code. Let’s assume the first digit is 2. To enter, press the pedal twice, “Check Engine” lights up - release the pedal (you can also hold it for no more than 3 seconds). If the lamp goes out, it means that the first digit of the code has been recorded; all that remains is to record it in the controller’s memory. To do this, press the pedal again, hold it for 5 seconds, and wait until the lamp goes out. As soon as this happened, it means that the first component of the secret code was fixed. As you may have guessed, you need to do this with the remaining 5 digits.
If the password was activated, and in some situation the immo failed, the engine can be quickly started.
Replacing the battery in the key remote control
To power the remote control, a CR2032 type element is used. Press any of the buttons on the control panel. In this case, the indicator on the remote control should light up briefly. If the indicator does not light up or lights up with two short flashes, you need to replace the battery.
1. Using a Phillips screwdriver with a thin blade, unscrew the self-tapping screw that tightens the two parts of the remote control housing.
2. Using a slotted screwdriver, inserting its blade into the groove, we separate the parts of the remote control body.
3. Remove the replacement battery and install a new one, observing the polarity indicated on the battery holder.
4. Squeeze the parts of the remote control housing until the latches snap into place. Then we tighten the self-tapping screw.
Principle of operation
The immo's task is to prevent an attacker from starting a car in order to steal it. The device body is small in size and is located in places that are difficult to break into. If a standard alarm can only scare away a thief, then the immobilizer does not allow the car to start if the person does not have a special electronic key (tag).
There are 3 groups of protective devices:
- contact;
- code;
- contactless.
Contact and code immobilizers give away their location to an attacker due to the presence of a reader or device for entering a code. To start the motor, you need to enter a code or touch the chip to the contact pad. These devices will only prevent the engine from starting during initial startup. This protection mode resembles the operation mode of a secret button. Installing a secret button is cheaper than the cost of these devices, so they have not gained much popularity.
Modern Russian cars are equipped with standard contactless immobilizers, in which a chip with a code is located in the ignition key. The protection device works as follows:
- The driver inserts the key into the ignition switch; when the key is turned, current from the on-board network is supplied to a coil of copper wire wound around the lock.
- The generated electromagnetic field pulse, propagating in space, induces current in the microantenna, which is located in the ignition key body, and charges the capacitance that supplies voltage to the chip containing the code.
- The complex electromagnetic signal generated by the chip is transmitted back to a coil wound around the ignition switch. The code in the form of an electrical signal is sent to the immobilizer, which carries out the recognition procedure. If the immo confirms the authenticity of the code, it sends a command to the electronic engine control unit (ECU) to start the car engine.
This type of protective device tests the chip once when the engine is started; more advanced immobilizers have a “WAIT-UP” relay that does not block engine operation when the vehicle is not moving. This anti-theft system tests the chip at specified intervals.
Such systems operate at 2.4 GHz, are miniature in size and are located in a wiring harness to hide them from intruders. The tag is equipped with a battery, and it is tested by the anti-theft system at a specified frequency. The encoded chip should be stored separately from the ignition key. This increases the vehicle's protection from possible theft. If the driver is forcibly removed from the car, the engine will stall after a preset time.
If, when you turn the ignition key, the immobilizer icon blinks or does not go out, and the engine does not start, then most likely there is a malfunction in the anti-theft system in the car.
What disables immo in a car?
Structurally, this device includes electronic controllers that block the main vehicle systems - the driveshaft and engine. The immobilizer can also deactivate the ignition and fuel supply systems to the engine.
Should I disable the immobilizer myself?
It is better for inexperienced car enthusiasts not to do this; if the immobilizer detects an attempt to break into or open elements of the device, it will block the engine. As a result, you will have to turn to specialists.

