Lada Kalina cars use an APS-6 or 6.1 immo block. If a malfunction occurs in its operation, you first need to find the cause and try to eliminate it. You will need to disable the immobilizer on Kalina if repairing the device does not produce results.
What malfunctions can there be and how to fix them?
When operating a VAZ Kalina, the following problems arise related to the operation of the immobilizer:
- The engine starter turns the crankshaft, but there is no spark in the cylinders. The immobilizer indicator on the instrument cluster lights up. Symptoms indicate desynchronization of the control unit and key. For repairs, the keys must be retrained. If the problem does not go away, then you should look for a fault in the electronic circuits of the controller or keys.
- “Floating” malfunctions during immobilizer operation. One of the common causes is liquid filling the connector pad. For repairs, you need to remove the unit and dry the electronic circuits. A faulty controller must be replaced.
- The power supply to the control unit does not work due to the failure of the fuse located in the mounting block (in the passenger compartment). On Kalina-1 cars, an insert with a rating of 10 A is used; on the later Kalina-2, the part was changed to 15 A. If the fuse fails repeatedly, it is recommended to conduct a detailed analysis of the car’s electronics.
Where is the immo in Lada Kalina?
The anti-theft agent is installed inside the dashboard, behind the central trim containing deflectors for air supply to the cabin. Access to the controller is possible by disassembling part of the panel. The antenna, which serves to communicate between the key and the unit, is located on the steering column around the ignition switch.
The arrow indicates the immobilizer unit, the panel trim and air ducts have been removed
The location of the immobilizer on the Lada Kalina is rather unfortunate, since the connector block is filled with liquids that have entered the air ducts of the air conditioner. The problem often occurs when flushing the air conditioner radiator.
How to activate the immobilizer?
Often, a VAZ Kalina car reaches its owner with an inactivated immobilizer. To carry out the independent activation procedure, you need both car keys (with a red mark and a regular one). A prerequisite is that the doors are closed (until the limit switch is activated).
To ensure the correctness of the immo activation procedure on Kalina, it is recommended to refuel the car, since the low fuel level signal is identical to the sound during programming.
Activation on Kalina-1
The training procedure on Kalina-1 is as follows:
- Take the training key with the red mark and insert it into the ignition switch.
- Turn the key to the ignition switch point. Since the immobilizer is not active, after six seconds the control indicator on the instrument cluster should turn on. If this does not happen, the system is in an active state and further steps are not performed.
- Turn off the ignition, and the immobilizer indicator will switch to rapid flash mode. The flashing mode lasts six seconds, which are allocated to the owner to install a regular key in the ignition switch.
- Turn the lock cylinder to the activation position. The correctness of the procedure is confirmed by the alarm buzzer sounding three times. The absence of a sound indication indicates that the time interval allocated for installing the key has been exceeded, or that the immobilizer is faulty. The option of “training” the standard key to work with a device from another car cannot be ruled out.
- Wait 5-6 seconds, the buzzer should sound two more times. Then you need to turn off the ignition and remove the key from the lock.
- After this, the owner has six seconds at his disposal, during which he must turn on the ignition with the key with a red mark. During this time, the immobilizer indicator light flashes on the instrument cluster.
- After turning on the ignition, the buzzer should sound three times. Wait a few seconds until the second series of beeps sounds (two separate beeps).
- Turn off the ignition, leaving the key in the lock. After some time, a single signal will be sent by the buzzer, and the warning lamp on the instrument panel will begin to flash with increased frequency. Up to 15 seconds pass between turning off the ignition circuits and the indicator switching to the accelerated flashing mode. The time interval depends on the model of the immobilizer control unit installed on the car.
- After this, within 10 seconds you need to turn on the ignition briefly (for 3 seconds).
- Turn off the ignition. The alarm should sound three times. This confirms the successful completion of programming.
- Wait until the indicator on the instrument cluster stops blinking. Then you should remove the red key, programming the devices is completed.
Activation on Kalina-2
On Kalina-2 the procedure is different:
- When you turn on the ignition with the key with a red mark, three short beeps will follow from the buzzer. After the third signal passes, the ignition is turned off and the key is removed from the lock. Important - if the car was operated with a red key, the immobilizer will not make sounds. In this case, you need to wait a few seconds and move on to the next step.
- Within 5-6 seconds, insert a regular key and activate the ignition circuits again. Three beeps will sound, followed by a pause followed by two more beeps.
- Change the keys in the lock (within 6 seconds). After turning on the ignition with the red key, three signals will be given, then two more.
- Turn off the ignition, leaving the key in the lock. A buzzer will sound, after which the key will be turned to the ignition switch position. The car's standard horn will sound, indicating that the regular key has been stored in memory.
- Turn off the ignition. The indicator on the instrument cluster will go off. Otherwise, we are talking about device failure or programming error.
The procedure for activating the immobilizer on the VAZ Kalina, as well as Priora and Grant is shown in a video from the channel “avtodopka. ru".
Warning icons on the panel
The steering wheel icon can light up in two colors. If the yellow steering wheel is on, then adaptation is required, and when a red image of the steering wheel with an exclamation mark appears, you should already be concerned about the failure of the power steering or power steering system. When the red steering wheel lights up, your steering wheel will probably become very difficult to turn.
The immobilizer icon usually blinks if the car is locked; in this case, the indicator of a red car with a white key signals the operation of the anti-theft system. But there are 3 main reasons if the immo light is constantly on: the immobilizer is not activated, if the tag on the key is not read or the anti-theft system is faulty.
The handbrake icon lights up not only when the handbrake lever is activated (raised), but also in cases where the brake pads are worn out or the brake fluid needs to be topped up/replaced. On a car with an electronic handbrake, the parking brake light may come on due to a glitch in the limit switch or sensor.
The coolant icon has several options and depending on which one is lit, draw conclusions about the problem accordingly. One red lamp with a thermometer scale indicates an increased temperature in the engine cooling system, but a yellow expansion tank with waves indicates a low coolant level in the system. But it is worth considering that the coolant lamp does not always light up at a low level; perhaps there is simply a glitch in the sensor or float in the expansion tank.
The washer icon indicates a low fluid level in the windshield washer reservoir. Such an indicator lights up not only when the level actually decreases, but also if the level sensor is clogged (the sensor contacts become coated due to poor-quality liquid), giving a false signal. On some vehicles, the level sensor is triggered when the washer fluid does not meet specifications.
The ASR icon is an Anti-Spin Regulation indicator. The electronic unit of this system works in tandem with ABS sensors. When such a light is constantly on, it means the ASR is not working. On different cars, such an icon may look different, but often in the form of an exclamation mark in a triangle with an arrow around it or the inscription itself, or in the form of a car on a slippery road.
The catalyst icon often lights up when the catalytic element overheats and is quite often accompanied by a sharp drop in engine power. Such overheating can occur not only due to poor cell throughput, but also if problems arise in the ignition system. When the catalyst fails, high fuel consumption will be added to the burning light.
How to disable the immobilizer on Kalina?
The immobilizer is disabled if problems arise in the operation or use of the alarm system with remote start. In the second case, a more competent solution would be to install a bypass device.
If the owner intends to block the immobilizer on Kalina, then he needs to know the type of ECU (engine control controller) that is installed on his car.
When using crawlers, two schemes are possible:
- using a device with a key or chip inside;
- use of a keyless crawler equipped with a chip signal emulator.
What will you need?
Depending on the type of ECU you will need:
- K-Line adapter;
- a laptop with pre-installed software, for example, ChipLoader 1.97.7 or analogues;
- soldering iron or soldering station;
- additional wires and elements (in accordance with the diagram);
- additional 12 V power supply;
- Firmware may be required for a unit with the immobilizer function disabled.
DIY shutdown instructions
The work is carried out with the removal of parts from the car, so the owner must have the skills to disassemble and assemble components. Otherwise, it is better to contact a car service.
Bosch M 7-4 controller
Sequence of steps to deactivate Bosch M 7.4:
- Turn off the on-board power supply. The unit is equipped with two plugs; for further work you need to remove the large one, the small one can be left in place.
- Install the wires required to supply additional positive voltage into pins A4 and B2 on the wiring harness. The conductors are connected to the battery through a switch.
- Carefully place the block in place and fasten the fasteners.
- Install the adapter into the diagnostic connector and connect to the computer. For correct operation, a data exchange rate of no higher than 38400 bps is recommended.
- Run the software and then turn on the power on the auxiliary wiring.
- Turn on the ignition, after which communication with the unit will be established.
- Read EEPROM data and save it.
- Load new firmware into memory with the immobilizer disabled.
- After the firmware is completed, close the software and then turn off the ignition.
- Remove the plug and disconnect any additional wiring.
- Check the ability to start the engine with a key without a chip. At the same time, the immobilizer indicator on the instrument cluster will turn on and off.
Location of pins in the plug
Bosch 7-9-7 controller
The modification of the Bosch 7.9.7 block consists of removing one resistance. Since the dimensions of the parts are small, it is recommended to carry out the work in a specialized service center. Without soldering skills and without additional equipment, the unit can be damaged.
Controller January 7-2
In order to disable the immobilizer on Kalina with ECU January 7.2 yourself, you must:
- Turn off the on-board power supply and remove the unit from the vehicle.
- Connect the controller connector in accordance with the diagram.
- Install the adapter on your computer.
- Apply voltage using the switch, simulating the operation of the ignition.
- Launch the software on the computer and establish communication with the programmable unit.
- Read the firmware and save it on your hard drive.
- Read the EEPROM data and delete it programmatically (using the “delete IMMO” button). If the deletion is successful, a corresponding message will be displayed.
- Turn off the program, “turn off” the ignition switch.
- Gain access to the immobilizer unit installed on the vehicle and remove the harness from the connector. It is necessary to connect pins 9 and 18 in the plug, which will ensure the normal functioning of the car’s electronics.
The photo below shows some steps to remove immo January from memory.
Connection adapter
Connection diagram for programming
Expanded version of the scheme
Connection to socket
Software operating window
Establishing a connection
Reading parameters
Removing an immobilizer from memory
Controller January 5 1
If the January 5.1 unit is installed on the car, the immobilizer is disabled by flashing the EEPROM memory chip. The procedure is performed in specialized services, since it requires special equipment (soldering station, hair dryer, programmer).
Emergency shutdown
On the VAZ Kalina you can independently enter the emergency code into memory:
- You can come up with your own code consisting of six digits in the range 1-9; 0 cannot be used for the code.
- Open the car, get behind the wheel and be sure to close all the doors (before the door limit switches are activated).
- Retrain the keys. The procedure depends on the car model.
- After completing the recording procedure, you must leave the red key in the ignition.
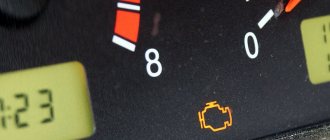
- Turn the cylinder to the ignition switch position and wait for the Check Engine indicator on the instrument cluster to deactivate.
- Enter the code numbers into memory. Programming is carried out by quickly pressing the gas pedal all the way. Each press causes the Check Engine light to turn on; when released, it goes out. To finish entering a number, keep the pedal pressed until the lamp goes out. Important note: on vehicles with a cable-operated throttle valve, programming problems may occur. The reason is that the cable tension is insufficient, which prevents the recording procedure from being activated.
- By analogy, enter the remaining digits of the code. If an error is made while dialing, the Check Engine indicator will go into flashing mode. In this case, the procedure is repeated again starting from the moment of retraining the keys.
- If the programming is done correctly, then after entering the last digit, the Check Engine lamp does not turn off. It is recommended to wait 10-15 seconds with the gas pedal depressed and then deactivate the ignition.
In order to delete the code from the immo memory on Kalina, you should enter the setup mode and, instead of entering the first digit, press the gas pedal for a long time.
Sequence of actions for emergency deactivation:
- Turn on the ignition and try to start the power unit. If problems are detected, the immobilizer indicator on the instrument cluster will flash.
- Wait about one minute for the Check Engine Light to turn off. This is a signal to start entering the code.
- Enter numbers into memory by analogy with programming (gas pedal). When the code is recognized, the fuel pump will turn on and the Check Engine indicator will remain active. If an error is detected, the indicator will go into slow flashing mode.
Dashboard of the car "Kalina"
On the car panel there are several instruments showing the operating status of the engine, speed, coolant temperature, and the amount of fuel in the gas tank. Modern VAZ models also have an on-board computer.
Tachometer
This device is located on the far left of the panel. It shows the number of revolutions of the crankshaft per unit of time. The numbers on the dial are in multiples of 1000. Values starting at 5000 rpm are placed in the red zone. It shows a dangerous operating mode.
At idle speed, 1000-1100 per minute is considered normal. When traveling in the city, with the engine running normally, the gauge needle should be in the region of 2000. On the highway, at a speed of 100 kilometers per hour or more, the value reaches 3000.
Speedometer
The device with the largest scale. Located in the center of the panel. Shows vehicle speed. The value is kilometers per hour. The pointer dial is graduated with numbers from 0 to 200.
The icons on the panel of the VAZ Kalina car in the form of two green arrows located on top of the speedometer indicate left and right turns. When the driver switches on the selected direction of travel, the lights begin to blink.
Coolant temperature dial gauge
The calibration of this device is from 60 to 130 degrees Celsius. Operating temperature is from 90 to 105. Next is the red zone, warning the driver of overheating.
The readings on the device come from a temperature sensor. If the coolant overheat reaches 105 degrees or higher, the arrow will move into the red zone and the driver will hear a buzzer. It is not recommended to operate the car in this case.
Fuel quantity indicator
The dial of this device has three values - 0, 0.5 and 1. These numbers show the fuel level in a tank designed for 50 liters. When the arrow of the device is in position 0, an icon is turned on, schematically depicting a gas station. This means that there are less than 7 liters of gasoline left. When the symbol lights up, the buzzer sounds.
Digital display of on-board computer
Under the speedometer there is a display of the BC - on-board car computer. The readings on this device are displayed in two lines.
Dashboard upgrade
The top line shows the total mileage of the car and the number of kilometers traveled per day. To switch modes in the bottom line there is a button mounted on the windshield wiper lever. Values shown:
- time;
- outside air temperature;
- vehicle travel time;
- average fuel consumption;
- current gasoline consumption;
- power reserve;
- average speed.
The daily mileage indicator in the top line can be reset using a button located on the dashboard. It is located in the left corner under the fuel consumption indicator scale.

