The VAZ 2114 gas tank is a special metal tank for storing fuel reserves. The product is equipped with a special neck in order to replenish its capacity with new fuel.
If we touch on the design features of the element, it consists of two stamped metal parts that are firmly welded together. In addition, the tank has special technical openings to which hoses for supplying and discharging fuel are connected. In general, there are several types of materials from which containers for storing fuel in a car are made, for example, plastic, aluminum.
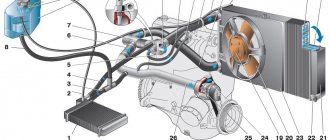
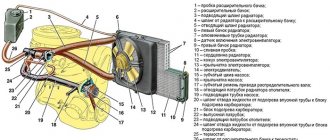
Gas tank vapor recovery system
In almost every modern car, the gas tank has a built-in ventilation system (otherwise called a vapor recovery system).
It includes elements such as:
- separator;
- connecting tubes;
- two way valve.
The main purpose of this system is to maintain stable pressure inside the tank and capture vapors formed in it during strong shaking, vibration, or in hot weather, when the fuel inside begins to expand and evaporate. The absence of such ventilation could lead to the fact that the gas tank, under the influence of excess vapor pressure, would simply swell and become deformed.
The fuel vapor recovery system operates as follows:
- when heated or vibrating, gasoline vapors are formed in the tank;
- due to their volatility, they rise up and fall inside two drainage tubes running from the tank to the separator;
- getting inside the separator, they condense, turning into drops of liquid, and flow back into the gas tank;
- excess vapors that do not have time to condense (for example, in very hot weather) enter the two-way valve from the separator and are discharged into the atmosphere.
In cars with an injector, the tank ventilation system works on a similar principle with the only difference that instead of a two-way valve, it has an adsorber (absorber) of vapors installed, which accumulates them and, at the command of the ECU, releases them into the engine for afterburning. This avoids intentional leakage of fuel into the environment.
Separator design
The VAZ 2114 gasoline vapor separator is a small, completely sealed tank made of metal or impact-resistant plastic. It is installed in the right rear part of the car on a special bracket. Using a hose system, it is connected to the gas tank (from where vapors flow through drain pipes) and to a two-way valve. The total volume of this device is 7 liters.
Once in this tank, the vapors accumulate in it and, due to increased concentration and cooling, condense. Drops of condensation settle on the walls and bottom, after which they gradually flow back into the gas tank. The same vapors that did not have time to condense flow towards the two-way valve. From its name it is easy to guess that it works in both directions at once - “for the intake” of atmospheric air into the tank and “for the release” of fuel vapors outside.
Despite the obvious simplicity of the fuel ventilation system and the minimum of parts located in it, it still breaks down, leading to rather unpleasant consequences.
So, signs of a vapor separator failure may include:
- smell of fuel inside the cabin;
- the smell of fuel near the car (and a lot of time has passed since refueling);
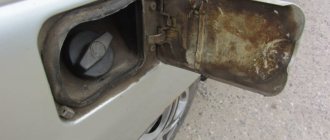
- gasoline stains near the neck of the tank;
- drops of fuel on the ground after a long stay.
Having noticed these signs, we can conclude that the VAZ 2114 gas tank separator is cracked or leaky and is no longer doing its job.
Separator replacement
Due to the fact that the separator is an ordinary tank (most often plastic), it is hardly worth trying to repair it with improvised means - due to the high fluidity of gasoline, the problem may remain, and time for repairs will be wasted. That is why the best option in this situation is replacement (especially since a new vapor separator is very inexpensive).
If possible, it is better to purchase a metal separator - it is more resistant to vibrations and has an increased service life.
To replace this device you will need the following set of tools:
- Phillips screwdriver;
- key to 8;
- key to 10;
- ratchet;
- head at 13.
The separator replacement itself is performed in the following order:
- Place the machine on a pit or overpass.
- Apply the handbrake.
- Remove the rear bumper trim.
- Fold back the right side of the upholstery inside the trunk.
- Using a 10mm wrench, unscrew the separator shield fixing nut.
- Remove the fuel tank cap.
- Using a screwdriver, loosen the clamp where the inlet hose connects to the pipe at the bottom of the car.
- Remove the hose from the filler tube.
- Using a 13mm socket, unscrew the nut securing the clamp that presses the filler tube to the body.
- Using the same head, unscrew the fasteners of the filler pipe bracket.
- Loosen the clamp holding the gas tank ventilation hose to the filler tube fitting.
- Remove the ventilation system hose from the fitting.
- Remove the filling tube from the separator.
- Remove the O-ring from the junction of the separator shield and the tube.
- Unscrew the bolt securing the separator shield to the car body (you will need a size 8 wrench).
- Move the separator shield and separator to the side.
- Loosen the clamp securing the separator hose.
- Remove the separator hose from the fitting.
- Remove the old separator.
The new gas tank vapor separator should be installed in exactly the same order, but in reverse order.
Source
Replacing the fuel filter on a VAZ-2114
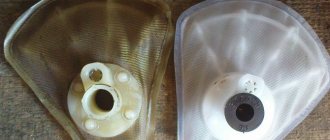
The fuel entering the car engine should not contain any foreign particles. Therefore, the design of the fuel system includes a special filter, the basis of which is filter paper. This allows you to trap dust or water that accidentally gets into the fuel tank before it ends up in the engine combustion chamber.
Where is the fuel filter located in the VAZ-2114
The fuel filter on the VAZ-2114 is located on the bottom under the trunk and is included in the fuel line. If you look in the direction of travel of the car, it is fixed slightly to the right of the muffler. To carry out work to replace it, you need a garage with an inspection hole.
On carburetor versions of the car (limited edition, first releases) this part is located next to the fuel pump.
Fuel filter on a car
Symptoms of a problem
It is recommended to change the fuel filter on the injector after 30 thousand kilometers. The malfunction of this part is confirmed by several signs:
- The engine stops after idling for a short time.
- Fuel consumption is increasing.
- Difficulties in engine operation.
- Jerking or sudden stopping of the engine while moving.
Tools for work
To dismantle the filter element, you need the following tools:
- Container for draining gasoline.
- O-rings.
- Open-end wrenches ranging in size from 10 to 19 mm.
How to change it yourself
Before starting work, the vehicle's on-board electrical system must be de-energized. You also need to relieve the fuel pressure in the system, for which the fuel pump is disconnected from the power supply and the engine is allowed to run until it stops on its own.
Next steps include several steps
- Preparing a container for draining gasoline.
- Treating the gas filter mounting with penetrating lubricant.
- Removing the fittings suitable for the fuel line filter using wrenches 17 and 19. Draining the remaining fuel leaking from the lines.
You need to unscrew two 17 mm nuts on the line fittings - Removing the clamp securing the part.
This is how you remove the fuel filter mount
Filler valve 2114
- To the beginning of the forum
- Forum Rules
- Old design
- FAQ
- Search
- Users
I park the car on a slight slope - the front is higher, the back is lower, and also tilted towards the gas tank filler neck.
Zilch when opening the lid = clogged tank ventilation! (As far as I understand)
When you open the gas cap there is only a slight whine.
Someone asked at the beginning of the summer)
