An internal combustion engine is designed to operate at a certain temperature. Only within a certain range of heating of the coolant are the correct temperature gaps of the rubbing parts and the factory-set characteristics observed.
To speed up warm-up, the coolant first passes through a small circuit (bypassing the radiator). Then, as it heats up, the flow is redirected along a large circuit through the radiator.
If necessary, the cooling fan is also forced to turn on. Thanks to this three-stage system, heating occurs more evenly and operating temperature is reached faster.
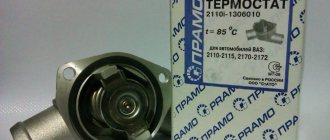
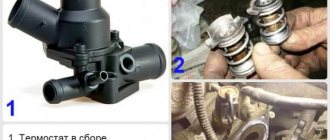
Design and replacement of the VAZ-21213 thermostat
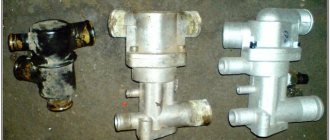
The thermostat with a solid heat-sensitive filler has a main and bypass valve.
The opening of the main valve begins at a coolant temperature of 79–82 °C, the stroke of the main valve is at least 6 mm.
On a cold engine, the thermostat valve closes the pipe leading to the radiator, and the liquid circulates only in a small circle (through the thermostat bypass pipe), bypassing the radiator.
The small circle includes the heater radiator, intake manifold, carburetor heating unit (on engine 21213) or throttle assembly (on engine 21214).
At a temperature of 78–85°C, the valve begins to move, opening the main pipe; in this case, part of the liquid circulates in a large circle through the radiator.
At a temperature of about 90°C, the main valve opens completely, and the bypass valve closes, and all the liquid circulates through the engine radiator.
The main valve stroke must be at least 6.0 mm.
You can evaluate the serviceability of the thermostat by heating the lower radiator pipe: it should be cold until the liquid temperature (according to the indicator) reaches 80–85°C, and hot when it rises to 85–90°C.
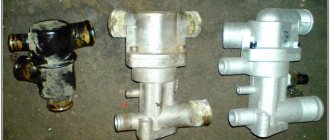
The thermostat is beyond repair. In case of malfunction, loss of tightness, or deformation of the pipes, it is replaced.
Symptoms of the problem and consequences
The main signs of a malfunctioning thermostat in a car are abnormal coolant temperatures when the engine is running. It may be too high when the radiator fan is working correctly and there is a sufficient amount of antifreeze itself, or too low when the engine is warm. A concomitant sign of the last symptom is a sharp jump in coolant temperature when the engine stops.
Valve malfunction can also be monitored by the behavior of the temperature sensor when the machine is moving. When the speed increases, it shows values below normal, and when it decreases, on the contrary, higher.
A thermostat failure on a Niva reduces the service life of the motor and its final operating life, accelerating the wear of mechanisms due to constant overheating.
Main element device
As for the cooling radiator, it is impossible to imagine the operation of the engine as a whole without it. It is represented by these components:
- upper and lower tanks;
- core;
- fastening parts.
Its main purpose is to cool the mixture coming from the water jacket to the required temperature standard. Good thermal conductivity is facilitated by the fact that it is usually made of brass. The core contains transverse plates. Once here, the reagent is divided into many streams - this allows you to get a more effective result.
The principle of operation goes like this:
- The pump constantly “moves” liquid into the VAZ 21214.
- The system operates in such a way that water circulates in a circle, washing the heated walls of the blocks and cylinder.
- In this case, engine overheating can be avoided, and heat will be guaranteed to be removed from important parts.
- Then the mixture goes through the radiator, and after that it is released into the environment.
- Thus, the cyclicity is completed - now the cooled liquid will have to repeat it again for the VAZ 21214.
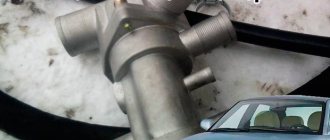
Lada 4×4 3D VYATSKAYA GUN › Logbook › Installing a thermostat according to the principle of the NIVA-Chevrolet scheme.
For a long time I was planning on switching to a thermostat from a Chevrolet Niva on the Niva, before that it was installed on the 2106... Unlike the native one, a more thought-out scheme ensures: - supply of coolant/oil directly to the cylinder block. - Air pockets are quickly expelled. - Faster warm-up motor and, as a result, the heater heats up faster in winter.
For the remodel you will need:
-2 pipes (in the picture No. 1 and No. 16) -Hose of 18 mm in inner diameter to the stove. -Hose from the expansion tank to the radiator (now this will be the return (in the picture No. 13) -Expansion tank (I took from 21214) - Chevrolet Niva thermostat. - Plug for the coolant/oil supply channel to the heater from the pump. (I made it myself) - Clamps (it is advisable to take NORMA GM, very high quality.
And in detail:
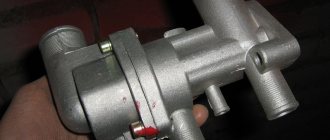
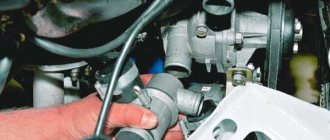
We remove all the old parts of the coolant/oil system and attach the thermostat to the pump with the purchased hose.
From the old hose we cut out a new pipe from the thermostat to the head.
We adjust the purchased hose from the thermostat to the radiator in place...
After that
Take a purchased hose with an internal diameter of 18mm
And pull it onto the upper pipe of the stove.
We connect the carburetor heating to the smallest fitting of the thermostat. I recommend using a very strong oxygen hose…
We install a pump plug made from a former pipe.
The radiator fitting, which previously served to supply coolant/fuel from the expansion tank, has a double cross-section; we attach a hose to the smaller one.
And we pull it into the new expansion tank.
Now coolant/fluid will circulate through it, expelling air pockets and constantly maintaining the required level of coolant/fluid in the radiator.
We slightly modify the radiator cap. We saw off the rod with a grinder and cut out 2 gaskets from the inner tube to seal the connection as much as possible.
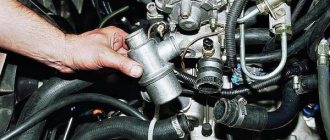
General form.
And assembled.
In addition to everything, I installed a thermocouple and an emergency coolant temperature sensor in the upper radiator pipe.
The sensors are oriented downward to avoid contact with steam and incorrect readings.
In the afterword, I will say that an electric fan with forced shutdown will be installed, and the emergency sensor will be displayed on a warning lamp. Do not switch