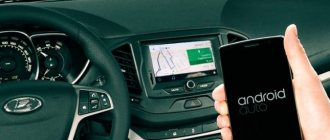
Lada Largus is largely copied from models of the French brand Renault. And this applies not only to components and assemblies, but also to the standard radio. For example, the Renault Duster, Sandero, Logan models have exactly the same audio system head units. There is nothing surprising in this, because the assembly of these cars is completely organized in Russia. On Largus, the standard radio can only be seen in the “luxury” or “standard” configuration.
Radio tape recorder - removal and installation
Place the car in the workplace, apply the parking brake, and turn off the ignition.
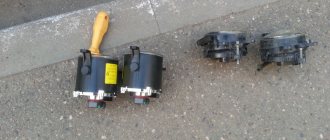
Lift the hood cover and disconnect the ground wire terminal from the battery. Remove radio 1, Figure 17-3, from the instrument panel using two special pullers (radio puller 7711381821 - 2 pcs.). Or using four pins, inserting them into the holes about 3 cm (see photo) and pressing on them at the same time (thin nails, knitting needles, etc. will do).
Holes for inserting keys (pins)
Disconnect block 1, Figure 17-4, of the wiring harness from the radio 2.
Disconnect cable 3 of the radio antenna from the radio.
1 - block of the wiring harness to the radio; 2 — radio tape recorder; 3 - radio antenna cable
Install the radio in the reverse order of removal. Wherein.
. The pin of the head unit with the rubber bushing put on it must fit into the hole in the instrument panel.
For normal operation of the radio, during installation, make sure that the antenna cable and wires are not compressed, twisted or deformed.
Video
Source
Types of fastenings
Before you start, you need to find out how the device is fixed in the dashboard. There are the following mounting options:
- Using brackets. The housing is fixed in the mounting socket with screws. To remove the car radio, you need to dismantle the frame and unscrew the bolts. This fixation method is typical for standard audio systems.
- Using latches. A mounting casing with grooves into which the radio tape recorder is inserted is installed into the seat. The device body is equipped with latches that securely hold it in the socket. To unlock the latches, use the keys included with the device. Most often they are metal strips inserted into holes on the front of the player. Hidden latches and complex keys make it difficult for criminals to remove the radio when the car is opened.
How to remove the radio on Lada Largus FL
On the Lada Largus FL (facelift from 2022), AVTOVAZ began installing a new multimedia system (MMS). During repairs or modifications to the vehicle, it may be necessary to remove this head unit. How to replace the radio on the updated Largus with your own hands is described in the factory’s technological instructions.
Before starting work, disconnect the earth wire terminal from the battery (spanner 10).
Remove the visor
1, Figure 12-7, central trim 2, grasp it with your hand and pull it away from the instrument panel, overcoming the forces of the latches.
Figure 12-7 – Removing the visor of the central lining: 1 – visor of the central lining of the instrument panel; 2 – trim for the central instrument panel
Remove the center trim
1, Figure 12-8, instrument panel, pulling its lower edge with a force that overcomes the efforts of the clamps, disconnect the wiring harness connectors from the switches located on the trim (a device for dismantling decorative body elements or a flat-head screwdriver with a protected tip).
Figure 12-8 – Removing the central trim: 1 – trim of the central instrument panel.
Remove the multimedia system
, unscrewing the screws 1, Figure 12-9, securing the head unit 2. Remove the device from the instrument panel by disconnecting the cables and connectors of the instrument panel wiring harness from the device (replaceable Torx T20 head, wrench).
Figure 12-9 – Removing the right trim: 1 – screw securing the head unit of the multimedia system; 2 – head unit of the multimedia system
On the Lada Largus dorestyle, the radio tape recorder is removed like this.
You will find other instructions for removing and disassembling Lada Largus FL parts here.
Source
Lada Largus head unit: how to remove, connection diagram and installation
Place the car in the workplace, apply the parking brake, and turn off the ignition. Lift the hood cover and disconnect the ground wire terminal from the battery.
Remove radio 1, Figure 17-3, from the instrument panel using two special pullers (radio puller 7711381821 - 2 pcs.). Or using four pins, inserting them into the holes about 3 cm (see photo) and pressing on them at the same time (thin nails, knitting needles, etc. will do).
Holes for inserting keys (pins)
Disconnect block 1, Figure 17-4, of the wiring harness from the radio 2.
Disconnect cable 3 of the radio antenna from the radio.
1 - block of the wiring harness to the radio; 2 — radio tape recorder; 3 - radio antenna cable
Install the radio in the reverse order of removal. Wherein.
. The pin of the head unit with the rubber bushing put on it must fit into the hole in the instrument panel.
For normal operation of the radio, during installation, make sure that the antenna cable and wires are not compressed, twisted or deformed.
The standard head unit used on the Lada Largus has a security code that must be entered after the battery is disconnected or the fuse in the power circuit fails. The password is printed on a separate insert in the service book, which is given along with the car upon purchase. If documentation is lost or the head audio unit is replaced with an analogue one, the owner needs to know how to unlock the radio on the Lada Largus.
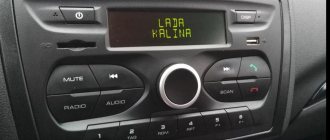
"secret" menu of the Lada Largus radio
To go to the section with individual settings, use the SET button located on the front of the radio panel. Not every car owner knows that this button has hidden capabilities. Just press this key and hold for 6–7 seconds. The device will go to the engineering menu, where a number of special settings become available. The instructions included with the standard radio contain no information about such a tab. The “secret” menu opens three sections (“Diagnostics”, “Configuration”, “Radio Monitor”). On the right is a rotating knob, which allows you to navigate up or down between these sections. To select the desired one, press the handle. To go to the previous level, press the “Back” key, which is located to the left of the rotary knob.
In the “Radio Monitor” section you can see the current frequency at which the received signal is located and some other data. In the “Diagnostics” section there is an additional subsection with the items “Autotest”, “Monitor” and “Errors”. The “Errors” block was created to inform the driver about existing problems in the BC (on-board computer).
The best option would look like this
| Figure 17-3 - Radio device: 1 - radio device |
| Figure 17-4 — Removing the radio (radio device): |
| Inscriptions | What does it mean |
| FM, Am ant OK | The radio module is working properly. |
| Microphone OK | The microphone is working. |
| VT-Module OK | Bluetooth works fine. |
| CD OK | The disc player operates normally. |
| Fascia Button OK | The keys work properly. |
| Power IC OK | The on/off button works. |
The “Monitor” item provides information about the vehicle’s operating parameters. Simply put, the radio display displays information from the electronic control unit. In this menu, you can find out about the status of the current network, the functionality of the car’s backlight (to check the mode, just turn on or off the side lights - accordingly, the information about the backlight will change properly).
It also displays data on battery charging and its current voltage, whether a removable device is connected or not, data on the correct decrease or, conversely, increase in volume when the vehicle speed changes (only if the wire required for this is connected to the appropriate connector).
In general, the engineering hidden menu on the Lada Largus radio was a good addition to the standard functionality. It won’t be difficult to figure out what’s here and how.
As for the electrical circuit and connection method, including pinout, this information can be clearly seen in the user manual or in the photo.
Radio capabilities
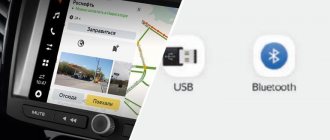
In the part of the right radio there is a USB connector, which is intended for connecting:
- USB Flash USB (card 2.0 and 3.0 up to 64 GB);
- USB Flash player with a memory capacity of less than 1024 MB;
- USB HDD with FAT32 file system;
- Mobile phone (only in left mode).
On the charging part of the radio there is an SD card slot for. SD Memory Card Slot: Supports SD, SDHC cards with dimensions of 32 X 24 X 2.1 mm. SDHC up to 32 GB, SD up to 32 GB.
The file allocation table (FAT) of the connected device must be FAT16 (2 GB). The maximum number of primary partitions should be no more than 4. It is desirable that the directory tree of the connected device have no more than eight levels. There should be no more than 1000 files in one directory.
While playing files, the display shows all the necessary information about the track. source Selecting playback is done using the AUDIO button on the left side of the radio. The radio preset has an equalizer (JAZZ, POP, CLASSICAL, USER and VOCAL). The range of timbre adjustments for bass, treble, balance, front balance/rear is from “-7” to “+7” units.
The radio has Bluetooth and Handsfree functions. You can connect your phone by long pressing the button with At. pairing handset on the phone, the inscription “MMC12” should appear in the list of found devices, the password is 0000 “by default”. After successful connection, the BT icon will appear on the display of the radio. There is no phone book on the Grant 2 and Kalina radio, but it is possible to save up to 6 numbers in the memory of the radio. The audio system also remembers the last outgoing and incoming calls. The manufacturer does not guarantee that a phone will work in Handsfree mode if it uses two or more SIM cards.
The radio allows you to listen to audio files from your mobile phone. To do this, you need to connect your phone to the radio via launch and Bluetooth player on the phone. The manufacturer states that some cell phone models may not work correctly with the radio, but this is not a sign of a malfunction.
The Kalina 2 and Granta radio has its own battery, which allows you to save custom ones after setting the battery disconnection for 10 days.
No speakers
The layout without speakers is found on the basic configuration. The car has connectors for connecting the radio and front speakers, as well as an antenna output. After switching the radio, you need to disassemble the door trims, which will allow you to mount the speakers in their standard places.
Loudspeakers are attached to factory mounting points, and wooden adapter rings may be used. After installing the elements, it is necessary to return the removed parts to their place.
Some car enthusiasts love their favorite car so much that they cannot live a day without it. And considering that many people live in huge cities, it takes a lot of time just to get to work and back. If you add traffic jams, you can spend almost half your life in a car. It’s good that at least the Lada Largus has modern acoustics at its disposal. This feature allows you to brighten up a little downtime in long lines, when your last nerves give out.
But it also happens that we have a standard Lada Largus radio, but understanding all its functions is not an easy task.
How to connect a radio
Connecting the head unit depends on the vehicle modification. When installing the radio, you need to firmly snap the ISO plugs in place, and then reinstall the antenna connector.
If the product is equipped with a wired remote control, it is located on the steering column or the front of the instrument panel. The wire is laid inside the panel along the standard lines of the electrical harnesses.
With 2 speakers
The 2-speaker circuit is used only on cargo vans; the loudspeakers are located in the doors under the plastic panels.
The radio is ready for use immediately after connecting to the standard connectors. The car owner can install additional speakers in the cabin by laying separate speaker wires to them.
With 4 speakers
On passenger versions, 4 speakers are used, which improves the sound quality in the cabin. The wiring has a separate harness leading to the speakers in the rear doors.
The connection does not require any additional modifications to the vehicle wiring.
No speakers
The layout without speakers is found on the basic configuration. The car has connectors for connecting the radio and front speakers, as well as an antenna output. After switching the radio, you need to disassemble the door trims, which will allow you to mount the speakers in their standard places.
Loudspeakers are attached to factory mounting points, and wooden adapter rings may be used. After installing the elements, it is necessary to return the removed parts to their place.
Installation of the radio. . . There is nothing complicated, you need to select the wires. I bought the wires on the white tower in the first boutique I came across, with music.
Read also: How to choose springs for Opel Astra H
In short, I subconsciously believed that there were some cheap speakers at the door.
In the hope that the music will play. . . Fuck you and not the speakers.
In the previous Largus I had four speakers and somehow I didn’t bother with it at all, the music was playing and I didn’t worry.
On the Lada Largus, audio preparation is present on all modifications, but a radio and speakers are equipped only as options on the “norm” and luxury trim levels.” Next, let’s try to figure out what the manufacturer understands by the word “audio preparation” and what connectors the standard Lada Largus radio has.
- Audio preparation of the Lada Largus includes an antenna with a cable, an interference suppressor, a wiring harness for the radio, a wiring harness for connecting the front door speakers. AvtoVAZ awarded this list to all Lada Largus configurations.
- The wiring harness for connecting the rear speakers (doors) is found on all station wagons and is missing on the van.
- The standard Lada Largus radio with CD-MP3+AUX+USB+Bluetooth+Hands Free functions is installed optionally on the “standard” and “luxury” trim levels.
On versions without a radio, a shelf is installed instead. If you remove the shelf, the wires for connecting the radio will be inserted into its rear part. One plug is used to connect power to the radio, the other to connect two front and two rear speakers.
It is worth considering that the connectors for the audio system differ from the usual ISO standard. Therefore, to connect a non-standard radio, you will have to use adapters, which have the name: car radio socket/adapter Renault Duster/Sandero/Logan > 2012 - ISO (euro).
Adapters will also be needed to connect the speakers in the car doors and the antenna (by the way, the standard speakers are 13 cm in size). The connector for the rear speakers should be found in the pillar behind the driver's seat (near the passenger's feet).
Read also: Do-it-yourself powder coating chamber
If there are no adapters for connecting a radio or speakers, you can cut off the connectors and connect the wires according to the diagrams presented below. However, in this case you will have to think about maintaining the warranty on the radio and the car.
Connection diagram
The procedure for connecting the car radio may differ slightly due to the modification of the car. The audio device sometimes comes with a remote control. It is installed on the steering column or the front of the dashboard. The cable is laid along the length of the electrical harness lines.
The exact wiring diagram may vary due to the number of speakers. Therefore, it is advisable to remember the following information:
- With 2 columns. Two loudspeakers are used exclusively on trucks. Speakers are most often placed in doors under plastic panels. After installation, the radio can be used immediately for its intended purpose. You just need to connect it to the sockets. You can install other speakers in the cabin. Then you will need to lay a separate speaker cable.
- With 4 speakers. In passenger versions, a device with two pairs of speakers is more common. The electrical wiring contains a special harness connected to the rear door speakers. Connection does not require any modifications to the vehicle wiring.
- There are no speakers. The scheme is typical for the basic configuration. The car has connectors for connecting the device and front speakers. Additionally there is an antenna output. When the car radio is connected, you need to disassemble the door trim. This step will help you get the speakers in place.
The speakers need to be fixed to the factory points. You can use wooden adapter rings. After installing the parts, the removed elements must be returned to their original place.
Are you a car driver?! Then you can take this simple test and find out. Go to test »
Replacing car radio Lada Largus
Suddenly you decide to replace the device. Or maybe you just want to clean it, change the firmware, install a code, or repair a tired standard device. Another relevant question arises: how to remove the Lada Largus radio without any visible external latches, keys and locks?
You will need 4 short rods at once, something similar to metal knitting needles or wire 2-2.5 mm thick. You need to first insert our two pins into the left side, and then the remaining two into the right. By simultaneously pressing all four, you need to pry the plastic card from below, and the radio will come out of its grooves.
After this procedure, you need to enter the code again, and if you don’t know it or don’t remember where you put the documents, you will need information from the back panel. There we will find a barcode, the last four characters of which we will need in order to generate a new code for the Lada Largus radio. It is advisable not to forget it. Without the correct code, the radio will not even turn on.
New Lada: Warranty obligations of the manufacturer AVTOVAZ
Other unlock options
There is an alternative way to unlock the Lada Largus radio. You will need to contact an authorized dealer. Specialists send the car's VIN number to the manufacturer. The dealership receives a password from the factory for the installed car radio. The method will not work if the device was replaced with a similar one under a warranty card or personally by the driver. Most often, the official representative removes the radio. The dealer reads the information on the label. He determines the code using a calculator.
The first Largus models had a device that broadcast a preliminary password. To see the code, you need to immediately press keys 1 and 6. Hold the buttons for 5 seconds. An explanation will appear on the screen, followed by a four-digit password. It must be entered into the calculator as described above.
Nowadays such equipment is rare. There are no other ways to unlock the radio. Some car owners reflash the software. But this will not help decode the stereo device.
Sound via bluetooth
A standard car radio in combination with dynamic speakers “reads” music programs equally well, “digesting” any genre without much difficulty. The manufacturer has addressed radio lovers with a powerful antenna device that allows them to pick up a signal of even minimal power. The radio allows you to memorize 6 stations in each frequency range.
Renault Sandero DIY repair
Renault Sandero wiper blades
Compare Renault Captur and Hyundai Creta
Listening to music is available via CD drives or flash devices. Also for the same purposes, switching using Bluetooth is possible.
Recognized formats:
With a wireless connection, it is possible to rewind not only between music programs, but also directly within a track.
The display clearly displays the charge level indication (if “Bluetooth”), as well as the “RDS” line. There is a Russified font in “IDTag”.
Other methods of connecting to this device are the “Jack” and “USB” sockets.
Some owners are not satisfied with the lack of a removable decorative panel for the radio. We consider this point to be unimportant, since it is not able to protect against fraudsters.
Functions of the standard Largus audio radio
The audio device that is present in the Lada Largus allows the owner to acquire such useful options as:
- search and memorize radio stations broadcasting in the traditional FM or AM bands;
- the ability to display the names of tuned stations with a convenient “RDS” function;
- playback of audio programs recorded in the following formats: “MP3” and “WMA”, as well as “AAC” and “WAV”;
- connecting external sources to the head unit for the purpose of subsequent playback of information programs through standard speakers (for this, the radio has “USB” and “Jack” connectors, as well as a “Bluetooth” option;
- switching with the “Hands Free” wireless kit, which allows telephone communication with subscribers while driving.
Functional
ðöôÃÂù ÿþúÃÂÿðÃÂõûàÃÂþÃÂõàòøà´ÃµÃÂààÃÂòþõóþ ÿÃÂøþñÃÂõÃÂõýøàà¿Ã¾Ã»ÃµÃ·Ã½ÃÂõ úðÃÂõÃÂÃÂòð ø ýþòÃÂõ Ã²à ¾Ã·Ã¼Ã¾Ã ¶Ã½Ã¾ÃÂÃÂø. àþÃÂýþÃÂõýøø úþüÿûõúÃÂð óÃÂþ üúþù ÃÂòÃÂ÷ø ÃÂÃÂø ÃÂòþùÃÂÃÂòð øóàðÃÂàþóÃÂþüýÃÂàÃÂþûÃÂ. ýðÿÃÂÃÂüÃÂàþÿÃÂõôõûÃÂÃÂàñõà VALUE õýøÃÂ.
ÃÂÃÂþüúðàÃÂòÃÂ÷àò üðÃÂøýàôûàÃÂàµÃ»ÃµÃÂþýð ò øôõðûõ ôþûöýð:
- 1st »Ã°Ã½Ã¸Ã Ã¿Ã¾Ã»ÃÂ÷þòðÃÂõûÃÂ.
- 2. ýõ þÃÂòûõúðÃÂÃÂõõ þàòþöôõýà¸ÃÂ.
- 3) ¾Ã»ÃÂúþ ÿþÃÂûõôýøà÷òþýúþò. ãüõÃÂàÃÂôõûðÃÂàòÃÂ÷þò ýð ûÃÂÃ±Ã¾à ¹ ø÷ ýøÃÂ.
- 4. õ ÃÂÃÂþÃÂþýÃÂ, ñõ÷ ëüøúÃÂþÃÂþýýþà³Ã¾ ÃÂÃÂÃÂõúÃÂðÃÂ.”
- 5. ½Ã¸Ãµ ÃÂÃÂüÃÂ, ÃÂÃÂþ.
- 6. GALA ÃÂú ÃÂðôøþ/mp3-ÿÃÂþøóÃÂÃÂòðÃÂõûÃÂ.
- 7. HAPPY àÃÂõûõÃÂþýð, ÿþüøüþ ÃÂð÷óþòþà Âþò.
- 8. ÃÂûÃÂÃÂÃÂ÷ ðôðÿÃÂõàÃÂÃÂÃÂÃÂþùÃÂÃÂòð Ã´à › ðÃÂàÃÂòÃÂ÷ààÃÂõÔõÃÂþýþü, öõÔ ðÃÂõûÃÂýþ àýõÃÂúþûÃÂúøüø ÃÂÃÂÃÂÃÂà ¾Ã¹ÃÂÃÂòðüø.
- 9. ¸Ã»ÃÂ, õÃÂûø ýÃÂöýþ ÿÃÂþôþûöøÃÂàÃÂà °Ã·Ã³Ã¾Ã²Ã¾Ã Ã½Ã° ÃÂûøÃÂõ.
ÃÂþýõÃÂýþ, òÃÂõ ÃÂÃÂþ ò þôýþü ÃÂÃÂà› ¾ÃÂõÃÂðõÃÂÃÂÃÂ. ÃÂþ ÃÂÃÂþàÃÂÿøÃÂþú ÿþüþöõàúðöà ôþüàòþôøÃÂõûàýðùÃÂø ÃÂðúþù àºÃ¾Ã¼Ã¿Ã»ÃµÃºÃÂ, úþÃÂþÃÂÃÂù üðúÃÂøüðÃȈ VALUE þöøôðýøÃÂü.
How to install
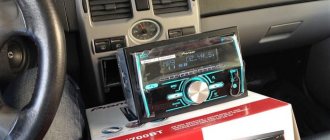
Some cars come from the factory with a 1 DIN car radio with CD player. Basic versions are equipped only with audio preparation; a plastic plug is mounted instead of the head unit.
To install the radio on Largus with your own hands, you need to:
- After removing the plug, place guide slides with locks in the instrument panel.
- Secure the mounting assembly using the tabs located around the perimeter of the part. Bending is done with a screwdriver; the installed shaft should not vibrate or make any extraneous sounds.
- Connect the ISO connectors located on the standard wiring to the head unit.
- Connect the antenna plug to the socket on the radio. If the sizes and shapes of connectors and plugs do not match, appropriate adapters are used.
- Insert the audio device into the shaft and push it until it clicks, indicating that the latches engage.
- Install a decorative frame around the radio panel.
Some owners install 2 DIN size radios on their Lada Largus. To place the head unit, it is necessary to replace the front plastic trim on the instrument panel, since it is impossible to accurately modify the original one.
The original panel is secured with latches, which can be removed manually or with a plastic screwdriver inserted into the gap between the parts.
The front panel with an extended window requires modification - it is necessary to install control buttons for additional equipment on it, borrowed from the Renault Logan sedan; original elements from Largus cannot be placed. This is due to the fact that the panel is designed for oval-shaped keys, which were never used on Largus.
New Lada: Buy door sill stickers for Lada Largus (carbon)
At the same time, the mounting sockets for installing mounting clips are being finalized.
In the instrument panel, it is necessary to remove the horizontal jumpers located near the socket of the standard radio and climate control controls. Dismantling is carried out with a hacksaw and wire cutters, the remaining elements are cut off with a construction knife. All manipulations are carried out with caution, since there is a risk of damage to the standard electrical wiring. Then you need to reinstall the center console to assess the contact density of the elements.
Since the original wiring has cables with colored insulation that does not comply with the ISO standard, it will be necessary to compare the assignments of each element on the car and the radio. An adapter is used for connection; wire switching is allowed by twisting the necessary cables. It is recommended to reinforce the joints with tin-lead solder or a metal connecting sleeve. The connection point is covered from above with a heat-shrinkable tube, which provides protection from moisture and short circuits.
How to find Pre-code
Largus cars use a head acoustic device, unified with Renault-Nissan products. To protect the radio from theft, there is coding that does not allow access to the device's functions without first entering a 4-digit number. The prerequisites for the appearance of a text message like “Radio Code 0000” on the screen are as follows: a terminal has been removed from the positive or negative terminals of the battery to install additional equipment, repair electrical circuits, or install a new battery.
Another reason for enabling encoding is poor contact in the power supply plug, which is connected to the rear wall of the head unit. In this case, the radio operates for a few minutes and then turns off. When you turn it on again, you will be prompted to enter a password.
The code required to unlock the radio can be calculated using a special calculator. It requires entering a 4-digit alphanumeric code printed on a paper label that is pasted on the top cover of the head unit.
Access to the plate requires removal of the equipment.
To dismantle the radio from Largus (and how to find out the code), you need to:
- Prepare a special removable device, unified for Renault radio tape recorders. The equipment has a factory code 7711381821 and is purchased through official dealers or spare parts stores. To reduce costs, ballpoint pen refills or metal rods of suitable diameter with rounded tips are used.
- Insert pullers into the 4 holes located in the corners of the radio. Press down on the elements to release the clamps; it is possible to remove the spring clips alternately from the left and right.
- Carefully pry off the bottom of the front panel using a plastic spatula or an old bank card.
- Pull the head unit completely out of the mounting shaft. Disconnect the power plugs and check their condition (in case of periodic spontaneous shutdowns).
- The pre-code is a part of the barcode that is applied to the square label with the Renault markings. You need to write down the last 4 characters, which include 1 letter and 3 numbers, on a piece of paper.
- Install the removed elements in their original places. The radio is mounted without distortions until all latches are activated.
- Enter the code value into the online calculator, which generates a code to unlock the head unit.
Useful tips
Instead of a 1 DIN device, you can install 2 DIN on the Lada Largus. To accommodate it, you need to update the front trim on the dashboard. It is impossible to improve the original one. It won't look neat. In the panel, remove the jumpers located near the connector for the radio and climate control controls.
The front panel with a wide window will require some work. You need to install control keys for additional equipment. They are borrowed from Renault Logan. Elements from Largus cannot be placed. Initially, the panel was designed for oval buttons.
The original wiring has colored insulation. It is not ISO compliant, which means you will need to match the functionality of the items on the machine and on the device.
An adapter is used for switching. You can connect wires by twisting the cables. The junction point should be reinforced with tin and lead solder. A metal sleeve is considered a good alternative. It is better to cover the connection at the top with a heat shrink tube. It protects against moisture, preventing short circuits.
Radio malfunctions and methods for diagnosing them
As you know, the Lada Largus is equipped with an audio system with a set of speakers already from the factory (depending on the configuration). The amplifiers are located in the front and rear door panels. To connect non-original speakers, several wiring harnesses are provided (including for increasing power using an amplifier when connecting a subwoofer).
A standard car radio sometimes brings not only the pleasure of listening to music, but also some problems. The device may not work or function incorrectly for various reasons. In general, the list of faults includes only those that an ordinary driver (without special knowledge of electrical engineering) can fix with his own hands, without the need to contact a specialized center.
When it comes to repairs, it can often be cheaper to replace the device. Especially considering the availability of alternative options in different price categories and with different capabilities. At a cost of no more than 6,000 rubles, repairs can cost half this amount.
Instructions
According to the diagram in the instructions, two versions of the radio are indicated:
- double din (2 din);
- standard.
There is nothing complicated about the first category, it’s just the name that is incomprehensible. These two versions differ only in different buttons and what is written on them. The most useful and practical feature is the ability to pair with some wireless devices via Bluetooth, such as connecting to a mobile phone. In this case, the standard radio on the Lada Largus will provide you with the opportunity to talk on the phone even without using your hands, thereby not violating traffic rules. If you think that you will have to talk very loudly or shout so that the interlocutor can hear clearly, then nothing like that. A normal tone of voice will be sufficient.
Pinout of Lada head unit connector, 2 DIN 1 DIN diagram
Pinout of Lada head unit
Among Lada drivers there is a special type of driver who constantly improves and refines the car’s audio system. Changing, often in a circle, a bunch of head units, eventually arriving at the point where the standard radio is put in place. If you belong to this type, or simply, for some other reason, removed the radio from its original place, and now want to return it, then our material today is for you! The pinout of the standard Lada radio does not hide anything particularly complicated; anyone with growing hands can handle it. Well, at least from somewhere. To begin with, we will have to deal with the wires, namely their color. Which wire will be responsible for some component of the car's audio system, and it would be advisable not to confuse them. Although in this case there will be nothing terrible and it is not forbidden to search at random. But there’s no need for you and me to wander around; we’ll figure out the color marking of the Lada wires right away. So let's get started.
Downloading a book
After successfully completing the payment (by any method) and returning to the KrutilVertel store from the payment system website, you will be taken to the successful payment page:
On this page you need to indicate your e-mail, where access to download the book will be sent.
If you are already registered on our website, then simply follow the link to your personal account.
The book you purchased will be in your personal account, from where you can always download it.
Please note that after making the payment, you need to return back from the payment system website to the KrutilVertel website.
If for some reason you did not return back to the site and closed the payment system tab with a message about the successful completion of the payment, please let us know - we will send you a letter indicating access to download the book.
The principle of operation of the radio
You can't please all people. Some people like the original standard audio system that comes with a new car, while others want a more advanced option. So what is it like - the original Lada Largus radio? The appearance harmonizes very well with the interior design. Convenient control buttons help you quickly figure out what to press or scroll where.
You can play music from discs or via the Bluetooth connection of your smartphone. It should be noted that the quality does not suffer. Yes, and tuned radio stations can be recorded so that they do not disappear. In addition to disks, you can also use a USB connector, to which you can easily connect a flash drive and play music from it. The device reads basic formats perfectly.
You can rewind and pause even in the middle of a song without having to start over every time. The display shows information about connected devices if a song is playing, that is, the title and artist. In general, connecting devices and operating them is a simple task.
If necessary, you can connect to it, in addition to the above, also headphones via the Jack connector. Some people don’t really like that the outer panel is non-removable, like the previous options. But to think that this is not a problem at all, because if someone wants to steal it, then the absence of an external socket is unlikely to stop the attacker. And he didn’t come for her, but for the radio.
New Lada: 6001551352 RENAULT - Coil spring, airbag. Replacement, description, photos, analogues, prices, buy spare parts at the nearest office | Online store YULSUN (YULSAN)
So, the Lada Largus factory head unit has a good set of functions. As soon as the thought arises that something is missing, you need to take the instructions and read them carefully. It is possible that we simply do not know about some possibilities.
Lada Largus › Logbook › Installing a 9 inch radio in Largus
Hello everyone and happy new year! I am duplicating a post from a blog that I wrote on by mistake.
A radio was ordered in China for Singles' Day, and a month later it arrived in Kazakhstan. And then I started looking for the keys for Logan, even before the radio arrived, I found a couple of showdowns with Logan in Kostanay. I call and start asking about prices for keys. I’m shocked, for a used key they asked from 4000 to 5000 tenge, a ruble costs approximately 5.7. I'm looking through the sites, to the Logan shop in Almaty these keys cost a little more than 2000 tenge, which is normal, but delivery only starts from 20,000 tenge. Out of curiosity, I looked into local auto stores, the prices were announced at 8,000 per key. This no longer surprised me after sorting out the 5000. As a result, I had to ask friends and relatives in Russia who could help with the problem of the keys. Relatives helped and sent keys from Yekaterinburg for 300 rubles, I found out the prices with the seller myself via Avito. It would be possible to order a Eurocar from the website for 200 rubles, but it is unclear how much delivery would cost since my city is not on the list at all, and the website is excellent.
In general, today the keys arrived and I started installing
We hook the beard from below with the spatulas that the seller sent along with the radio and remove the panel by disconnecting the keys. remove the fasteners from the removed panel
then connect the wires. I had a regular radio installed in a car dealership, so I just connected them and everything worked, the bunch of tulips remained free because I’ll install a rear view camera when it’s a little warmer. But I couldn’t figure out how to connect an active subwoofer.
On a bunch of tulips, only one is designated as a sub, and I have 2 tulips left right and a wire that takes rem that takes + from the radio antenna. I didn’t see such a wire on this radio? If I find the left-right channel, I don’t understand where to connect the rem wire.
At first, after installation, the beard from below did not want to snap into place and fell out, I loosened the latches and after that it seemed to hold on better. I immediately checked the connection between the phone and the radio, I was worried that the iPhone would not want to communicate with the Android, but the connection was successful. I just can’t say about the sound quality, because I’m used to a subwoofer, without it the sound is quieter and there’s not enough bass, I hope after installing the subwoofer it will be better. I’ll add after some study, the sound is no worse, I just didn’t know where to find a normal equalizer since I’ve never messed with androids.
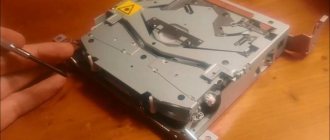
Update process
Now you can connect the media to the radio in your car.
- Before starting the procedure, be sure to turn on the ignition. Otherwise, the radio will automatically turn off and the firmware process will be interrupted, which may lead to device failure.
- When reading information on the media, the radio will determine that the contents on the drive are material for flashing. After analyzing the information, the device will offer to update the software. You should select "Yes" to refuse to click "No".
- Confirm the information by clicking the “OK” button.
Firmware for audio device on Lada Largus
The standard head unit on cars of this model does not look very presentable, but at the same time the functionality is complemented by a large number of possibilities. Unfortunately, despite the decent quality of the technical part, the manufacturers did not pay enough attention to the software. It's no secret that modern audio systems have a full-fledged electronic control unit, which is a kind of computer.
On the other hand, the more complex the audio system, the greater the likelihood of failures and malfunctions. The radio installed on the Lada Largus is no exception to the rule. The software has not been properly tested, so malfunctions are not uncommon. The most common problems are the inability to recognize the file format, reproduce high-quality sound, or identify the removable storage device.
Device characteristics
It can't be called complicated. In addition, the instructions and user manual supplied with the system will help you understand the structure, functionality and characteristics of the device. Structurally, a car can be equipped with either a conventional 1 Din or 2 Din radio. The differences between them are minimal and lie in the location of the buttons and inscriptions.
To reproduce high-quality sound, the audio system provides four speakers:
One of the main features and at the same time advantages of this device is the ability to connect to a smartphone via Bluetooth wireless channel. In addition to comfort and convenience, this function provides passive safety, since the Hands free system allows you to talk on the phone while driving without using your hands. The quality of communication is decent, communication with the interlocutor is not associated with difficulties, the driver does not need to raise his voice, and passengers hear him well.
The standard radio on Largus does not have much functionality and advanced capabilities, for some this is quite enough, but for others the characteristics of the radio are not enough. In terms of appearance, the device blends harmoniously with the standard car interior. All buttons and other controls are easy to use, and the inscriptions are easy to read and intuitive. The device is tightly fixed in the seat, there is no play or other defects.
Largus head unit instructions
Many people spend a lot of time in their car. This is especially true for residents of megacities, because in order to get to work and back, they often have to sit in traffic jams. The Lada Largus car is equipped with a modern audio system that allows you to brighten up your time on the road. Let's take a closer look at what capabilities the standard radio in Largus has.
The radio installed in the car comes with a user manual, so it won’t be difficult to figure out how and what works. Schematically, the instructions indicate two devices: a double-din version and a standard one. The difference between them is mainly in the form of buttons and the inscriptions on them. Four speakers allow you to reproduce clear and high-quality sound.
The radio provides good sound through four speakers
The most useful and necessary characteristic of the radio is the ability to connect it via a wireless Bluetooth connection to a mobile phone. This is not only convenient and comfortable, but also safe, because now you can talk on the phone without using your hands. And the quality of such communication is quite decent, the interlocutor hears perfectly, and there is no need to shout.
Radio in action
It is clear that there is no friend for taste and color, as they say. Some people like the standard audio system, but others don't like it at all. Let's figure out what Lada Largus owners actually acquire along with the car.
Visually, the design of the radio tape recorder fits perfectly into the interior of the cabin. Its buttons and controls are quite convenient, and the symbols are intuitive. No loosening, backlash or failures are observed. Everything is adjusted very clearly.
Music in Lada Largus via Bluetooth:
As for playback, any genre of music will sound great. If you want to listen to radio stations, then an excellent antenna allows you to catch the signal even where it is too weak. It is possible to save certain radio stations in the amount of 6 stations in each band.
You can listen to music from existing CDs, flash drives, or simply from your phone or player via Bluetooth. The system reads formats such as CD, MP3, AAC, WMA and WAV. If this is Bluetooth playback, then pause and rewind control is available not only in albums, but also within songs.
The charge indicator of the Bluetooth device is visible on the display of the radio. There is also RDS - this is when the title of the song and its artist are displayed on the display. The device understands Russian fonts in ID Tag. The system has several options for connecting additional devices: Jack connector, USB connector and Bluetooth connection.
The radio has various inputs for reading music from external devices
Many car enthusiasts are not happy that the standard radio panel is not removable. However, there is nothing to worry about, because drivers often store the removable panel of their audio systems directly in the car, either in the glove compartment or under the seat. Therefore, if someone decides to steal a radio, it is unlikely that the main criterion when choosing a device will be the absence of a removable panel.
Summarizing all of the above, we can conclude that the standard radio in the Lada Largus car is quite good. It has a sufficient number of functions so that drivers do not have any difficulties when using it. And detailed instructions will help you easily master all the capabilities of this audio system.
Car radio for Lada Largus
There are quite a lot of owners who, by the will of fate, are destined to spend a long time at the “wheel” of their car. For example, these are residents of megacities who get stuck in traffic jams every day. The Lada Largus model is equipped with a modern standard car radio, which allows the driver to escape from the hustle and bustle of the world and relax a little while listening to pleasant music.