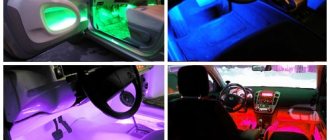
What car enthusiasts don’t do to make their car more convenient and unusual. Some car owners spend a lot of money on professional dashboard tuning. And some craftsmen prefer to do it themselves. This kind of tuning is quite easy to do. In order to replace conventional light bulbs with light-emitting diodes (LEDs), you do not need to have special knowledge or skills. We’ll tell you how to make LED backlighting for the instrument panel in a car with your own hands.
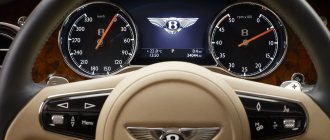
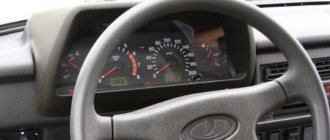
A well-lit dashboard is not only more informative at night, but also has a better view
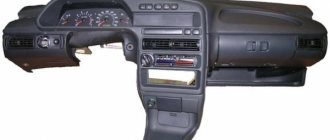
Disassembling the console
Initially, you need to disassemble the dashboard: remove the protective glass, then the arrows, but keep in mind that they are very fragile, and in order not to damage them, it is better to slip thick paper under the screwdriver; it does not require much effort.
And to remove the dashboard backing you will need a knife, with its help you need to cut through the layer of sealant around the entire perimeter.
After removing the “cover”, use a knife to carefully scratch the filter; it is a special paint. Then degrease this area with acetone or alcohol.
Replacement instructions
The procedure for replacing dashboard lamps is not particularly difficult. The only problem may be disassembly, which allows you to remove the backlight panel and get to the light bulbs. The difficulty is that the fastening screws are located at different points, and you need to know their location. Let's consider the process in order:
Required Tools
To replace the light bulbs in the dashboard you will need:
- a screwdriver with a cross blade;
- a flat-head screwdriver, preferably with a thin blade for unsnapping plugs and fasteners;
- pliers for dismantling cartridges;
- set of replacement lamps.
A small number of necessary tools makes the work convenient and fast. If you plan to make a small tuning - changing the color or brightness of the backlight, then additional devices will be required to remove the factory paint, dismantle the plastic filters and a solvent to clean the remaining paint layer on the back of the instrument panel.
Replacing the backlight
To obtain an even backlight, it is recommended, if possible, to change all the dashboard bulbs at once. Replacing one lamp can create a situation where after a week you will have to repeat the entire procedure in order to change another burnt out lamp. Therefore, experts recommend updating all the lighting at once. It is also advisable to replace incandescent lamps with LEDs - they are economical, have a wide range and provide a large selection of shade and brightness.
How to disassemble the dashboard
First of all, you need to remove the decorative trim from the radio. On the VAZ 2114, the dashboard is mechanically connected to this part, so you need to immediately disconnect it. After this, perform the following steps:
- Using a flathead and Phillips screwdriver, the decorative casing is disconnected. The steering column should be lowered as much as possible so that it does not interfere with the work. You will have to carefully snap off the decorative plugs and unscrew the 5 screws securing the casing. You also need to remove the handles from the sliders and the heater switch;
- After disconnecting the screws, the casing must be pulled towards you. You should act carefully; perhaps not all elements have been removed yet and they can be broken. You don’t have to completely remove the casing; there’s enough room to unscrew the mounting screws;
- To disconnect the dashboard you need a long Phillips screwdriver. Unscrew the screws, tilt the shield towards you and pull out the terminal blocks with connecting wires.
Replacing backlight bulbs
To dismantle the cartridges, it is convenient to use small pliers. They grip the flat back. It is carefully turned half a turn counterclockwise, after which the assembly can be removed from the socket. In a similar way, all elements to be replaced are extracted. Then the lamps are removed and new copies are installed in their place. Insert the cartridges into the sockets and turn them half a turn clockwise to secure them. After this, it is recommended to connect the terminal blocks, apply operating voltage and check the functionality of the light bulbs until the casing is assembled. The vehicle systems are checked:
- turn on the ignition and check the operation of the oil pressure, generator and check indicators. Raise the handbrake lever and see if the lamp lights up;
- trigger an alarm to check;
- switch the high and low beam of the headlights and determine whether the indication works;
- include dimensions.
If all elements of the lighting system are operating normally, reassemble the dashboard in the reverse order. This completes the process of replacing the VAZ 2114 dashboard bulbs.
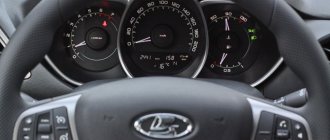
How to make dashboard arrows backlit
The color of the speedometer and tachometer needles is important. If they are white, then you can leave them as they are. But if not, then you need to remove the old paint with a knife and treat them with alcohol, then paint them with white varnish or regular paint.
The color of the arrow should be white, because only it conveys the entire gamut of LEDs.
You can try and highlight the arrows separately. This requires LEDs with a diameter of 3 mm at 12 V.
Important! In the car network, the voltage is 12 V; if the LEDs are designed for a lower value, then they cannot be connected directly. They should be connected through a stabilizer.
If the diameter of the LEDs is larger, you will have to make additional holes for them.
It is recommended to place LEDs either along the entire scale or opposite those values near which the arrow is most often located.
Operating procedure
Replacing the backlight on a VAZ 2114 begins with purchasing a set of LED lamps in the color you need. On the instrument panel, there are several sensors and indicators that require a certain number of diodes to ensure their normal visibility for the driver, especially at night. Therefore, before buying a set of lamps, calculate the required number of LEDs for each device. For example, a brake sensor requires 3 bulbs.
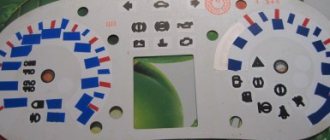
Location of light bulbs on the dash
It is advisable to buy with a reserve, at least 5 - 10 lamps more. Since, during installation, you can damage one of the circuits and the LEDs will not work. This often happens to those who are doing this work for the first time.
You need to start work by removing the instrument panel, as well as turning off the resistance. Next, carefully remove the old backlight bulbs from the factory sockets. On the reverse side of the VAZ 2114 panel, there are special sockets designed for installing LED backlight bulbs.
After the old backlight is removed, carefully grind off the heads of the LED lamps to the required size. If this is the first time this work is being done, then you will most likely need spare diodes. Next, when the heads are prepared, they need to be installed on the instrument panel. Replacement of light bulbs must be carried out strictly according to the same polarity as in the standard version. After the diodes are in place, they need to be secured. Do not under any circumstances use screws for this. Scotch tape is also not suitable for this type of thing. When choosing a fastening element, you need to assume that it will heat up a little. Silicone glue is ideal for this. It will not damage the surface of the panel, thanks to its soft consistency, and will securely secure the light bulbs in the sockets.
Now, you need to check the quality of the work done. To do this, without putting the panel in place, turn on the ignition and look at the result. If everything works as it should, then the replacement was made correctly. If there are any inconsistencies, then you most likely have violated the polarity of connecting the backlight bulbs on the VAZ 2114. To fix the problem, you will need to find the connection diagram and double-check whether all the bulbs are in their places. If, after turning on the ignition, the backlight does not light up at all, then you need to check the integrity of the wires. The wires installed on diode lamps are quite thin and can easily break under the insulation or even break completely. So, be careful when handling them.
When you have made sure that all the light bulbs on the VAZ 2114 are working correctly, you can begin assembling the panel. To do this, all the backlight wires are brought out onto the board and carefully attached using a soldering iron. They should also be attached to the board in a certain sequence, otherwise the backlight may not work. If the wires are too long, they should be shortened so that they do not bend and do not fall into the grooves of the latches between the dashboard and the dashboard during installation. Otherwise, the wires will easily get damaged.
When connecting the pointer drive, also make sure that they are not deformed. Now, the instrument panel can be inserted back into the grooves and fixed with screws. The indicator arrows must be set with the ignition off, at the zero mark. Next, the last check: turn the ignition key, and if everything works, then the replacement procedure was completed correctly, and the new backlight will please the eye. Well, if something doesn’t work, then most likely you damaged the wires when installing the panel on the dashboard. In this case, disassemble everything again and check the integrity of the wires.
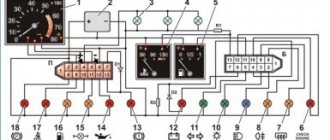
Schemes for smooth switching on of the backlight
To smoothly turn on the backlight of the scale and arrows, you need to spend a little effort, and more specifically, re-solder the circuit.
Below are two diagrams, in the first case - the dashboard, and then - the arrows. The circuits can be implemented on small pieces of a circuit board, which are sold in radio parts stores.
Consider one important factor: if the LEDs differ in power, they will not light up at the same time, some ahead of time, others late, but in general the backlight will turn on smoothly. This also applies to the LEDs on the scale.
We collect
When everything is ready, we begin to slowly assemble the console. First of all, we install the substrate. Apply sealant to the back side and glue it to the panel.
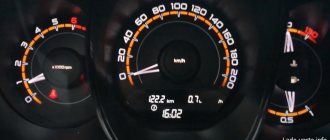
Then we put the arrows and protective glass in place. After modernization, the instrument panel looks bright and unusual.
LED lighting not only looks unusual and bright, but is also a good addition to the car in terms of economy, which helps save battery power, since LEDs consume 80% less energy than a regular light bulb.
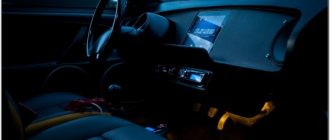
We change the dashboard lighting in a VAZ to any color
The new dashboard lighting in the classic folk car VAZ adds sophistication and a sense of comfort to the interior. Installing neon or even LED illumination on a car requires a lot of money for such an expensive pleasure. The best way to solve the problem is to replace the dashboard backlight yourself . The process of replacing the lighting in your garage, firstly, is not complicated, and secondly, it requires less money. One of the options for tuning your car is a special overlay for the dashboard, but this will cost a lot. It will be better if you do the tuning of the instrument panel yourself.
To complete the job you need to be patient, as well as the tools and necessary materials. The first step in creating perfection is disassembling the dashboard. To do this, you need to remove the protective glass of the devices. The next step is to remove the arrows from the instruments. To avoid damaging the arrows made of fragile material, before removing the arrow with a screwdriver, place several layers of cardboard under the opposite end of the plastic. Using a little force, gently remove the arrow from the axis. Similar actions need to be done with the remaining arrows.
The dashboard backing is also very easy to remove. To remove it, you need any stationery knife. The edge of a knife is inserted between the panel and the substrate, and then we cut a layer of sealant around the perimeter of the substrate. After removing the protective glass backing, we proceed to further work on tuning the panel.
A light filter is placed on the surface of the dashboard under the backing, which evenly distributes lighting over the entire area of the panel. This light filter must be removed using a utility knife, carefully scraping off the light-conducting layer.
A light filter is a special paint that is applied to the back side of the dashboard substrate and provides color illumination for numbers and other information indicators. After rough processing of the substrate, the places where the light filter was applied must be treated with acetone or alcohol. The reagent will remove any remaining paint, as well as degrease the surface and prepare it for the next treatment process.