In the article we will talk about what a charging relay on a VAZ-2107 is and what functions it performs. And most importantly, we will understand the operating principle of various types of devices. This element is inconspicuous, very reliable and inexpensive, but it can fail at the most unexpected moment. As a rule, drivers pay attention to it after the battery loses charge. This leads to a lot of other problems - the engine does not start, electrical equipment does not work correctly. To prevent this from happening, you need to check the functionality of the charging relay.
What does it look like and where is it installed?
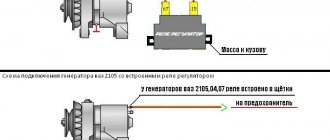
Now let's find out where the VAZ-2107 charging relay (carburetor) is located. Initially, this device was placed away from the generator on the arch under the hood (on the left side). On newer “sevens” equipped with an injection system, the voltage regulator was combined with a brush assembly.
The first voltage regulators were based on electromagnetic relays; they worked quite slowly and required constant intervention. The problem is that mechanical elements wear out very quickly. In addition, it was constantly necessary to adjust the gaps in the relay. Modern semiconductor devices operate silently, quickly, without electromagnetic relays. One silicon crystal can perform the functions of several mechanical relays.
Advantages of installing a three-level regulator
The three-level voltage regulator on the VAZ 2107 is capable of maintaining a constant voltage supplied by the generator to the vehicle network. With this product it is possible to save and increase the battery life. In addition to regulating voltage, three-position regulators are capable of maintaining current within a certain range.
Some of the main advantages of the device in question include:
- The main board of the device is located not in the generator itself, but away from it, which contributes to less heating of the product, as well as extending its service life.
- Possibility to regulate the voltage level manually thanks to a special switch. The device operates from a switch.
- The charge level is significantly higher, in contrast to standard products.
Problems with starting the engine, especially on frosty days when it is very difficult for the starter to start the engine, can be avoided by replacing the standard device with a three-position one. Large loads on the electrical circuit in a car, such as headlights, heater, heated glass, can contribute to battery discharge, even if the engine is running and the standard product is in good working order.
Types of regulator relays are simple, three-level and with temperature compensation. In the brush section of a standard seven generator, in most cases, a temperature-compensated option is installed. But, as practice shows, in terms of thermal regulation, these regulators are mostly ineffective. Recently, among drivers of the VAZ 2107 and other Lada models, the three-level type is gaining more and more popularity. Car owners who have installed such a regulator overwhelmingly recognize it as more effective than the standard one.
Characteristics of the Energomash device for VAZ 2107
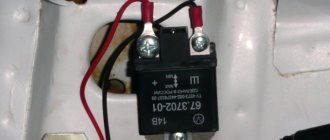
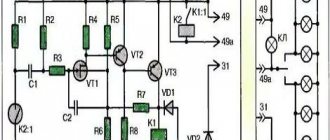
The Energomash voltage regulator for the VAZ 2107 is equipped with three “25C” type diodes and a mode switch. With their help, a three-stage voltage change is carried out. A three-level balancer is also called a current injector, since the device is capable of maintaining it at a level of up to 6A. The main functionality of the three-level voltage regulator for the VAZ 2107 model "Energomash" is based on changing the current from the generator, thereby increasing the voltage of the on-board circuit to 13.6-14.7 V.
The first operating mode provides for maintaining the voltage at the generator output at 13.6 Volts. The switch should be installed in a position where the ambient temperature is +20 degrees and above. The switch in the neutral position should be set at temperature values from 0 to +20 degrees. And in the third position, the generator will produce a voltage of 14.7 V when the air temperature is from 0 to -20 degrees.
It is important to know! The Energomash model will cost about 350 rubles.
Replacing a standard product with a VAZ-2107
Connecting a three-position regulator, or rather, changing a standard product, does not present any difficulties. After purchasing the product, you must complete the following steps:
- Initially, you need to remove the protective cover of the generator. Don't forget to disconnect the negative terminal from the battery.
- The standard part is removed by unscrewing two bolts using a screwdriver or a “6” key, which depends on which VAZ generator is installed on the car. It is also necessary to remove the terminal.
- After this, we compare the standard device with the three-level one. The brushes and fasteners must be identical in design, otherwise the product will need to be replaced.
- A new product is installed in place of the standard “tablet”, after which it is fixed with fasteners (bolts).
- The body of the product should be secured to the ground of the car in any convenient place (pictured below). This is not difficult to do, since the wire is long enough.
Why is a charging relay needed?
To maintain the correct charging mode of the battery, as well as to ensure the normal functioning of all electrical appliances in the vehicle’s on-board network, the generator must produce a voltage in the range of 13.6 ... 14.6 V. Under load, the generator must produce about 14 V stably. Using a regulator, the voltage changes in the power circuit of the rotor winding.
The essence of the generator's operation is that as the supply voltage to the excitation winding increases, the voltage at the generator output increases. It is the voltage in the rotor winding power circuit that stabilizes the regulator. If this is not done, the voltage supplied to the winding will change (it depends on the speed, load on the engine crankshaft, etc.).
Types and location of voltage regulators
As you know, the VAZ 2107 car began to be produced a very long time ago. And over the years, not only different motors were installed on it, but also different voltage regulators. On the earliest models, the relay regulators were external. On later “sevens” the regulators were internal three-level. Let's take a closer look at these devices.
External voltage regulator VAZ 2107
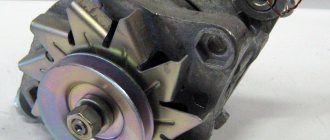
It is the external voltage regulator that many motorists in the old fashioned way call a “relay-regulator”. Today, external voltage regulators can only be seen on very old “Sevens” produced before 1995. These cars were equipped with an old generator model 37.3701, which was equipped with external relays.
External relay regulators were installed on the very first VAZ 2107 models
The external regulator was located under the hood of the car; it was mounted on the left front wheel arch of the car. As a rule, external relays were made on the basis of a single semiconductor, although after 1998 on some VAZ 2107 there were external regulators made on a common printed circuit board.
The external regulator was not built into the generator, but was located under the hood of the car
External relays had certain advantages:
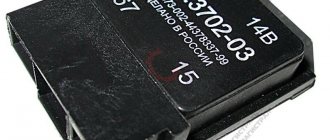
- Replacing the external regulator was fairly easy. It was held on by only two bolts, which were not difficult to reach. The only mistake that a beginner could make when replacing this device is to mix up terminals 15 and 67 (they are located next to each other on the regulator);
- the cost of the external regulator was quite affordable, and they were sold in almost all car stores.
Of course, the device also had disadvantages:
- bulky design. Compared to later electronic regulators, the external relay seems very large and takes up too much engine compartment space;
- low reliability. External VAZ regulators have never been of high quality. It is difficult to say what is causing this: the low quality of individual components or the poor build quality of the device itself. But the fact remains a fact.
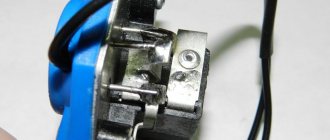
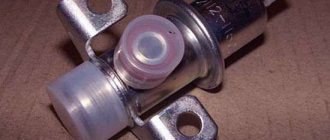
Internal three-level voltage regulator
Internal three-level voltage regulators began to be installed on the VAZ 2107 starting in 1999.
The internal regulator began to be installed on the VAZ 2107 after 1999
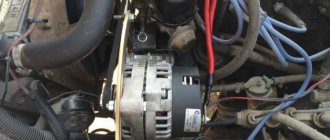
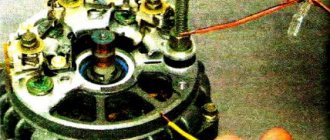
These compact electronic devices were built directly into car generators.
The internal regulator is mounted directly into the VAZ 2107 generator
This technical solution had its advantages:
- compact sizes. Semiconductors were replaced by electronics, so now the voltage regulator fits in the palm of your hand;
- reliability. It’s simple: there’s nothing special about electronic devices that breaks. The only reason why a three-level regulator could burn out is a short circuit in the on-board network.
There are also disadvantages:
- difficulty of replacement. If there were no particular problems with external regulators, then to replace the internal relay the car owner first needs to get to the generator. To do this, he will have to remove the air filter and a couple of air ducts, which requires patience and time;
- difficulty of acquisition. As you know, the VAZ 2107 has long been out of production. So getting new components for the “seven” is becoming more and more difficult every year. Of course, this rule does not apply to all details. But internal three-level voltage regulators for the VAZ 2107 are among the parts that are not so easy to find today.
Read about malfunctions of the VAZ 2107 generator: https://bumper.guru/klassicheskie-modeli-vaz/generator/proverka-generatora-vaz-2107.html
What happens if there is a breakdown
But what can happen if the VAZ-2107 charging relay (injector) fails? There can be two options:
- Breakdown of the crystal and complete lack of charging on the battery. This will lead to the battery being quickly discharged and the engine will not be able to start.
- Violation of the regulator operating mode, increase in voltage at the generator output. In the “best” case, only the battery will suffer - it will boil. In the worst case, the battery will short out and all the wiring will burn out.
Therefore, the voltage regulator should not be neglected; if breakdowns are detected, they should be repaired immediately.
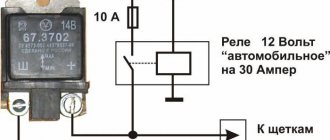
How to install TRN on a VAZ-2107
Before installing a three-level battery on a car, you need to disconnect the negative terminal of the battery. To do this, remove the protective cover from the battery case and unscrew the fastening bolts.
The winding switching relay must be removed and a contact group of new equipment installed in its place. The wire is pulled through the generator cover.
The TPH block is secured to one of the free studs with a ground contact. The terminals must face down.
Before carrying out work to replace or install the device, experienced mechanics recommend first charging the battery and taking measurements at the terminals.
How to understand that the regulator is faulty
If you suspect that the VAZ-2107 charging relay has broken down, you need to check the voltage on the battery.
If it is less than 13 V or more than 14, we can judge the presence of the following causes of breakdowns:
- Internal regulator malfunction.
- Generator malfunction.
- There is no contact (or it is bad) in the connections between the generator and the battery.
To make sure that the regulator is working properly, you need to disconnect it from the entire electrical network of the car. If you have an external one installed, simply remove two terminals from it and use the “8” key to unscrew the fasteners to the body. To remove the internal relay, you will need to unscrew the two bolts that secure the housing to the back cover of the generator.
Be sure to turn off the power to the vehicle's on-board network - remove the negative terminal from the battery. Otherwise, a short circuit may occur. In this case, some sections of the electrical wiring may burn out.
Troubleshooting battery failure
The first step is to check the tension of the alternator belt - it is what drives the alternator and coolant pump, so this malfunction can also manifest itself in the form of engine overheating.
If the VAZ 2107 battery charging light does not light up and the voltmeter shows normal on-board voltage and the battery is not charging, the reason is clearly in the contacts at the terminals.
It is necessary to remove the clamps from the battery and sand them with sandpaper. If the charge does not appear, it is necessary to measure the voltage at output “30” of the generator with the engine running. If the voltage readings on this output and the battery are very different, you need to clean the contacts and check the wire going from the generator to the battery. If the wire is faulty, it must be replaced.
If the voltage in the on-board electrical network is within acceptable limits when the engine is running, but drops when the headlights are turned on, the reason is the weak tension of the alternator belt. A weak belt will slip under greater load. The correct belt tension is when, with a force of 10 kgf, it should bend by 12-17 mm.
Another reason for the lack of charge could be a short circuit or break in the stator or rotor winding, as well as a failed rectifier diode on the generator.
Diodes can be tested using a test light or multimeter to check their resistance. To check the diodes using a test lamp, remove the “+” terminal from the battery and connect the test lamp with one end to the positive terminal, and the other end must be touched in series to the three bolts shown in the figure below. Then perform the same operation, only with the “-” terminal. If the test lamp lights up, the diode being tested is broken.
If one of the diodes fails, the diode bridge assembly must be replaced.
A malfunction of the stator winding can be determined with a multimeter by measuring the resistance between the rectifier unit mounting bolts. If there is no contact between them, then the winding is broken. In this case, the winding or generator assembly is changed.
Probably the most common cause of generator failure is brush wear. To check them, you need to remove the brush assembly. The length of the brushes must be greater than 5 mm, otherwise they must be replaced. Brushes can also become jammed or twisted in the sockets.
Note: the injection generator is no different from the generator of the carburetor version of the VAZ 2107. All proposals for repair and inspection of the generator are relevant for both modifications of the car.
The battery does not charge and can it completely drain at night with the headlights on? Family story! It is possible that the whole issue is a faulty generator voltage regulator. You can only find out by checking it.
Checking the functionality of the device
To carry out diagnostics, you will need a voltmeter (you can even use a simple incandescent lamp), as well as a constant voltage source with regulation of 12...20 V.
To carry out diagnostics you need to perform the following manipulations:
- The negative terminal of the power source must be connected to terminal “Ш” (or the housing of the voltage regulator).
- To the terminal marked with the letter “B”, connect the plus from the power source.
- Connect a voltmeter or incandescent lamp to the brushes.
If the charging relay is working properly, then at a voltage of 12...14 V the indicator lamp will light up. When the voltage increases/decreases, the lamp should go out. If this does not happen, you can judge that the voltage regulator is broken.
Please note that the brushes must protrude from the housing by at least 5 mm. If they are very worn, replace them.
Functionality check
There are several verification options. And when it comes to a newly purchased relay, and an old one, in any case it is very easy to test it:
- the multimeter is connected directly to the brushes;
- then a constant voltage is supplied to the relay, a battery will do in the field (ground is minus, contact B is plus);
- if the charging device is operational, then the measuring device will show how many volts are supplied (up to 14.8);
- in the absence of a multimeter, it is replaced with the most ordinary 12 V light bulb, the power of which, however, should not exceed 3 Watts.
Once you are sure that the device is fully functional, install it in its intended place. The procedure here is the reverse of the dismantling described earlier.
After completing all the manipulations, check whether you forgot to connect the negative wire to the battery.
Source