The Lada Kalina sound signal is a really important element in a car, which in most cases helps prevent emergency situations on the road.
Agree that if the horn is faulty, it is very difficult to notify road users of your approach; it is impossible to honk at a pedestrian who has not noticed your car, who is also crossing the road in the wrong place right in front of you. Therefore, the state of the warning system should be given special attention.
New sound signal on Lada Kalina
Some drivers believe that they do not need a horn at all.
They press it very rarely, so they don’t pay attention to its condition and performance. A car signal is a very important thing because it makes it possible to avoid road accidents in difficult conditions. This article will help you understand the sound signal on the Lada Kalina. If you want a loud sound, read how to install a signal from the Volga to a VAZ
We press the desired button, but there is no signal. What should be done in this case? First you need to check the integrity of the F6 fuses in the mounting block. This fuse is responsible for supplying power. If it is burnt out, then you need to replace it and enjoy the working sound signal.
What to do when the fuse is intact on Lada Kalina cars. You need to listen to the operation of the signal relay; it clicks when pressed, but you can only hear it when the engine is not turned on. The wiring is normal, the relay is normal, the fuse is intact, it turns out that the problem itself is in the signal.
We go to any car store and buy a new signal complete with all the necessary parts. In addition to the signals themselves, there must also be terminals for connecting wires for power and the corresponding instructions.
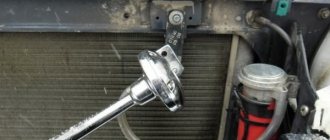
Gaining access to operate the horn is very difficult, especially when there is a 1.4-liter engine under the hood with air conditioning. There is not enough space because the installation is hampered by the radiator and its fan. We open the hood of the Lada Kalina car, remove the negative terminal from the battery, carefully remove the upper grille located above the front bumper, and it is held on by three screws. We lift the grille up and disengage it with the brackets of the plastic latch. A small gap is created, through which you can see the installation location of the sound signal. There is no way you can reach them with your hand, and they won’t fit in your hand, so this gap should be used only for external inspection.
To gain full access to the sound signal, you need to completely remove the radiator grille, which is held on by two screws.
If the number has a frame, then it also needs to be removed. The upper transverse plate of the radiator grille must be gently bent downwards with light movements and the upper protrusions should be disengaged. All that remains is to pull the grate towards you and pull it out of the lower recess. Now we take the key 13 and unscrew the signal fasteners, but the whole process of work needs to be controlled through the gap that we previously created.
We remove the old signal and install a new one. The new signal must be attached to the radiator cooling fan stud. This operation must be performed with a 10mm wrench. It is a little confusing that the protruding nut is located 1.5 cm from the radiator and looks a little risky. The signal cannot move closer to the radiator, because there is an iron frame in its path. No need to worry about the signal and radiator not meeting together. We assemble all the parts in reverse order. The car now has a good signal.
Why the signal on the viburnum does not work reasons
Hello! When I picked up the car from Samara, the signal did not work, well, I think I’ll fix it later, it’s time to change it! You need: instructions on the Internet, a multimeter (or wires with a light bulb, but a multimeter is better), a minimum set of tools. Started from the front:
Unscrewed the upper and lower radiator grille
Remove both grates.
We see a horn between the radiator and the body. Unscrew the nut securing it and remove the contacts.
We ring the contact on the horn that is coming: we stick the multimeter probes into the contacts and press the signal on the steering wheel, nothing happens... So that’s not the problem! Just in case, we check the horn itself (connect it with wires to the battery) We look further...
We disassemble the steering column casing.
Remove the top cover (turn it a little, twist it and move it to the right, pull it out)
You will see a block with contacts on top (no photo). Black wiring (brown-gray and gray-black, if memory serves) We connect the wire to each other, there is no sound, which means the cable inside the block on the steering wheel is torn...
Let's go to the store... 1350 rubles. Holy shit!
The following is short: We buy it, go to the station to remove the steering wheel and replace it at the same time.
We unscrew the steering wheel. Attention ! Don't tear off the safety harness on the steering wheel, the wire is very short!
With sharp blows on the steering wheel back and forth, we pull it off, unscrew it and change the block.
We put everything back together, lo and behold, everything works for only 1350 rubles + a new horn 350 rubles + 300 rubles labor!
An unexpected waste of money, of course, but it had to be done, without a piper you can’t do it!
A non-functioning horn on a car is a very dangerous malfunction. The most unpleasant thing is that they find out about this breakdown just when the signal is needed most - in a dangerous situation on the road. What could cause the signal to fail?
There are several reasons why the horn may stop working. Almost all of them are electrical and simply involve no contact where it should be. Let's go through them all:
Horn fuse blown
The very first and easiest check that can be performed when the sound signal is not working is the integrity of the fuse. If it turns out to be burnt out, then there may be a short circuit in the car. Try inserting a whole fuse that matches the rating (How to choose a fuse. Colors and ratings). If it burns out in the same way, it means there is actually a short circuit. If not, then perhaps the fuse has simply exhausted its resource and you should pay attention to other reasons.
The horn button does not work
The signal in most cars is turned on by a button in the center of the steering wheel. There are variations with a button in the steering column switch or a certain position of this switch itself, but this is rare.
There are actually a whole bunch of places inside the steering wheel where contact can be lost, leading to the failure of the horn. To understand exactly where they can be located, you need to understand how the sound signal in the car turns on. Let's look at the diagram.
Diagram for connecting an audio signal via a relay
This circuit assumes the presence of a signal activation relay. This relay is found on all modern cars. On a certain category of cars (for example, VAZ classics), there is no relay. In this case, the signal is connected directly through the button on the steering wheel.
The diagram shows that there are two electrical circuits: control and power. The power circuit feeds the signal and does not come into the car interior; the control circuit, on the contrary, comes to the steering wheel. When you press the signal button, the control contacts of the relay close, connect the power circuit and the signal turns on. What are relays, control and power contacts, read the article: how a relay works in a car .
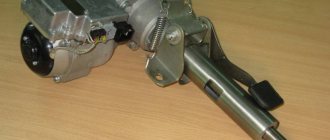
The control current from the relay is transmitted from the steering column to the steering wheel through a floating contact. There may be one, or maybe two. These contacts rub against a special conductive ring built into the steering wheel at the point where it is attached to the steering shaft. Due to the fact that the contacts are spring-loaded, they are constantly pressed against the ring, ensuring the transmission of current to the steering wheel in any position.
Then the voltage is transmitted through a short wire to the button and when it is pressed, the electrical circuit closes to ground - the signal turns on. Now about malfunctions that can occur in the steering wheel.
ATTENTION!
It is better to entrust all work related to disassembling the steering wheel on cars with airbags to a car service center. Unskilled actions can cause the airbag to deploy, which can lead to life-threatening injuries!
— Worn contacts
The pressure contacts on the steering column rub against the slip ring whenever you move the steering wheel and wear out over time. Sooner or later, a moment may come when they can no longer reach the contact ring on the steering wheel and then pressing the horn button will lead to nothing. To avoid this, when removing the steering wheel for any repairs, it is necessary to lubricate the contacts and the ring on the steering wheel with a conductive lubricant, for example, graphite. Such treatment will reduce the friction of the contacts on the ring and extend their service life.
Source: https://chevroletcars.ru/info/pochemu-ne-rabotaet-signal-na-kaline-prichiny/
Sound signal Lada Kalina
The Lada Kalina sound signal is a really important element in a car, which in most cases helps prevent emergency situations on the road.
Agree that if the horn is faulty, it is very difficult to notify road users of your approach; it is impossible to honk at a pedestrian who has not noticed your car, who is also crossing the road in the wrong place right in front of you. Therefore, the state of the warning system should be given special attention.
How to remove the signal without touching the front bumper
To do this, you need to remove two radiator grilles, upper and lower (which is located under the license plate). First, remove the bottom; the photo shows the approximate location of the fastening screws:
In addition to the bolts, it is also secured with latches that need to be bent down a little. When you shoot, I think you'll figure it out.
Next, remove the top grille, which is attached to three self-tapping screws and also to two side latches. You can read more about this here.
After this, you can freely reach the sound signal through the upper hole. To avoid any doubt, the photo below shows everything clearly:
To remove the signal from Kalina, you need to unscrew the top mounting nut with a size 13 wrench. Of course, there is not a lot of space to work, but you won’t have to make any special efforts, so you can easily do it.
After which you can easily remove the signal from the stud of its fastener:
And we release it out through the lower hole where we removed the lining:
Now it is enough to disconnect the plug by simply pulling it lightly:
And all the repairs. The signal is safely removed, and is installed in the reverse order if it needs to be replaced.
If you need to adjust the sound tone, there is a small bolt on the back that can be tightened in any direction to achieve the desired result.
Personally, in my case, I had to loosen this bolt a little and the signal began to work louder. And before that it was buzzing like an old lawn.
The Lada Kalina sound signal is a really important element in a car, which in most cases helps prevent emergency situations on the road.
Types and causes of malfunctions
Statistics show that 70 percent of Lada Kalina car owners, to one degree or another, encounter problems associated with incorrect operation or complete failure of the horn. The fact is that the horn itself is installed between the radiator and the car body, so it is exposed to increased negative effects of an aggressive environment (dampness, high temperature, cold, icing). The main, main reason for the failure of the unit is the oxidation of contacts and conductive elements.
The most common reasons affecting performance:
- failure of the viburnum horn relay;
- rust of the internal elements of the speaker, which appears as a result of condensation;
- lack of contact on the movable ring of the power button;
- faulty viburnum horn fuse.
Diagnosis of the causes of the malfunction
If your sound signal does not work on Kalina, it is best to start checking its functionality with the fuse and relay, which are located in the mounting block. After the functionality has been checked, it is necessary to inspect and test the contacts of the horn itself using a multimeter. Quite often, the device for sending sound signals has various oxidations and contaminations, and before replacing it with a new product, it makes sense to disassemble and thoroughly clean all the component parts of the unit, especially in the places where the contact wires are connected.
Common causes of malfunctions
All that remains is to talk about why such situations arise and what the motorist himself needs to do in order to restore the functionality of the horn.
Since a car signal consists of a fairly large number of components, the reasons must be looked for in them. To do this, it is good to understand the device, design and principle of operation of the warning system.
- Blown fuse. A trivial but common problem. The fuse is located in a special block. Look for information in the instruction manual. Sometimes simply replacing the fuse is enough;
- Burnt out relay. Since the horn is powered through a fuse and a relay, the latter is also necessarily checked in the mounting block, and changed if the problem is with it;
- Broken horn. If everything is fine with the relay and fuse, the problem may be in the device itself. To check, you can take the element and directly supply power through the battery. When the horn is working, the signal appears;
- Short circuit. The place to start your search is with the safety socket. And then move along the chain;
- The contact ring on the steering wheel is worn out. It will need to be replaced if necessary;
- The clamping contacts on the column are worn out. A characteristic feature of domestic cars;
- The contacts have oxidized. Check the contact group for rust or signs of oxidation;
- The winding on the horn has burned out. The problem is solved by replacement;
- Violation of electrical contact;
- The cable on the steering wheel where there is an airbag is broken.
In the vast majority of cases, and if desired, most of the possible problems can be solved on your own.
But for this you need to know how to use a tester or multimeter. These are truly integral tools that help determine the source of problems, check the condition of the electrical circuit, the power supply to the horn and other points.
Replacing the sound signal on Kalina
For some reason, there is an opinion among car enthusiasts that to replace the sound signal, you will need to remove the front bumper of the car. In fact, it is possible to get by with a little “blood” without resorting to dismantling the bumper, but limiting yourself to removing just two radiator grilles. To carry out all the work you will need: a long screwdriver, a key “13”.
To make the whole process clearer, it can be divided into 5 steps:
- First, unscrew the radiator grille. To do this, you need to open the hood, unscrew the three upper mounting screws holding the grille. Then, using a long flat-head screwdriver, release 2 latches on the right side and 2 on the left. Pull the grill towards you and remove it from its fastening points.
- To carry out work safely, disconnect the negative terminal from the battery.
- To remove the lower grille, you only need to unscrew two screws, which are located at both corners of the upper part of the grille.
- Between the radiator and the body we find the horn itself. Using a “13” wrench, unscrew the fastening nut. Disconnect the contacts (pull out the contact plug) and remove the device.
- Installation of a new product is carried out in the reverse order of the removal process.
Why the sound signal stopped working: where to look for the reason
Hi all! I can’t say that car horn malfunctions occur very often and everywhere. But we cannot exclude a situation in which the signal does not work.
Car horns are safety features. Moreover, they must be present in all vehicles and be in good condition. This will allow you to give a timely signal to other road users, inform about the approach, and prevent collisions and other dangerous situations.
But at some point it happens that the sound signal located on the steering wheel suddenly stops working. It is necessary to address the issue of diagnostics as soon as possible, since it is dangerous to continue operating the car with a non-working horn.
Relay location
The relays are in the same block as the fuses.
K1 - headlight washer . If the washers stop working and this relay is working properly, check their nozzles. Sometimes they become clogged or damaged.
K2 - electric windows . Check this relay together with fuse F2. See F2 for troubleshooting.
Short circuit - starter relay . If you turn the ignition key and the starter does not turn, it may be the relay. Check its contacts and clean them if necessary. Next, you need to check the battery terminals so that there is reliable contact between them, and if necessary, clean them. Also check the contact group of the ignition switch, there may be no contact there.
K4 - additional relay, rear window defroster, heater switch, wiper and washer switch .
K5 - relay-breaker for turn signals and hazard warning lights . If the direction indicators or hazard lights do not work, check this relay together with fuses F1 and F3.
K6 - windshield wiper relay . Check together with fuse F4.
K7 - high beam relay . Check together with fuses F14 and F15.
K8 - sound signal . Check together with fuse F6.
K9 - fog lights . Check together with fuses F16 and F17.
K10 - heated rear window . Also check relay K4 and fuses F4 and F8.
K11 - heated seats . Also check fuse F18.
K12 - reserve.
How it works
Before looking for reasons and finding ways out of the current situation, it would be useful to understand the principle of operation and structure of the signal.
Structurally, the horn includes a fairly extensive list of elements, among which are:
- anchor;
- kernel;
- core;
- tungsten contacts;
- frame;
- capacitor;
- relay;
- activation button;
- resonant disk;
- membrane;
- contact relays, etc.
When the driver presses a special button, current flows through the winding, thereby magnetizing the core and tightening the armature. Together with the anchor, the rod moves, bending the membrane.
Due to a special nut, the contact group opens and the electrical circuit breaks. Next, a number of horn elements return to their original position. At the same time, it closes the contacts again, and current flows to the winding. Opening occurs the moment the driver presses the button.
For the driver himself, everything is much simpler. He just presses a button and the machine emits a loud, characteristic signal.
Similar systems, having different signals, but identical operating principles, are used:
- on Niva;
- on Gazelle;
- VAZ 2110 cars;
- VAZ 2107;
- VAZ 2114;
- Renault Logan;
- Renault Sandero;
- Lada Priora;
- Daewoo Lanos;
- Lada Kalina;
- Chevrolet Lacetti;
- Skoda Fabia, etc.
If the sound signal suddenly stops working, or shows obvious signs of malfunction, action should be taken immediately.
The motorist should know what the signs of problems are and the main reasons for the horn’s failure to emit warning sounds.
Symptoms of problems
How can you even determine that the horn is not working or has some kind of malfunction? It's actually extremely simple.
There are 2 main signs of problems with a car horn:
- The signal doesn't work at all. When you press the button, the driver, like other road users, hear absolutely nothing. This is a clear indication that the system has failed;
- The signal appears periodically. There is also a slightly different situation when the horn does not go off with every press. That is, they pressed it once, everything works, but when you try to honk again, the horn goes silent, there is no reaction to the press. Then the situation repeats itself.
