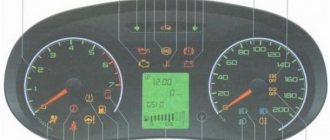
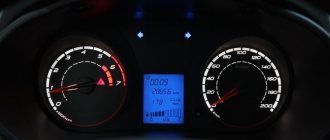
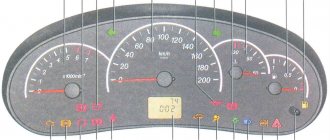
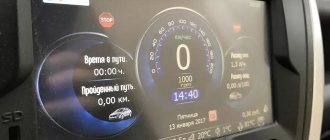
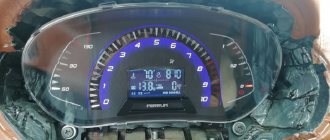
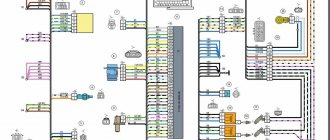
As you know, AVTOVAZ removed the internal combustion engine temperature scale from the panel on the new Grants and Kalinas and left only the overheating light, but if it lights up, then this is already the beginning of the end. Therefore, in luxury trim levels, the coolant temperature display was added to the on-board computer readings, and for all others, only a collective farm is assumed in the form of installing additional screens in place of button covers or external On-board computers.
To fix this problem, you can update the dashboard firmware of Lada Granta and Kalina 2 cars.
First, we find out what version of the firmware is embedded in the instrument panel.
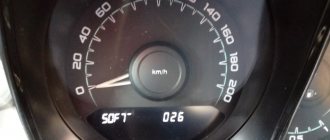
- With the ignition off, press the daily mileage reset button on the panel and, without releasing it, turn on the ignition, the service mode of the panel is activated, in which all the indicators light up and the arrows begin to move
- release the button and press again. Numbers will appear on the display, this is the software version
Now let's decipher them
The first numbers (2190 or 2192) indicate the car model (Granta or Kalina 2). This is followed by the numbers 00, 20 or 40, which stand for “standard”, “norm” or “lux”, respectively.
Now, using the table below, you can see if it is possible to flash your panel so that it displays the temperature.
FIRMWARE VERSIONS OF INSTRUMENT PANELS LADA GRANT AND KALINA 2
| Equipment | Firmware version | DTNV | DTOZH | What is needed for firmware | Note |
| Granta Standard | 015 | No | No | Changing the display and working with a soldering iron | Old board |
| 029-040 | No | No | Changing the display and working with a soldering iron | Updated board | |
| Granta Norma | 053, 060, 076, 087 | No | No | Work with a soldering iron or use modified firmware 2190-20_092_for_076 | |
| 090, 091 | Yes | No | Suitable 092 and 009 or 012 from Kalina | ||
| 092-095 | Yes | Yes | |||
| Granta Lux | 032, 038, 042 | Yes | No | Firmware 046 is suitable | |
| 046 | Yes | Yes | Shows the transmission number | ||
| 047 | Yes | Yes | |||
| Kalina Norma | 007 | Yes | No | Suitable firmware 009 or 012 | |
| 014 | Yes | Yes | Added on/off gear shift sound | ||
| Kalina Lux | 009 | Yes | Yes | Firmware 012 is suitable | |
| 012 | Yes | Yes | Shows the transmission number | ||
| 014 | Yes | Yes |
Purpose of additional lighting
Additional dashboard lighting is intended for:
- ensuring a more original appearance of the instrument panel;
- better lighting of the main components of the PCB;
- providing additional lighting for the car interior;
- increasing safety while driving - if the backlight of the instrument panel effectively illuminates the dashboard, this will allow the driver to pay attention to the main parameters in a timely manner.
Installing a diode light bulb in the tidy
If you want the instrument lighting to be most effective, then the best option would be to install LEDs; in this case, you have several options:
- The dashboard lighting can be arranged using individual LED elements, so you can provide effective decorative lighting. It is necessary to take into account that the diodes themselves may have different colors; accordingly, such lighting can become part of the tuning.
- Also, the backlight of the instrument panel can be organized using a diode strip, which is often used in everyday life. If you get tired of the color of the glow, the diode strip can be completely replaced. The installation procedure will not take much time, since the tape has a self-adhesive backing.
Installation of 1 din radio in Grantu standard and norm
What is needed to install a radio in a VAZ 2190:
- The radio itself is also the head unit;
- flat screwdriver;
- Straight arms.
Abbreviations and symbols in the text:
- GU – head unit;
- MMS – multimedia system;
- DIN (din) – installation size for acoustics in a car.
Step-by-step instructions for installing the head unit
- a narrow flat screwdriver or plastic spatula for installing acoustics;
- 1-din radio with frame.
The seat in Grant is designed for 1 din. To work with large 2-din sizes, you will need to cut out the partition and install a decorative frame.
Step 1. Using a flat-head screwdriver, remove the plastic plug for the radio. To do this, carefully pry it around the edges and pull it towards you.
The placeholder for the radio is installed from the factory.
Step 2. On the back of the plug there is a mount for ISO connectors. There are two connectors: music power and wires for the speakers.
Step 3. If necessary, connect an adapter for your radio to the ISO. Usually it comes included.
If an adapter is not needed, proceed to step 4.
If an adapter is needed for acoustics, it is included in the kit. Example in the picture.
Step 4. Remove the glove compartment. Holding the glove compartment clamps in the upper position, forcefully lower the glove compartment down.
Overcoming resistance, we pull the lid towards ourselves - the glove compartment is removed.
Removing the glove box on a Grant is easy when you know where its latches are located.
Step 5. Using a flashlight, we climb under the panel in the area of the front right passenger's feet. Behind the felt on top we find a thick black wire - at its end there is a plug for the factory antenna.
We extend the plug to the installation location of the radio.
Here we are looking for the antenna wire.
Step 6. Install the metal slides for the radio. Use a screwdriver to bend the fastenings of the slide at the top and bottom to ensure secure fastening.
These fasteners secure the slide into the panel opening.
Step 7. Connect the power connectors, speakers, antennas to the radio. We insert it into the slide all the way. We attach a decorative plastic frame.
What to do if the length of the wires and antenna is not enough
To get by without extending the wires, you will have to suffer:
- We put our hand under the panel in the glove compartment area;
- We put the radio in the slide and connect it to the plugs;
- We blindly connect the power, the connector for the speakers, the wires for the amplifier, and the antenna.
Disadvantages of the method: we spend a lot of time, the process is dreary and inconvenient. We'll probably rip off your wrist.
Plus: there is no need to build up wires, which will then interfere with the installation of the PG, resting against the back wall.
If the radio tape recorder dangles in the slide and rattles
It happens that the acoustics hold weakly in the sled, although they sit firmly. Solving the problem:
- Using the keys for dismantling (included with the control unit), remove the radio;
- We take a small piece of vibroplast (resin-based foil) and glue it onto the slide from the inside, top or bottom - this way we will ensure that the tape recorder is completely pressed against the slide without unnecessary vibrations;
- Once again, use a screwdriver to press down all the fastenings of the slide: some might have been under-tightened;
- We put the acoustics back and check - all unnecessary vibrations during shaking should disappear.
Advantages of LED lighting
The modern automotive market offers users a huge number of different types of lighting sources that can be used for car tuning. It must be taken into account that not every car needs this, since most manufacturers today equip cars with diode lighting during production.
Photo gallery “Different dashboards”
However, in many cars, the backlight of the speedometer and other instrument panel elements is not as effective as we would like, so car owners decide to change it. In particular, this is especially true for older vehicles produced when LED lighting was not as common.
Why many car enthusiasts choose LEDs:
- Due to the small size of the light sources themselves. This makes it possible to install a light bulb anywhere on the control panel.
- Easy to solder diode components together for their further connection. But you need to take into account that if you are dealing specifically with a diode strip, then to perform this task you should follow some rules.
- The ability to achieve full illumination even with the use of a limited number of diode elements.
- One of the main advantages is that the car owner can organize both regular white and colored lighting. You can use yellow, red, green, blue light sources. In addition, if one of the components fails, it can be easily replaced if necessary.
- Diode lamps consume significantly less electricity. This is especially true for cars with anti-theft systems that operate on a battery (the author of the video is the MrMacyuk channel).
Recommendations
Comments 45
Good day everyone! I want to install a used luxury dash with navigation and cruise. It is not active in my car. One thing that confuses me is that there are keys to an old car in the used dashboard. As I understand it, when I turn on the ignition for the first time, these keys will be registered in my ECU, and I ended up cleaning the ECU and the instrument panel. Or will the registration not happen, the engine just won’t start? And therefore the current cleaning of the tidy?
As far as I understand, you cannot start the car with other keys than your own. If you say that imo is not active, why don't you install the tidy? I think the tidy should work without witchcraft.
I'm afraid that the keys that are in the dashboard from the old car will not be registered in the engine ECU. Then I will start the engine with the keys of the old car from which the tidy is used. My keys are not registered, the dash is empty and so is the ECU.
As far as I understand, you cannot start the car with other keys than your own. If you say that imo is not active, why don't you install the tidy? I think the tidy should work without witchcraft.
And I don’t know who to ask if my guess is correct or if nothing will happen!)
Try installing a new device and starting it, it should work. Otherwise, you’ll put on the original shield and that’s it
Good evening, I have a similar question, were the keys registered after connecting?
Good afternoon. I didn’t have to register anything, because my imoshnik is not active due to autostart, and the tidy from the other car also had no registered keys.
If you want the same mileage as it was before, then when replacing with a new one you will have to increase
I didn't bother. Do you need it?
In general, I have the following situation: I want to buy a used one. panel GF851, install it instead of the standard one on a grant, then maybe return the standard one, you will have to, when selling or the like, then if I put back the panel that was there, what will be the mileage? is it the same as when I removed the panel, say 51 thousand km, or should it be reset to zero?
nothing will be reset, I took my dashboard, which showed a mileage of 29,800 km. There shouldn't be any problems. PS: If you want to remove the standard instrument panel on which the mileage was 51t.km, then replace it with another panel and, after driving for a year, decided to put the old panel back, then the mileage on the panel will remain the same, i.e. 51 t.km., although actual mileage will vary. As I was told at the service center, the odometer in the “brains” is not activated in grants from the factory, so change the shield at least 10 times
As we know, the standard equipment has an instrument panel without BC.
In general, about a month ago, I bought myself an instrument cluster from a used luxury grant. I wish BC would appear.
Since the device was used, it did not work correctly. Namely, the indication of ABS, faulty brakes and transmission was on.
There is also no indication of low and high beam, although the diodes are lit on the tidy test, which means they are working. To fix this problem, you need to go to the OD and reset the instrument panel configuration. I took a different path. I ordered a USBDM programmer from Aliexpress. And then my programmer arrived. Solving the matter is not difficult, I was guided by ready-made tips from these entries: www.drive2.ru/l/6010764/?page=1#comments www.drive2.ru/l/8229206/ www.drive2.ru/l/7673604/ Thanks to the authors!
In general, I decided to upload the firmware from Kalina 012, and was led by the gear shift prompt. I’ll say right away that it didn’t appear, for what reason I don’t know. I have I484GR15 ECU firmware, the same is on my brother’s car with the 025 configuration, it all works there. Also on the 025 configuration there is a 2-display tidy and another steering column switch with a joystick. Maybe there is no prompt because there is no joystick switch? But for this tidy it doesn’t seem to be needed. I used the EraseMass function to erase everything unnecessary, restored the mileage, and activated the immo again. The abs, brake and transmission indicators went out, since I don’t have them, everything seemed to be fine, but the low and high beam indication did not appear. Why? It’s not clear... More differences, on PO-38 the turn signals beeped, but on 012 they didn’t.
Instructions for replacing the backlight
So, if you decide to change the color of the control panel lighting, then first of all you need to go to the store and buy diodes or LED strip.
- First of all, disconnect the terminals from the battery.
- Sit behind the wheel of a car, move the seat back, if possible, lower the steering wheel.
- The next step will be to remove the tidy itself. The dismantling process will be individual for each car, so at this stage we recommend using the service book for setting up and operating your car. It should describe in detail all the nuances of this process. But in general, this procedure usually does not cause difficulties for car enthusiasts - you just need to unscrew the bolts or disconnect the clamps, and then disconnect all the wires connected to the device.
- Then the glass is detached or peeled off. If it is fixed with glue, then a hairdryer may be required to unstick it; you should treat the tidy around the perimeter with hot air.
- When the glass is disconnected, you can check the functionality of existing lighting sources using a tester. Of course, this is necessary if you are just replacing burnt out bulbs and not all LEDs. Now we change the lamp itself - for this, first of all, the base is dismantled - it can be unscrewed by hand or with pliers, counterclockwise. This procedure is repeated in a similar way with all other light sources.
- If the light bulbs themselves are soldered to the device, then you will need a soldering iron to remove them. Unsolder all light sources one by one. In this case, you need to be very careful, since when changing the backlight and replacing lamps, you can accidentally damage the tracks on the panel.
- When all light sources are sealed off, the procedure for installing new diodes is performed. Now you just need to solder them into the seats and check their functionality.
Price issue
The cost of diode light bulbs today averages from 20 to 150 rubles per piece, depending on the type and manufacturer. As for the tape, its average price is about 100-200 rubles per meter.
Relay block Lada Granta
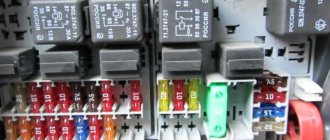
The relays are located in the same fuse and relay box, which is located to the left of the steering column under the cover.
K1 - heater fan relay
K2 - power window relay. If they do not work, also check fuse F2; if this does not help, then the problem may be in the control unit.
K3 - starter relay. If it does not work (does not turn) and this relay is working, check the battery charge level. It could also be a problem with the retractor or the ignition switch and its contacts.
K4 - ignition switch terminal 15 relay
K5 - turn signal and hazard warning relay. If the turn signals come on and do not turn off, this relay may be shorted. Also check fuse F3 (emergency mode).
K6 - windshield wiper relay. Check also fuse F4.
K7 - high beam relay. Also check fuses F14 and F15 and the lamps themselves.
K8 - horn relay. Also check fuse F20, signal switch contacts on the steering wheel.
K9 - low beam relay. Also check fuses F12 and F13 and the lamps themselves.
K10 - rear window heating relay. If the heating does not work, the problem may be in fuse F8.
K11 - engine control unit relay. Also check fuse F1.
K12 - electric fuel pump relay. Also check fuse F21.
Video “Visual instructions for replacing light bulbs in the dashboard”
What the procedure for replacing light sources in a car dashboard looks like - detailed instructions are described using the example of VAZ cars (the author of the video is the Sergey Avtocar 2nd CH channel).
Sanya (Alex-Calisto) has already written about the topic of dashboard overexposure, so I will partially duplicate, expand and supplement the information on this topic.
Introductory part
I previously wrote about replacing the scoreboard.
Now I want to highlight the second part of the work on remaking the dashboard - electrical, or rather replacing the LEDs and selecting the appropriate resistance. Our instrument panels (regardless of the type - simple or SuperVision) use SMD 3528 LEDs
and
SMD 1206 resistors (0.25W; 1%)
of different values.
They are responsible for illuminating the scales, indication icons and on-board computer display. The only exception is the ECO mode indication, the LEDs of which I could not identify, but more on that below. As Sanya already wrote, all LEDs are controlled by a controller. The controller is inactive without a load, so each circuit with an LED consists of two input resistors soldered in parallel (we will change them), a diode and a field capacitor and output resistor soldered in parallel to the diode (this is the integral load).
LADA GRANTA FL HOW TO REMOVE THE CAP FROM THE PANEL
Usually there are plugs on cars and they are replaced with switches, but I have never heard of something like that. I haven't seen it on sale. You can just put an empty button, it will come in handy later.
Yuri you are handsome.
@Andrey Zakharov What kind of car, body, equipment, year and mileage?
@Yuri Fedorov exactly))))
@Andrey Zakharov Then hello Saratov!) Apparently the owner of a new Grant?
@Yuriy Fedorov Kirov district, student town)
Hello! Where did hello come from?))
How to disassemble the plastic where the radio tape recorder can be accessed to the wires and to the glanas unit
I have never removed the panel with a radio, but it seems to snap off easily, although in cold weather you have to be careful, everything is held in place with clips so as not to break it. You can look on YouTube to see who installed or changed the radio.
It’s placed on the edge, it’s not particularly noticeable, it’s not distracting, and the wires when connected to the connector are not so tight, they’re a little short
@voris petriot Thank you.
@Sergey Tishkov is a wonderful thing, plastic covers for the bumper, they are attached according to the number in standard places, in two parts, upper and lower, no need for insulation, collective farming, works well in the cold, the car looks cool with such covers, it’s not expensive, the plastic is high quality , you won’t regret it, manufacturer Chelyabinsk
@voris petriot what kind of winter bumper cover is it, what does it look like, how is it installed, thank you.
@Yuriy Fedorov I have a winter cap on the bumper, insulation in cold weather when the engine is below 15, yes, in the city in traffic jams it warms up, at least up to 102, but when driving it doesn’t rise above 85-87
@voris petriot I don’t understand the temperature, is this the cooling fan turning on at 96 degrees? In winter, when it was cold, did the fan even have time to turn on?))
A cricket appeared in the tarped somewhere behind the radio, what could it be and how to fix it?
No, there seems to be a glanas block there, they say it’s rattling
Yes, there could be many reasons. Disassemble and wrap the wires with modelling, that’s what it’s called (fabric with adhesive backing). When I was making a radio so that it would work without ignition, I rewound all the wires with modelling.
Maybe the glove compartment lid transmits crickets, have you looked into this reason? I don’t even know what could be behind the radio.
The question is of course sensitive.
