With the onset of the first cold weather, every car owner pays special attention to the heating system of his car. This is especially true for domestically produced machines, in which malfunctions occur quite often. Often, owners of such cars are faced with the problem that the interior is poorly heated or does not warm up. Among the possible causes, the most common are the following:
- An air lock that has formed in the cooling system. In this case, high pressure is created in the radiator, which can lead to depressurization of the system;
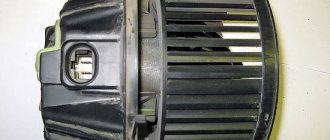
- Heater motor malfunction;
- The stove faucet does not open completely. Quite often it happens that it turns sour and does not open;
- The heater radiator is clogged due to which warm air does not enter the car interior;
- Wear or corrosion damage to the structure.
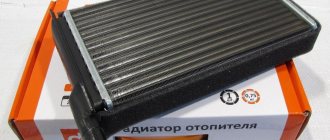
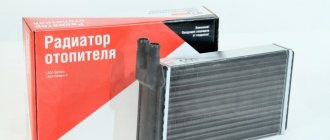
If these problems are identified, for further operation of the heating system it is necessary to remove or replace the stove radiator. In some cases, it can be repaired, but before that, you need to find out the material of the radiator. Basically, they are made of copper or aluminum. Radiators made from copper are more expensive, but have a long service life, and in some cases they can be repaired. Repair of the stove radiator is carried out by soldering. Their cost varies between 1500-2000 rubles.
Due to their low price, aluminum products are more common, but less reliable. The price of aluminum radiators is approximately 700-1000 rubles. In any case, you first need to remove the heater radiator from the car, and then plan your next actions.
Inconvenient design solutions
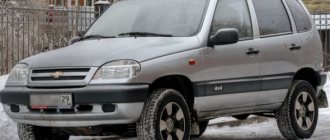
VAZ-2114 and 2115 cars are quite modern and quite popular cars in the budget segment.
But in these cars, as in most new models, there is one not very pleasant feature.
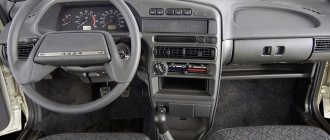
By increasing the comfort of the interior and the design of the front panel, designers significantly complicate the maintenance of the heating system.
The heater radiator in these cars is hidden deep under the panel and is not so easy to get to.
But the heating radiator is a rather vulnerable element of the cooling system. And if the heating of the interior has deteriorated, in more than half of the cases the problems are related specifically to the heat exchanger.
And all this despite the fact that the element itself is practically not repairable and is often simply replaced.
What to install?
Brand Pekar
Heating radiators used for the VAZ 2110 are usually divided into two types:
- Old style;
- New sample.
Until the fall of 2003, old radiators were installed on the “tenth” model, and then cars with new units began to be offered. There is practically no difference between them, but the repair differs in approach and complexity.
In addition to the standard aluminum radiator, a copper analogue is perfect for the VAZ 2110. This unit has fewer fins, but is characterized by more efficient heat transfer. This will make the stove work much better. The only drawback of a copper radiator is its cost. Ideal for installation on a VAZ 2110, a double-row copper radiator marked 2110-8101060 will cost you up to 2,000 rubles.
If you don’t want to spend that kind of money, but want to get an effective device with high quality indicators, then choose the DAAZ model. This radiator is made of aluminum, works well, and the price does not exceed 1000 rubles.
Main reasons for replacement
There are not many reasons why it may be necessary to replace the radiator of the interior heating system. One of them is the appearance of a leak.
Heat exchangers are made of non-ferrous metals - copper or aluminum.
Gradually, these metals oxidize due to exposure to liquid, which leads to the appearance of cracks through which coolant flows out.
The second reason for replacing the heater radiator is clogging of the tubes with contaminants. The coolant, circulating through the cooling system, washes away corrosion products, small particles, etc.
Moreover, the liquid cannot contain them and these polluting elements settle on surfaces, including the stove radiator.
As a result, the heating system first loses efficiency, and later (if it is heavily contaminated) it simply stops working.
In some cases, radiator blockages can be eliminated by flushing using chemicals.
But if the blockage of the tubes is severe, then the plugs can only be removed from the dirt mechanically. And this can only be done with the radiator removed.
Before you start disassembling, you should first make sure that the problems arose with the radiator.
So, a leak of this element is manifested by the appearance of traces of antifreeze on the floor in the cabin.
But the same result can also be caused by damage to the radiator pipes or loss of tightness at the point of their connection with the heat exchanger.
A decrease in heating efficiency can occur not only due to blockage of the radiator tubes, but also due to severe clogging of its honeycombs.
Dust, fluff, leaves, and insect remains get clogged between the cooling fins, making it difficult to transfer heat to the air.
But in this case, it is very easy to identify the problem - turn on the stove fan at full power and check the air flow from the deflectors.
If it is not strong, the radiator should be cleaned, which also cannot be done efficiently without removing the element.
The stove may also stop heating due to the radiator becoming airy, which often happens when replacing the coolant. Often the cause is a malfunction of the cooling system elements, especially the thermostat.
In general, before removing the heater radiator, you should make sure that it is the cause of poor interior heating that is hidden there. And for this you will have to check almost the entire cooling system.
Flushing the stove radiator without prior dismantling
The main cause of stove malfunction is a clogged damper. Dirt and dust get clogged between the grilles and airflow does not move well enough through the system. The cause of congestion is low quality refrigerant.
For cleaning you need:
- Disconnect the vehicle from power by removing the terminals from the battery.
- Drain the coolant into a separate container.
- Remove the heater radiator pipes.
- Connect the tube and pump. Secure the hoses with clamps.
- Heat the washing liquid to 75°C. Dilute 150–200 g of citric acid into 5–6 liters of water.
- Start the pump. The radiator flushing procedure takes about 2–3 hours. Every 15–20 minutes, you should change the direction of flushing by rearranging the hoses.
- Rinse off any remaining rinsing with normal water pressure.
- Fill with coolant.
- Remove air pockets.
Over time, they may disappear on their own, but the stove will not work correctly the first time after washing. To get rid of air blockages yourself, you should raise the front of the car with the radiator as high as possible. You should press the gas several times. The refrigerant will begin to bubble. When the “gurgling” stops, all the plugs will come out.
Methods for replacing a radiator
There are two ways to remove the heater radiator on a VAZ-2113, 2114, 2115. The first involves completely removing the front panel
, which is necessary to access the heat exchanger.
Note that complete dismantling is a relative concept, since the panel itself is not removed from the car, but is only disconnected from the body, which allows it to be moved and thereby allow access to the radiator.
You will also have to move the torpedo itself.
Second method - without removing the panel
. But it is not suitable for everyone, since to provide access it is necessary to make cuts in some places so that it is possible to tilt the lower part of the panel in the area where the heat exchanger is located.
The disadvantage of the first method is that it is labor-intensive, since you will have to unscrew a lot of fasteners and disconnect the wiring, of which there is a lot that goes to the panel.
As for the second method, the panel itself will essentially be damaged, although it is cut in places hidden from view.
Also, after completing the replacement, you will have to think about how to reattach and secure the cut parts.
But since the stove radiator can leak at any time, ease of access to it is very important, so the second method is preferable.
Selecting a replacement radiator
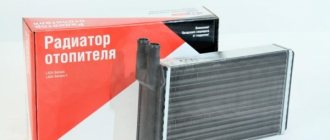
But before you begin the removal and replacement operation, you should first select a new heat exchanger.
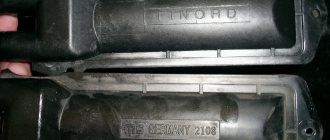
You can buy a factory heater radiator, catalog number 2108-8101060. But analog products made by DAAZ, Luzar, Fenox, Weber, and Termal are also quite suitable.
As for the material, it is recommended to use copper heat exchangers, but they are much more expensive than aluminum ones. Although this is not an acquired taste, many people use aluminum products and are quite satisfied.
In general, the main thing is that the radiator is designed specifically for these cars.
The designers used the same front panel design on the VAZ-2113, 2114 and 2115 models, so the replacement algorithm is the same for them.
Next, we’ll look at how to remove the radiator of the interior heating system using the example of a VAZ-2114, and how this is done in different ways.
Heating system repair
Some drivers repair the interior heater in cars such as Audi, Ford, BMW and other models using sealant or a soldering iron. The method allows us to partially solve the problem of radiator failure, but over time this leads to malfunctions of other working units.
CarCity car service employees strongly recommend contacting a service station if the radiator or other parts of the car are faulty. Professionals will conduct a full computer diagnostic and find out the exact cause of the breakdown.
The car service provides the following types of heating radiator repair services:
- Car diagnostics;
- replacing antifreeze;
- stove damper repair;
- interior heater motor repair;
- flushing the heater radiator.
The catalog can be found on the company's official website. The operator will advise on any issue regarding car repairs. In order to ask for help less often, our employees recommend following the operating instructions and periodically conducting a complete diagnostic of the vehicle.
Replace without removing the panel
But no matter what method is used, you will first have to drain the coolant from the system. Therefore, you will have to stock up on antifreeze in the required quantity in advance.
First, let's look at the replacement method without removing the panel. As already mentioned, this will require making cuts in some places.
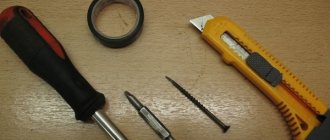
To complete the work you will need:
- Set of screwdrivers of different lengths;
- Hacksaw blade for metal;
- Flat container for draining residual coolant from the radiator;
- Rags.
Having prepared everything and drained the coolant from the cooling system, you can begin work:
- We remove the storage box (glove compartment) from the panel, for which it is necessary to unscrew 6 screws securing it;
- Remove the side trims on the center console;
- Use a metal blade to make the necessary cuts: The first cut is vertical
, we do it on the inner wall of the panel near the center console (behind the metal strip of the glove compartment). Moreover, here you will have to make two cuts.
The second cut is horizontal
, runs in the upper part along the rear wall of the opening under the glove compartment.The third is also vertical
, but not end-to-end. It is done on the right on the rear wall of the lower storage shelf of the panel; - After all the cuts, part of the panel together with the wall can be bent down, which will provide access to the radiator. We bend this part and fix it;
- Unscrew the near bracket for fastening the heating system flap control cable and move the cable to the side;
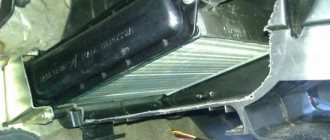
- Loosen the clamps of the coolant supply pipes to the radiator. In this case, you should place a prepared container under the connection points, since liquid will flow out of the heat exchanger. Remove the pipes;
- We unscrew the three screws securing the radiator, remove it and immediately inspect it.
Afterwards we replace the heat exchanger, fix it in the seat, connect the pipes to it and clamp it with clamps. To make the pipes fit easily, lubricate them with soap.
At this stage of work, you should fill the cooling system with liquid and run it to remove air pockets.
Next, it remains to make sure that the connections between the pipes and the radiator are not leaking, and that the damper and faucet are connected without errors.
After this, all that remains is to return the cut part of the panel to its place and fix it. To do this, you can use screws and plates.
The main thing is to fix it in several places so that in the future the cut off part does not rattle when moving. Use sealant or silicone.
This method is convenient because if you replace the radiator again (which is quite possible), all the work will be very simple - you just need to remove the storage box and unscrew a few screws.
In addition, all cuts are made in such places that after assembling the panel and installing the glove compartment they will not be noticeable.
How to remove the heater on a VAZ 2110
- first you will need to remove the air intakes with corrugation;
- If a spacer is installed, it must also be removed.
In the next step you need to get to the vacuum expander:
- remove the insulation from the end wall;
- remove wipers;
- remove the frill (this is a plastic part that stands between the glass and the hood).
The next stage is draining the antifreeze:
- To drain it carefully, you need to unscrew the clamp that comes from the bottom of the injector pipes and lower the hose into the container so that it is below the level of the stove. The capacity should be 1.5-2 liters. This is done to ensure that everything is dry, clean and tidy.
- The next step will be to remove the expansion tank.
- One half of the insulation was removed, leaving the second with it will be problematic since the screws on which the insulation is attached, and there are two of them, are located deep inside. The places are not convenient, but you can get there.
- When all the insulation is removed, all the barrels next to the insulation are removed.
- Now we need to start removing the vacuum booster. Use a seventeen wrench to remove the nuts, there are only two of them. After unscrewing, carefully move the master brake cylinders to the side so as not to damage the brake system pipes.
- This is not all, we unscrew the pipe that goes to the vacuum booster.
- The next step is to remove the brake pedal. There are four bolts that need to be unscrewed. If you follow the pedal to its base, you can find bolts.
- And now we slowly get to the stove, there are three screws that will need to be unscrewed.
Unscrew them and remove the stove. The whole stove is in unsightly condition with sweat stains.
- The radiator itself is junk.
- We bought a new radiator, pipes (hoses) and heat treatment.
We may even find a lighter, a half-empty pack of cigarettes, and various garbage there. This is another reason among many that you need to treat your car with care.
We begin assembling the new stove in the reverse order:
- pedal;
- vacuum booster;
- main brake
Collecting Jabot
- insulation;
- vacuum expander;
- air collectors with corrugation;
- wipers;
- spacer.
Fill with antifreeze and try.