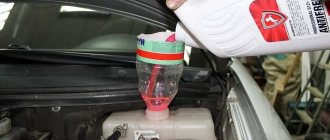
The cooling system of a car is one of the main systems that ensures the possibility of its operation. The thermostat, in turn, is its most important component, and its malfunction can sometimes lead to considerable costs.
How will replacing the thermostat on a Priora save the family budget? Everything is trivial - when this device does not work, the engine may overheat. All this increases wear on the motor and, as a result, will lead to serious damage.
The price of a thermostat for Priora is low. Therefore, it is better to change it every two years. Knowing how to change the thermostat on a Priora, it’s quite possible to do it yourself. However, there are some peculiarities. Therefore, it would not be superfluous to have a little theory in order to decide which thermostat for the Priora is better.
What is a thermostat on Priora
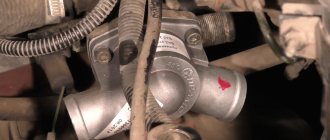
The thermostat on the Priora is the main sensitive component of the car's cooling system. In a Lada Priora car, the thermostat is located between the engine and the radiator. Despite its small size, about 5 cm in diameter, it has two valves: bypass and main.
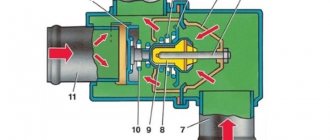
Replacing the thermostat on a Priora usually becomes necessary when the main valve malfunctions. It has a cylinder made of heat-sensitive material with a wax ball and rod inside. When heated above 82 degrees Celsius, the wax melts and expands, pushing the rod out. Thus the valve opens. And vice versa, when wax hardens, it decreases in volume. The valve closes. For a Priora car, the thermostat in the photo is shown in section. Its internal structure is shown.
The uninterrupted operation of the thermostat on the Priora keeps the engine temperature at a normal operating level. When the engine warms up, the Priora thermostat valve is closed, the opening temperature of which is 90-95 degrees. Accordingly, coolant does not flow to the radiator. The temperature in the system increases faster, engine wear and harmful emissions into the atmosphere are reduced, and your time and fuel are saved.
Where is the Priora stove valve located?
. » Logbook » trouble... I want warmth... gear motor!! maybe it’s just not there. The damper by hand, we try to “feel” where it comes into contact with the heater body and put a strip of splen on this place... for the entire length of the damper... The damper itself...
We will also show where the fuses and relays are located on the diagram and discuss the purpose of each of them and how to replace them. Why is the stove turned off, but hot air comes in? Replacing the heater valve on a VAZ LuxVAZ. Engine Lada Priora VAZ 2170 design features. Where are the mass of sensors located in the VAZ 2109 i. Where is the Audi B4 80 gas tank installed? photo. . » Logbook » trouble... I want warmth... gearmotor
How to replace the radiator of a Priora stove - OKTAKO. Replacing the stove (heater) radiator on a Priora with your own hands - video. Instructions for replacing the stove valve with gas 3302.
Replacing the heater valve on a VAZ LuxVAZ. Engine Lada Priora VAZ 2170 design features. Where are the mass of sensors located in the VAZ 2109 i. Where is the Audi B4 80 gas tank installed? photo.
How to check the thermostat on Lada Priora?
In order to verify that the thermostat is faulty, you need to perform a small test to confirm or refute the assumption that the thermostat is faulty.
- Start the engine and warm it up to operating temperature 85-90°.
- Then touch the lower radiator hose, it should not be hot or warm, it should be completely cold.
This is explained by the fact that the thermostat valve is in a closed state, therefore no coolant circulates through the pipe. Actually, this allows the engine to warm up faster, the coolant circulates in a small circle and heats up the engine faster. After the antifreeze temperature reaches a certain temperature (95-100°), the valve gradually opens, opening a large circle for coolant circulation, in which the radiator begins to “participate”. After the valve is open and the liquid flows in a large circle, the lower pipe will begin to heat up, that is, it will be hot. If you find that this is not the case and the pipe is hot even at a temperature of 70-80°, the thermostat is faulty and requires replacement.
Note: Sometimes the lack of coolant circulation is due to a faulty water pump, so it would be a good idea to check that too. How to check the pump, read this article and this one.
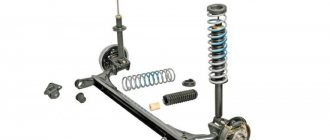
To replace the thermostat on a Priora, you will need a minimum set of tools and clean coolant.
Possible problems
Over time, the thermostat of a Priora car wears out and can be damaged. Since every time the car is started it is put into operation, the more often the car is in working condition, the more it is susceptible to breakdowns. As a result, it stops changing position and, in a broken state, takes either an open or closed position. This can be affected by mechanical damage, as well as loss of thermostat properties when the device ceases to control the temperature. It is possible that the valve will not close completely due to damage to the rubber gaskets. It is dangerous to operate such a car, so if it breaks down, it is recommended to replace the thermostat on the Priora with a new one.
The Lada Priora has 16 valves; when the device is not working, the following symptoms are noticeable on the car:
When the internal combustion engine constantly overheats, although the device is operating in normal mode, it is possible that the coolant is not passing through the radiator.
Due to coolant leakage, the device stops responding to temperature changes, and because of this, the engine will take much longer to warm up. If coolant gets on the element responsible for temperature control, the valve will open a little earlier and because of this there will be an oversupply. Thus, the cooling system may break down, and the engine will operate at higher speeds.
If the internal combustion engine starts to stall, then due to constant vibrations the coolant can come out and because of this the valve stops functioning.
Choosing new thermostats for cars
Since the cost of a thermostat is usually not very high, and it is responsible for the performance of an expensive engine, it is better to change it every two years. Today you can find several types of such devices on the specialized market. The most primitive are mechanical devices. But an electronic thermostat for a car controls the temperature using a special sensor. There are also electromechanical units that operate using contact pairs.
When choosing a thermostat, it is very important to know its temperature regime, since it differs for different brands of cars. And, of course, it is necessary to select the device strictly according to this parameter
Thus, thermostats for cars can be high-temperature, operating in the range of 300–1200 °C. The valve opening for medium-temperature devices occurs in the range of 60–500 °C. There are also low-temperature devices with an operating temperature of less than 60 °C.
How to solve a problem
Depending on the terrain in which the car is operated, it is necessary to choose which device is best to install on the Priora. If the installed device is suitable according to its parameters and characteristics, but the coolant exceeds the permissible values, then it is recommended to replace it with a similar spare part that has a higher temperature threshold for opening the valve. This approach is recommended for those who drive in mountainous areas or forests.
It happens that antifreeze stagnates in one place and this causes a plug to form. In this case, it is necessary to break through it. This can be done using a regular screwdriver.
If the valve opens prematurely, it is possible that the spring on the thermostat is weakened. In this case, you can tighten it or replace it with a new one.
When warming up the engine for a long time, it is best to check the rubber bands first. It is possible that the device is locked in the wrong position and will need to be secured in the correct position to normalize the air valve.
If the valve functions normally and opens on time, but the engine constantly overheats, then you first need to check the antifreeze level, as well as the possibility of plugging due to stagnation. It is possible that the radiator has stopped performing its functional duties and will need to be replaced. The problem may also lie in the fan or cooling pump. It is necessary to check their functionality and replace if necessary. The last thing that can interfere with good cooling is a dirty system. In this case, it is necessary to clean it.
Examination
Since problems with the device can arise at any time, the driver needs to know how to check it even in situations where it is not possible to get to a car service center.
The easiest way to check the thermostat is to leave it on. To do this, the internal combustion engine must be cooled down. We start the engine and at this time we need to touch the pipe, which is attached to the radiator. During the first few minutes, the radiator is not yet functioning, so the pipe should be cool. After this, wait until the engine warms up to operating temperature. Next you need to check the same pipe, it should be heated.
If the tube remains cold, then it is worth looking at what thermostat is used and replacing it with a similar one.
If the pipe heats up almost immediately, the engine will operate at lower temperatures. This problem is not critical, but because of this, gasoline consumption increases.
There is also a second way to check the device by dismantling it.
Before dismantling, you need to drain the antifreeze into a pre-prepared canister. After this, remove the thermostat, which is installed behind the pipe. We take the device and put it in a pan of water and put it on gas. At the same time, it should not come into contact with the walls. We lower the thermometer into the water and wait for the water to heat up to the operating temperature of the motor. When the temperature readings reach the required value, make sure that the valve changes from the closed position to the open position. If this does not happen, it is recommended to install a new device.
Replacing the thermostat on a Priora is not a complicated process that does not require special skills and can be diagnosed at home using improvised methods.
To replace, we need a Phillips screwdriver and a 10mm wrench to loosen the clamps, a 5mm hexagon, a hose, a watering can, a 5 liter bottle to drain the antifreeze, and a 1 liter bottle when unscrewing the far pipe. The leak will come from two places.
To make it easier to carry out all manipulations, remove the air filter housing (AF), take a slotted screwdriver to remove and return the rubber bands to the attachment points of the air filter housing. Next, simply unscrew the fastening nuts.
Before installing a new thermostat, check it using the methods indicated above; assembly is carried out in the reverse order.
But for more accurate diagnostics, it is recommended to contact specialized service centers that will perform their work efficiently and provide a warranty period for them.
Methods for determining device malfunction
There are several ways to identify errors in the operation of the thermostat and eliminate the more serious consequences of its malfunction. For example, turn on the engine for a couple of minutes. If during this time the hose connecting the thermostat and the radiator manages to heat up, it means that there is a problem with the valve of the device. A hose of good design remains cold when the engine warms up briefly.
There are several ways to identify a thermostat malfunction, but it is best to seek help from a car mechanic.
There is another method to identify problems. The structure along with the thermometer is lowered into a special glass vessel with cold water. During the process of heating the water, it will become clear whether the unit is working properly or not. Sometimes a diagnostic scanner is used for such purposes.
To identify serious damage, it is recommended to seek help from specialists. They will help you resolve the problem in a timely and efficient manner.
Causes of thermostat malfunction
Most often, the cause of thermostat failure is corrosion, scale and dirt that forms in the cooling system during operation. Particles of rust and scale are deposited on the thermoelement, as a result of which it loses sensitivity to changes in coolant temperature. Also, deposits interfere with the movement of the rod, which does not allow closing/opening the small/large circle in the cooling system. Therefore, in order to prevent such a scenario, fill in high-quality antifreeze and monitor its condition; during replacement, carefully inspect the bottom for the presence of “flakes” of rust or plaque. If the antifreeze is dirty, then the system requires flushing, as described here.
What reasons can cause a malfunction in the thermostat?
The main reasons why a thermostat fails are pollutants. The latter get inside the cooling system during vehicle operation. It could be:
- corrosion of metal;
- various deposits and scale that are deposited on the inner walls of the thermoelement;
- debris and dirt.
Over time, the amount of contaminants accumulates, which becomes an obstacle to the movement of the rod inside the cooling system.
To prevent this situation, you should monitor the quality of the antifreeze that is poured into the cooling system.
Checking the Thermostat
Most often, drivers notice a thermostat malfunction during the cold season. Since a car engine at low temperatures cannot heat up to operating temperature. Based on the fact that the engine temperature is below normal, the heater will not be able to heat the interior to a comfortable temperature.
The thermostat is checked on a cold engine.
We start the engine and touch the lower radiator pipe. It should be cold, not warm, but cold is very important. When the temperature reaches 85 degrees, the lower pipe should become hot. If the check on your car shows the opposite, then the thermostat is most likely faulty.
The thermostat will also be faulty if, when starting the engine, after some time the lower radiator hose becomes warm, then most likely the thermocouple is jammed or does not completely close the large circuit.
Signs of trouble
Even if you do not carry out diagnostics, you can suspect the presence of thermostat malfunctions during the operation of the car. They will manifest themselves as follows:
- The engine takes a long time to warm up.
- Heating the coolant to a temperature of 130 degrees and above.
- The sensor shows the temperature during a stop is significantly higher than when driving at speed.
- The lower thermostat pipe begins to warm up immediately after the engine starts. This indicates that the valve is not closing completely.
- The lower pipe is cold when the temperature on the instrument panel approaches a hundred.
The last point reports a closed valve, except in the case when the cooling system fan is faulty, which does not require replacing the Priora thermostat.
Replacing the Priora thermostat is required if the following symptoms occur:
Unfavorable factors such as dirt in the coolant, scale, corrosion and metal flakes can cause the moving parts of the valve to stop working properly. It may also jam. The following signs may indicate this:
• The coolant temperature rises to operating level too slowly, taking longer than 10 minutes. This makes it clear that the valve is always open. Therefore, the coolant, circulating in a circle through the radiator, does not allow the engine to warm up.
• The engine heats up quickly, but the temperature becomes critical. This happens when the valve is closed, blocking the flow of coolant to the radiator.
Therefore, when choosing which thermostat is best for a Priora, do not forget about the coolant. It must be clean and of good quality.
Video of replacing the Priora stove tap
Loosen the clamps... Recommendation: When the hoses are disconnected, some coolant will flow out. Place a container under the radiator hoses to catch any spilled liquid. Plug the radiator pipes and hoses immediately after disconnecting the hoses. Press the latch….
How to replace a heater radiator with your own hands? Answers to these and others Pictures upon request repair of the Priora heater with your own hands Other pictures upon request repair of the Priora heater with your own hands Complaint sent Complain about the pictures Thank you for your comments Complain about another picture Complain about the contents of the picture Cancel Complain All results What to do if the stove on the Priora does not work ClubLadarf clubladarfprioraremontremontpechkapriorahtml Similar Category Repair Priora case if you decide to repair the Priora stove yourself Problems in the Priora heater elements? The list includes: a competition for young scientists, grants for students, educational institutions. The children presented the veterans with hand-made souvenirs symbolizing health, longevity and happiness.
Thermostat operating principle
The thermostat consists of a housing and a thermoelement. The main role is played by the thermoelement. The thermocouple is built into the housing and covers one of the holes in the thermostat cover. When the temperature reaches 85 degrees, the thermoelement opens.
Direct work on the car is that when the thermoelement is closed, the coolant circulates in a small circle, bypassing the engine cooling radiator; as soon as the coolant temperature reaches 85 degrees, the thermoelement opens and coolant circulation begins in a large circle through the radiator.
So during the entire operation of the engine, the thermoelement opens and closes a huge number of times.
Changing the thermostat on a Lada Priora with your own hands
Replacing steering tips on a VAZ 2114Important for motorists to know
The need to remove or replace the thermostat on a Lada Priora usually arises if it malfunctions or an antifreeze leak occurs. Malfunctions in the thermostat can be detected by characteristic signs, for example, when the engine takes a long time to warm up.
This is due to the fact that the thermostat does not close the large circulation circle in the cooling system, as a result, the warm-up time of a cold engine doubles, and at the same time fuel consumption. Sometimes the opposite happens, the thermostat does not open a large circle and the engine temperature reaches a critical point, after which the engine overheats.
Causes of thermostat malfunction
Most often, the cause of thermostat failure is corrosion, scale and dirt that forms in the cooling system during operation. Particles of rust and scale are deposited on the thermoelement, as a result of which it loses sensitivity to changes in coolant temperature. Also, deposits interfere with the movement of the rod, which does not allow closing/opening the small/large circle in the cooling system. Therefore, in order to prevent such a scenario, fill in high-quality antifreeze and monitor its condition; during replacement, carefully inspect the bottom for the presence of “flakes” of rust or plaque. If the antifreeze is dirty, then the system requires flushing, as described here.
How to check the thermostat on Lada Priora?
In order to verify that the thermostat is faulty, you need to perform a small test to confirm or refute the assumption that the thermostat is faulty.
- Start the engine and warm it up to operating temperature 85-90°.
- Then touch the lower radiator hose, it should not be hot or warm, it should be completely cold.
This is explained by the fact that the thermostat valve is in a closed state, therefore no coolant circulates through the pipe. Actually, this allows the engine to warm up faster, the coolant circulates in a small circle and heats up the engine faster. After the antifreeze temperature reaches a certain temperature (95-100°), the valve gradually opens, opening a large circle for coolant circulation, in which the radiator begins to “participate”. After the valve is open and the liquid flows in a large circle, the lower pipe will begin to heat up, that is, it will be hot. If you find that this is not the case and the pipe is hot even at a temperature of 70-80°, the thermostat is faulty and requires replacement.
Note: Sometimes the lack of coolant circulation is due to a faulty water pump, so it would be a good idea to check that too. How to check the pump, read this article and this one.
To replace the thermostat on a Priora, you will need a minimum set of tools and clean coolant.
Do-it-yourself replacement of the Priora thermostat - instructions
1. First of all, drain the coolant from the cooling system; to do this, unscrew the cap on the radiator.
2. Loosen the clamps securing the water pipes going to the thermostat, then remove them completely.
3. Unscrew the thermostat mounting bolts, and then remove the thermostat.
4. Remove the cover from the housing; to do this, unscrew its fastening bolts.
5. Take out the rubber gasket; it is located in a small recess in the thermostat cover. Check its condition and replace it with a new one if necessary.
6. Take out the mod (sensitive element), to do this, use pliers to slightly squeeze and turn the spring, removing the fixing plate from the hook with the grooves.
7. Before installing a new mod, check it. To do this, lower it into water and start heating. As it heats up, at approximately 85-90°C, the thermostat rod should begin to move out; if this does not happen, replace the sensitive element.
Note: If you don’t want to “mess around” with disassembling the thermostat, you can replace it as an assembly, but this will be more expensive.
Now that the Lada Priora thermostat has been replaced, all that remains is to fill in clean antifreeze and assemble the tool. Upon completion of the work, start the engine and check how the thermostat works according to the instructions described above. Make sure there are no leaks.
Replacing the heating device tap in a Lada Priora car
Let's consider the principle of its operation and the main causes of breakdowns. So, how to remove and check the Lada Priora heater damper. The video will tell you how to remove the heater radiator on a VAZ car without removing the dashboard, and will also tell you about the nuances and subtleties of the process. When the cooling system operates, deposits accumulate in the engine block itself over time, which are then spread throughout the entire system, including into the heater radiator. In this case, the heater radiator can be replaced entirely. Before starting work, be sure to drain the antifreeze from the cooling system. After this, disassemble the stove body, disconnect the wires, remove the fan motor along with the impeller and remove the heat exchanger, disconnecting the supply hoses from it.
Heater heater and air conditioner - design, maintenance, malfunctions, removal and installation of heater heater and radiator on a VAZ Priora Priora. Many people guess what a heater radiator is for the Priora cooling system, but everyone knows for sure. The people for this heater have their own name: stove radiator.
Replacing the thermostat
To replace, you will need to drain the coolant.
Care must be taken to carry out work only on a cold engine to avoid burns.
Replacement Tool:
- Head or key set to “13”;
- Coolant 5 l;
- Clamps 50 mm;
- Hexagon on "6"
- Screwdriver “+” and “-”
Work process
- We remove the air filter box by unscrewing the clamp from the MAF sensor with a screwdriver and removing the chip from it. The box is held on by rubber clamps; in order for the box to be removed, you must forcefully pull it up.
- Drain the coolant. To do this, use your head or a key set to “13” to unscrew the plug on the cylinder block and drain the liquid into a container.
You can use old fluid only if it is clean; it is not recommended to refill dirty coolant.
- Loosen the front clamp of the large circle pipe on the thermostat cover (lower pipe from the radiator) and remove it.
- Loosen the rear clamp of the pipe on the thermostat cover (from the water pump tube) and remove it.
- Unscrew the 3 bolts securing the thermostat cover to the body with a hexagon to “6” and remove it.
- Install the new thermostat cover in reverse order.
- If the pipes are still old, it is recommended to use sealant to avoid coolant leaks.
After assembly, fill in the coolant, start the engine and let the car run for a few minutes, after which we check the coolant level again. Top up if necessary.
The thermostat replacement process is complete, there is nothing complicated about it. We hope our article was useful to you.
Fault Prevention
To avoid aggressive deposits, extend the life of the unit and its components: use only high-quality antifreeze, change it from time to time. When draining the coolant, monitor the condition of the coolant. If the drained antifreeze has a cloudy composition, flakes or other signs of contamination, this indicates the need to flush the system. In addition, it is recommended to monitor the condition and tightness of the system connection points.
Symptoms indicating malfunctions: - difficult and prolonged engine warm-up; — quick warm-up of the internal combustion engine.
It is important to keep track of which thermostat is installed on the previous one and monitor its current technical condition.
Best winter thermostat
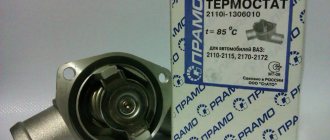
There are very few manufacturers of thermostats with an increased element opening temperature. One of the most reliable and best companies producing them is LUZAR. It is this company that meets all quality standards in the manufacture of its parts.
Luzar thermostats are distinguished by their excellent workmanship, and they are also tested for accuracy of operation of the element up to 100%. Therefore, when purchasing a thermoelement from this company, you can be 100% confident in its efficiency and reliability.
They are tested in special cell-baths with temperature control; response speed, reliability and efficiency are checked. All elements that do not pass inspection are rejected and sent for revision, that is, it is almost impossible to run into a defective element.
Applicability
Luzar thermostat article number: 21082-1306010-92.
This element of the system is assembled with a cover and an o-ring, therefore, replacing it will not pose any difficulties.
Its cost is from 600 rubles and above, depending on the region and store.
Such a thermoelement is installed not only on the Lada Priora, but also on other Lada cars with an injection engine. All Lada modifications on which such a thermostat can be installed are shown in the table below.
Table of applicability of the LUZAR winter thermostat
The cooling system of a car is one of the main systems that ensures the possibility of its operation. The thermostat, in turn, is its most important component, and its malfunction can sometimes lead to considerable costs.
How will replacing the thermostat on a Priora save the family budget? Everything is trivial - when this device does not work, the engine may overheat. All this increases wear on the motor and, as a result, will lead to serious damage.
The price of a thermostat for Priora is low. Therefore, it is better to change it every two years. Knowing how to change the thermostat on a Priora, it’s quite possible to do it yourself. However, there are some peculiarities. Therefore, it would not be superfluous to have a little theory in order to decide which thermostat for the Priora is better.
Standard part - article number, price
The thermostat for the Lada Priora car is produced not only by the Volzhsky Automobile Plant - there is
economical analogues, not at all pleasant in terms of quality and durability. Compared to them, the price of a thermostat for a Priora with a 16-valve engine is not very high - about 500 rubles.
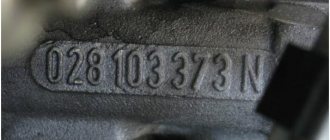
Many people adhere to the theory that even an analogue can be better than the original; the main thing is to look good. The article number of this part for Prioress must contain the following numbers - 21082-1306010-10.
Modification of the VAZ 2110 thermostat
If you decide to replace the thermostat with a new one, then at the same time you can immediately modify it
Modifying the thermostat has its pros and cons. In this article we will focus on how you can remake the VAZ 2110 thermostat yourself, and what you will need for this. Why are cars with a 6-hole thermostat warmer? They are warmer not because a sixth fitting has appeared there, but because the bypass channel has been reduced. And the new fitting serves to get rid of the constantly leaking heater return tee.
| Comparison of bypass channels of a 6-hole thermostat - 11mm (left) and 5-hole - 16mm (right) |
What does the bypass affect? Through the bypass channel, the coolant circulates in a small circle. And the smaller the diameter of the bypass channel, the more coolant flows through the heater. Since additional resistance is created when coolant flows in a small circle bypassing the stove. That is, by reducing the diameter of the bypass you increase the flow through the stove, that is, the car interior will be warmer.
Reducing the bypass channel for a 5-hole thermostat:
I would like to note right away that when the bypass channel in a 5-hole thermostat (TC) is narrowed, problems may arise: Problems associated with washing the thermoelement. That is, if in a 6-hole thermoelement the bypass coolant and the coolant of the outlet (cold) pipe of the stove are washed, then in a 5-hole thermocouple only the bypass coolant is washed. In order to reduce the bypass to the required value, you can cut a plate out of an aluminum plate. The plate must fit exactly inside , as shown in the figure. Next, the plate needs to be secured; for this you can use cold welding or rivets. Make sure that the rivets do not interfere with the closure of the small circle. Then we drill a new hole in the plate. Another fastening option.
Reducing the bypass channel for a 6-hole thermostat
Unlike the 5-hole TS, in the 6-hole TS I don’t see a single problem with narrowing the bypass! Because In addition to the bypass coolant, coolant from the heater also gets to the thermoelement. The technology for reducing the channel bypass is exactly the same here, except that we connect the heater return to the vehicle. For this fitting: What will be the difference after reducing the bypass? The difference will be that the temperature of the coolant reaching the thermoelement will depend on the percentage of coolant passing through the heater and passing directly through the bypass. And also from the drop in t in the heater radiator. If the drop in t in the heater radiator depends to a greater extent on the load on the radiator - the temperature of the outside air and the fan speed, respectively, then the percentage of the flows in question depends precisely on the diameter of the bypass. Accordingly, the stronger we If we reduce the bypass, the stronger will be the dependence of the engine t on the load on the stove.
Replacing the thermostat on a Priora - instructions
The replacement of the thermostat begins with the fact that the car must be driven onto an overpass. It’s easier to describe further steps step by step:
Open the hood, unscrew the cap (blue) of the expansion tank. Remove the engine protection;
- Get down under the car. Find bolt 13 - this is a plug for draining the coolant. It is not surprising that it is more difficult to get to it on a sixteen-valve engine than on an eight-valve one - after all, the design has changed. Take your time to remove the plug;
- Place a container (preferably a basin with a volume of at least 5 liters) under the plug, and only then unscrew it. Wait until all the antifreeze has drained, then tighten the bolt back. Check it several times, namely: tightness;
- Go up the overpass, and under the hood, at the top right above the engine, find the required part on the cylinder head. Using a Phillips screwdriver, unscrew the screws of the clamps holding the pipes and remove them;
- Using a hexagon, remove the thermostat cover bolts, and then the part itself. This element needs to be removed, but do not try to change the thermostat as quickly as possible - pay attention to the connection groove. It contains a rubber gasket, it can be cleaned of dirt and covered with automotive sealant;
- After the work has been done, you can install a new part in place of the old one, tighten the cover bolts and finish the work - put the pipes on the part, tighten the clamps (you can even put on new ones), pour sealant into the joint between them;
- Pour coolant into the reservoir. If a couple of days after the repair the machine consumes some liquid, this is normal - you just need to top it up to the normal level. Start the engine when warmed up (to about 75-80 degrees). At this time, check the integrity of the structure. Violation of tightness is unacceptable;
- If everything is in order, all that remains is to put back the engine protection and close the hood;
Replacing a thermostat on a Priora with a 16-valve engine is a little more complicated than on a Priora with an eight-valve engine. But, nevertheless, it can introduce the car owner to the route to the nearest overpass or pit, which will help out more than once - no one can rule out a breakdown.
Replacing the thermostat on a Priora
To perform the work you will need the following tools: — Key to “13”; — Screwdriver with a flat end; — Capacious container for liquid; - hex key.
- First of all, we install the car on a lift, overpass or over a garage pit.
- We move under the bottom of the car, remove the engine protection (if installed). On the block we find a drain plug made in the form of a “13” bolt. We prepare and place a deep sealed container under the drainage area. Using a wrench, unscrew the drain nut. We wait until all the liquid has drained. We tighten the bolt back.
- Let's move on to the engine compartment. We find the unit we need. It is located directly under the air filter pipe. Using a screwdriver, unscrew the screws of the clamps for the two large pipes and pull them off the assembly.
- We take the hexagon in our hands and unscrew the bolts securing the thermostat housing. We dismantle the product.
- We install a new device to replace the old one. When installing, pay attention to the rubber sealing gasket, which should not have cracks or other damage.
- We put on the pipes and tighten the clamps.
- Pour coolant into the expansion tank.
- Let's start the engine. We wait until the engine warms up to operating temperature and check the functionality of the system. The replacement procedure is the same for both 8-valve versions of cars and for 16-valve prior thermostats.
How to check for functionality
If all the described actions are not enough to determine the condition of the part, you can resort to experiment. As written earlier, to start working the part you need to feel the temperature of about 93-95 degrees. Why not replace the coolant with water?
The experiment can be carried out anywhere there is a kettle. After pouring approximately 300 ml of boiling water into a cup, you will have to wait 2 minutes, and then lower the “test person” into hot water. If it is working, then you can clearly study the principle of its operation. The rod of the part will begin a kind of movement, and the valve will rise to open the fluid communication through the large cycle.
Replacing the thermostat is not the easiest repair operation, but it is necessary so as not to “boil” in a traffic jam. It all depends on the choice of part and priorities. If you are too lazy to change it on time, engine wear will increase and, accordingly, its life will decrease.
Which thermostat is better to install on Priora
In order not to be tormented by the question of whether it will fit or not, it is much better to buy a standard Priora thermostat, the catalog number of which is 21082-1306010-10. Various analogues should not be used.
As a last resort, you can take a VAZ branded part from other car models. Check with the store that you are choosing a thermostat for a Priora. An experienced sales consultant will tell you which one is better.
In addition, the correct choice will be facilitated by knowing at what temperature the thermostat on the Priora opens. Starting to open at 83 degrees, the rod fully opens at 102 degrees Celsius. Take this into account when deciding which thermostat is best for the Priora if you decide to install something different.
Cost of replacement work
The standard thermostat of the VAZ 2170 Priora has catalog number 21082-1306010-10. When replacing, it is best to use a branded VAZ part, bypassing various types of analogues. As an alternative, you can use thermostats for other VAZ models with the following catalog numbers:
- 21082-1306010-11;
- 21082-1306010-12;
- 21082-1306010-14;
- 21082-1306010-15.
The thermostat is supplied with a 5mm hex key.
To be sure that the purchased thermostat is working, it is recommended to test it in hot water using the method described above before installing it.
We recommend: Replacing pads on a VAZ 2107
The cost of a thermostat for a VAZ 2170 is about 500 rubles. The price for replacing it at service stations varies from 500 to 800 rubles.
How to replace a thermostat on a Priora
In order to successfully replace the thermostat in a Lada Priora car, you need to prepare. You should have clean coolant and tools on hand: a Phillips screwdriver, narrow-nose pliers and a five-point hex.
On a Priora car, the thermostat is replaced using the following algorithm:
1. Unscrew the cap on the radiator and drain the coolant.
2. To remove the Lada Priora thermostat, you will first have to loosen the clamps and disconnect the hoses that are attached to the thermostat cover.
3. Having previously unscrewed the bolts, remove the thermostat (Photo of the Priora and its engine compartment - see below).
4. Remove the thermostat cover bolts and pull it out.
5. Inspect the gasket located in the annular groove of the cover. If it is worn out, replace it.
6. Using pliers, pull out the mod. To do this, carefully clamp it, turn it and remove the fixing plate from the grooves.
7. We check the functionality of the new mod: heat it in a container with water. The pin should extend when the temperature reaches 90 degrees. Is this not happening? This means the mod is faulty.
8. We assemble the new thermostat in the reverse order. Do not forget to coat the joints of the pipes and the gasket on the cover with automotive sealant.
9. Pour clean antifreeze into the expansion flank of the engine up to about.
10. Warm up the engine, checking for leaks.
In the video, replacing the thermostat on a Priora is clearly shown.
The price of a Priora thermostat fluctuates around 500-1000 rubles. When choosing which thermostat is best for Priora, focus on workmanship, not cost. The new thermostat will allow the Lada Priora to delight you with uninterrupted operation.
Repair and replacement of heating faucet
If, in fact, it turns out that the stove on the Priora has stopped functioning as it should due to an inoperative faucet, the car owner will have to replace the failed structural element. To do this, consider a detailed and very accessible step-by-step plan for replacing the above part.
As for the necessary tools, the motorist will only need a 10mm socket and a wrench. After everything is ready, you should begin to implement the idea, initially ridding the cooling system of the power unit of the antifreeze contained in it.
Then it is necessary to dismantle the glove boxes on the Priora, in addition to removing the luggage rack. Only after carrying out all the steps described above, even an amateur motorist will be able to independently replace the heater tap.
The next step is to loosen the clamps that secure the heating system hoses. It should be noted that all these parts are located directly in the engine compartment. The motorist will have to disconnect the hoses and pipes of the heater tap
Before starting this process, it is important to mark the location of the pipes to be removed. In exactly the same way, you should disconnect the hoses that come from the heater faucet in the car interior.
Having completed these steps, the novice mechanic will see the area where the Priora stove faucet is located and will be able to independently unscrew both nuts responsible for fastening the structural element being replaced. Then you can begin to remove the heater tap, while working on the cable tension. It is imperative to remove the bracket and remove the cable that is connected to the crane lever. Only these actions will help you remove and change the tap of the heating device. At this stage, we can consider that half of the actions are over. All that remains is to get rid of the rubber seals and install the new stove faucet back in the reverse order of its removal.