Happy owners of the domestic VAZ-2114 car in some cases have to deal with improper operation of the heater. It is especially annoying when such a failure occurs in winter, because hardly anyone would dare to call staying in a cold cabin comfortable.
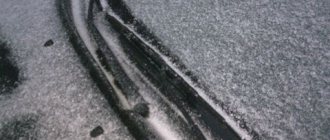
It often happens that in a VAZ-2114 car, the heating generally functions as it should, but cold air only blows onto the windshield. In this case, the crust of ice formed on its surface does not melt - and as a result, it is difficult to drive the car.
Sometimes the heat does not come from the vents located on the sides of the instrument panel. It is worth noting right away that any malfunctions with the heating system must be eliminated as soon as possible, since the harsh climatic conditions of our country in this case threaten serious troubles for the car owner.
VAZ 2114: cold air blows on the windshield - all ways to solve the problem
The interior heater in the VAZ 2114 model has never been famous for its high reliability.
During operation, this unit constantly causes the need for repairs or modifications for the owners of this model of the domestic automobile industry. Cold air coming from the windshield deflectors on the VAZ 2114 is the most common heater problem. The situation when cold air blows onto the windshield of a VAZ 2114 causes it to constantly fog up, especially in winter. Next, we will look at the causes of the problem and how to fix it yourself. First of all, you need to check the heater valve. It opens and closes with a special cable. If its tension has weakened for some reason, then when you turn the lever, the faucet either does not open at all or moves literally a few millimeters. It will need to be tightened.
It is easy to check the performance of the radiator itself by warming up the power unit while the fan is not working. All you need to do is gently touch the antifreeze supply and discharge pipes with your hand.
Getting to them is easy - you just need to open the hood.
Often, over the summer, the heater valve manages to sour, as they say. Therefore, when an attempt is made to open it, the damper simply breaks off and the drive roller remains in place. Such an element will have to be completely replaced with a working one.
If the cooling fluid level is very low, this will cause the radiator to remain relatively cold. Here you will need to look for a leak and replenish the coolant volume.
If the thermostat breaks down, it needs to be replaced with a new one, and the air lock is removed by pumping antifreeze through the system.
A failure of any main element of the heating system should be suspected only when warm air stops flowing into the cabin altogether. If its supply is limited only in several directions, then most likely we are talking about local breakdowns.
Step-by-step instructions for replacing the radiator
What should I do to get the stove working again? First of all, replace or repair the radiator; to do this, follow these steps step by step:
- Drain the coolant into a container.
- Unscrew the 2 clamps located on the pipes of the old device from the engine compartment and remove the hoses.
- Unscrew the rubber seal retainer and then remove it completely.
- The interior of the VAZ-2107 will also have to work. Remove the panel where the radio is located, using a screwdriver or a 7mm wrench, unscrew the fastening element of the heater valve drive cable.
- Don't put the screwdriver down; you'll still need it to remove the spring-shaped brackets. There are four of them, the parts are located on the casing of the ventilation equipment.
- Slightly lower the cover downwards and then move it to the left.
- The radiator can now be pulled out.
- Proceed to inspect the old unit. Which product can not be changed? If there are no traces of leaks on the metal tubes, there is no corrosion. Corrosion is cleaned out, and leaking metal pipes are replaced. It happens that the heater tap lever is jammed, the point is that it no longer opens or there are problems with closing. When reinstalling radiator components, remember that good gaskets seal the fit of the parts to each other. Each gasket should be covered with silicone sealant; screw them securely, but without overtightening the fasteners.
- Rubber hoses that carry coolant along the entire path are also subject to lubrication with sealant.
- Assemble and mount the radiator exactly as indicated in the instructions, but in reverse order.
- If necessary, add antifreeze.
- All that remains is to turn on the ignition and check how tight the connection of the pipes with the hoses of the VAZ-2107 is.
What to do if the stove in the VAZ-2107 does not heat and the radiator is to blame is shown in the video: https://www.youtube.com/watch?v=gGOGR8EeHWI.
Why does it blow cold on the windshield?
The supply of heated air in this location is regulated by a special damper. It is driven by a cable, which on a VAZ is generally stretched very often. This, in turn, leads to the fact that the damper itself does not open fully. In such a situation, air will be supplied inside the car directly from the street, that is, cold.
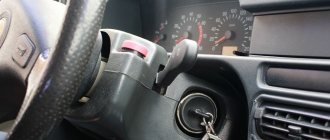
Understanding the principle by which heating functions in the VAZ-2114, it is generally not difficult to find out what the actual problem is. But even an experienced car enthusiast will need a lot of time to fix it. The thing is that the stove itself is located directly behind the panel located in the front of the cabin, near the steering wheel - troubleshooting requires its dismantling.
The problem with the cable is most noticeable when the temperature control is turned downward (that is, to the left).
Repairing heating in general is quite easy. You should proceed in this order:
- The cover under the steering wheel on the left is removed;
- the cable itself and its fastening are found near the gas pedal;
- the clamp is dismantled;
- the cable is tightened so that it does not sag;
- fixed with the same clamp;
- the damper control levers move (left to right all the way and vice versa);
- The tap regulator is set to maximum.
After this, the ignition is turned on and very soon fairly hot air begins to blow from the previously blocked holes. As practice shows, these manipulations help get rid of the problem in virtually all cases.
True, sometimes car owners note that despite the fact that the temperature regulator has begun to work much better than before, the air still flows warmer than hot. In addition, when you move it to the left, a cold stream sometimes escapes from the side deflectors, despite the heater being running. The problem here is that the specified regulator not only controls the faucet, but also the damper that prevents the supply of outside air.
To eliminate this mess, you will need to remove the cable of the damper mentioned above from the heating regulator. This is done as follows:
- remove the cover on the right side of the steering column;
- the regulator drive is found there (it has 2 cables);
- the one to the right is unhooked;
- the dismantled cable is tensioned so that the damper moves to the position of maximum heating of the interior;
- the resulting excess piece is cut off after fixing it in the old place, with a margin of no more than one and a half centimeters.
After this, the stove should work fully, and adjusting the temperature will be easy and comfortable.
VAZ 2114, practically no air blows from the side air ducts and onto the windshield, but it’s normal in the face and legs. What can be done? VAZ 2114 does not blow on the side windows.
Similar articles
11 comments on “Vaz 2114 does not blow on the side windows. There is practically no air blowing from the side air ducts or onto the windshield.”
I sympathize with the same for me.
I am also struggling with this problem.
the problem needs to be solved somehow
The cans keep their brand))
By the way, I read about a voltage converter for the generator, has anyone installed it, my wipers and lifts are working hard, they recommended it
this problem can be solved, but the process is not particularly interesting. You remove the panel and look at all the dampers on the stove to make sure they close tightly and open completely; if they don’t overlap well, which often happens, use pliers to pry the cable to kind of tighten it and voila it will blow wherever you want and it's not even bad
But ideally, you remove the entire stove, disassemble it, and when reassembling, wash all the seams with sealant and reassemble it, and with the assembled sealant you don’t have to walk much along the seam
and it will be hot in the car, you’ll kill it all day, but in cold weather you can drive in a T-shirt
I'll do it tomorrow) thanks
You remove the heater, turn off the central air duct and leave it on the side windows, glue all the dampers with foam rubber in the legs and on the windshield, insulate the outside of the heater and in the car Africa is fucked
How much will such a procedure cost in the service?)
The most common causes of problems
Most often, the phenomenon in which cold air blows from the VAZ 2114 stove on the sides and onto the windshield is caused by one of the following reasons:
- The thermostat has failed;
- air got inside the cooling system;
- The heater regulator has broken or its cable has become loose.
In addition, in quite rare cases, the cause may be a failed (clogged or leaking) radiator - you should start troubleshooting the system by checking it.
Heater maintenance
To ensure that the VAZ-2114 heater heats well in winter, carry out maintenance of the heater before the cold weather:
- Remove it from the car.
- Disassemble and clean.
- Check the functionality of the dampers, seal their ends with sealants.
- Seal the joints with sealant.
- Flush the radiator.
- After assembly, adjust the drive cables so that when moving the sliders, the valves and the tap become in their extreme positions.
These measures are enough for the heating system to function normally in winter, providing warmth to the car interior.
Finally, we note that the reasons for the poor operation of the stove were discussed above, but it still continues to function. But this unit also has breakdowns and then the stove fails and stops working completely. Such reasons include breakdown of the radiator, leaks at the joints of the pipes, fan malfunction (open circuit, exhausted motor life or burnout).
First of all, you need to check the heater valve. It opens and closes with a special cable. If its tension has weakened for some reason, then when you turn the lever, the faucet either does not open at all or moves literally a few millimeters. It will need to be tightened.
It is easy to check the performance of the radiator itself by warming up the power unit while the fan is not working. All you need to do is gently touch the antifreeze supply and discharge pipes with your hand.
Getting to them is easy - you just need to open the hood.
Often, over the summer, the heater valve manages to sour, as they say. Therefore, when an attempt is made to open it, the damper simply breaks off and the drive roller remains in place. Such an element will have to be completely replaced with a working one.
If the cooling fluid level is very low, this will cause the radiator to remain relatively cold. Here you will need to look for a leak and replenish the coolant volume.
If the thermostat breaks down, it needs to be replaced with a new one, and the air lock is removed by pumping antifreeze through the system.
A failure of any main element of the heating system should be suspected only when warm air stops flowing into the cabin altogether. If its supply is limited only in several directions, then most likely we are talking about local breakdowns.
Dismantling algorithm
VAZ cars of the classic family, which includes modification 2107, are good because to remove the heater radiator you do not need to dismantle the front panel, so the work of removing the heat exchanger of the interior heating system is not difficult. No specific tools are required, just 8 and 10 size screwdrivers and wrenches are needed.
Algorithm for removing the heater radiator:
- Drain the coolant by unscrewing the drain plugs on the engine and main radiator.
- On the left side of the engine shield (standing in front of the car) we look for two rubber tubes through which coolant is supplied and discharged to the heater. We loosen the clamps of these tubes and tighten them.
- We unscrew the screws securing the rubber seal through which the metal radiator pipes pass. Let's remove the seal.
- We move to the salon.
- We dismantle the shelf under the storage compartment on the passenger side. To do this, you need to unscrew the screws that secure it.
- Remove the lower part of the center console. It is attached to the floor and front panel with self-tapping screws. Since keys, a cigarette lighter, and a clock are installed on the lower part, after unscrewing the fastening elements, we move the box toward you (by turning on the reverse gear at the gearbox) and disconnect the wiring going to the indicated elements (it is better to mark the wires so as not to confuse them during assembly). After this, the box can be removed from the cabin.
- Unscrew the control mechanism cable from the antifreeze supply shut-off valve.
- We disconnect the lower part in which the fan is located from the stove body. It is attached to the top of the case using 4 latches installed on the sides. Use a screwdriver to pry up the latches, after which the lower part of the case will drop down. We move it to the side or completely remove it, having first disconnected the power wires of the fan motor.
- After dismantling the bottom of the case, you will have access to the radiator, which can be removed by pulling it down using the metal pipes.
Radiator installation
We recommend: Why do car headlights sweat from the inside and what to do about it?
Note that this is only one of the methods for disassembling the stove on a VAZ-2107. It is not necessary to drain the antifreeze; you can disconnect the rubber tubes without removing them, and 1.0-1.5 liters of coolant will flow out of the cooling system, which are topped up after assembly. The main thing is that after disconnecting the tubes, lift their ends up and secure them in this position.
During the disassembly process, you can immediately disconnect the pipelines from the radiator along with the shut-off valve and then remove the heat exchanger itself.
Solving the problem
First of all, you need to check the heater valve.
It opens and closes with a special cable. If its tension has weakened for some reason, then when you turn the lever, the faucet either does not open at all or moves literally a few millimeters. It will need to be tightened. It is easy to check the performance of the radiator itself by warming up the power unit while the fan is not working. All you need to do is gently touch the antifreeze supply and discharge pipes with your hand.
Getting to them is easy - you just need to open the hood.
Often, over the summer, the heater valve manages to sour, as they say. Therefore, when an attempt is made to open it, the damper simply breaks off and the drive roller remains in place. Such an element will have to be completely replaced with a working one.
If the cooling fluid level is very low, this will cause the radiator to remain relatively cold. Here you will need to look for a leak and replenish the coolant volume.
If the thermostat breaks down, it needs to be replaced with a new one, and the air lock is removed by pumping antifreeze through the system.
A failure of any main element of the heating system should be suspected only when warm air stops flowing into the cabin altogether. If its supply is limited only in several directions, then most likely we are talking about local breakdowns.
How to fix antifreeze leaks and bad smells
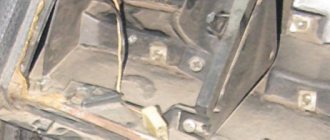
First you need to conduct a complete diagnosis of the car's cooling system. This can be done in the garage, even without special skills, just inspect the car for leaks. To do this, you need to open the hood, check the integrity of the pipes, hoses and covers. The condition of absolutely all elements must be assessed, and if there is damage, replacement must be carried out.
Antifreeze can also leak due to a malfunction in the crankcase of the power unit. Such a breakdown gradually leads to disruption of the functionality of the engine. To detect the problem, you need to inspect the oil tank cap from the inside. If there is a white coating on it, this means that coolant is getting into the engine crankcase. If the liquid gets directly into the car interior, then, as a rule, we are talking about a malfunction of the radiator. When a leak forms, some of the antifreeze leaks into the cabin, and the driver just notices a characteristic sweetish smell. To fix this problem, you will have to replace the radiator with a new one. In this case, the spilled liquid must be completely removed. Some car owners use old newspapers to do this and soak the leak area. Others use a plastic bottle to collect the liquid. A small hole is made in its cap, and the bottle itself is compressed to release air. The lid with the hole is immersed in the collected puddle, the moisture is sucked into the container. In several approaches, the liquid will be collected, and its remains will need to be wiped off with a cloth. Some causes of leakage can be even more difficult to identify
If there are no visible signs of a leak anywhere, but the smell is constantly present in the cabin, you should pay attention to the radiator of the heating system. Sometimes coolant leaks from the heater
Then the smell will be not just sweet, but burnt. In this case, as a rule, the leaked liquid goes under the mat. To fix this problem, you need to disassemble the stove body and replace its radiator. Sometimes it seems that the reason is in the radiator itself, and that the tubes connected to it are to blame. To prevent and eliminate leaks, it is worth treating the joints with sealants. But the best solution would still be to replace the problematic tubes.
vote
Article rating
The VAZ 2114 stove does not work: reasons
The following are the most common breakdown factors:
- Fan malfunction.
- Fuse blown.
- Problems with contact of electrical circuits.
- Radiator malfunction.
- Crane failure.
- Thermostat malfunction. It does not respond to temperature changes.
- The coolant circulation system is disrupted: low pressure or air lock.
- The cylinder head gasket in the engine is burnt.
- Damper malfunction.
It would seem that most problems can be solved by simply replacing components. But not everything is so simple, so let’s take a closer look at each of the points.
Fan fault
One of the reasons why the stove stopped working in the VAZ 2114 is a broken fan. Because of this, warm air does not enter the car and, accumulating inside the device, can cause overheating of the engine.
The cause of fan failure may be:
- power supply failure;
- fuse burnt out;
- failure of the fan connection sensor;
- Thermostat malfunction.
The check begins with the power supply. It’s fast, and the breakdown, most often, lies precisely in it. Then check the fuse. If it is faulty, no current flows through it and the element must be replaced. For VAZ 2114 stoves, F7 fuses with a current strength of 20A are purchased.
When checking the connection sensor, the fan is directly connected to the battery. If everything works, then the ventilation system is working properly, and you need to check the sensors. To do this, the fan is connected to the carburetor. And if the system works, then the sensor is faulty.
Fuse blown
It seems that it is enough to simply replace the device with a new one. However, if the fuse is broken, it is the fault of the short circuit that needs to be found.
In total, the car has 2 safety blocks: external and internal. The first is located on the left side under the hood, the second is under the panel in the cabin. You can understand which one is not working by looking at the devices connected to them. To get to the fuses themselves, you need to carefully remove the cover of the blocks by holding a special latch.
Fuse
The best option for a malfunction is a blown fuse. A voltage drop in the vehicle's on-board network or a mismatch in the power of the fuse leads to its burnout. The location of the required element in the mounting block differs depending on the year of manufacture of the machine. In earlier copies, the heater fuse is located in the bottom row under the F7 marking. If you count from left to right, then the desired element will be the 4th in a row.
On later versions of the mounting block, the required fuse is located in the right column last, if you go from top to bottom.
In both options, the fuse capacity is 30 Amps. For quick repairs, you can store a set of new parts in the glove compartment. If the replacement does not produce results, you need to further understand why the stove does not work on the VAZ 2114.
Heater motor VAZ-2114
It is best to start looking for problems in the operation of cars of the Lada Samara family by checking the heater motor. To do this, you need to start the engine. Then the operation of the motor in each position is checked on the stove control unit. Next, they determine by ear whether the mechanism is working. If it changes speed, the stove starts blowing cold air; the VAZ-2114 has a working motor. You can talk about its malfunction if it shows no signs of life.
If the mechanism operates at the maximum possible speed in the third position, then the problem is a faulty resistor. If the motor burns out, it must be replaced. It cannot be repaired.
Reasons why the stove blows cold
A car's heater is a rather complex mechanism that includes a large number of different parts that are involved in heating the interior. Failure or improper operation of one of the elements can lead to consequences that will contribute to the ineffective operation of the heater.
The cold air flow from the stove is affected by:
- Insufficient amount of antifreeze;
- Faulty expansion tank cap valve;
- Thermostat malfunction;
- Heater radiator clogged;
- Malfunction of the stove tap;
Also, the car may have a weak air flow, which does not help warm up the interior. This reason arises due to:
- Radiator clogged;
- Malfunction of the electric motor of the stove;
- Cabin filter clogged;
To figure out why the heater is blowing cold air in your car, you need to familiarize yourself in detail with each of the possible reasons.
Low coolant level
As you know, the interior heating system directly depends on the engine cooling system. Antifreeze (antifreeze) is used to heat the heater radiator, so all problems associated with the ODS are reflected in the operation of the heater. For proper and efficient operation of the heater, it is necessary that the coolant level be in the middle position between o and “maximum”. An insufficient level can lead to the formation of an air lock in the system, which will negatively affect the operation of the heater.
How the stove works on a VAZ 2113
Wanting to understand the question of why the stove on the 2113 VAZ model does not heat well, you need to study the design of the interior heating system itself.
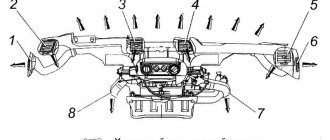
Structurally, several main elements can be distinguished. The stove consists of:
- housings;
- radiator;
- radiator pipes;
- ceiling tap;
- air ducts;
- dampers;
- fan;
- control unit.
It is malfunctions on the part of these elements that may be the reason why the stove does not heat well.
Heating of the air entering the cabin is carried out due to the fact that hot air flows pass through a heat exchanger (radiator), inside of which coolant (antifreeze or antifreeze) heated from a running engine circulates.
On VAZ 2113 heaters, it was possible to shut off the supply of cooling liquid to the stove radiator. This allows you to turn off the interior heater when it is not needed. This mainly applies to car operation in the summer.
The supply of antifreeze is shut off with a special tap, which is cut into the coolant supply pipe to the stove radiator.
The radiator itself is located inside the heater housing. In addition to the fact that the housing contains the main elements of the stove, it also does not allow heat to dissipate in different directions and controls its movement throughout the car.
The housing is securely connected to the air ducts. It is through the air ducts that hot air flows can flow to the side windows, onto the windshield, into the passenger compartment, as well as to the feet of the driver and front passenger. To control the flow of air, deflectors are used at the ends of the air ducts.
To distribute air flows to different zones, dampers are used inside the stove body. Structurally, the stove on the VAZ 2113 has 3 types of dampers:
- Control. The first damper is responsible for controlling the stove itself. It is used to redirect the air flow through the heat exchanger (stove radiator), or bypass. In the first case, hot air will flow into the cabin, and in the second, the ventilation of the car interior is simply activated.
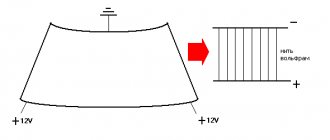
- Supply to the windshield area. The second flap helps redirect air towards the windshield. This is a useful feature. Especially in winter. Helps remove ice from glass, as well as get rid of fogging caused by the temperature difference between inside and outside.
- Redirection to the feet, side windows and interior. The third damper, which allows you to choose exactly where the hot air will blow.
Using the stove valve and dampers, the driver controls the interior heater, directs air flows and determines the zones where they will be directed.
There is also an important element in the form of a stove fan, which is part of the heater. With its help, air flows are created. The power supply circuit of the fan motor is equipped with rheostats. This allows you to select one of 3 operating modes. That is, by choosing one mode or another, the fan rotation speed changes
It is important to take into account that rheostats affect precisely the reduction in the speed of rotation of the blades. This is useful to know when identifying stove malfunctions.
The system used on the Samara and Samara-2 families, which includes the VAZ 2113 model, differs from the classic VAZ. Previously, the fan sucked in air. Now the process of pumping air into the stove body takes place. This significantly increased the efficiency of air supply.
Plus, access to the fan has been simplified. Now you can reach it through the engine compartment, near the engine shield.
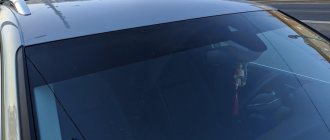
Poor windshield airflow
One of the problems with the ventilation and heating systems of VAZ models is poor airflow through the windshield. Many owners, complaining about design flaws, try to make modifications or turn to service center specialists for help. However, in most cases, if the windshield blows poorly, the problem is not some kind of defect, but a simple adjustment.
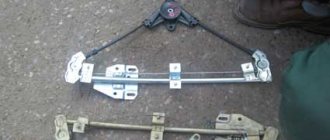
As practice shows, weak windshield airflow is primarily caused by the damper. More precisely, all the problems are due to the fact that the damper control cable has become loose or has fallen off the lever. It just needs to be pulled up or put in place.
Adjusting the windshield defogger system
As we said above, in order to ensure normal airflow on the windshield of Kalina or another VAZ model, you must first check the tension of the damper control cable. To do this, you will first have to remove the left screen of the dashboard, having first unscrewed all the mounting bolts.
If you see that the cable tension is not enough to completely close the damper, you need to shorten it a little. We will need an awl and wire cutters. First you need to remove the bracket. Along its edges there are semicircular cutouts, into one of which we insert an awl and carefully remove the tip from the end of the cable. Then, using wire cutters, we bite off one turn, and then twist the remaining part. After this, we thread the end of the cable back.
To make sure that the actions are correct, we test the operation of the windshield blower. Turn on the stove and control the airflow. If the air flow is weak and cold, you can repeat the procedure and bite off another turn of the cable tip.
Note. You should not immediately bite off two or more turns of the end of the damper control cable. You can overdo it and ruin everything. It's better to do everything gradually.
After completing the cable tension adjustment, install the panel in the reverse order.
Modification of the windshield blowing system of VAZ-2113 (2114, 2115)
Almost every Samara owner complains about uneven airflow in the cabin. This is primarily expressed by the fact that hot air flows from the central air ducts (from the dashboard) to the windshield, and a cold flow comes from the side nozzles. This situation manifests itself most clearly when the heater temperature decreases when the control lever is moved to the left.
As a rule, service centers do not solve this problem. Masters claim that this is the operating principle of the system. However, you can fix everything yourself.
First, we dismantle the torpedo cover, which is installed on the left. Not far from the gas pedal there is a throttle control cable secured with a bracket. The clamp should be loosened and the cable pulled down. Then we fasten the bracket and move the right damper control lever to the left all the way, and the left one to the right all the way. In this case, a warm flow from the side air ducts will be supplied to the windshield.
However, the desired control of the temperature of the windshield blower flow will not be implemented in all modes. When the lever is moved to the left, cold air will still flow in a certain position. This is due to the fact that the lever controls both the damper and the heater valve. The damper, in turn, allows access to cold air flow.
To prevent this from happening, you should disconnect the cable that controls the damper. To do this, first remove the torpedo cover on the right and find the engine that controls the temperature. Two cables are connected to it. We select the cable located to the right and tighten it so that the damper moves to the maximum heating position. After this, we bend the cable at the attachment point. Now the damper will always be in this position. The cable should be cut off with wire cutters, leaving 15 mm. Otherwise, the extra length will interfere with the movement of the engine. After such modification, a flow of warm air will flow into all air ducts, and the temperature will be smoothly regulated in any position of the lever.
Regulator repair
To adjust the damper cable tension, you will need:
- Remove the cover located to the right of the steering column and find the regulator drive in the opened niche (2 cables fit to it).
- Loosen the fastening of the right cable by removing it from the lever and tighten it (for example, using pliers) so that the damper fits as tightly as possible into the “interior heating” position, without cracks or gaps.
- Fix the cable in this position by placing its loop on the lever.
- Bite off the extra piece of cable.
Cutting off the entire cable remaining after adjustment is not recommended due to possible inconveniences when repeatedly manipulating the damper. You should leave a small “tail” about 1.5 cm long.
In some cases (when the damper does not reach its extreme position by only a few millimeters), it is possible to tighten it without even removing the cable loop from the lever - just bend it slightly with pliers.
Adjusting the heater cable VAZ 2114
After completing such repairs, you need to start the car and make sure that warm air enters the cabin from all deflectors at once (if this does not happen, then you will simply need to repeat the tightening).
Sometimes the reason why cold air blows from the VAZ 2114 stove onto the windshield may not be the regulator damper, but the regulator itself, which controls the heater tap. The reason here also lies in the sagging of the cable, which often occurs due to its stretching during prolonged use.
To cope with this trouble, you need to:
- Remove the cover located on the left side of the steering column.
- Find the regulator cable located near the gas pedal.
- Loosen the cable clamp.
- Use pliers to tighten the cable until it stops.
- Keeping the cable in a taut position, secure its fastening clamp.
- Set the stove tap to the maximum position.
After such repairs, the heater should work properly, and the temperature should be adjusted smoothly from minimum to maximum.
VAZ 2114 stove faucet
If the above repair methods do not help, and cold air continues to flow into the cabin, then you will have to look for other possible causes of the malfunction and ways to eliminate them (for example, “bleed” the cooling system in order to remove the air trapped inside it).
But, as was said earlier, such problems are typical for the entire system. If there is only partial airflow or if cold air comes from only part of the deflectors, then the fault should be looked for in the damper regulator.
In conclusion, it is worth noting that it is recommended to periodically check the condition of the regulator control cables and, if necessary, tighten them - this will help to avoid “unexpected” troubles with the onset of cold weather.