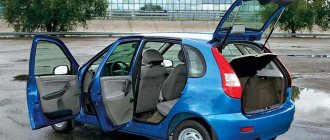
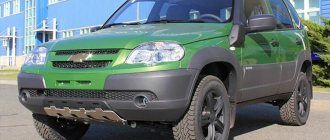
Niva, LADA 4×4, VAZ 2121 - Russian and Soviet all-terrain vehicle with permanent all-wheel drive. The universal SUV has been produced since 1977; the model became the basis for the compact crossover Suzuki Vitara. Until the latest Urban generation, Niva door trims were made of leatherette or vinyl leather, the material was glued or installed on self-tapping screws, a plastic or wooden door card. The upholstery of doors and trunk is not a frequent repair, since the lining is generally replaced after significant wear of the outer covering or when the card is deformed.
Features of the skin in different Niva models
Over the 42 years of Niva production, the interior trim of the SUV has not changed radically. Waterproof fiberboard is used for door cards.
The plywood is covered with stitched leatherette; for relief, a sheet of dense foam rubber is laid between the outer material and the wooden frame.
21213
The VAZ 21213 model is a restyled version of the first generation Niva 2121. The interior of the modernized SUV was trimmed with leatherette. Depending on the assembly, the car was produced both at the head plant in Tolyatti and in Ukraine; three color options for the door card were offered: blue, brown, black.
21214
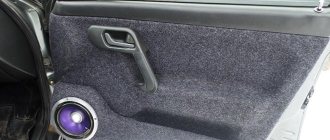
Modification 21214 in the interior is similar to the previous configuration. The door trim of the updated version copies the door trim of the VAZ 2121 with the only difference - the door panel provides space for a larger diameter speaker. It is installed on the door using bolts and screws. Starting with model 21214, drivers replace the old lining with new door card samples, plastic flat linings with parts of patch pockets.
In addition to leatherette, natural leather, Alcantara, and eco-leather are used for upholstery. Alcantara remains the most popular, since you can choose any color, artificial leather retains elasticity and strength under temperature changes, and does not wear out.
Urban
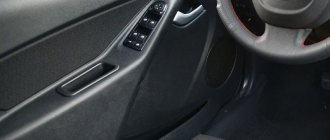
Niva Urban appeared on the market in 2014. The model is recognized as a technological breakthrough for VAZ. The SUV retained some parts of the transmission, wheelbase, and elements of the braking system from its predecessor. Durable plastic with a texture reminiscent of shagreen is used to trim the trunk, front and rear doors and the interior.
A characteristic feature of all Niva models remains the interchangeability of power units and interior elements. The driver can independently reinstall parts of the floor tunnel, door cards, dashboard, etc. Factory trim numbers for Niva Urban 2015:
- front right - 21214-6102012-00;
- left - 21214-6102013-00;
- rear right - 21214-6102012-20;
- left - 21214-6102013-20.
Tips for using sewing machines
General recommendations for better results:
- The surface and elements are prepared for further use of the pattern.
- Paper is used as a blank, where the elements are transferred.
- Lines along which further work is carried out are marked on the material.
- The stitching of the material is carried out along the lines outlined in advance. Afterwards everything is stitched.
- Excess parts are carefully trimmed.
- The adhesive composition is applied to the reverse side. After which the products are connected to each other.
- The main thing is to protect the front surface from glue. Removing it does not cause any trouble.
Is it possible to install a door trim from a Niva Urban onto a regular Niva?
The Urban cladding is suitable in size and shape for the first Niva configurations. The only difficulty is that not a single technological hole in the door cards matches.
The cards of both cars are mounted on long and short self-tapping screws; inside the trim there are clips that secure the trim, preventing vibrations and rattling.
To reinstall Urban door cards on Niva 21213-14, you will need to drill new holes for screws in the door:
- near the door handle for two screws;
- there are 5 holes in the top side of the door panel;
- in the speaker area under the cover.
10.12.1 Removing the rear door trim
Removing the trim is carried out as follows: Everything is ready to remove the front upholstery. It is secured around the perimeter with special plastic dowels. The keys are fixed in the holes, and their removal can only be done by removing the casing by hand.
First you need to go around the perimeter with a sharp screwdriver and press out the casing a centimeter. After this, it can be easily removed from its seat.
Sheathing fastening
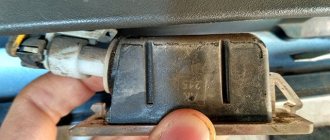
As standard for all Niva modifications, original VAZ 2121, 21213, 21214 NIVA caps are produced. Catalog number 2121-6102053. Pistons are made of durable plastic, usually white.
The shape of the pin fasteners is simple: a double skirt and a forked pressure tip. With the first skirt, the piston is installed into the casing, and the tip enters the clip.
Design features of car door trim holders
Today, the market offers a series of Niva skins from various manufacturers. Depending on the cladding model, the shape of the fastener also differs. As a standard, all door cards are installed with clips and screws in standard places and do not require additional preparation of the door metal.
The trim on the VAZ 21213 Lux series is produced in Syzran. The new door card is a gray plastic panel, the texture of the material resembles shagreen or smooth leather. There are no additional pockets in the cover; clips and a set of pistons are included.
The new VAZ 21213 door upholstery is manufactured at the AvtoVAZ head plant in Tolyatti. Covering material – genuine leather (on request), high-quality black leatherette.
Clips are not included in the kit.
Tomsk Motorists Club
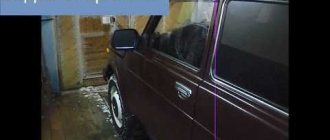
During the process of repairing a car (VAZ-21213), I needed new door trim. The door has a slightly modified design: the handle is from the Sh-Niva, a speaker is installed, the standard window lifting mechanism is replaced with an electric rack and pinion mechanism. Therefore, the standard upholstery available for sale was absolutely not suitable for me; I would still have to modify it, and it looked unattractive!
In general, I decided to do it myself. For this I bought a sheet of plywood (1520*1520*4mm) - 1 piece. Vibration-isolating insulation “PENOTERM LE 4506” - 1.5 m.p. Fabric "Target Steel" - 1.5 m. Glue “Moment” – 2 pcs. + paper clips for furniture stapler.
Rules for removing and installing casing
To quickly remove the casing, you need to prepare the following:
- Flat blade screwdrivers, small and large.
- Phillips screwdriver or screwdriver. Craftsmen recommend using a screwdriver to unscrew the bolts, which are quite firmly seated in the metal and in 70% of cases have oxidation and a strong grip on the door panel.
- A wooden wedge, you can use a wide screwdriver, after wrapping the tip with a rag.
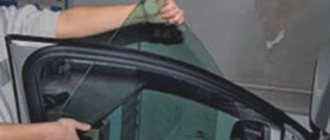
Dismantling the door trim of Niva Urban and Lada 4x4 differs in the procedure for unscrewing the screws and removing the linings. Regardless of the configuration, before work it is necessary to remove the negative terminal from the battery. The procedure for dismantling the cladding on Niva 21213-14:
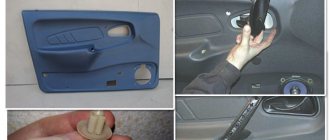
- Using a thin screwdriver, pry the window handle between the washer and the latch. Remove the latch.
- Pull out the handle and washer.
- Use a slotted screwdriver to pry the door handle plug and pull it out.
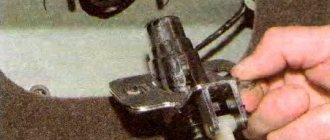
- Crosswise, unscrew two screws for the lower fastening of the handle and one self-tapping screw for the upper one.
- Pull out the door handle.
- Use a slotted screwdriver to pry the handle cover, remove it from the clamp, and pull it out.
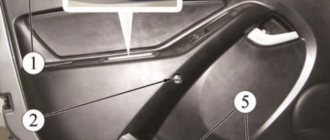
- Use a screwdriver or move a wooden wedge between the trim and the door and unfasten eight pins: four along the lower edge, two each on the rear and front side panels.
- Pull the top edge of the cladding out from under the flange.
- Remove the door card.
To replace the clip, the part is rotated 90 degrees and removed from the casing. Installation of a new piston is carried out in the reverse order.
Connecting ESP without ignition
By default, the front door power windows on the Chevrolet Niva only work when the ignition is on. There are several ways to connect an ESP bypassing the central locking.
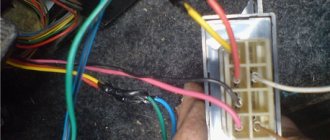
We will need a simple tool: a Phillips screwdriver, a thin screwdriver, wire cutters, and insulating tape. To replace the relay, we purchase a simple jumper, or we make it ourselves. Process: 1. We bridge the power legs of the relay, which supply power to the window regulator. To do this, remove the protective plastic cover. There are three to five relays under the fuse block.
2. To determine which one is responsible for the window regulator, turn on the ignition, hold down the button and remove each relay in turn. At the desired relay, the glass will stop rising.
3. We jumper two contacts: 30 and 87. If you purchased a ready-made jumper, it is recommended, for safety reasons, to insulate it.
4. Install the relay in its original place.
The second method is to modify the ESP relay. Two contacts also close, but not outside the relay, but inside it. This modification is done at a car dealership.
The third method is to connect the power windows to the cigarette lighter:
- On the passenger side, remove the lower valve of the torpedo and remove the cigarette lighter wires.
- We connect the wire to the plus of the cigarette lighter.
- We connect the wire to the ESP buttons.
- We connect the assembled structure to the black and white wire. The power windows have a common plus, so we choose any wire.
- Remove fuse ESP F5. Replace the cigarette lighter fuse with a 30 A
Important! Remember that changes in the connection of power windows significantly increase energy consumption, which quickly drains the battery.
How to eliminate rattling sheathing
Vibration of the door card is becoming a frequent problem; many owners call the defect a “childhood disease” of the VAZ. The characteristic sound is not produced by the door trim itself, but by an incorrectly adjusted door locking mechanism in the area of the striker. The defect also spread to the Niva Urban sample. If the door card itself is rattling, then it is necessary
- Tighten all trim screws tightly.
- Check the sound insulation, as the screw may have come loose.
- Check the operation of the lock rod.
If the rattling is associated with a loose fit of the lock pawl to the engaging plate, then drivers are advised not to waste time on lengthy disassembly and adjustment of the locking mechanism. It is better to take a medical adhesive plaster and seal the bracket at the end of the door in one layer.
The work takes 3 minutes and rattling does not appear for at least three months.
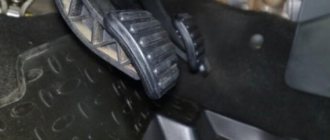
The traction is broken.
Basically, the rod can bend if it was assembled incorrectly. The problem can also appear if the car is often used in off-road conditions and dirt gets into the cavity. This can happen if the plastic film peels off from the door frame. In this case, dust may accumulate inside it.
During movement, dust settles not only at the bottom of the cavity, but also on all components, including the levers. After the car gets caught in the rain or washed, all the dust turns into dirt, firmly settling on the insides. As it accumulates, it leads to a decrease in the lock stroke, and at the moment when the passenger tries to open the door, great efforts have to be made. Because of this, the rod begins to bend over time. And at some point its progress is not enough to unlock it. Even after it is straightened, the integrity of the system will already be compromised and components will need to be replaced.
In this situation, complete replacement of the door lock components, or dismantling, lubricating all components and cleaning the lock can help. This must be done as early as possible, even if the slightest problem arises, so that the Niva Chevrolet door handle does not become completely blocked.
The rear door device is quite simple and does not contain complex mechanisms. The lock used is the same as on most AvtoVAZ models. The only difference is that its locking and unlocking is actuated by an actuator. Sometimes they fail and then it becomes necessary to open them manually.
In this case, it is necessary to know the nuances of this system. If you activate the system at the moment when one of the doors is open for at least one click, this can lead to the other one jamming.
Repair work to replace the casing
For the Niva Urban, the algorithm for dismantling the trim differs from the classic assembly of the VAZ 2121. It is recommended to use a screwdriver instead of a Phillips screwdriver. Reinstalling a plastic door card in steps:
- Remove the door handle plug and remove the two fastening screws.
- Remove the pistons along the upper edge of the cladding; there are four screws under them, and unscrew them with a screwdriver.
- Use a screwdriver to pry off the inner handle trim and remove. For the rear door, use a screwdriver to pry between the washer and the latch.
- Pull out the door lock, pointing the part down.
- Remove 3 plugs along the bottom edge, remove three screws under the plugs.
- If the latest generation model has a speaker installed, remove the mesh, remove the four screws, the speaker will fall into your hand, and carefully unfasten the two power supply terminals.
- Remove the screw at the bottom of the space under the speaker.
- Unfasten 4 or 8 pistons around the perimeter.
Reassembling the casing should be done in the reverse order, starting with installing the pistons and screwing in the first screw under the speaker.
Spring failure.
Basically, the problem of lock failure lies in the fact that the tendrils of the spring break off, which loads the rear door lock lever. This occurs due to the use of low-quality steel in the production of the part or violations of operating conditions. In any case, such a breakdown leads to the fact that one of the lock levers begins to move in a random direction and it is impossible to predict whether the lock will open at the moment or not. There are even situations when the rear door lock of a Niva Chevrolet can open while driving. Therefore, you should not wait for unpleasant situations to arise and carry out repairs immediately if any problems arise with the lock.
Additional recommendations
Drivers recommend choosing new plastic door cards when reinstalling the trim on classic models. The panels are resistant to damage, do not scratch, and retain an attractive appearance.
If you are re-upholstering an old door card, then it is better to choose classic, domestic leatherette instead of vinyl leather or more expensive Alcantara. The Chinese-made material cracks after a few months and contracts strongly during frost, deforming the card.