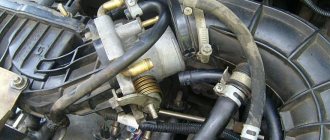
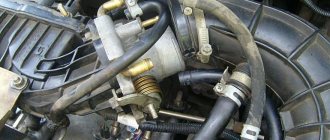
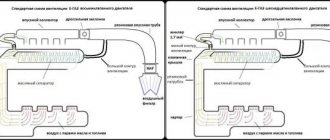
Today we’ll talk about the crankcase on Kalina with an 8-valve engine. And to be more precise, about cleaning this system. Crankcase gases straight from the crankcase (hence the name) are sent mixed with air to the intake manifold for re-burning, thus saving a certain percentage of fuel. So, along with the gases, oil particles enter the system and clog it.
It is this oil that needs to be cleaned from the crankcase ventilation system. Over time, plaque forms on the walls of the hoses, which impedes the passage of gases.
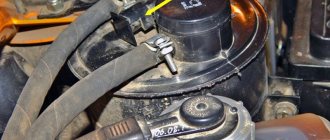
In the Kalinovsky engine, in the valve cover, there is a special separator that separates crankcase gases from the oil. It gets clogged the most. So, let's get started. The entire ventilation system consists of 3 pipes. We need to unscrew them.
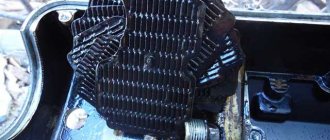
Then remove the valve cover. There are two bolts on the back side, unscrew them and get to the separator.
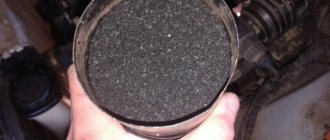
The easiest way to clean it from oil and deposits is in a bath of gasoline or solvent.
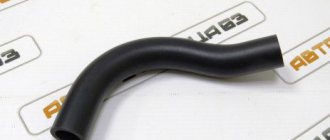
While the separator is acidifying, you can work on the pipes. In general, if they are heavily soiled, it is advisable to replace them with new ones. In my case, I replaced only one - coming from the valve cover to the air filter pipe. The rest were washed with carburetor cleaning fluid (great stuff, it corrodes absolutely everything). The separator itself can also be washed a second time with this thing.
We wipe everything with a clean cloth and put it back together as it was. Pay attention to the condition of the valve cover gasket. It is considered disposable and it is better to replace it with a new one each time you remove it in order to avoid oil leaks.
Crankcase ventilation system Kalina 8kl
Today we’ll talk about the crankcase on Kalina with an 8-valve engine. And to be more precise, about cleaning this system. Crankcase gases straight from the crankcase (hence the name) are sent mixed with air to the intake manifold for re-burning, thus saving a certain percentage of fuel. So, along with the gases, oil particles enter the system and clog it.
It is this oil that needs to be cleaned from the crankcase ventilation system. Over time, plaque forms on the walls of the hoses, which impedes the passage of gases.
In the Kalinovsky engine, in the valve cover, there is a special separator that separates crankcase gases from the oil. It gets clogged the most. So, let's get started. The entire ventilation system consists of 3 pipes. We need to unscrew them.
Then remove the valve cover. There are two bolts on the back side, unscrew them and get to the separator.
The easiest way to clean it from oil and deposits is in a bath of gasoline or solvent.
While the separator is acidifying, you can work on the pipes. In general, if they are heavily soiled, it is advisable to replace them with new ones. In my case, I replaced only one - coming from the valve cover to the air filter pipe. The rest were washed with carburetor cleaning fluid (great stuff, it corrodes absolutely everything). The separator itself can also be washed a second time with this thing.
We wipe everything with a clean cloth and put it back together as it was. Pay attention to the condition of the valve cover gasket. It is considered disposable and it is better to replace it with a new one each time you remove it in order to avoid oil leaks.
Principle of operation
Why does it drive and squeeze oil out of the breather? To answer this question, let's figure it out. How the breather works and why it spits oil. As many people know, gases accumulate in the engine crater during operation. To remove them, a special ventilation system called a breather is used. This allows the pressure inside the engine to be relieved. Since the crankcase constantly contains a suspension of air and small droplets of oil, it is not surprising that part of the lubricant gets into the breather along with the air.
There is an oil catch mesh here. But some of the droplets still fly further. Therefore, slight contamination (closer to the end of operation) of the air filter is quite normal. When there is too much oil, it makes sense to start looking for the cause.
Modification of the crankcase ventilation system Kalina 8 valves
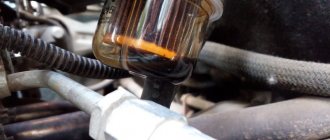
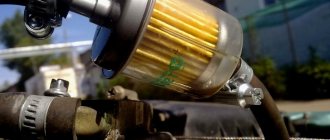
This system could be improved a little. One of the 3 pipes supplies crankcase gases directly to the throttle valve assembly next to the IAC. If they contain oil, it will definitely settle there. This is how the IAC becomes clogged. So, to avoid this, you can embed a regular fuel filter right in the middle of this pipe.
It will trap oil particles contained in crankcase gases. After a few hundred kilometers, you will see for yourself. Monitor the condition of this filter and promptly change it to a new one. On average, as practice shows, it needs to be changed every 1000 kilometers.
Why do you need to clean the valve?
The external conditions created during the operation of the breather valve often lead to the accumulation of dust and dirt in it, which interfere with its normal functioning. Because of this, excess or, conversely, insufficient pressure occurs, leading to oil leakage.
The breather should be replaced with a new one in cases where it is too contaminated, and before installing a new unit, it is recommended to thoroughly clean the place where it is installed, which will avoid rapid contamination again. Breathers of other important components of the car also need to be cleaned in a timely manner to prevent car malfunctions.
Crankcase ventilation system Kalina 8 valves
Today we’ll talk about the crankcase on Kalina with an 8-valve engine. And to be more precise, about cleaning this system. Crankcase gases straight from the crankcase (hence the name) are sent mixed with air to the intake manifold for re-burning, thus saving a certain percentage of fuel. So, along with the gases, oil particles enter the system and clog it.
It is this oil that needs to be cleaned from the crankcase ventilation system. Over time, plaque forms on the walls of the hoses, which impedes the passage of gases.
In the Kalinovsky engine, in the valve cover, there is a special separator that separates crankcase gases from the oil. It gets clogged the most. So, let's get started. The entire ventilation system consists of 3 pipes. We need to unscrew them.
Then remove the valve cover. There are two bolts on the back side, unscrew them and get to the separator.
The easiest way to clean it from oil and deposits is in a bath of gasoline or solvent.
While the separator is acidifying, you can work on the pipes. In general, if they are heavily soiled, it is advisable to replace them with new ones. In my case, I replaced only one - coming from the valve cover to the air filter pipe. The rest were washed with carburetor cleaning fluid (great stuff, it corrodes absolutely everything). The separator itself can also be washed a second time with this thing.
We wipe everything with a clean cloth and put it back together as it was. Pay attention to the condition of the valve cover gasket. It is considered disposable and it is better to replace it with a new one each time you remove it in order to avoid oil leaks.
White smoke
If white smoke sometimes comes out of the exhaust pipe due to a cooled engine, then this may be quite normal, but if this phenomenon has become frequent, and it was not observed before, then it is worthwhile to diagnose the car and subsequently repair it.
Let's talk about the reasons why thick white smoke may form from the exhaust pipe and what malfunctions it may indicate.
So, first, let's define what the exhaust as a whole is essentially? The exhaust is a mixture of nitrogen, water vapor and carbon dioxide. In principle, if the engine and other car systems are working properly, then the exhaust should not have any color, because exhaust systems have a special component - a catalyst that cleans the exhaust from various gases and other substances. So why does the engine sometimes smoke white smoke? There may be two main reasons for this phenomenon:
- Technical problem
- The process of condensate evaporation.
White smoke due to condensation
As mentioned above, a situation often occurs when a driver approaches his car in the morning, starts the engine and notices that thick white smoke begins to come out of the exhaust pipe of his car. In case of high air humidity or during the cold season, condensation may form on the walls of the exhaust pipe circuit.
When the driver starts the engine, the muffler heats up, and the resulting moisture mixes with the exhaust gases, causing white smoke to come out of the exhaust pipe. This phenomenon can occur until all the condensate that has formed in the system comes out.
If the air temperature is less than 10 degrees, then white smoke will come out even when the engine heats up for a long time. At its core, it is not smoke, but just steam.
You can also pay attention to the presence of water drops on the exhaust pipe. Such vapor dissipates quite quickly in the air
Crankcase ventilation system Kalina 8kl
Today we’ll talk about the crankcase on Kalina with an 8-valve engine. And to be more precise, about cleaning this system. Crankcase gases straight from the crankcase (hence the name) are sent mixed with air to the intake manifold for re-burning, thus saving a certain percentage of fuel. So, along with the gases, oil particles enter the system and clog it.
It is this oil that needs to be cleaned from the crankcase ventilation system. Over time, plaque forms on the walls of the hoses, which impedes the passage of gases.
In the Kalinovsky engine, in the valve cover, there is a special separator that separates crankcase gases from the oil. It gets clogged the most. So, let's get started. The entire ventilation system consists of 3 pipes. We need to unscrew them.
Then remove the valve cover. There are two bolts on the back side, unscrew them and get to the separator.
The easiest way to clean it from oil and deposits is in a bath of gasoline or solvent.
While the separator is acidifying, you can work on the pipes. In general, if they are heavily soiled, it is advisable to replace them with new ones. In my case, I replaced only one - coming from the valve cover to the air filter pipe. The rest were washed with carburetor cleaning fluid (great stuff, it corrodes absolutely everything). The separator itself can also be washed a second time with this thing.
We wipe everything with a clean cloth and put it back together as it was. Pay attention to the condition of the valve cover gasket. It is considered disposable and it is better to replace it with a new one each time you remove it in order to avoid oil leaks.
Operating principle of the engine ventilation system
The design of older models of internal combustion engines included the simplest ventilation system designs; they included only one breather, which was located in the crankcase. It was a link connecting the inside of the cylinder block with the atmosphere, and crankcase gases escaped through it.
This scheme had a significant drawback: the exhaust gases contained oil particles, which were dispersed in the external environment. The negative effect led to significant losses of lubricants and was also a serious factor polluting the atmosphere.
Modern diesel and turbo engines are equipped with closed ventilation systems. A special pipe is connected to the breather, through which exhaust gases are discharged into the cavity of the intake manifold or to the air filter for further movement into the cylinders to participate in the combustion process.
Improved designs eliminate the causes of environmental pollution and do not allow oil particles to be driven into the atmosphere.
On top of that, each engine is equipped with special elements that separate oil particles from gases and return them to the crankcase cavity.
Depending on the manufacturer and model of the car, there are several options for oil separation devices, which differ both in design and in operating principle.
The ventilation systems of diesel power units of modern cars include the following elements:
- Oil separator.
- Breather.
- Two pipes.
- Gas pressure valve.
The appearance of the systems may differ depending on the car model, but the principle of operation and purpose remain the same.
What is the EGR valve for?
We should start with the fact that the USR system is installed on most diesel engines and gasoline, naturally aspirated units. The essence of this system is that at certain moments the valve
EGR and a portion of exhaust gases
.
Schematic representation of the operation of the USR system.
Thus, the amount of oxygen in the fuel mixture is reduced, which in turn reduces its combustion temperature. And at a lower combustion temperature, the amount of nitrogen oxides in car exhaust decreases quite significantly. If the engine is turbocharged, then the range of application of the USR is significantly narrowed, which makes its installation irrational. In such cases, other solutions are used to reduce the amount of harmful components of automobile exhaust.
Exhaust Gas Recirculation does not work at idle speed, it is not used when the engine is cold, and the EGR valve closes when the throttle valve is wide open.
There is smoke coming from the exhaust pipe - gray, blue, white, black smoke from the exhaust pipe
This post has .
Big white cloud of smoke
When starting your car on a cold winter morning, you have often noticed clouds of white smoke coming out of the exhaust pipes, enveloping the car from behind. The cloud rises and completely dissolves in the air. The formation of such “smoke” is explained by the fact that the car’s engine cools down overnight and becomes very cold. The composition of the cloud is not smoke, it is water vapor that condenses under the influence of cold air. Water vapor is a byproduct of gasoline combustion and is produced at cold temperatures. The lower it is, the larger and more noticeable the cloud. A large amount of water vapor in the exhaust indicates good engine performance. For the exhaust system itself, its formation is not a good indicator. During long trips, when the engine warms up to optimal operating temperature, the water evaporates completely. If the car is driven short distances, the engine does not warm up to the required temperature, and water remains in the exhaust pipes and muffler, which causes corrosion.
Smoke is bluish-white
If starting the car is accompanied by the release of bluish smoke from the exhaust pipes, this indicates that a small amount of engine oil has entered the cylinders. When the engine starts, the oil burns within a few seconds, the smoke disappears and does not appear again. The appearance of bluish-white smoke does not indicate a serious problem, does not exceed oil consumption and is not a sign of worn pistons. It can be compared to a “stiffness” of the body in the morning, which quickly disappears after a few movements.
Formation of thick white smoke after warming up
The appearance of white smoke after the engine warms up, when its cloud reaches enormous size and density, indicates an existing problem. Thick white smoke is a sign that coolant, which is half water, has entered the engine. When the engine heats up, the metal parts that make it up expand. Between the parts, including in the cylinder heads, there are gaskets called oil seals. Their task is to prevent coolant from leaking into the cylinder. When the head seals wear out, fluid begins to seep into the cylinder. To avoid serious problems with the engine, it is necessary to replace the cylinder block gaskets. Thick white smoke can also occur as a result of a crack in the cylinder head. This is a serious problem that requires contacting a car service.
Constant white smoke
Some mid-90s cars are equipped with a valve with a vacuum hose for the engine. The formation of thick white smoke occurs due to transmission fluid entering the engine through this valve. Liquid entering the cylinders quickly contaminates the spark plugs, which results in a lack of spark and inoperability of the cylinder. There is nothing good in this, but there is no point in talking about a big risk for the engine in this case.
Formation of black smoke from the exhaust pipe
Black smoke coming from the exhaust pipe indicates that unburned fuel has entered it. Smoke may appear as a result of large amounts of fuel entering the cylinders due to flooding of spark plugs. On modern cars with injectors, spark plug flooding can occur due to fuel pressure or the injection system. There may be other reasons. For example, loss of power and consumption of large amounts of fuel. At a certain point, the spark plugs become completely dirty and stop working. To correct this problem, you need special equipment available in a car service center.
Constant bluish-white smoke
If engine oil continually enters the cylinders, bluish-white smoke will be present continuously. This is due to the piston ring sealing the gap between the piston and the cylinder. A motorist who is attentive to his car will notice the increase in oil consumption characteristic of this problem and will be able to solve the problem in a timely manner. If left unattended, the oil may flood the spark plugs and cause more problems. To check each cylinder you will need special equipment, which means you will have to contact a car service.
Modification of the crankcase ventilation system Kalina 8 valves
This system could be improved a little. One of the 3 pipes supplies crankcase gases directly to the throttle valve assembly next to the IAC. If they contain oil, it will definitely settle there. This is how the IAC becomes clogged. So, to avoid this, you can embed a regular fuel filter right in the middle of this pipe.
It will trap oil particles contained in crankcase gases. After a few hundred kilometers, you will see for yourself. Monitor the condition of this filter and promptly change it to a new one. On average, as practice shows, it needs to be changed every 1000 kilometers.
Cleaning the crankcase ventilation system of VAZ (Lada) Kalina 1118
Tools:
- Open-end wrench 10 mm
- Open-end wrench 13 mm
- Open-end wrench 17 mm
- Medium Phillips screwdriver
Parts and consumables:
- Gasoline/kerosene
- Rags
- Sealant
- Automotive compressor
- Cylinder head cover gasket (if replacement is needed) -2108-1003270-10
The crankcase ventilation system of the VAZ Lada Kalina 1118 tends to accumulate tarry deposits from crankcase gases, which make it difficult to remove these gases into the engine cylinders for combustion. Because of this, the gas pressure inside the engine increases and oil leaks through the seals appear. We recommend cleaning the crankcase ventilation system before each oil change.
1. Remove the decorative plastic engine cover.
2. Loosen the clamp and disconnect the hose of the large branch of the crankcase ventilation system from the air supply pipe.
3. Disconnect the second end of the large crankcase ventilation system hose from the fitting on the cylinder head cover and remove the hose.
4. Similarly, remove the hose of the small branch of the crankcase ventilation system by disconnecting it from the fittings of the throttle assembly and the cylinder head cover.
5. Remove the supply hose of the crankcase ventilation system by disconnecting it from the fittings of the cylinder block and the cylinder head cover.
6. Rinse the hoses with gasoline or kerosene, blow with compressed air and dry. Clean the holes in the fittings and pipes for connecting the hoses.
7. Unscrew the two fastening nuts and remove the cylinder head cover.
8. Unscrew the long 1 and short 2 bolts securing the oil separator from the inside of the cylinder head cover and remove the washers.
Crankcase ventilation hose upper 8-valve Lada Kalina / Granta / Priora / Datsun
- 145 rub.
- Description
- Characteristics
- Reviews (0)
- Question answer
Upper crankcase ventilation hose for 8-valve engines of Lada Kalina, Kalina-2, Granta, Priora, Datsun cars.
Product characteristics
Lower crankcase ventilation hose Lada 8-valve. “A-Sport” Lada Granta / Kalina-2 / Priora, Yes..
New items
Set of rear wheel mudguards for Lada Largus and Largus Cross FL cars (from March 2022). Mud flaps are issued under br..
Set of front wheel mudguards for Lada Largus and Largus Cross FL cars (from March 2022). Mud flaps are issued under..
The protective boot (casing, cover, cap) on the battery terminal is designed to protect the terminals from dirt and water. The cost of the decree..
Fuse FLK-213 NORD YADA 20A for Lada Vesta, Grant, Kalina-2 and Datsun. The fuse allows you to maintain the integrity..
Fuse FLK-213 NORD YADA 30A for Lada Vesta, Grant, Kalina-2 and Datsun. The fuse allows you to maintain the integrity..
The repair kit is intended for repairing the gear shift cable on Lada Vesta cars. ..
A set of plastic products for the body of Lada Priora. Contents of the kit. electrical wiring clamp 21100-3724308-00 10 pcs bracket ..
Plastic cover (plug) for BOSCH headlights for Lada Priora with seal. The price is for 1 cover. ..
Air filter BIG FILTER for Lada Vesta Sport. A budget analogue of the original Filtron air filter, which is installed...
A set of original internal seals for sliding windows for Lada Xray. The seals have a soft velvety coating. Art..
A set of original external seals for sliding windows for Lada Xray. The seals have a soft velvety coating. We're standing...
A set of original external seals for sliding windows for Lada Largus. The seals have a soft velvety coating. We're standing...
Set of 2 original direction indicators in the mirrors of Lada Vesta and Largus FL to replace damaged indicators in the mirrors. ..
Baseless reversing lamp W16W for Lada Vesta and Xray cars of the STANDARD series is an economical and reliable product for drivers..
Original factory airbag cover for Lada Vesta, Xray and Largus FL cars from 2022. The cover will come in handy..
Radiator protection for Chevrolet Niva I restyling (L /LC/ GL/LE/LE configuration) 2009-2020. Not suitable for GLCGLS packages. Color..
Radiator protection for Chevrolet Niva I restyling (L /LC/ GL/LE/LE configuration) 2009-2020. Not suitable for GLCGLS packages. Color..
Strelka radiator protection for Lada Largus FL from 2022 (including Largus Cross). The set includes a 2-piece bottom protection that...
Strelka radiator protection for Lada Largus FL from 2022 (except Largus Cross). The set includes a 3-piece top protection that...
Strelka radiator protection for Lada Largus FL from 2022 (including Largus Cross). The set includes a 2-piece bottom protection that...
- Guarantees
- How to pay online
- About Us
- Payment Security Policy
- Regulations on the cumulative discount system
- Shipping and payment
- Contract of sale
- Personal data processing policy
- Write to us
- Site Map
- Personal Area
- History of orders
- Our partners
- FAQ
- Manufacturers
- Articles and news
- Checking order status
- Didn't find the product you were looking for? Leave a request!
Tolyatti
st. Dzerzhinskogo, 70, 3 entrance, Mon-Fri, from 10 to 18. Phone: +7-8482-44-42-33 (pickup and retail store)
S imferopol
Evpatoriya highway, 157, Mon-Fri, from 10 to 19, Sat - from 10 to 17. Store phone number +7-978-664-88-48 (retail store)
First option
Modification of crankcase ventilation can be done in several ways. For example, on the M50 you can install an oil separator unit from the M52 model. However. This manipulation does not solve the problem of having a container for draining liquid, external aesthetics and the need to place a water seal.
One of the current solutions to the problem under consideration would be the installation of a HEPA filter, which contains wire and filament components that make it possible to adjust as accurately as possible the amount of gases released. The inside of the oil separator is filled with copper wire wool. In the standard version, the packing should protrude slightly beyond the base of the lid. The corrugated inlet and throttle assembly are thoroughly wiped. After performing the manipulations, the element is checked by mechanical purging for changes in air flow.
, operating a car with an improved crankcase ventilation system does not give you any reason to worry about excessive oil separation. The modification carried out according to the “NERA” principle, after a run of 15 thousand kilometers, shows that the appearance of oil stains in the system has disappeared, and the corrugation remains absolutely dry. The throttle block is also clean. Impurities settle on the wire packing, which, according to the laws of physics, move towards the oil separator cover. The filler periodically requires cleaning by performing a simple procedure of removing the cover and rinsing it with gasoline.
Where is the engine breather located?
From engine to engine, different car manufacturers may place the breather in different places. But in most cases it is located on the valve cover, next to the filler neck. Although there may be options: it is better to clarify in the description instructions for the car or find out on thematic forums.
In the picture on the right is the crankcase ventilation system of the VAZ 2111 engine, which includes a breather:
- Crankcase.
- Breather.
- Hose from the breather to the valve cover pipe.
- Oil separator under the valve cover.
- A thin hose from the valve cover to the fitting with the throttle body nozzle.
- Fitting with jet on the throttle valve block.
- Thick hose from the valve cover to the intake pipe..
But the breather is installed not only in internal combustion engines. It is in:
- Gearbox. Otherwise, the gearbox would begin to operate jerkily, and the wear of the gears on the secondary shaft would increase many times over. Something similar is observed when the breather becomes clogged and ceases to perform its function.
- If the design of the car provides for a separate transfer case, then a similar mechanism may be in it.
- Front, and in rear-/all-wheel drive vehicles - in the rear axle. Moreover, this inconspicuous detail not only equalizes pressure, it protects the mechanisms from dirt and moisture when overcoming water obstacles.
However, even their appearance is often similar, and often identical: they perform the same function.
Methods for checking crankcase gases
It is necessary to open the cover on the hood and unscrew the oil filler cap, but do not unscrew it completely and remove it. Next you need to start the engine and see what happens to the cover:
If it jumps but doesn’t fly off, it means there is pressure and gases are escaping. This is fine.
When discharged, the cover suctions, this indicates problems with the intake manifold. In this case, a vacuum is created in the crankcase.
When it is thrown up strongly, this phenomenon means that the rings have sagged.
The second diagnostic method is to start the engine and open the lid completely. If it sticks slightly during removal, then the ventilation is working properly. When the suction is too weak and smoke comes out of the neck, this indicates a failure.
A lid that suctions too tightly is also a sign of failure. Most likely, the valve is leaking because its membrane is damaged. If, while the engine is running, oil splashes from under the cap and flows through the injectors, a major overhaul may be required. Such problems usually occur on cars with high mileage and a worn-out engine.
The third method will give results if the system is heavily clogged. You need to start the car and remove the dipstick. The engine is considered to be operating properly when a slight suction is felt when plugging the dipstick hole. If smoke appears, the mechanism is faulty.
Checking with a balloon
This technique is used with muffled ventilation. It is necessary to remove the oil dipstick from the tube. Then a balloon or medical glove is put on it and secured with electrical tape. You can also put it in place of the filler plug, but then you will have to make sure that the ball does not get sucked inside.
Next, start the engine, at minimum speed in idle mode, the ball should inflate slightly and stop.
When within 5 minutes the balloon hardly increases in size or inflates too much, this means that the ventilation is clogged and is working poorly. The piston rings may be worn out.
It happens that the ball stops increasing in size when the plugs are installed. This means that you will have to disassemble the system and see which element is clogged.
To check the functionality of the valve, clamp the tube forcefully with the engine running. If a click is heard at the moment of compression, the element is working properly. Another option is to hold a piece of paper over the flap. The leaf should float in the air under the influence of gases. If you put it over the hole, it will be attracted.
The second method of upgrading crankcase ventilation
The meaning of the following is to transfer the small ventilation circuit from the throttle part to the receiver, which helps reduce differences when switching modes. To complete this design, you will need to perform the following manipulations:
- The thin crankcase ventilation hose is disconnected from the throttle;
- The free end is connected to the free inlet fitting on the receiver, with preliminary removal of the plug;
- The free opening of the remote control is blocked by installing a plug;
- As a result, the flow of air mass increases, eliminating the possibility of a sharp response of the throttle valve to a jerk of the engine;
- In addition, crankcase ventilation increases and additional draft appears in the lower part of the mechanism.
Changing the purge valve on Kalina
The replacement procedure itself is not a complex undertaking. To perform this, the owner will need to acquire a regular Phillips screwdriver and know where the valve is located.
Below we provide an algorithm of actions that allows you to quickly and efficiently complete this procedure.
- Disconnect the corresponding terminal from the negative terminal of the battery.
- You will need to disconnect the power connector from the valve itself.
- For ease of access to the unit, we move the suction pipe of the intake system slightly to the side together with the “Max Air Mass Airflow” sensor. For this purpose, use the indicated screwdriver to loosen the clamp of the pipe and perform the action.
- Now we proceed to dismantling the unit. To do this, disconnect a pair of fittings located on the sides of the product. One of the fastening elements is fixed with a latch and to dismantle it, you will need to recess the latch, then lift the antennae and finally tighten the fitting to the side.
- Before installing a new component, we check that the markings on both valves match and make sure that they are identical.
- Installation and fixation of the product is carried out in the reverse order.
The canister purge valve has been replaced.
Cleaning the crankcase ventilation system
Over time, tarry accumulations of gases accumulate in the crankcase ventilation structure, which blocks their release into the engine cylinders for combustion. In this regard, the gas pressure increases, the oil gradually flows through the seals. To avoid this situation, keep the structure clean.
Helpful advice
Clean the crankcase ventilation after changing the oil.
To clean VAZ-21116, VAZ-11186 engines, take a “10” wrench, a Phillips screwdriver, and pliers.
1. Loosen the breather clamp of the large branch of the crankcase ventilation structure and unfasten it from the air supply hose.
2. Unfasten the other end of the breather from the pipe on the cylinder head cover and remove the hose.
3. In the same manner, remove the breather of the small branch of the crankcase fan structure. Unfasten it from the cylinder head cover and the intake module pipes...
4. ...and the inlet breather of the ventilation structure, unfastening it from the fittings of the cylinder block and the cylinder head cover.
5. Wash the breathers with gasoline. Clean all spans of pipes and fittings.
7. Unscrew the oil separator fixing bolts and remove the washers.
8. Unfasten the oil separator housing.
9. Remove the head screens from the block head.
10. Wash the grids, cylinder head cover, and oil separator housing thoroughly with kerosene.
11. Place the grids equally and fix them so that the grids rest against the bulges in the lid on one side, on the other...
12. ... the hole for fastening the bolt was visible. Place the oil separator housing and screw in the bolts.
13. Secure the cover to the block head.
14. Fix the structure’s breathers in the opposite order to disassembly.
To clean the crankcase ventilation structure of VAZ-21126, VAZ-21127 engines, do the following.
The work is depicted using the example of a VAZ-21126 engine. Identical work is carried out with the VAZ-21127 engine. The difference is in the intake pipe model.
Take an 8mm wrench, a screwdriver and pliers.
1. Unfasten the air filter.
2. Loosen the tie and unfasten the large branch breather from the air hose.
3. Having loosened the tie, unfasten the large branch breather from the cylinder head and remove it.
4. Using the same method, unfasten the breather of the small branch of the crankcase ventilation structure by removing it from the throttle body pipe and the cylinder head.
5. Loosen the tie, unfasten the supply breather of the ventilation structure from the cylinder head cover fitting.
6. In the same manner, remove the second end of the breather from the cylinder head pipe and unfasten the breather.
7. To connect the breathers, wash them thoroughly with kerosene and dry them, clean the pipes with compressed air.
9. Unscrew the 6 fastening bolts of the separator inside the cylinder head cover and remove it.
10. Grab the separator oil deflector fasteners with a clamp and remove it.
11. Carefully pry up the rubber ring using a screwdriver. Replace the ring that has lost its elasticity with another.
12. Secure the breathers and parts in the opposite order of removal.
Purpose of the adsorber purge valve
In the Lada Kalina model, as in principle in any other car equipped with distributed fuel injection, an adsorbing system is necessary to localize the resulting gasoline vapors. They accumulate inside the tank after the engine stops, and after a certain time necessary for the transformation of these vapors into a condensation state, they turn back into liquid fuel. The remaining volume of vapor that failed to return to the tank moves to the adsorber, where it is retained by two valves. The first (gravity type) is necessary to prevent fuel spillage when the LADA Kalina body turns over (in an accident, etc.), and with the help of the 2nd, the pressure indicator inside the tank is monitored.
Alternative options
The next version of the improvement involves installing a hose with a small diameter into the crankcase ventilation circuit of the EPK valve of the “Cascade” model. In idle mode, the valve for standard exhaust gas outlet should be opened. Considering the fact that when installing the system in question, the supply of harmful impurities through the throttle valve stops due to the circuit opening. This is very important in the case of a transition of the engine operating mode from idle to light loads, when a lean air-fuel mixture is categorically unacceptable. Ventilation is carried out through the entire line, including the carburetor unit.
After further replacing the durite with a hose from the vacuum ignition advance device, it is reasonable to increase the diameter of the main jet of the first combustion chamber or simply reduce the input fuel flow to 4.5 mm. The scheme under consideration was tested on a model of the domestic VAZ 2101. At the same time, the following positive aspects became noticeable:
- The pedal drop during acceleration has disappeared;
- The engine's operation became smooth;
- There are no intermittent oscillations at idle.
Let's sum it up
The work of replacing the valve is simple, however, when the owner of a Lada Kalina is not confident in his capabilities or does not show the desire to carry out repair operations in such a high-risk unit as the fuel supply system, we recommend using the services of a specialized workshop.
The car's EGR Exhaust Gas Recirculation system is a very vague and rather capricious thing, especially with the very low quality of fuel that is found in our area, quite often. The ambiguity of this system lies in the fact that its purpose is purely environmental. waste recycling system
gases or USR, is designed to reduce the amount of nitrogen oxides in the car exhaust. What is the USR, why is it needed and how its malfunctions are expressed, we will talk about all this for now.
Modification of the crankcase ventilation system Kalina 8 valves
This system could be improved a little. One of the 3 pipes supplies crankcase gases directly to the throttle valve assembly next to the IAC. If they contain oil, it will definitely settle there. This is how the IAC becomes clogged. So, to avoid this, you can embed a regular fuel filter right in the middle of this pipe.
It will trap oil particles contained in crankcase gases. After a few hundred kilometers, you will see for yourself. Monitor the condition of this filter and promptly change it to a new one. On average, as practice shows, it needs to be changed every 1000 kilometers.
USR system management
recirculation system is controlled by the electronic engine control unit. And the command to open or close the EGR valve can be given based on:
- coolant temperature sensor;
- crankshaft sensor;
- throttle position sensor;
Read
In various car models, either all of the listed sensors are used to control the USR valve, or some of them, and in some cases, only the coolant temperature sensor.
What does the EGR valve look like on a Chevrolet Lacetti?
One way or another, the operation of the USR valve is always controlled by automotive electronics. And while this system functions normally, the driver practically does not feel its operation at all. The useful work of the USR system outside of environmental issues is very unnoticeable. This system allows you to save about three percent of fuel on gasoline engines. Also, in some cases, the USR system prevents fuel detonation in the engine. But this phenomenon in itself is rare and extraordinary. As for diesel units, if they have a properly functioning EGR system, they operate more smoothly, softly, and quietly. In addition, in diesel engines, the formation of soot is reduced through the USR. That's all the bonuses that the exhaust gas recirculation system provides the owner.
What is an EGR valve and what is an exhaust gas recirculation system for?
REAL TAXI DRIVER A huge flaw in the design.
EGR (Exhaust Gas Recirculation) System - Evil or Good?
In this video I explained in Russian why the EGR valve is needed
, but to jam it or not, draw your own conclusions.
EGR system malfunctions
Diagnosing problems with the described system is not as simple a task as it might seem at first glance. The trouble is that there are no pronounced symptoms characteristic of EGR problems. The engine seems to be running rough, it seems to be malfunctioning, but it doesn’t seem to be. And only a professional can suspect the exhaust gas recirculation of such unstable engine operation. But before that, various sensors, components and systems of the car are checked. Actually, what problems may arise here:
- deposits of soot and other elements on the parts of the EGR valve, leading to it jamming in any position;
- burnout of the EGR valve;
- clogging of the USR line itself;
- violation of electronic control systems for the USR valve;
If a valve or line is simply clogged, cleaning them, in general, is not difficult, although in some cases such cleaning is simply impossible. Well, if the valve burns out, then you will have to change it, and this, as already mentioned, is by no means cheap.
There are virtually no symptoms specific to problems with the EGR valve. This is, for example, unstable engine operation at idle speed, unmotivated dips in power, lack of pronounced acceleration when the throttle valve is fully opened, and other signs of disturbances in engine operation.
One way or another, do not rush to change the EGR valve or turn it off if there is no obvious damage to the valve and its parts. Perhaps the problem here is not entirely in the USR, because this system is closely interconnected with other components and systems for regulating air supply and exhaust gas removal.
Troubleshooting
- The first thing you need to pay attention to is the color of the exhaust, blue or black smoke, a sign of burnt valves or problems with rings.
- Next, you should check the compression in all cylinders. The value on gasoline internal combustion engines should be within 11-13 MPa.
- Disconnect the pipes from the valve covers, air vent and breather. Assess the degree of contamination. If the pipes are very dirty or clogged with oil deposits, use gasoline to clean them or a special carburetor cleaner.
- Check the condition of the oil separator. Unscrew the required bolts to get to this unit. Remove the oil separator and assess its condition. If necessary, clean or rinse followed by drying.
- Inspect and, if necessary, flush the breather valve. There are situations when the valve gets stuck, resulting in exhaust gases entering the crankcase and creating excess pressure. Remove the part and wash it; in most cases, this will resolve the issue of squeezing oil out of the breather.
Helpful advice! To distinguish stuck rings from a burnt-out valve, it is enough to perform several manipulations. After checking the compression in the cylinders, determine the cylinder with the lowest value. Then inspect the spark plug of this cylinder; if the rings are lodged in this cylinder, the spark plug will be covered with a thick oil layer. If the valve is burnt out, the spark plug will appear normal without any major abnormalities.
Finally…
The problem of oil escaping through the breather worries many motorists and causes a lot of trouble, but if the problem is detected in a timely manner and the right approach is taken, serious consequences can be avoided. It is important to ensure that the oil level is normal; as soon as you find that the engine is taking oil, monitor its level and constantly monitor it so that it does not fall below the permissible level. Also pay attention to the breather and filter; oil on the air filter in large quantities also does not bode well. Regularly monitor the condition of the engine and all systems, and also promptly correct any malfunction. This will save you from engine overhauls and unnecessary waste.
Source
Carrying out diagnostics of lubricant output
To identify the causes of a defect in the flow of lubrication through the breather of a diesel and turbo diesel engine, it is necessary to conduct a comprehensive check of the power unit. This does not require disassembling the engine. Experienced craftsmen measure certain parameters and visually assess the condition of the elements included in the ventilation system.
If plaque and oil deposits are detected in the intake manifold, it is concluded that there is a lubricant outlet through the diesel breather seals. To carry out diagnostics, you will need a set of tools consisting of open-end wrenches, screwdrivers, and a compression tester.
Algorithm of verification activities:
- Analysis of the state of exhaust gases. This turns on the engine and checks the color of the exhaust. A black or bluish tint indicates that oil is getting into the cylinders, because there is wear and sticking of the oil scraper rings, and there are also problems in the operation of the gas distribution mechanism.
- Check compression in each cylinder. The compression value, equal to 11 - 13 MPa, indicates proper operation of the cylinders and pistons. The difference between compressions in the cylinders should not exceed one megapascal. Low compression of one of the cylinders may cause lubricant leakage.
- Using a glow plug, the specific cause of the defect in a given cylinder is determined. The spark plug is removed and checked for strong traces of carbon deposits, which indicate defects in the cylinder-piston group.
- The absence of carbon deposits on the spark plug indicates that the valves need to be checked.
- If compression is normal in all cylinders, it is necessary to further check and clean the elements of the ventilation system. All incoming devices must be dismantled and thoroughly washed, dried, and then reinstalled.
