Modern cars are equipped with one or more connectors. However, they have long been used for purposes other than their intended purpose. Car owners connect additional devices to the car cigarette lighter socket. Among the most common:
- fan;
- portable electric compressor that pumps up car tires;
- traffic recorder;
- navigation system;
- charging device for electronic devices (phone, tablet, laptop).
Therefore, if the cigarette lighter stops working, this is fraught with inconvenience and hassle. Information on why the cigarette lighter on the VAZ 2112 model does not work, how to identify the cause of the malfunction and carry out repairs can be found in the article.
What does a cigarette lighter consist of and how does it work?
The device on the VAZ 2112 has a simple design. The cigarette lighter consists of two parts - a metal tube, inside of which there is a nichrome spiral, and a seat for it (socket). The plus is connected to the bottom, and the body is connected to the car body or ground.
When you press the insert, the cigarette lighter starts working: the contacts close and the coil heats up. When the temperature reaches its maximum value, the thermal relay is activated and the device snaps into its original position.
Finishing touch
The standard warm-up period is 20 seconds. Well, or 15-25 seconds (no more). Therefore, before assembly, adjustments are made:
- Temporarily connect the battery;
- Power is supplied to the cigarette lighter socket. Install the moving part.
- Warming up occurs at a constant speed, but the “automatic” mode can be configured in different ways. To change the response threshold, squeeze or bend the two tabs on the body. Take the test.
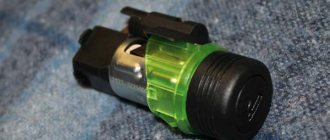
Cigarette lighter socket housing
Is there a standard cigarette lighter?
VAZ 2112 models that came off the assembly line are equipped with long, old-style instruments. Their disadvantage is that they do not provide reliable fixation of connected devices that are designed to meet European standards. As a result, cigarette lighters sometimes short out and refuse to work correctly.
Many owners decide to replace the device on the 2112 with a new device (see photo). The cost of such a cigarette lighter ranges from 600 to 1.5 thousand rubles. Too low a price indicates low-quality materials used in the production of the part. Therefore, you should discard such elements; they will quickly break.
Checking the cigarette lighter wiring
It is necessary to check the integrity of the cigarette lighter wiring. First of all, pay attention to the connectors located near the passenger’s left leg; they should be inserted tightly. Then make sure that the connector on the cigarette lighter itself is not disconnected.
Also make sure that the mounting block is in good condition. Based on the results of the check, the wiring to the cigarette lighter can be connected from Ш5-3 mounting block to the +12V connector of the cigarette lighter.
If the wiring is intact, and the fault lies in the cigarette lighter itself (for example, it shorts out), then only replacing it with a new one will help.
Reasons why the cigarette lighter does not work
There are several situations why a device may fail. The most common reasons why the VAZ 2112 cigarette lighter does not work:
- short circuit;
- broken cigarette lighter wiring;
- blown fuse;
- weak contact;
- faulty spiral;
- burnt out backlight bulb.
Each breakdown situation is discussed in detail below.
The fuses on the cigarette lighter are burning
If the device on a VAZ 2112 stops working, then a burnt-out protective element may be the cause of the malfunction. The vehicle circuit in this area is protected by a 25 amp fuse. This means that devices with a total power of more than 300 W (12 volts * 25 amperes = 300 watts) cannot be connected to the cigarette lighter socket.
Otherwise, the protective element will burn out. A hint that it is the fuse that has “gave up” is the failure of the heater fan. If it does not work, it should be replaced. The location of the mounting block is to the left of the steering column, behind the decorative panel trim.
The element with index F-18 must be replaced. The fuse rating is 25 amperes. It is prohibited to install parts designed to carry high current. This may lead to short circuits, damage to wiring cables, and fire.
Broken or shorted wiring
You need to check where the fuse for the cigarette lighter of the VAZ 2110 is. If it is intact, but often burns, then you should check the serviceability of the cables. Due to a mismatch in the rating of the protective element or connecting too powerful devices, the wires may burn out, which causes a short circuit or damage to the cigarette lighter.
For diagnostics, you will need a multitester, which needs to ring all the wires suitable for the element, finding out their condition.
It's a matter of contacts or filament coils
Over time or due to intensive use, the connection inside the device on the VAZ 2112 may be broken. Incorrect connection of devices leads to loose sockets and poor contact. This can be treated by bending the metal tendrils on the cartridge and resoldering it.
With age, oxides or rust appear on the cigarette lighter, which has a bad effect on its operation. The situation can be corrected by treating the contact areas with a needle file. It is necessary to clean them and remove all traces of corrosion. Another malfunction is a burnt-out nichrome spiral. It is recommended to replace the device here.
Backlight
Around the socket itself there is a special light element that allows you to find the device in the dark. The backlight may stop lighting due to a broken filament. In this case, it is necessary to dismantle the cigarette lighter, remove the faulty element and replace it with a new light bulb.
Cigarette lighter repair and replacement
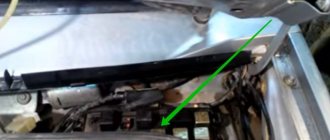
If checking the fuse link shows that the element is in good condition, then you will need to remove the cigarette lighter to check. To access the mounting points, you need to partially disassemble the center console located between the driver and front passenger seats. Work is carried out in a garage box with artificial lighting or outside in dry weather. Before starting work, it is recommended to disconnect the battery from the vehicle's on-board network.
How to remove the cigarette lighter
To remove the cigarette lighter from cars with a standard instrument panel or with a “European panel” you must:
- Remove the plastic cover located on the center tunnel trim on the front passenger's foot side.
- Find a plug with a red and black wire that disconnects from the general wiring harness.
- Disconnect the block with the only yellow cable from the connector. On some machines, a wire with a different color of insulation may be used to power the backlight lamp. You can determine the purpose of the connector by the 1st wire; there are no other similar plugs at the junction of the instrument panel and the center console.
- Remove the decorative cover from the driver's foot side, and then remove the plastic shield under the parking brake lever. To avoid damaging the plastic, you must use a special mounting spatula.
- Use a spatula to pry off the plastic frame of the decorative cover on the gear shift knob. Lift the cover up; there is no need to remove the part from the metal pin.
- Use a Phillips screwdriver to unscrew the screw located under the decorative frame.
- Remove the 4 additional screws holding the top of the console to the base. The screws are located on the sides near the rear edge; to access the heads you need to move the front seats all the way forward and then back.
- Lift up the plastic trim, which is removed along with the cigarette lighter socket and the ashtray body.
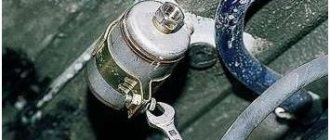
If the owner does not want to disassemble the center console, then it is possible to pull the cigarette lighter housing out of the mounting socket. You must first remove the connector from the red and black cables, since the plastic plug will not fit into the gap between the halves of the tunnel lining housing. Then, using a metal spatula or awl, press out the clamps holding the metal glass in the lining. The product is pulled out of the mounting socket for cleaning, repair or subsequent replacement.
DIY repair
Repair of the device begins with an inspection of the internal part, on which traces of corrosion are not allowed. Rust must be removed with fine sandpaper or shaped files, while the rigidity of the bimetallic clamps is checked. The plates can be tightened, which allows you to restore the functionality of the product. You should also check the device for short circuits with a test device.
If wire breaks are detected, the integrity of the circuit is restored by soldering. When repairing, the cross-section and material of the wiring are taken into account. Areas with a damaged insulator layer must be protected with heat shrink tubing or PVC tape.
Replacement
To replace the cigarette lighter, use part with catalog number 2108-3725010. Parts from other Lada or foreign cars do not fit the connection plug and mounting dimensions. The old part is removed from the mounting socket; after installing the new element, the center console is assembled. The bundles are pushed to the commutation point with steel wire. After connecting the battery, you should check the functionality of the equipment.
Connection diagram
The cigarette lighter design on cars of the “tenth” family uses 2 plugs. The first block for connecting the backlight lamp has 1 pin, the cable is protected with yellow insulation (positive power is supplied when the side lights are turned on).
The second plug contains red (positive signal) and black (ground) wires, which provide operation of the filament. The positive wires pass through the fuses located in the mounting block. The ground is connected to a metal part on the car body.
- Car cigarette lighter socket
- Cigarette lighter fuse Lada Priora
- What is the fuse for the cigarette lighter of VAZ 2110
- VAZ 2109 cigarette lighter does not work
Diagnosing cigarette lighter problems
If malfunctions occur, the device should be inspected to determine the cause of the failure.
- Turn on the heater fan. If it does not work, then the VAZ 2111 cigarette lighter fuse located in the mounting block has blown.
- We inspect the contacts on the device itself and its socket. If there are oxides or rust, remove them with a file.
- Visually inspect the cables coming to the device for fractures or breaks. We test the wires using a multitester. We turn it on for resistance, and then check each of the three cables coming to the device.
After identifying the problem, you can begin to repair the device.
How to check your cigarette lighter for problems
- First of all, you need to visually inspect the wires that go to the mounting block (through them the cigarette lighter receives current from the battery).
- In addition to inspection, you also need to check the connectors of the connections - they must “fit” tightly. It happens that they become separated.
- Special attention should be paid to electrical connectors. They are located approximately in the same place as the passenger's left foot.
- If there are problems with the wires, then you need to replace them (you will need new wires, electrical tape, a utility knife for stripping the insulation, rubber gloves).
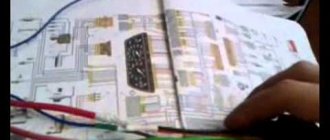
VAZ 2110 cigarette lighter connection diagram
Before interfering with the circuit, you should understand the pinout. Three wires come to the device.
- Red is the positive contact, responsible for heating the coil. Powered by a battery through a fuse with index F18 (common for models 2110, 2111, 2112).
- Yellow – backlight, positive contact.
- Black – permanent negative wire. A mass connected to the device body at one end, and to the car body at the other.
How to remove and replace the cigarette lighter on a VAZ-2110
Chassis front and rear suspension VAZ 2110 2111 2112 Removing the lever and extension of the front suspension VAZ 2110 2111 2112
A cigarette lighter in a car is a useful thing. It can help light a cigarette for those who smoke, and various external systems can be connected to its connector. But when the cigarette lighter fails, and this happens for various reasons, it will need to be replaced. But not everyone knows how to do this.
Dismantling the tunnel on a VAZ-2110
To remove the tunnel you will need:
- Remove the facings by unscrewing two bolts on each.
Use a Phillips screwdriver to unscrew the screws and remove the tunnel lining. - Disconnect the connectors for the backlight.
On the right side we find and disconnect the pads. - Remove the cover under the handbrake using a screwdriver by prying it up.
Remove the cover under the handbrake. - Remove the cover from the gear knob.
Remove the cover by prying it with a flat screwdriver in four places. - Remove the tunnel.
We turn out the screw under the gearshift knob cover.Moving the seats back, unscrew the screws from the sides of the tunnel.
Move the seats forward and unscrew two more screws.
We pull out the upper part of the tunnel.
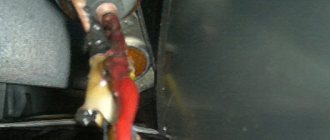
Removing the cigarette lighter
To remove the cigarette lighter itself you will need:
- Pull the cigarette lighter out of the socket by squeezing the connectors.
Remove the lamp screen by squeezing its claws. - Press the latch under the cigarette lighter with a screwdriver.
Press the latch with a screwdriver.Pull out the cigarette lighter by hand.
- Remove the backlight.
We remove the light guide.
Installing the cigarette lighter is carried out in the reverse order.
When installing a new cigarette lighter, observe the polarity of the terminals.
Quick method
If you look at this procedure as it is described in the User's Guide, the work will seem complicated. That is why for many it is a problem how to remove the cigarette lighter from its socket without removing the tunnel itself. There is little space for such manipulation and there is no access to the cigarette lighter from different sides. But there are certain points that will help you cope with the task.
You should insert your finger into the cigarette lighter socket and pry off the cigarette lighter itself with a screwdriver. If you manage to remove the cigarette lighter from its socket, then it can be changed. Installation is also carried out in reverse order.
If the cigarette lighter socket is hanging into the hole, you may be able to remove it without dismantling the tunnel.
Also, when removing the tunnel, you can make a small hole in it, which will help you remove the cigarette lighter easily next time.
Cigarette lighter of VAZ 2110 is closed
If the device fails, then you should look for the causes of the failure. It is quite easy to find out that there is a short circuit in the circuit.
- Turn the key in the ignition switch, turning it off.
- We measure the voltage of the battery when it is turned off.
- We turn on the ignition, and then measure the voltage again. If the indicator drops more than 0.5 volts, then there is a breakdown somewhere.
To find out the location of the break, you should arm yourself with a tester and ring all the wires for integrity. You can first visually inspect the cables - there should be no creases or breaks. Additionally, it is necessary to check the tightness of the cartridge in the metal connector. A loose device can also cause a short circuit.
Cigarette lighter fuse blows
The first thing you should check after the cigarette lighter fails is the fuses, there are two of them:
- F6 for 15A, responsible for the portable lamp socket and cigarette lighter.
- F18 at 25A is responsible for the heating and ventilation control unit, as well as the barchak lighting lamp, which according to the circuit is connected through the cigarette lighter.