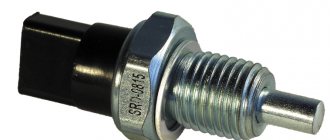
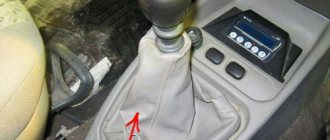
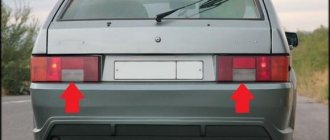
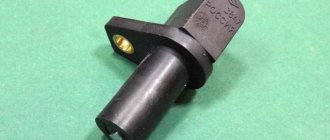
To ensure a high level of safety when operating a vehicle, it is necessary to completely transfer all processes that can be automated to this mode of operation. The reverse sensor (hereinafter referred to as RSD) of the VAZ 2115 automatically turns on the lighting when the vehicle moves in reverse. This part can also be classified in this category, because no human intervention is required to activate the lights, which are necessary when the car is moving in the opposite direction.
The features of operating and replacing the reverse sensor of a VAZ 2115 car will be discussed in detail in this article.
Functionality check
Before blaming the sensor for the malfunction of the reverse signals, make sure that the device has actually lost its functionality. To do this, run the diagnostics:
- Turn the wheels to the left all the way and look at the sensor from the driver’s side - there is a protection on the side of the gearbox, and contacts inside it;
- Remove this protection and inspect the device. There are also two contacts going to the sensor;
- Close the contacts on the frog limit switches (this is the same reverse sensor) and start the engine, engaging reverse gear;
- If everything is fine, the wires and contacts are working properly, then the white headlights will turn on;
- If the headlights do not light, use a tester to check the voltage on the wire (orange) and ground;
- If there is voltage, check the light bulb board and the quality of the contacts.
Causes of the problem and solutions
There are several most common reasons why the DZH fails. But there are countermeasures that can return the sensor to operation.
Causes of failure
Before you start replacing the reverse sensor (RDS), we recommend checking the condition of the rear lights and determining whether the signal may not be working for other reasons.
| Possible reason | Your actions |
| Burnt out light bulbs | A common and fairly banal cause of problems, which, nevertheless, many ignore. Take out the light bulb, arm yourself with a multimeter and check if they have burned out. Replace if necessary |
| Wiring is damaged | The problem is no less common, but looking for the source of the problems in such a situation is a little more difficult. You will also need a multimeter, which you need to test the wiring and check the resistance readings |
| Poor regulator contact | It happens that during operation the contact of the sensor with the socket is broken. Lack of contact means that the device will not work normally. So check its condition |
| Wiring insulation is broken | If the insulation on the wires near the sensor is broken, this can lead to a short circuit. The result is quite obvious, so check the condition of the wiring and replace it if necessary |
| Fuse burned out | Depending on the type of fuse box, check the condition of the corresponding element in the mounting block. On old-style blocks this is fuse F16, and on new-style fuse blocks you should look at fuse 5. If they are melted, they will need to be replaced. But it is also important to determine the reason why the fuse blew |
| Sensor failure | A failure of the reverse control itself may be indicated by a situation where the lights do not light up at all or, on the contrary, light up without interruption. In the second case, the option of burnt out light bulbs is excluded by itself. |
Replacing a reverse sensor is not a difficult or financially expensive job. Today, the DZH can be purchased at any auto parts store, and its cost is about 100 rubles.
Do-it-yourself IAC cleaning
How to clean the IAC? The procedure for cleaning the device begins with removing the device, we described this above. Once you have the device in your hands, you first need to clean it with a dry cloth and cleaning fluid, which is usually sold in aerosol form. Alternatively, you can use WD-40. In addition to the controller itself, you should also clean the seat. Press the canister with the product several times, with the aerosol stream directed towards the tip of the IAC, which is also called the needle.
It is best to use carburetor cleaning fluid.
Depending on the design features of the IAC, this needle can be either plastic or metal. Clean the sensor needle directly, since liquid should not be allowed to get under the spring into the inside of the device . If you do hit the spring, the regulator will have to be purged with a large volume of air; for this you can use a pump or compressor. If liquid gets into the device mechanism itself, it can damage the lubricant inside it, and this, in turn, will cause a quick breakdown of the device. Choose the correct dosage of the product and do not dose the liquid too much, as this will also force you to clean the spark plugs in the future.
ABOUT THE SIGNS OF DZH MALFUNCTION AND ITS SEARCH
It is safe to say that there can be only one sign when the VAZ 2114 reverse sensor does not work, this is the absence of lighting when driving the car in reverse. But there are quite a few culprits for this. It could be:
- Fuse F16 (15A) has blown;
- Oxidation of contacts in flashlights;
- Poor contact of the connector with the fuse block;
- Broken wires;
- The sensor output terminals have oxidized;
- The light bulb has burned out.
Often the culprit of such problems is the light bulb socket, where oxidation of the contacts occurs due to poor sealing of the lamp.
TROUBLESHOOTING
The location of the reverse sensor on the VAZ 2114 (2115, 21113) has already been clarified, let's talk about how to determine the true cause of the malfunction. To do this, it is advisable to have a measuring device such as a tester or multimeter, a light bulb with two wires, but in some cases you can do without them.
The check procedure could be as follows:
- Open the hood of the car, and then the fuse box cover;
- Check fuse F16 and replace it with a new one if necessary. If after this the lighting does not light up, continue the search;
Find and check fuse F 16
- The device checks the presence of electrical voltage at the fuse legs when the ignition is turned on. It should be equal to 12 volts. If it is absent, poor contact between the connector and the fuse box may be to blame. If there is tension, then move on;
- The search moves down under the car. You need to turn on the ignition and reverse gear. But before that you need to remove the engine protection. After this, check the supply voltage to the DZH connector;
- Connect the device or control light with one wire with ground, and the other end with an orange wire. The “movement” of the instrument needle or the glow of a light bulb indicates the presence of supply voltage;
- The next step is to short-circuit the conductors of the DZH connector to each other. If lighting appears, then we can safely say that the VAZ 2114 reverse sensor has failed. If it is absent, the search continues. The troubleshooting algorithm for VAZ 2109, VAZ 2113, VAZ 2115 is the same.
The diagnosis has been made, and now they are starting to treat it.
How to replace the reverse sensor
The reverse sensor is a device that switches the rear white lights when reverse gear is engaged. In other words, the sensor is used to ensure that the reversing lights turn on when you put the car in reverse gear.
The reverse sensor for a VAZ is a reliable part, but not eternal. Therefore, sooner or later there may come a time when your reverse lights fail.
If your rear white lights do not work, this does not mean that the reverse sensor has failed. To find out in more detail why the reverse lights do not light up, read the article Reverse lights do not light up.
Where is the reverse sensor located?
Location of reverse sensor number 7
Finding the location of the reverse sensor is not so difficult. This sensor is located on the gearbox. There are only two sensors on the box: the speed sensor (DS) and the reverse sensor. Reverse sensor photo: the sensor is located at number 7.
How to check the reverse sensor
To check the functionality of the sensor, remove the contacts from it and clamp them together. Then turn on the ignition and put the gear in reverse. If the lights are on, the sensor is faulty and needs to be replaced. And if they don’t light up, then the problem is in the circuit, not in the sensor.
We recommend: How to connect and adjust the “oars” on car doors – window regulators?
Replacing the reverse sensor
To replace, we will need transmission oil and an oil container. The fact is that when we pull out the sensor, oil will flow out of the hole that appears and your task is to insert a new sensor in place of the old one as quickly as possible.
- We park the car on the overpass.
- We put it on the handbrake or gear.
- We remove the protection.
- We find the sensor and remove the contacts from it.
- We substitute the container and begin to unscrew the sensor.
- Having taken out the old one, quickly screw in the new one.
Then let it sit for a while and check the oil level in the gearbox. To find out how to check the oil level in the gearbox, read the article How to check the oil level in the gearbox? Add as much oil as needed and put everything back together.
Buy a reverse sensor
You can buy the sensor at any auto parts store for domestic cars. The price for it ranges from 150 to 250 rubles.
Description of RZH
Now we suggest that you familiarize yourself with the basic information regarding the reverse control. Where is it located, how to check the device and replace it? Read on.
Location and purpose
The main purpose of the RZH is to activate the white lights in the rear headlights, which indicate that the vehicle is starting to reverse. Thanks to this, other drivers know that the car will make a maneuver. Correct operation of the RZH allows you to prevent a possible collision on the road. As for the location, the device itself is installed on the gearbox - looking at the box, you can see two controllers - speed and RZH.
Principle of operation
The main component of any RZH is the limit switch. When the driver engages reverse, this switch is activated and powered by the battery. The device closes the electrical circuit, resulting in voltage being supplied to the lighting sources located in the rear lights. If the driver disengages the reverse gear, the limit switch is pressed out, as a result, voltage is no longer supplied to the light bulb and it goes out.
Possible problems and methods for eliminating them
A breakdown of the RZH can be recognized by the absence of light from the lamps when reverse gear is activated. Before checking the sensor itself, you need to make sure that the lamps installed in the headlights are working properly.
There may be several reasons for problems:
- The contacts on the rear headlights have oxidized. If such a problem occurs, it is necessary to clean them, which will most likely help solve the problem. If the contacts are severely damaged, they will have to be replaced.
- Over time, when operating under vibration conditions, the regulator may become loose. If the device is working, then simply screw it on and check that it is securely installed.
- There is no contact with the electrical circuit in the box itself. It is necessary to restore the contact of the device and check the wiring.
- In some cases, the reason lies in the lack of contact between the connector, as well as the mounting block with fuses. In this case, you need to check all contacts for signs of burning or damage. If burning occurs, then you should find out the reason why power surges occur in the on-board network.
- In "Fours" it often happens that the safety device in the block burns out (we are talking about any fuses), and this contributes to disruption of the contact circuit. It is necessary to check all safety devices and replace the failed element (the author of the video is the channel In Sandro's Garage).
The procedure for replacing the IAC on a VAZ 2114 engine
Before replacing the idle speed control of the VAZ 2114, you need to prepare the sensor, the necessary tools and materials:
- As a replacement device, you can buy an IAC marked 2112-1148300-04 “KZTA” or “omega” 2112-114830. When choosing, be sure to check the exit of the needle rod to a distance of no more than 23 mm;
- for work you need a Phillips-head screwdriver, as well as a key “13”;
- Be sure to have rags, WD-40 and carburetor cleaner ready.
Before replacing the device, you must:
- Place the car on a level surface and put the handbrake on.
- Raise the hood and lock it in the open position.
- Disconnect the battery; when replacing the IAC, this is not a requirement, but a mandatory condition.
- Remove the cover, which is the protective casing of the engine.
- After loosening the clamp, disconnect the rubber tube from the air filter pipe, otherwise it will interfere with the disconnection of the pipe itself.
- Unscrew the clamp securing the VF pipe, disconnect and move the pipe corrugation to the side.
- Loosen the fastening screw and pull out the cable running from the gas pedal to the throttle valve.
- Using a rag, clean the surface of the throttle body and around it.
- Lubricate the remote control mounting nuts and IAC mounting screws with WD-40 to make them unscrew better .
- Unscrew the two nuts to “13” and remove the entire throttle assembly.
- Disconnect the IAC connector by removing it from the sensor terminals.
- If there is dirt in the places where the IAC is attached and adjacent to the remote control housing, it must be removed by thoroughly wiping everything with a prepared rag.
- Using a Phillips screwdriver, unscrew the two screws that secure the IAC to the remote control.
- Remove the valve from the mounting socket.
- It is advisable to wash the throttle assembly with carburetor cleaner.
- Install the regulator prepared for replacement on the throttle assembly in the same position in which the device was just removed.
The rubber gasket, which should be sold together with the sensor, must be pre-lubricated with engine oil.
- Tighten the two screws and make sure that the IAC is tightly attached to the remote control housing.
- Place the throttle assembly in place and make sure the mounting nuts are tightly tightened.
- Connect the connector to the valve terminals.
- Attach the cable to the throttle valve and connect the VF pipe and the rubber tube, tightening the clamps.
- Install the protective cover on the engine.
- After installation, the IAC must be calibrated. To do this, connect the battery terminals and turn on the ignition for ten seconds. The ECU will calibrate itself. After this, the IAC is ready for operation.
We recommend: About Webasto
Guide to replacing idle air control
How to replace the IAC on your own:
- First of all, you need to turn off the ignition and disconnect the power supply to the car. Open the hood and disconnect the terminals from the battery.
- Find the regulator and disconnect the connector with the connected wires from it.
- After this, you need to use a screwdriver to unscrew the two screws that secure the IAC, then the regulator can be removed. Sometimes the IAC is attached to bolts, which require an asterisk wrench to unscrew.
- A new regulator is installed in place of the old one. Before placing the IAC in its seat, it is necessary to lubricate the rubber seal with engine fluid.
- Install the IAC and tighten the screws, connect the power plug to the device and do not forget to connect the terminals to the battery (the video was shot by user Ivan Vasilyevich).
Repair methods
To repair the reverse signal, you can proceed in two ways. They differ in the way the sensor is accessed.
- Drive the car onto a lift or pit.
- Do the work by climbing under the car.
If you have already encountered a similar problem, then you will probably agree that replacing the DZH is best done using a pit or overpass. This makes access to the sensor as comfortable as possible, plus you minimize the risk of being splashed with oil from the gearbox.
Replacing the DZH is not the cleanest job
Of course, there is another cleanest way - sending the car to a car repair shop. But then you will have to pay not only for the sensor, but also for the services of the specialists. And this is another 2-3 times the cost of the sensor. The choice is yours anyway.
Self-replacement
It’s not difficult to get to and replace a failed DZH on your own. Follow the instructions, do not break the sequence of operations, and then the process will not take you much time and effort.
- Place the car on a pit or overpass. Be sure to apply the handbrake and place the transmission in first gear. This will help prevent your car from accidentally rolling away.
- Remove the protection from the contacts of your sensor, disconnect the contacts.
- Prepare a container into which the oil will be drained when unscrewing the DZH.
- When the container is ready, remove the sensor. In some cases, it may not be unscrewed by hand. In such a situation, use a 22 mm socket.
- Very rarely even the key cannot help, since the sensor becomes stuck to its location. Here you will have to arm yourself with a hammer and chisel and try to remove it as carefully as possible.
- Take out the failed device and insert a new one in its place.
- If oil gets on the gearbox housing, remove it with dry rags. There is no need for extra dirt. Plus, it can lead to a decrease in the efficiency of the device.
- Return all contacts to their places, put the protection back on.
- If a decent amount of lubricating fluid has spilled out of the box, be sure to top it up. Just use fresh ones. By the way, this is one of the reasons to completely change the oil in the gearbox if it has been there for more than the first season.
- The decision to change the oil will simplify the task when removing the sensor. If the liquid is drained in advance, it will not flow in different directions when the sensor is unscrewed. The work will be cleaner, plus you will kill two birds with one stone - replace the sensor and gearbox oil.
Article on the topic: Self-adjustment of the clutch on a VAZ 2114
Removal and replacement
After completing the work, do not forget to check whether the reverse traffic warning system is now working. For this:
- Turn the ignition key, but do not start the engine;
- Engage reverse gear on your gearbox;
- See if the white lights turn on. If yes, everything went great.
How much it costs?
Many VAZ 2114 owners are often interested in the cost of certain spare parts. In the case of DZH, a new device will cost you up to 300 rubles. You can find devices for 100 rubles.
The price depends on the manufacturer, quality level and pricing policy of the auto parts store where you decide to shop.
Additionally, it wouldn’t hurt to purchase WD40, which can be used to clean contacts. Plus, the wires may need to be replaced. We do not recommend doing this on your own if you do not have the relevant experience.
If the culprit for the problem with the rear lights is the light bulbs themselves, replacing them will cost a pittance. Today they cost up to 50 rubles.

