general information
Headlight settings are lost for a variety of reasons - from off-road conditions to minor traffic accidents.
Symptoms can also vary, for example, problems with low beams most often arise due to a broken relay or fuse.
Let’s also make a reservation that the headlight corrector installed on Grants can only compensate for the different load of the car, however, the car owner must level the horizontal plane independently.
The main reason for adjusting the headlights is the lack of light when illuminating the road, which has several possible reasons:
- Typically, a car that comes off the assembly line is adjusted to the weight of the average car owner (75 kg). If your body weight differs from the weight specified in the settings, then it is better to carry out the adjustment immediately after purchasing the car;
- If the hydraulic corrector breaks down, which results in bending of the headlights and difficulty making adjustments;
- After driving off-road;
- When buying a used car, since in this case the headlights were adjusted by the previous owner of the car to suit his own needs and weight.
Let's take a closer look at hydraulic correctors. These devices are installed on cars by the manufacturer and are designed to adjust the headlights higher or lower, depending on the degree of load on the car.
Since they do not have automatic adjustment, the adjustment must be carried out independently; the controls for the corrector are located at the light switch.
The zero position corresponds to a car with one person in the cabin (driver).
The operating principle of the device is as follows:
- the corrector cylinder is controlled using a handle;
- the cylinder is responsible for adjusting the pressure level in the tubes going to the pusher;
- the pushers are located directly in the headlights, and the higher the pressure in the tube rises, the more actively the liquid located in the inside of the pusher will press on the rod;
- The most important position for adjusting headlights is the position in which the rod is located.
New Lada: Grant fuse diagram with description
If the corrector breaks down, which often results in one of the headlights stopping responding to it, the pusher needs to be repaired - it is its failure that in the vast majority of cases leads to a malfunction of the device as a whole. There are two methods for repairing a pusher. The first of them does not provide for its subsequent adjustment; to implement this technique you will need:
- Remove the broken pusher from the headlight;
- Warm up the pusher tube (this will give it greater elasticity), and then remove the pusher from it;
- Tighten the self-tapping screw from the side of the tube (be sure to screw it at an angle, the degree of protrusion of the rod directly depends on the depth of the screw);
- Then adjust the length of the screw to get the final result you need.
The second method involves returning the hydraulic corrector to a fully functional state. To do this you need:
- Remove the pusher from the headlight;
- After warming the tube, remove it from the pusher;
- Try to move the pusher using pliers (the device will not function if there is not enough liquid in it or there is no proper pressure);
- When the rod moves, antifreeze is pumped into the pusher (using a conventional syringe), after which the system is put back together;
- If there is no movement of the rod, you should pump a small amount of antifreeze into the pusher (to the required level), and try to develop the rod;
- The optimal level of liquid inside the pusher can be determined both experimentally and by comparing a faulty hydraulic corrector with a working device.
What is a hydraulic corrector and how does it work?
The hydraulic headlight corrector is installed on the Grant from the factory. This device adjusts the headlights higher or lower depending on the vehicle's load.
You need to adjust it yourself - there is no automatic setting.
The corrector control is located under the light switch handle. Position 0 corresponds to a car with one person - the driver.
The more the machine is loaded, the higher the hydraulic corrector value should be.
Principle of operation:
- the handle controls the hydraulic corrector cylinder;
- the cylinder regulates the pressure in the flexible tubes that go to the pushers;
- pushers are installed in the headlights - the higher the pressure in the tubes, the stronger the liquid inside the pusher presses on the rod;
- the position of the rod deeper/further is responsible for adjusting the headlight higher/lower.
What to do if the hydraulic corrector is broken
Have both or one headlight stopped responding to the hydraulic corrector? Most likely your pusher is broken.
According to the regulations, the entire hydraulic corrector mechanism is replaced as an assembly and cannot be repaired. Price from 400 to 1000 rubles. Order number: 21903718010.
If you want to fix the pushrod, there are two ways.
Table 1. Options for repairing the headlight range control pusher.
| Option 1 is barbaric. No further adjustment. |
|
| Option 2 is humane. We return the corrector to full working condition. |
|
A corrector kit costs about 700 rubles - it may be easier to replace it
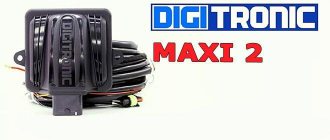
How to replace a hydraulic corrector with an electromechanical one
Do you want to replace the hydro with an electric corrector (EMKF)? The process is simple, as there are ready-made solutions from the factory.
Article: EMKF-41. Price 2000-3000 rubles.
To replace, you only need straight hands - depending on the manufacturer of the EMKF:
- dismantle the old hydraulic corrector;
- We install a new corrector control unit in place of the cylinder - we run the wiring according to the instructions;
- we pull the wires through the elastic band along which the hydro pipes went;
- We put the regulators in their standard places in the headlights.
Adjusting the angle of light
Setting up the headlights of a Lada Granta will not require much time from the driver or the purchase of a stand. All work will take no more than 30 minutes of free time without the use of complex tools.
The final results of do-it-yourself adjustment are no different from professional adjustment on a bench. The cost of carrying out this type of work in a car service starts from 1000 rubles. An official dealer will require about 1500-2000 rubles. The adjustment will not only have a positive effect on road visibility, but will also help you save on a full tank of gasoline or new lamps.
Tools for adjusting the position of the Granta reflector
To adjust the headlights, you will need the following tools:
- medium-sized Phillips screwdriver;
- clean rag;
- marker or chalk;
- roulette;
- building level;
- assistant for proper weight distribution.
Using a level will help determine the angle of the car and more accurately adjust the lights, but using this tool is not necessary.
Preparation
Before starting work, preparatory steps are taken to help obtain more accurate results. First, we find a flat area in an unlit place with a flat wall of a building or garage. The height of the object must be at least 2.5-3 meters.
It is also recommended to do the following:
- wash your car thoroughly;
- we check the presence of a spare wheel and clear the trunk of unnecessary things;
- set the tire pressure required by the manufacturer;
- fill a full tank of gasoline;
- we check the optics for the functionality of all lamps and components;
- raise the headlight to the top position by setting the adjuster knob to position 0.
As the mileage increases, scratches, chips and clouding appear on the glass of the Grant headlight. Before tuning, it is recommended to manually polish the optics using a cloth or a special anti-scratch compound, which is sold at any automotive store. The high beam lamps are not involved in the adjustment, but their operation should also be checked.
Marking the diagram on the wall
Granta lighting devices produce a dense stream of light with an even horizontal line and a “daw” for right-hand traffic. To make the correct adjustment, you will need to draw a diagram.
To do this, follow the steps:
- Install the Grant on a flat surface at a distance of 5 meters from the wall.
- Rock the body to loosen the suspension.
- Open the hood.
- Wipe the headlights clean.
- Measure the height from the ground to the location of the lamp in the headlight.
- Draw the horizon with a marker.
- Mark the center of the car using a vertical line.
- Measure the distance between the headlight bulbs and transfer it to the diagram from the center point of the Lada Granta. The reference point is the radiator grille icon.
After the diagram is drawn, settings are made.
When adjusting the angle of inclination, marks are also made on the wall to clearly see the change in headlight settings.
Adjustment
After drawing up the diagram, ask the assistant to sit in the driver’s seat for proper weight distribution. This will help you more accurately adjust the horizontal plane. To adjust the light in Grant, you need to turn the adjusting screws, which are responsible for tilting the reflector left and right, as well as up and down.
The Lada Granta headlights are adjusted according to a pre-designated diagram on the wall. The beam must meet the following parameters:
- Go below the marked horizontal line by 5.5 centimeters.
- The place of transition to the “daw” should be clearly seen by the distance marks of the light bulbs relative to the center of the Granta.
- In the area of the cut-off line there should be no unnecessary flare or bright rays that would interfere with oncoming drivers.
You should check the functionality of the Granta headlight range control yourself. To do this, set the regulator to positions 1 and 2 and monitor the uniform rise of the light border.
Self-adjusting headlights will improve your visibility of the road, eliminate accidental dazzle of oncoming drivers, and save your family budget.
Why is the setting broken?
Light angle adjustments get lost for several reasons:
- after mechanical impact during an accident;
- due to deep potholes, holes, speed bumps and uneven road surface joints;
- due to the installation of low-quality lamps of questionable manufacture.
The angle of the light beam may be lost due to an accidental collision with a deep pothole at high speed. Granta's suspension cannot completely absorb the force of a powerful impact of the wheel on the asphalt, and inertia is transmitted through the body. The headlight reflector suddenly accelerates up or down, the adjustment screw slips, and the light beam shines incorrectly. Frequent rolls over curbs or a high garage threshold can also have this effect.
During the journey, drivers find themselves in different traffic situations, accidentally falling into deep holes or driving over speed bumps at high speed. All this over time disrupts the position of the adjusting screw in the headlight reflector. However, the installation of Chinese low or high beam lamps affects the angle of the light beam. This parameter is affected by the location of the filament. If the bulb of the installed part is slightly offset vertically, then the standard optics will not be able to correctly collect the light beam and transmit it to the road surface. In this case, you will also need to adjust the light angle or replace the lamps.
At the time of an accident, strong vibrations are transmitted to the body, which can not only disrupt the settings, but also damage the Granta hydraulic corrector. Also, after an accident, adjustment of the PTF may be required.
Adjusting headlights on a Lada Granta with your own hands: video and photos
Lada Granta has become one of the most affordable cars of our time. This is what made him so popular. The situation is also improved by the fact that it has good technical characteristics, including high-quality optics, regardless of configuration (standard, standard, luxury).
Checking and adjusting Lada Granta headlights
Let's talk about adjusting the headlights, which is similar to how adjustments are made on other car models. This procedure must be carried out both on a completely new car and after driving on a rough road.
If your low beam headlights stop working, the culprit may be a relay or fuse. But if, on the contrary, the low beam does not turn off, then most likely your relay is stuck.
To make adjustments, we will need to acquire a Phillips-type screwdriver, a standard tool, as well as a spare tire and a full tank of gasoline (if possible). The last points are needed to ensure that the vehicle is fully loaded.
- The car must be placed on a flat, completely horizontal surface.
Checking the vehicle's leveling - After this, the car starts and idles. To fix its position, the handbrake is depressed. If the hand brake is not tightened or does not work, you can install a wheel chock under the rear wheels.
- Check the tire pressure. If it does not correspond to the norm, then pump them up or deflate them.
- Next, a special wall is installed in front of the machine, the height of which reaches two meters, and the distance to it is about three meters.
In principle, you can make the wall yourself from chipboard or plywood, as well as other available materials. Or the car is placed in front of a flat wall, onto which markings are applied. Adjustment diagram for adjusting headlights - A load weighing up to seventy kilograms is placed on the driver's seat, which is necessary to align the line of the headlights. You can ask your partner to drive.
- In order to remove vibrations of the body, as well as its shock absorbers, the car gently rocks.
- Next, we move the Lada Granta hydrocorrector light control to the “one person” position.
This position corresponds to the load in the car on the driver’s seat. Hydrocorrector in position “0” - We turn on the low beam, studying the output and the actual deviation of the headlight beams on the car.
Headlight adjustment (adjustment dials)
The thumbwheel is used for adjustment in the horizontal plane, and the hex bolt adjusts the position of the light beam vertically. If possible, the beams should correspond as closely as possible to points on the manufactured wall, both in the vertical and horizontal planes.
In the photo there are two headlight adjustment dials
The most difficult to reach vertical adjustment bolt
It is considered that the optics are correctly adjusted when the rays go directly to the places of the required projections, previously applied to the wall, according to the operating rules of the machine.
Now a so-called test run is being carried out. This must be done in order to secure the headlight adjustment, and also to check whether the work was done correctly. Make sure that the beams of light do not blind drivers coming towards you.
conclusions
As you can see, the procedure for adjusting the headlights on a Lada Granta with your own hands is not at all complicated. The whole procedure, if you have a ready-made “wall”, will take no more than twenty minutes.
The right headlight literally “fell” down, it’s dangerous to drive like that
As a rule, optics do not have a clear operating time. The duration of use is not limited in any way, since everything depends on the road conditions, as well as the style in which the driver drives the car.
But, even with normal output data, optics rarely withstand more than one hundred thousand kilometers, since its surface is covered with an abundance of small scratches. As we have already said, such scratches can be removed with polishes or a more significant abrasive, but the resources for such restoration are not unlimited.
Give some attention and power to your halogen headlight. The fact is that deviations up or down can lead to the fact that the adjustment of the headlights on the Lada Granta cannot be performed efficiently.
In addition, each batch of cars may have its own characteristics of setting up the light beam, which you can find out about by simply looking at the operating instructions.
Instructions for self-adjustment
To make adjustments you will need an auxiliary screen
The device of the Lada Granta car headlights
Headlight structure of a Lada Granta car (driver's side)
1 — luminous flux regulator in the horizontal direction; 2 — place for the turn signal bulb socket; 3 — socket of the main hydraulic cylinder of the hydraulic corrector; 4 — place for the high beam lamp socket; 5 — light flow regulator in the vertical direction; 6 — place for the socket of the side lamps and daytime running lights.
Tools and materials needed for DIY work
- hexagon to "6";
- chipboard sheet 3 by 2 meters;
- chalk.
How to adjust the light: mechanism of operation
- Place the idling car on a flat surface and turn on the handbrake;
- We load the car with any suitable loads for optimal balancing of the body so that its position is close to everyday use;
- We monitor tire pressure;
- We place a prepared screen three meters from the car headlights;
- We mark the screen as shown in the figure.
This way we make screen markings for subsequent optimized headlight adjustment
Fog lights must operate only with side lights or low beam headlights (Traffic Regulations, current edition). Their light is adjustable only in height.
Video on work
The headlight adjustment is complete when the light beams are projected on the screen as shown in the figure. After this adjustment, driving the car will become noticeably more comfortable.
Low beam lamps on the Lada Granta - which ones to choose, step-by-step replacement instructions
Good visibility on the road, especially in the dark, is a guarantee of safety. A correctly installed lighting system is extremely important for a car; the issue of uninterrupted operation of high and low beam headlights on a Lada Granta car is always relevant.
In today's article we will talk about the malfunctions and causes of failure (burnout) of low beam lamps on Lada Granta cars, we will look at what to look for when choosing, and I will also tell you step by step how to replace this undoubtedly important element of the car
The main reasons for LBS burnout on Grant
Most often, Granta owners complain about the fairly frequent failure of low beam lamps. Indeed, they most often require changing names, which is understandable: after all, they work almost constantly.
If previously car owners turned on the lights at night and in inclement weather, now, according to the rules, they must always be on while driving. Lamps do not last forever, and if a cheaper analogue is purchased to replace the fairly good standard OSRAM light bulbs, the problem may become a regular one.
LED lamps for Lada Granta SMD 2835
The second common reason for bulbs burning out in front and rear headlights is moisture getting inside. The culprit is usually cracked or poorly fitting rubber seals located between the headlight housing and the glass. The presence of a problem is indicated by periodic fogging of the headlight from the inside.
Halogen lamps may not light due to improper installation. During this procedure, you must avoid touching the glass surface with your fingers.
Traces of grease significantly reduce the life of the light bulb. In addition, although in rare cases, the lamps do not light up due to too high voltage supplied by the car's alternator or poor terminal contact.
LED halogen lamps on Lada Granta H4 (prohibited for use)
In general, as you were able to notice, there may be more than enough reasons why the low beam on the Lada Granta stopped working. Let's now figure out in what cases you will need to replace the lamps, and in which cases you should contact a specialist.
When replacement is required
Replacing low beam lamps on a Grant may be necessary if they burn out. But, if such a malfunction occurs very often, or along with the low beam, any other part directly related to the electrical system disappears or stops working, then in this case it is better to contact a specialist.
The process of replacing low beam lamps on a Lada Granta
In most cases, the problem lies in the car's wiring or insufficient voltage supplied by the battery. It will be extremely difficult to find the cause on your own without the proper skills.
Features of choosing LBS
Standard low beam lamps that are installed on the Lada Granta 60/55 H4: where 60/55 is the power of the low beam (55) and high beam (60) in watts H4 is the type of base
Therefore, please note that this lamp is used for both low and high beam headlights
In addition, the low beam lamps on the Lada Granta differ in many respects. The most popular of which are:
- Philips X-treme Vision (the brightest, give white light) Features declared by the manufacturer: bright white light, increase the lighting area in front of the car by 45 m, high-quality quartz glass. One of the highest brightness levels and incredible comfort in the dark.
- Philips LongLife EcoVision (inexpensive, extended service life) Features: high-strength quartz glass, resistant to temperature changes and vibration, high internal pressure - powerful light.
- Bosch Pure Light (extended service life) Features stated by the manufacturer: up to 90% more light, exclusive design with silver plating and blue sector.
- Osram Original Line (good illumination area) Features: OEM quality, improved visibility up to 130%.
Step-by-step instructions for replacing low beam lamps on a Grant
In order to replace the low beam lamp on a Lada Granta, you must perform the following procedure:
- Turn off the ignition, headlights and parking lights.
- Disconnect the terminal from the battery
- Open the hood of the car.
- Shine a flashlight under the upper cross member on the left side to find the headlight cover
- Find the locking tab at the top, press it and remove the cover
- Remove the block with wires by pulling it with sufficient force
- Remove the rubber boot by pulling it by the tab.
- Installing the lamp is done in reverse order.
How to adjust headlights on a Lada Granta
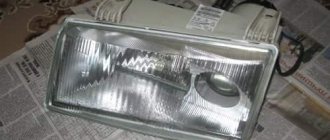
Grants are equipped with two headlights equipped with halogen lamps, which are structurally analogous to the headlights of the Lada Kalina.
Their blocks are equipped with hydraulic corrector cylinders and two hexagons designed to adjust the horizontal and vertical light fluxes. In addition to them, the car's headlights are equipped with hydraulic correctors, thanks to which the driver can, if necessary, change the beam of light going in the vertical direction directly from the passenger compartment.
Below we will try to analyze in detail the process of self-adjusting headlights on Grant, which will allow its owner to save on the services of service centers.
general information
Headlight settings are lost for a variety of reasons - from off-road conditions to minor traffic accidents.
Symptoms can also vary, for example, problems with low beams most often arise due to a broken relay or fuse.
Let’s also make a reservation that the headlight corrector installed on Grants can only compensate for the different load of the car, however, the car owner must level the horizontal plane independently.
The main reason for adjusting the headlights is the lack of light when illuminating the road, which has several possible reasons:
- Typically, a car that comes off the assembly line is adjusted to the weight of the average car owner (75 kg). If your body weight differs from the weight specified in the settings, then it is better to carry out the adjustment immediately after purchasing the car;
- If the hydraulic corrector breaks down, which results in bending of the headlights and difficulty making adjustments;
- After driving off-road;
- When buying a used car, since in this case the headlights were adjusted by the previous owner of the car to suit his own needs and weight.
Operating principle of the device in Grant
- The corrector cylinder must be controlled using the handle.
- The cylinder is responsible for regulating the pressure in the hoses extending to the pusher.
- The pushrods are located in the headlights. The higher the pressure rises in the tube, the more dynamically the liquid presses on the rod (located in the internal compartment of the pusher).
- The main position for adjusting the headlights is the position in which the rod itself is located.
When the corrector on the Grant is damaged (one headlight does not respond to it), the pusher should be put in order. It is the malfunction of the latter that mainly provokes the breakdown of the entire device. There are 2 ways to repair a pusher. With the first, no further adjustment is provided. To implement this technique you need to do the following:
- remove the damaged pusher from the headlight;
- warm up the pusher hose (which gives greater flexibility), and then remove the pusher from it;
- tighten the self-tapping screw from the side of the hose (you need to tighten it at an angle, since the level of protrusion of the rod directly depends on the depth of tightening of the screw);
- adjust the length of the screw to obtain the desired result.
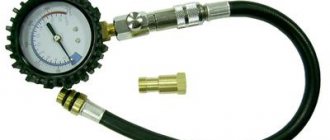
To work on adjusting the headlights, you need to prepare the tool in advance:
- 6 mm hexagon or Phillips screwdriver;
- a sheet of chipboard 3x3 m or a vertical flat panel made of another material;
- tape measure or long ruler;
- a couple of crayons;
- several newspapers.
Checking and adjusting Lada Granta headlights
Adjusting headlights, both left and right, is necessary both on a new car and after repair.
Left headlight of Lada Granta
The methods used for checking and adjusting the light are identical for different car models. The Lada Granta has two headlights with halogen lamps. The function of adjusting the light of the lamps from the interior of the Lada Granta is performed by a hydraulic corrector; there is a delay function for turning off the low beam after turning off the ignition after 45 seconds.
To carry out the adjustment, you need to prepare the following materials and tools:
- a set of keys;
- Phillips screwdriver;
- spare wheel;
- full tank of gasoline.
The last two points are needed to give the machine a full load. To check, the car must be installed horizontally (video author - Autonakat).
Further actions consist of the following steps:
- First you need to start the engine and let it idle. To fix the position, you need to put the car on the handbrake.
- Next, you should check the tire pressure and bring it back to normal.
- In front of the car, at a distance of about 3 meters, you need to install a special wall 1.8-2 m high and apply markings on it.
- You need to place a weight of up to 70 kg on the driver's seat to align the low beam line with the bulbs.
- To remove vibrations from the shock absorbers and body, the car should be slightly rocked.
- The light correction control must be set to the “one person” position, which corresponds to the load on the driver’s seat.
- Next, you need to turn on the low beam and adjust the left and right headlights separately. Both the left and right headlights need to be adjusted using a corrector. The rays of light from the light bulbs should shine according to the markings.
Low beam adjustment circuit
You also need to set up the light-off hold function. If desired, you can turn off the function within 45 seconds.
Headlight adjustment (adjustment dials)
Using the thumbwheel, you adjust the low beam horizontally, and using the hex bolt, you adjust the light in the vertical plane. You can raise or lower the beams from the headlights if, for example, the rear of the car is loaded. Ideally, the light beams should exactly match the markings on the wall.
After adjusting the low beam, you need to perform a test drive in order to check the correctness of the adjustment after repair. The light from the headlights should not blind drivers on oncoming vehicles.
Recommendations for quality improvement
To properly adjust the low beam, you need to check the body. There should not be any deformations on it, as they can affect the quality of light; the rays from the lamps will shine scatteredly. If the body has flaws, it needs to be repaired. In addition, in order for the bulbs to shine brightly, you need to check the cleanliness of the glass on the headlights. Dust that has accumulated on them can be removed with a vacuum cleaner.
During use, scratches may appear on the glass. In this case, it is not necessary to change the headlight; you can polish the glass surface. If problems are identified with the reflector, it cannot be repaired and should be replaced with a new one. To make the adjustment correctly, the machine must have lamps of the same power and size.
Halogen lamp for car
You can distinguish a car from the crowd using tuning:
- install eyelashes;
- dim the headlights;
- install lensed headlights;
- make lighting from LEDs.
The simplest tuning option is to purchase ready-made eyelashes and stick them on the top of the Lada Granta headlights. You can give the eyelashes the desired shape using a stationery knife. Tuning can be done with eyelashes made yourself. The materials used to make eyelashes can be different; film materials are suitable.
You can buy vinyl film, cut a template out of paper, and then cut out the eyelashes from vinyl. Tuning is done by gluing eyelashes onto an applied soap solution. You can perform tuning with plastic eyelashes.
Tuning - eyelashes on headlights
There are many tuning options used during car repairs. It all depends on the capabilities and imagination of the driver.
Preparing the car
To adjust the headlights correctly, you need to prepare the car: completely fill the fuel tank, put the spare wheel in its proper place, and adjust the tire pressure.
Headlights and reflectors must be clean, preferably polished, and not fogged up. It is necessary to install light bulbs of the same size, brand and electrical power.
Then, in the dark, the car is installed on a flat horizontal platform at a distance of 3 meters (or 5-10 meters for other brands of cars, according to their instructions) from the wall with markings applied to adjust the luminous flux. Such test walls (stands) are available at service stations and car repair shops. You can apply this marking yourself.
To remove vibrations from the body and shock absorbers, you need to rock the car, place a load on the front seat (or seat an assistant), the weight of which coincides with the weight of the driver.
This is necessary in order to equalize the height of the low beam headlights. The headlight leveling control located inside the car is set to the “one person” position.
The low beam setting is carried out with the engine running (idling) and the handbrake on or with anti-roll devices installed under the rear wheels.
Step-by-step instructions for replacing the headlight adjuster on a Lada Granta
On my car Lada Grante, the headlights began to shine too low. At first I raised the beam of light by adjusting the hydraulic corrector, but after a while the headlights dropped again. The adjustment reached the maximum level, but the light fell low. This question comes up among owners of cars equipped with hydraulic headlight leveling. To replace the headlight hydraulic corrector on a Lada Granta car, you will need a wrench (head 21). Algorithm of actions:
- The adjustment knob on the dashboard is removed. There is a nut behind it that can be unscrewed with a knob. Afterwards you can pull out the main cylinder.
- Under the hood, the clamps holding the hydraulic mechanisms are pressed out. To pull them out, you need to turn the cylinders counterclockwise.
- The connecting tubes are secured with clamps having screw clamps. They need to be unfastened and brought into the car interior using the hole previously hidden by the seal.
After dismantling the old device, a replacement should be installed.
Installation of both hydraulic and electrical correctors is carried out through the vehicle interior. First, the device is pulled through the hole in the shield, then mounted in its usual place.
To electric
A more reliable and attractive electric headlight corrector on the Lada Granta is installed as follows:
- Before installing the headlight electric corrector, it is necessary to dismantle the failed device - first by disconnecting the main cylinder, then by disconnecting the hydraulics and leading the pipes through the passenger compartment.
- The negative terminal is disconnected from the battery.
- Electrical mechanisms are located where the working cylinders were installed. If the O-rings are worn out, they are replaced.
- The negative wire is connected to ground, the positive wire is connected to terminal 20.
- The wiring runs in the space previously occupied by connecting pipes.
Having finished with the wiring, you need to return the terminal to negative. The performance of the new system must be tested.
To hydraulic
If the owner is satisfied with the hydraulics, then replacing the headlight hydraulic corrector on the Grant is done in the same way:
- the old system is dismantled, connecting pipes are removed;
- new elements are installed in the same way in place of failed elements;
- O-rings are checked;
- Full testing is carried out.
Hydrocorrectors first appeared on classic rear-wheel drive VAZs. More modern cars from the Volzhsky plant are also equipped with hydraulic regulators for the direction of the light beam. Although at one time they began to install more reliable electrical correctors. They perform the same functions, but operate thanks to electric motors powered from the on-board network.
Hydraulic corrector malfunction
In terms of its design, the corrector is a fairly simple device, consisting of a main cylinder, as well as two additional ones - one for each headlight. These cylinders are connected to each other through special tubes. On the center console of the Lada Granta there is a corrector control, which is used to adjust the optics. When the driver presses the corrector handle, the pressure level in the main cylinder changes - it is subsequently transmitted to the working cylinders. Due to the forces acting on the reflector piston, the angle of the optics changes.
If we are talking about an electric corrector, then in this case the option of transmitting force is carried out thanks to special motors. These devices are powered from the vehicle's electrical network. In practice, such devices have proven to be more resistant to temperature changes, in contrast to hydraulic correctors. Accordingly, the cost of the former is also higher.
Replacing the hydraulic corrector with a similar device
If the corrector does not work, then it will be necessary to either replace or repair the device, and the second option, as practice shows, is less appropriate. The reason for the repair usually lies in the jamming of the cylinder or a violation of the tightness of the system, in particular, we are talking about rupture of the sealing components or damage to the pipes.
How to replace the hydraulic corrector with a similar device:
- First, you need to unscrew the nut from the inside, and also remove the handle of the device itself to free the main cylinder of the system.
- The cylinder itself is removed after release.
- Next, other cylinders are dismantled, as well as the pipes through which pressure is transmitted.
- When these steps are completed, the entire structure is removed from the technological hole in the cabin.
- The procedure for installing a new corrector is performed in the reverse order (the author of the video is Romanych).
Replacing a hydraulic corrector with an electric one
As for replacing a hydraulic device with an electric one, in this case the replacement procedure looks similar. The device is dismantled and removed, and instead of the cylinders, electrical analogues of the devices are mounted. After completing these steps, the positive wire of the system must be connected to terminal number 20, and the negative wire must be connected to ground, that is, the car body. All connecting pipes should be replaced with wiring, and at the final stage, power from the device should be connected to the battery. After this, you should carefully check everything to see if the system is working correctly.
➤ Adjusting headlights on the Lada Granta - description of the process
The factory adjustment of the headlights on the Lada Granta is not ideal; owners often independently adjust the optics to “their needs.”
The adjustment process is not complicated, every driver can do it. If you don't have time, contact the service center for assistance.
Why does the headlight adjustment go wrong?
Poor quality assembly of components, insufficient fixation with fasteners;
- Manufacturing defect;
- Due to damage, the headlight range control does not work;
- Violation of operating conditions;
- Inconsistency in temperature conditions, as a result of which the reflector, base, and mounting socket are destroyed and deformed;
- Negative consequences of an accident, impact, collision;
- Wear of springs, front / rear struts, ground clearance decreases, the car body leans forward.
The given list of reasons why headlight adjustment is impossible is exhaustive.
Procedure for adjusting the headlights of a Lada Granta with your own hands
Tool preparation: screwdriver, hexagon.
- Installation of the machine within the perimeter of the repair area, on a flat platform.
- Checking the tire pressure, the presence of a spare tire in the trunk, the weight of the load on the driver's seat is 75.0 kg.
- Adjustment / correction of the light beam at a distance of no more than 3.0 meters from the wall.
- Check the illumination angle of each headlight one by one.
- Completion of work, testing for serviceability and accuracy of lighting.
The lighting system on the Lada Granta (liftback) is completely identical to that of Kalina, Priora, Vesta. The turn signal, high beam, and daytime running lights (hereinafter referred to as DRLs) are located together in one module.
Each lamp is placed in a separate socket with the possibility of autonomous adjustment using a hydraulic cylinder. The headlights are adjusted using two hexagonal screws:
- the top one is responsible for the horizontal position of the light beam,
- bottom for vertical.
Preparation and adjustment of headlights in accordance with GOST
Adjustment scheme
- We first check the tire pressure, place a load (75.0 kg) on the front seat, squeeze the parking brake lever;
- On the wall (obstacle) we draw a horizontal line at a distance of 550 mm. from the earth. This will be the level of visibility of the driver’s pupils at a distance of three meters from the front bumper;
- We draw a line perpendicularly passing through the center of the light beam for each of the headlights: line 1 and 2.
- A vertical line is drawn down the center.
Adjusting and adjusting the headlight manually
- We measure the distance of lines 1 and 2, they should be equal. For the objectivity of the data, let’s rock the side of the car and check the accuracy of the beam accuracy restoration, simulating a road bump;
- Using the hydraulic corrector, we complete the headlight height adjustment. Initially, set the lever to position “0”. Experts recommend setting up each of the headlights separately, after covering the inactive one with an opaque material;
- Adjusting the low beam headlights on the Lada Granta is considered complete when the light spots on the wall completely coincide with the horizontal line;
- If necessary, repeat the setup process again.
We improve the quality of work done
In order to increase the efficiency of roadway lighting, we check body elements for defects, damage, and deformation. By ignoring the curvatures on the body, it is impossible to achieve maximum concentration of the light beam.
We check the integrity of the headlight glass and the tightness of the sealing elements. There is dust and dirt inside the optics module - a sign of poor sealing. Replace the rubber seal, update the silicone sealant.
Long-term operation of the machine on rough terrain or unpaved surfaces leads to damage and scratches on the optics. It is not at all necessary to change the headlights; it is enough to carefully polish them with special means.
If the reflector or mirror surface is damaged, unconditional replacement of the optics. Such a defect cannot be restored.
Installation of lamps strictly in accordance with catalog articles. Purchasing components other than factory ones does not guarantee the quality of lighting or service life.
Checking and adjusting Lada Granta headlights
Let's talk about adjusting the headlights, which is similar to how adjustments are made on other car models. This procedure must be carried out both on a completely new car and after driving on a rough road.
If your low beam headlights stop working, the culprit may be a relay or fuse. But if, on the contrary, the low beam does not turn off, then most likely your relay is stuck.
To make adjustments, we will need to acquire a Phillips-type screwdriver, a standard tool, as well as a spare tire and a full tank of gasoline (if possible). The last points are needed to ensure that the vehicle is fully loaded.
- The car must be placed on a flat, completely horizontal surface.
Checking the vehicle's leveling - After this, the car starts and idles. To fix its position, the handbrake is depressed. If the hand brake is not tightened or does not work, you can install a wheel chock under the rear wheels.
- Check the tire pressure. If it does not correspond to the norm, then pump them up or deflate them.
- Next, a special wall is installed in front of the machine, the height of which reaches two meters, and the distance to it is about three meters. In principle, you can make the wall yourself from chipboard or plywood, as well as other available materials. Or the car is placed in front of a flat wall, onto which markings are applied.
Adjustment diagram for adjusting headlights
- A load weighing up to seventy kilograms is placed on the driver's seat, which is necessary to align the line of the headlights. You can ask your partner to drive.
- In order to remove vibrations of the body, as well as its shock absorbers, the car gently rocks.
- Next, we move the Lada Granta hydrocorrector light control to the “one person” position.
This position corresponds to the load in the car on the driver’s seat. Hydrocorrector in position “0” - We turn on the low beam, studying the output and the actual deviation of the headlight beams on the car.
Headlight adjustment (adjustment dials)
The thumbwheel is used for adjustment in the horizontal plane, and the hex bolt adjusts the position of the light beam vertically. If possible, the beams should correspond as closely as possible to points on the manufactured wall, both in the vertical and horizontal planes.
In the photo there are two headlight adjustment dials
The most difficult to reach vertical adjustment bolt
Now a so-called test run is being carried out. This must be done in order to secure the headlight adjustment, and also to check whether the work was done correctly. Make sure that the beams of light do not blind drivers coming towards you.
We recommend: How to make splices with your own hands?
We improve the quality of work done
To achieve the optimal result, it is necessary to check that the car body does not have any deformations, otherwise it will be extremely difficult to adjust the headlights, and the light from them will shine as if scattered.
Also check that the glass of the optical instruments is as clean as possible. You can remove dust and some other types of dirt using a vacuum cleaner without removing the headlight.
Scratches on a car headlight can be seen even with the naked eye.
If the car has been in use for a long time, especially on unpaved roads, then the headlight glass could have received damage in the form of small scratches. It is not necessary to change the headlights at all. Simply polishing them will be enough.
Some problems can also occur if the reflector is damaged or its geometry is violated. It’s difficult to help here, since the mirror surface is extremely difficult to restore. You will have to replace the reflector with a new one. It is not difficult to detect defects on it, since the uniform curvature of the image on the reflector will be disrupted.
And, of course, keep in mind that the optics must have lamps with equal power to each other, as well as identical dimensions. If this is not the case, then the adjustment will be of no use at all.